
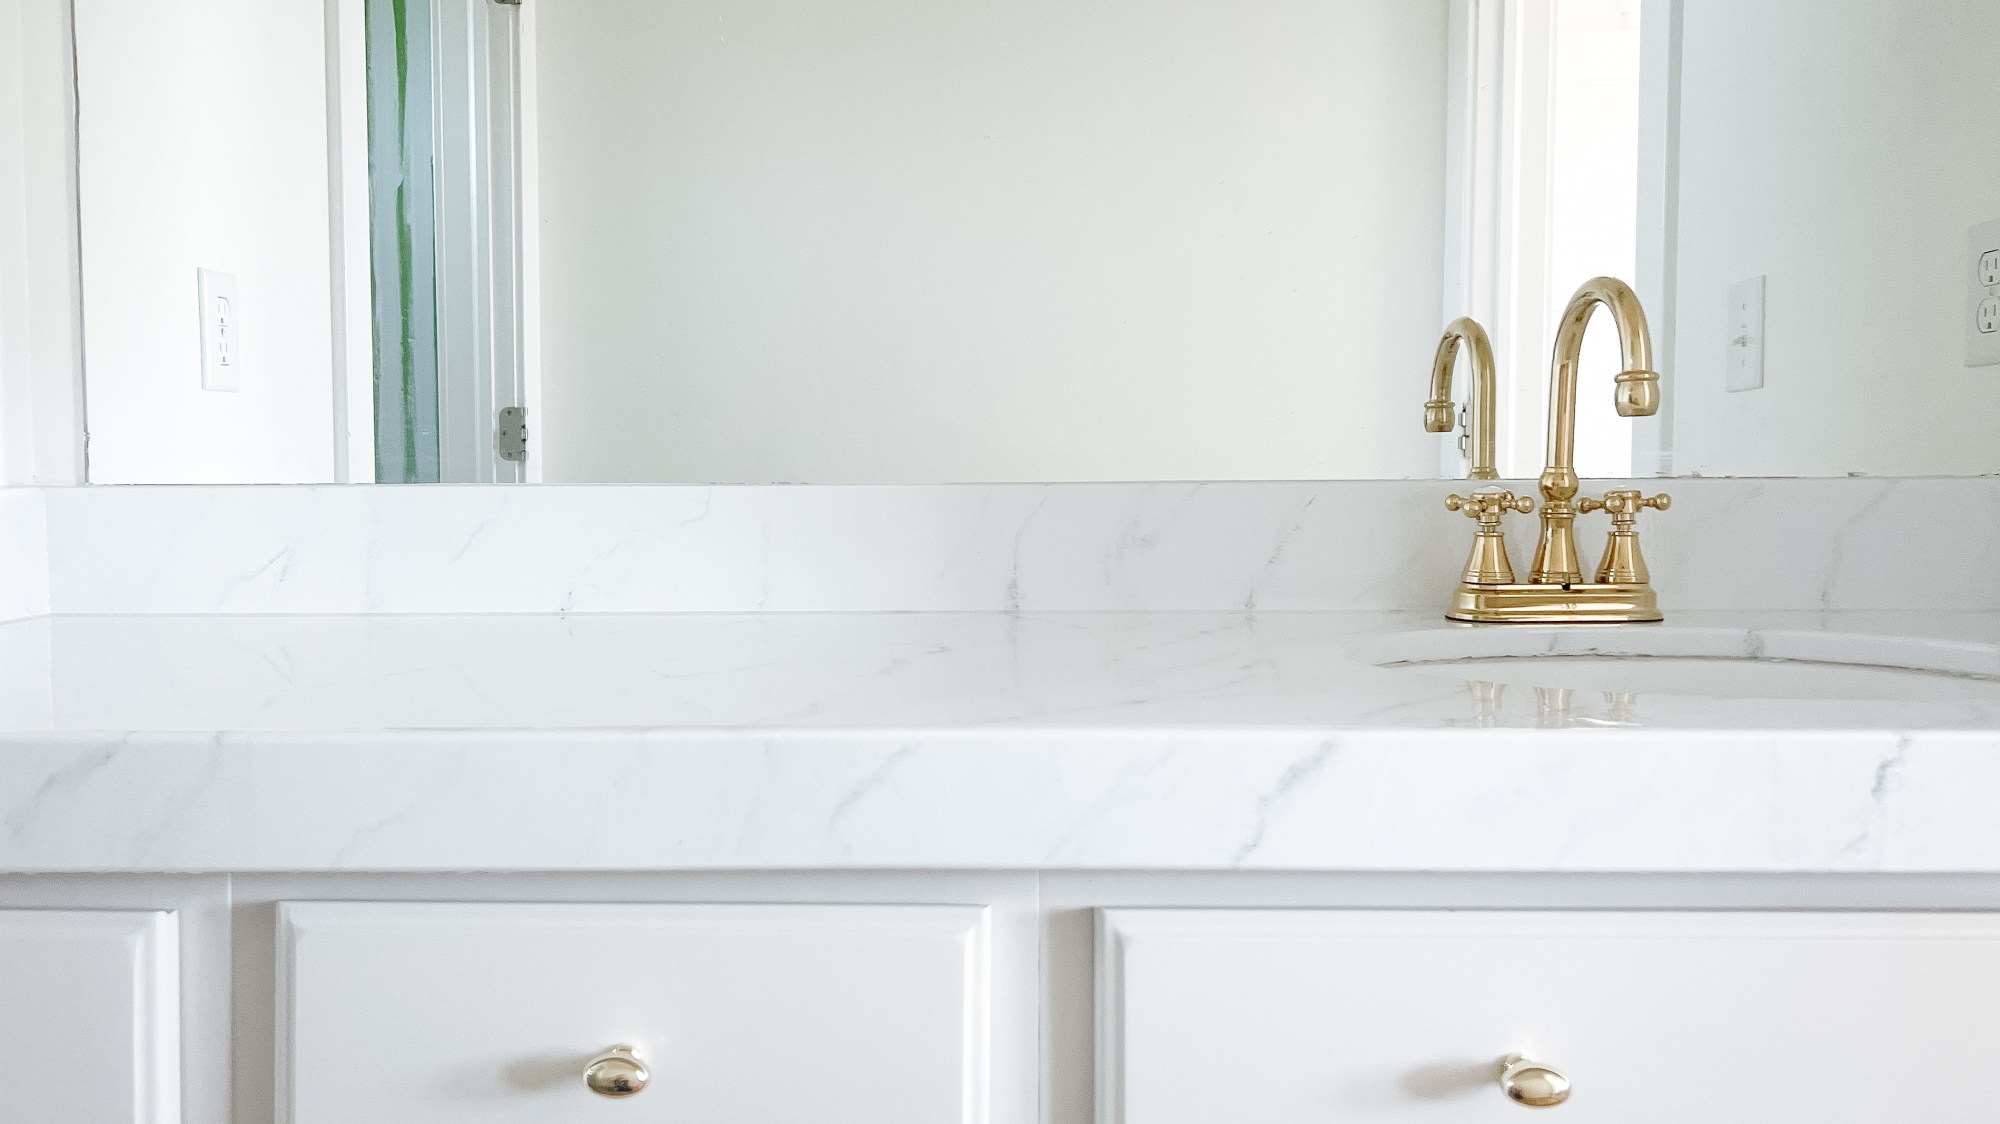
I know, I know. Painting over granite is controversial. And I promise you that I am not going make you to paint over your granite, but if you don’t love it… I’ll totally be your hype girl! The thing about updating your home is that you should do what you love. Not what someone else loves and not even what gives you the highest ROI, necessarily. Do what makes you feel happiest and most excited about the space that you’re in. This brown granite was just not the vibe I wanted in this bathroom but the faux marble? Heck yes! I’ll be sure to keep you updated on how it holds up, but so far I have zero regrets!
Want to see what projects I’m working on now? Follow me on Instagram!

This isn’t the first faux marble counter makeover I’ve done (see my parents’ kitchen here and my pantry here) but it is my first time pouring epoxy. I opted for a heavy duty polyurethane in the other spaces because I was hesitant of the yellowing that happens with epoxy over time, but I figured I’d give it a shot in here just to try it. Will it yellow over time? Probably. But I would love to install the “real deal” in here one day anyway, so I’m not too worried about it.
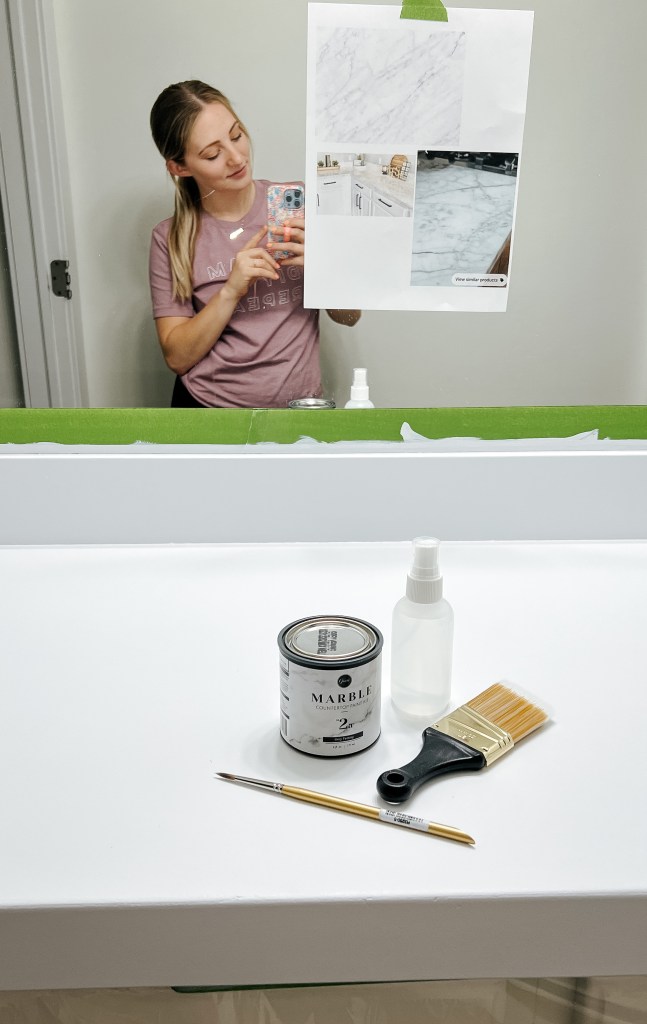
I used a kit and it was great to have everything supplied for me. All the paint, brushes, rollers, and obviously the epoxy was included. It was very convenient, but I will say that if you have primer, paint, brushes, etc. laying around, you can probably skip the kit and just find epoxy to purchase, which might save some money.
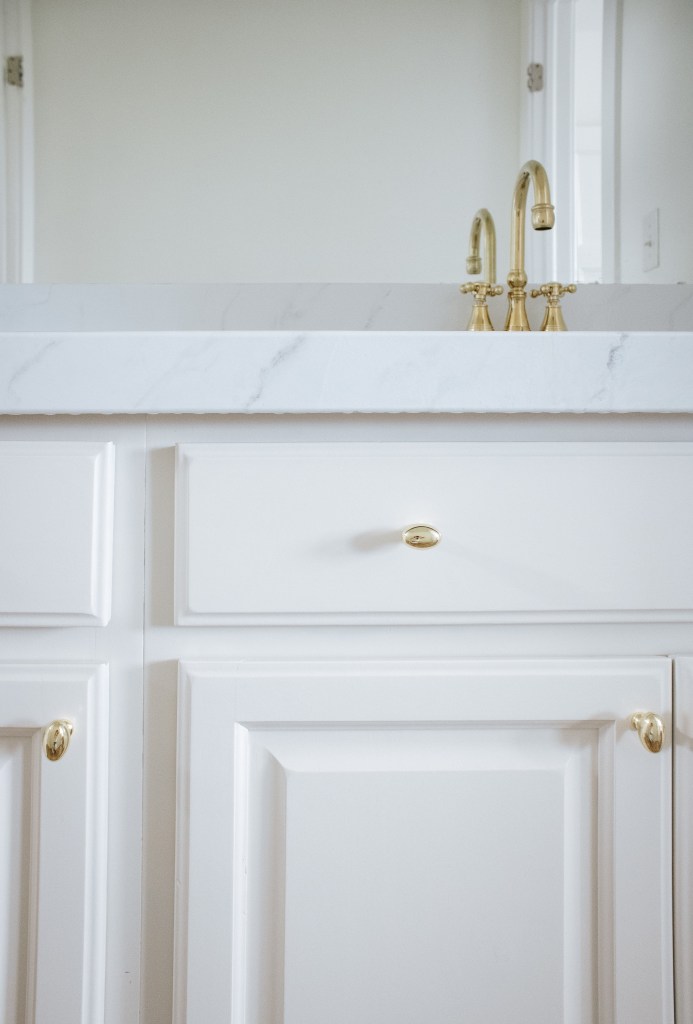
One thing that I was surprised about was that the kit has the primer as the base color. No additional paint on top, just primer and then veins. When I painted counters previously, I did like that I could add a little bit of a warmer white in and if I were to do this again, I think I would add in a few different whites for depth before adding the veining (even if I used the kti again). That being said, I’m super pleased with how this turned out so I think the kit is still a great option!
Keep reading for the tutorial!
Materials
- Giani Epoxy Countertop Kit
- Tape
- Safety glasses
- Mask (the instructions don’t specify to wear a mask, but it is a little stinky so if you’re not working in a well ventilated space, I recommend wearing one)
Tutorial
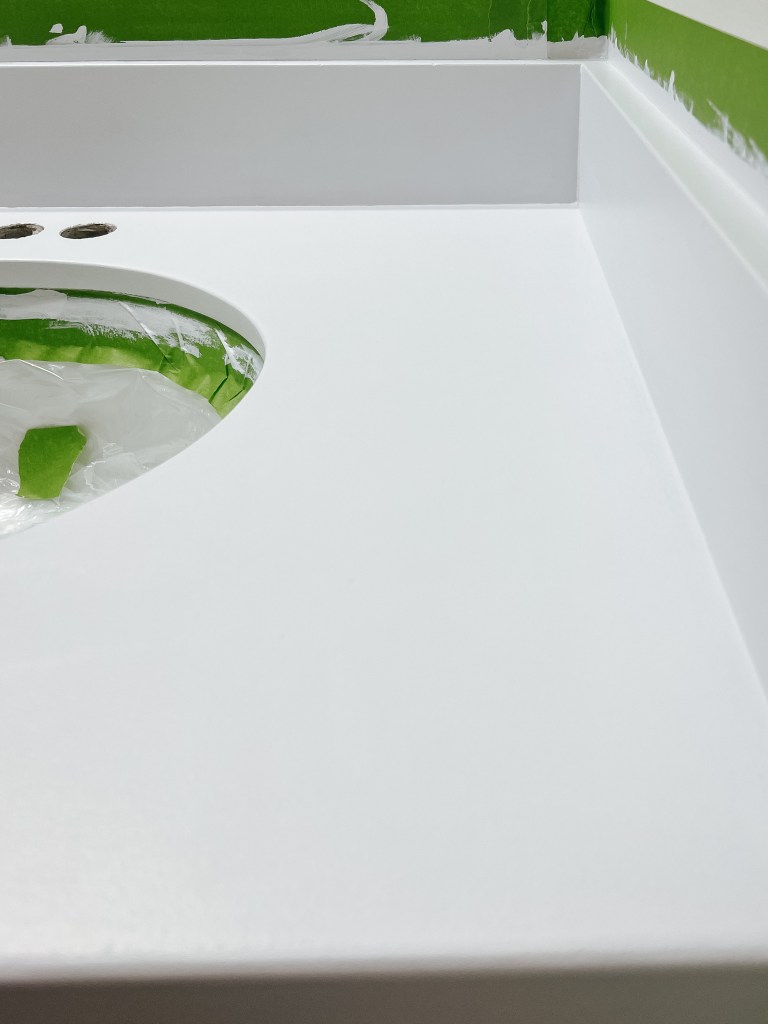
First, clean your counter and remove any caulk. The instructions for this kit specify to not use any special cleaners, but I had already cleaned my counters with my favorite Krud Kutter (whoops), so I just made sure to wipe it down a few times with water to get any residue off.
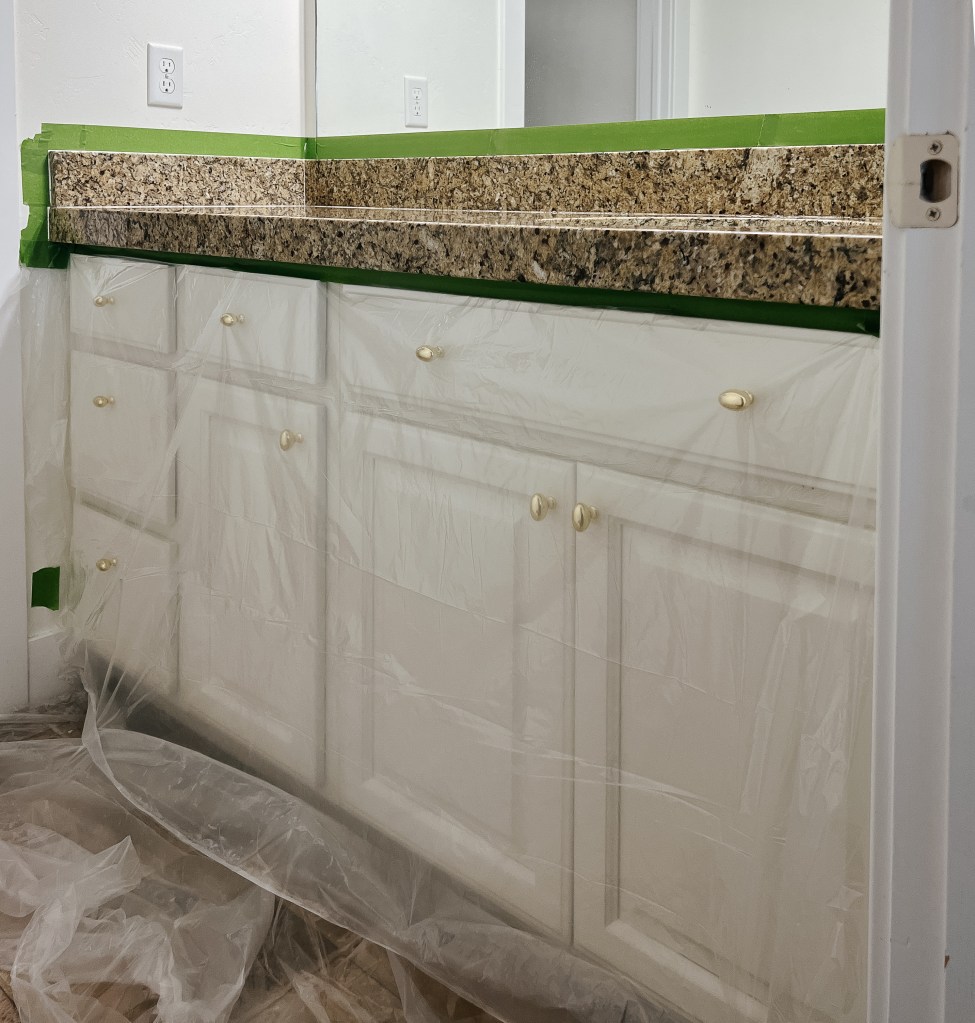
Everything – like, everything – needs to be taped off. The epoxy self levels by running off the edge of the counter, so use the plastic drapes in the kit to protect all your stuff, including the sink. I taped about 1/8″ away from the counter so that the tape didn’t get trapped in the epoxy. On the bottom edge of the counter, I taped a small 1/8″ lip which gives the epoxy had a spot to pool so that it can build up on the edge instead of just totally running off.
If you have any deep gouges in your counter, go ahead and fill them now. I had a few very small imperfections in the stone that I didn’t fill and the epoxy completely filled them, so don’t worry unless you have large ones.
Now paint! Roll on multiple coats of the primer until it is completely opaque. I needed 4 coats, plus a couple touch ups. I sanded between coats, which I actually don’t think is necessary since the epoxy is thick and levels well.
Once it’s nice and white, it’s veining time! This is the most nerve wracking part of the whole process but it’s not as difficult as it seems. I promise. Search on Pinterest and google to find a few examples of veining that you like and then use those to loosely guide you. I recommend lightly spraying the area you’re working on before and after you add a vein. Using the small brush, get a little gray paint and twirl the brush as you drag it across the surface to create an organic looking line. Then spray again and use one of the bigger brushes to kind of dab it so that it’s not so harsh. If you don’t like a vein, just wipe it off before it dries. Easy peasy. Have fun with it!

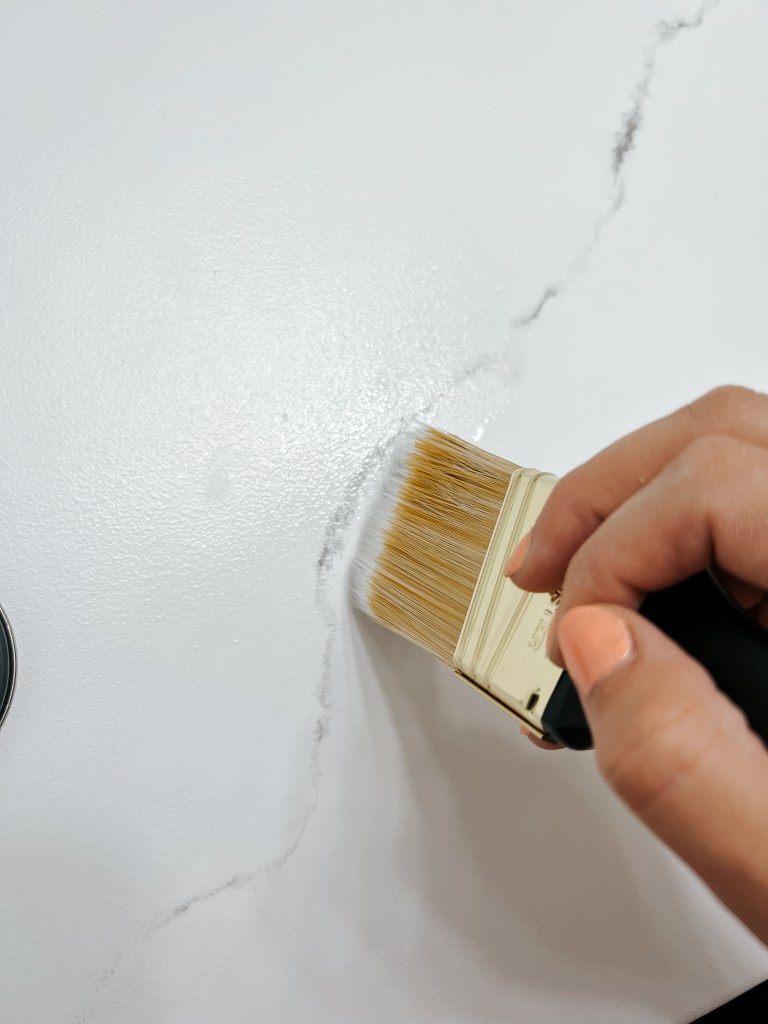
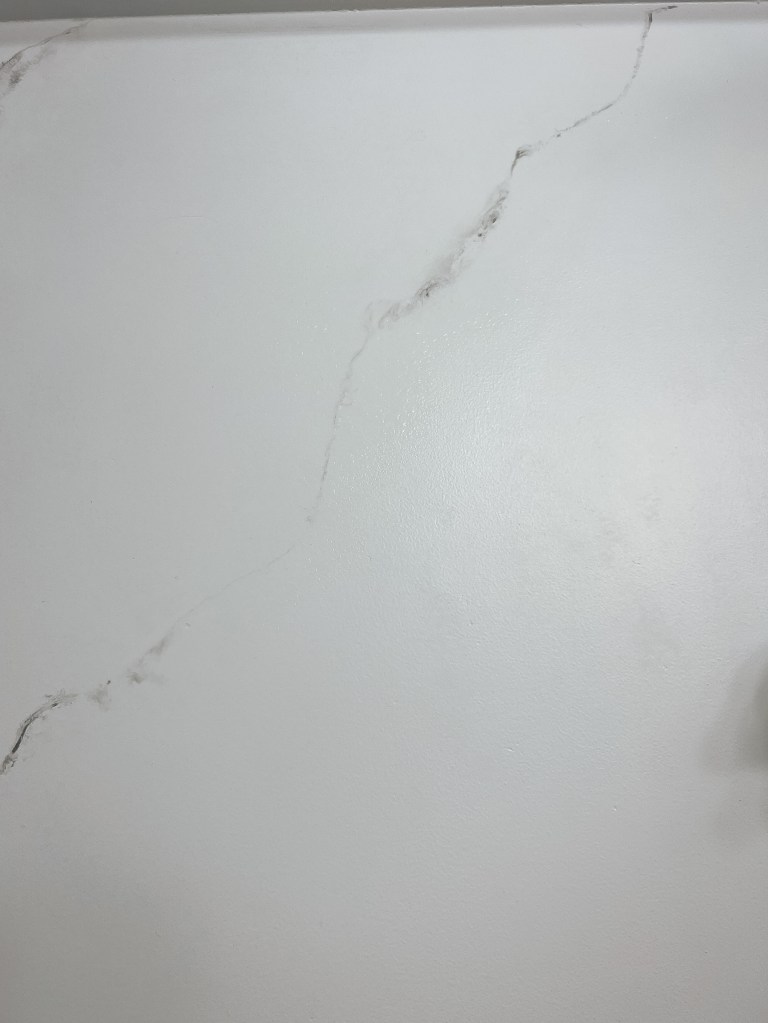
Paint your main veins and then come back through to add branches and accent veins until you’re happy. I recommend letting it sit overnight and coming back to it with fresh eyes before calling it good.
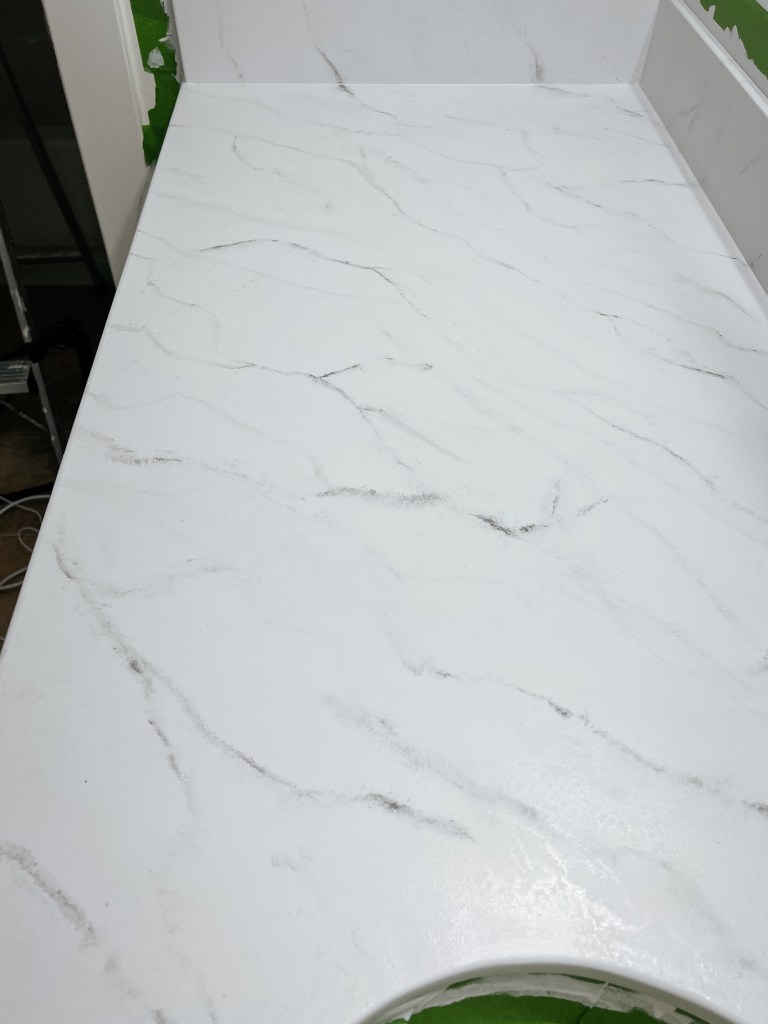
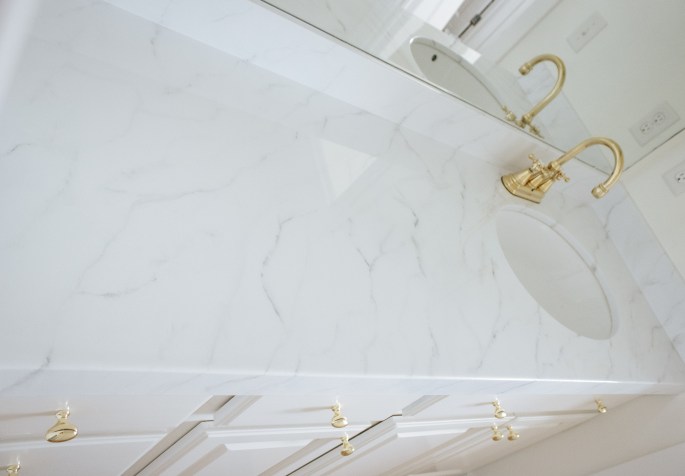
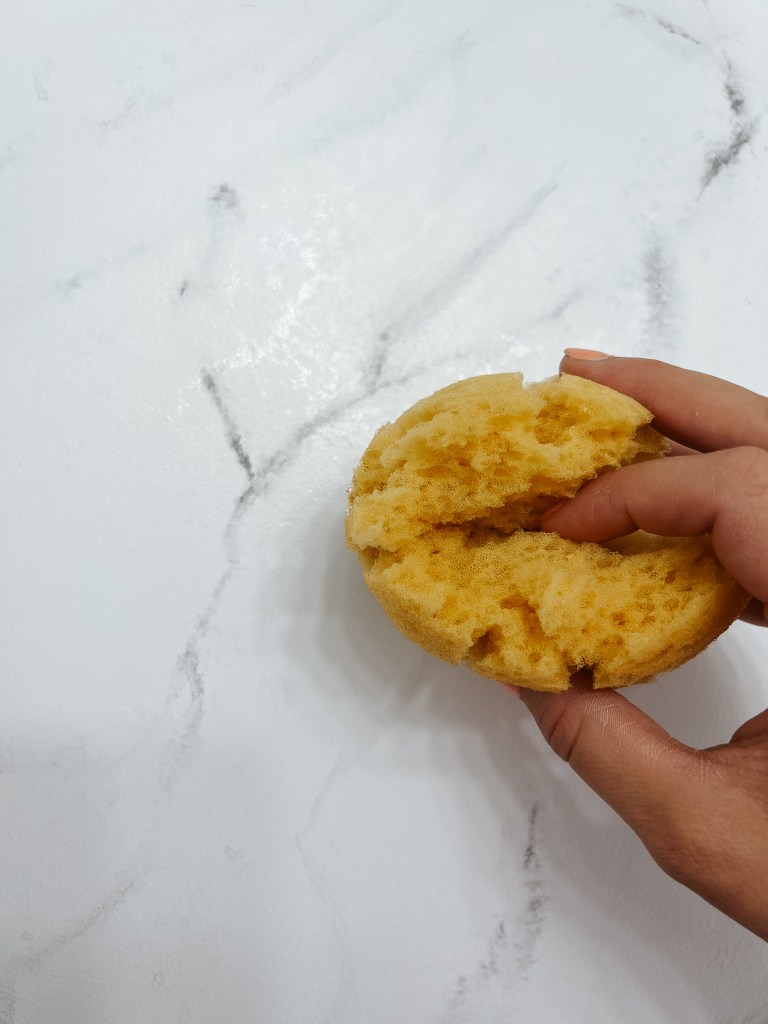
Once you’re happy, use the white highlight and the sponge to add in dimension. It doesn’t look like much going on, but it does help it to look more like real marble.
The last step is to pour the epoxy. Before pouring, wipe the counter off with a tack cloth to get any debris off. Then mix the activator with the epoxy and stir for 3.5 minutes. Make sure to mix it really well and then pour it out on your counter. This vanity is about 5′ long and I poured it in two sections. Pour it in sort of an S pattern and then gently spread it around with the other brush and foam roller. You need to get it in every corner, but don’t overwork it. Make sure to have a pair of tweezers handy for the inevitable rogue fuzz you’ll find, but I don’t recommend your favorite pair. Whoops!
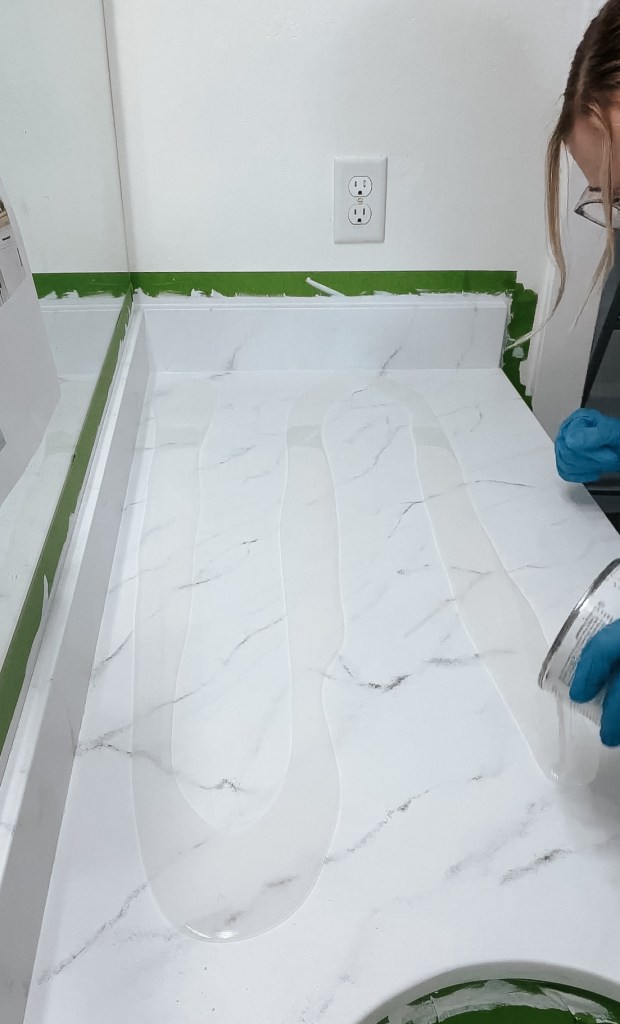
After you’ve poured, you have about a 30 minute window to work with it before it starts setting up. I poured half, then kind of brushed it up onto the backsplash before moving to the other half of the counter. I wish I would’ve done the whole counter first and then brushed it up onto the backsplash because by the time I got to the part right in front of the sink, it had started to harden just a little so it didn’t flow together perfectly. If I’m going to have imperfections, I’d rather have them on the backsplash then on the part of the counter that I touch frequently!

The countertop (except for the spot right in front of the sink) is smooth like glass. Seriously, it is so cool! The backsplash and the sides aren’t perfectly smooth because they are a vertical surface, but they’re good enough for me. I removed all the tape 2 hours after pouring the epoxy, but I do wish I would have left that bottom lip tape on until it had totally set up because I had a few drips I had to sand. Don’t sand anywhere you’ll see the epoxy though because it will dull it.

I made sure to keep my kids out of the bathroom for a few days while it set up since it takes a week to fully cure.
So what do you think? Did I get that faux marble look? Would you do this on your counters? I’d love to hear your thoughts below. If you want to watch all the behind the scenes of this bathroom makeover, be sure to follow me over on Instagram!
With love,
Mercedes ♥

It looks amazing! Have you ever painted a vinyl floor? You’ve just inspired me to paint the one thing that has been holding my whole design up! Thanks!
LikeLike
I haven’t but I’m about to!! 🥳
LikeLike