
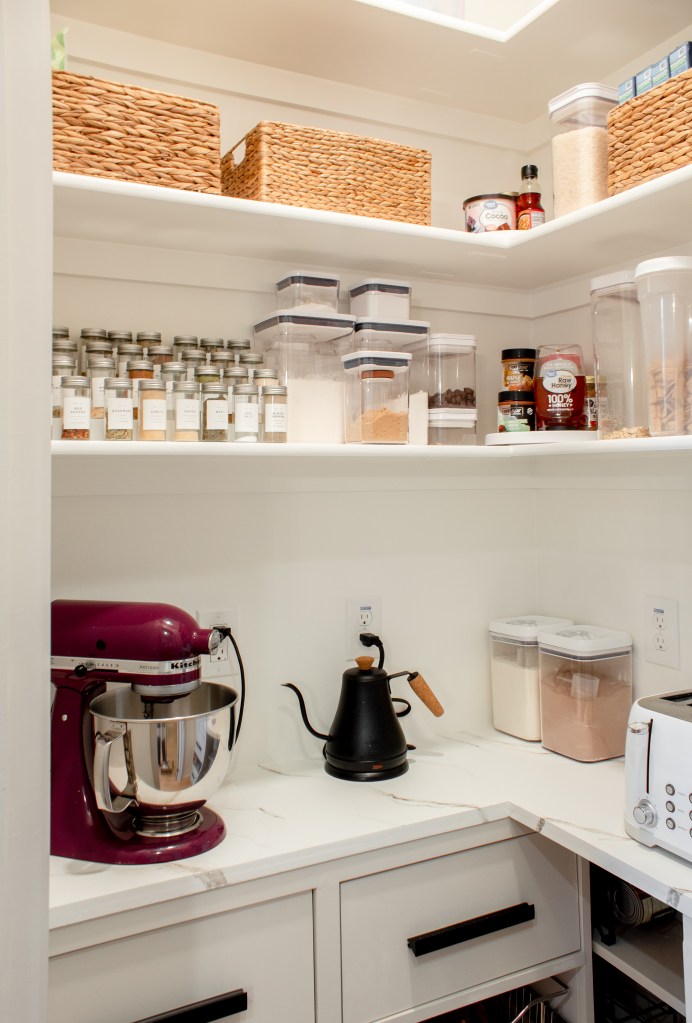
Having a pantry is somewhat of a luxury, but having a dream pantry, wow. I smile every time I walk in there now, which is a far cry from what it was a month ago. When we bought our house, the pantry had wire shelves, which are standard and they were fine.
Want to see what projects I’m working on now? Follow me on Instagram!
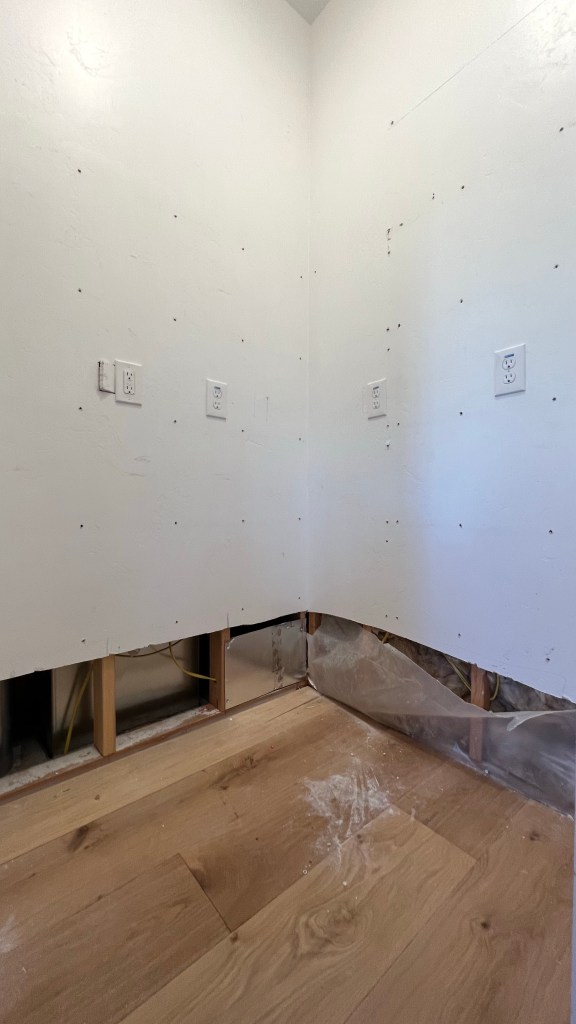
Fast forward to June and we had our floors replaced with beautiful, white oak hardwoods. The wire shelves had supports resting on the floor, so I figured it was as good a time as any to pull out the shelving that I didn’t love and make space for something else. The only problem here was that it meant spending about 4 months with no shelves in our pantry, which is obviously not ideal!

This pantry is small – it’s about 4’x4’ – but even though it’s not big, it had a lot of potential!
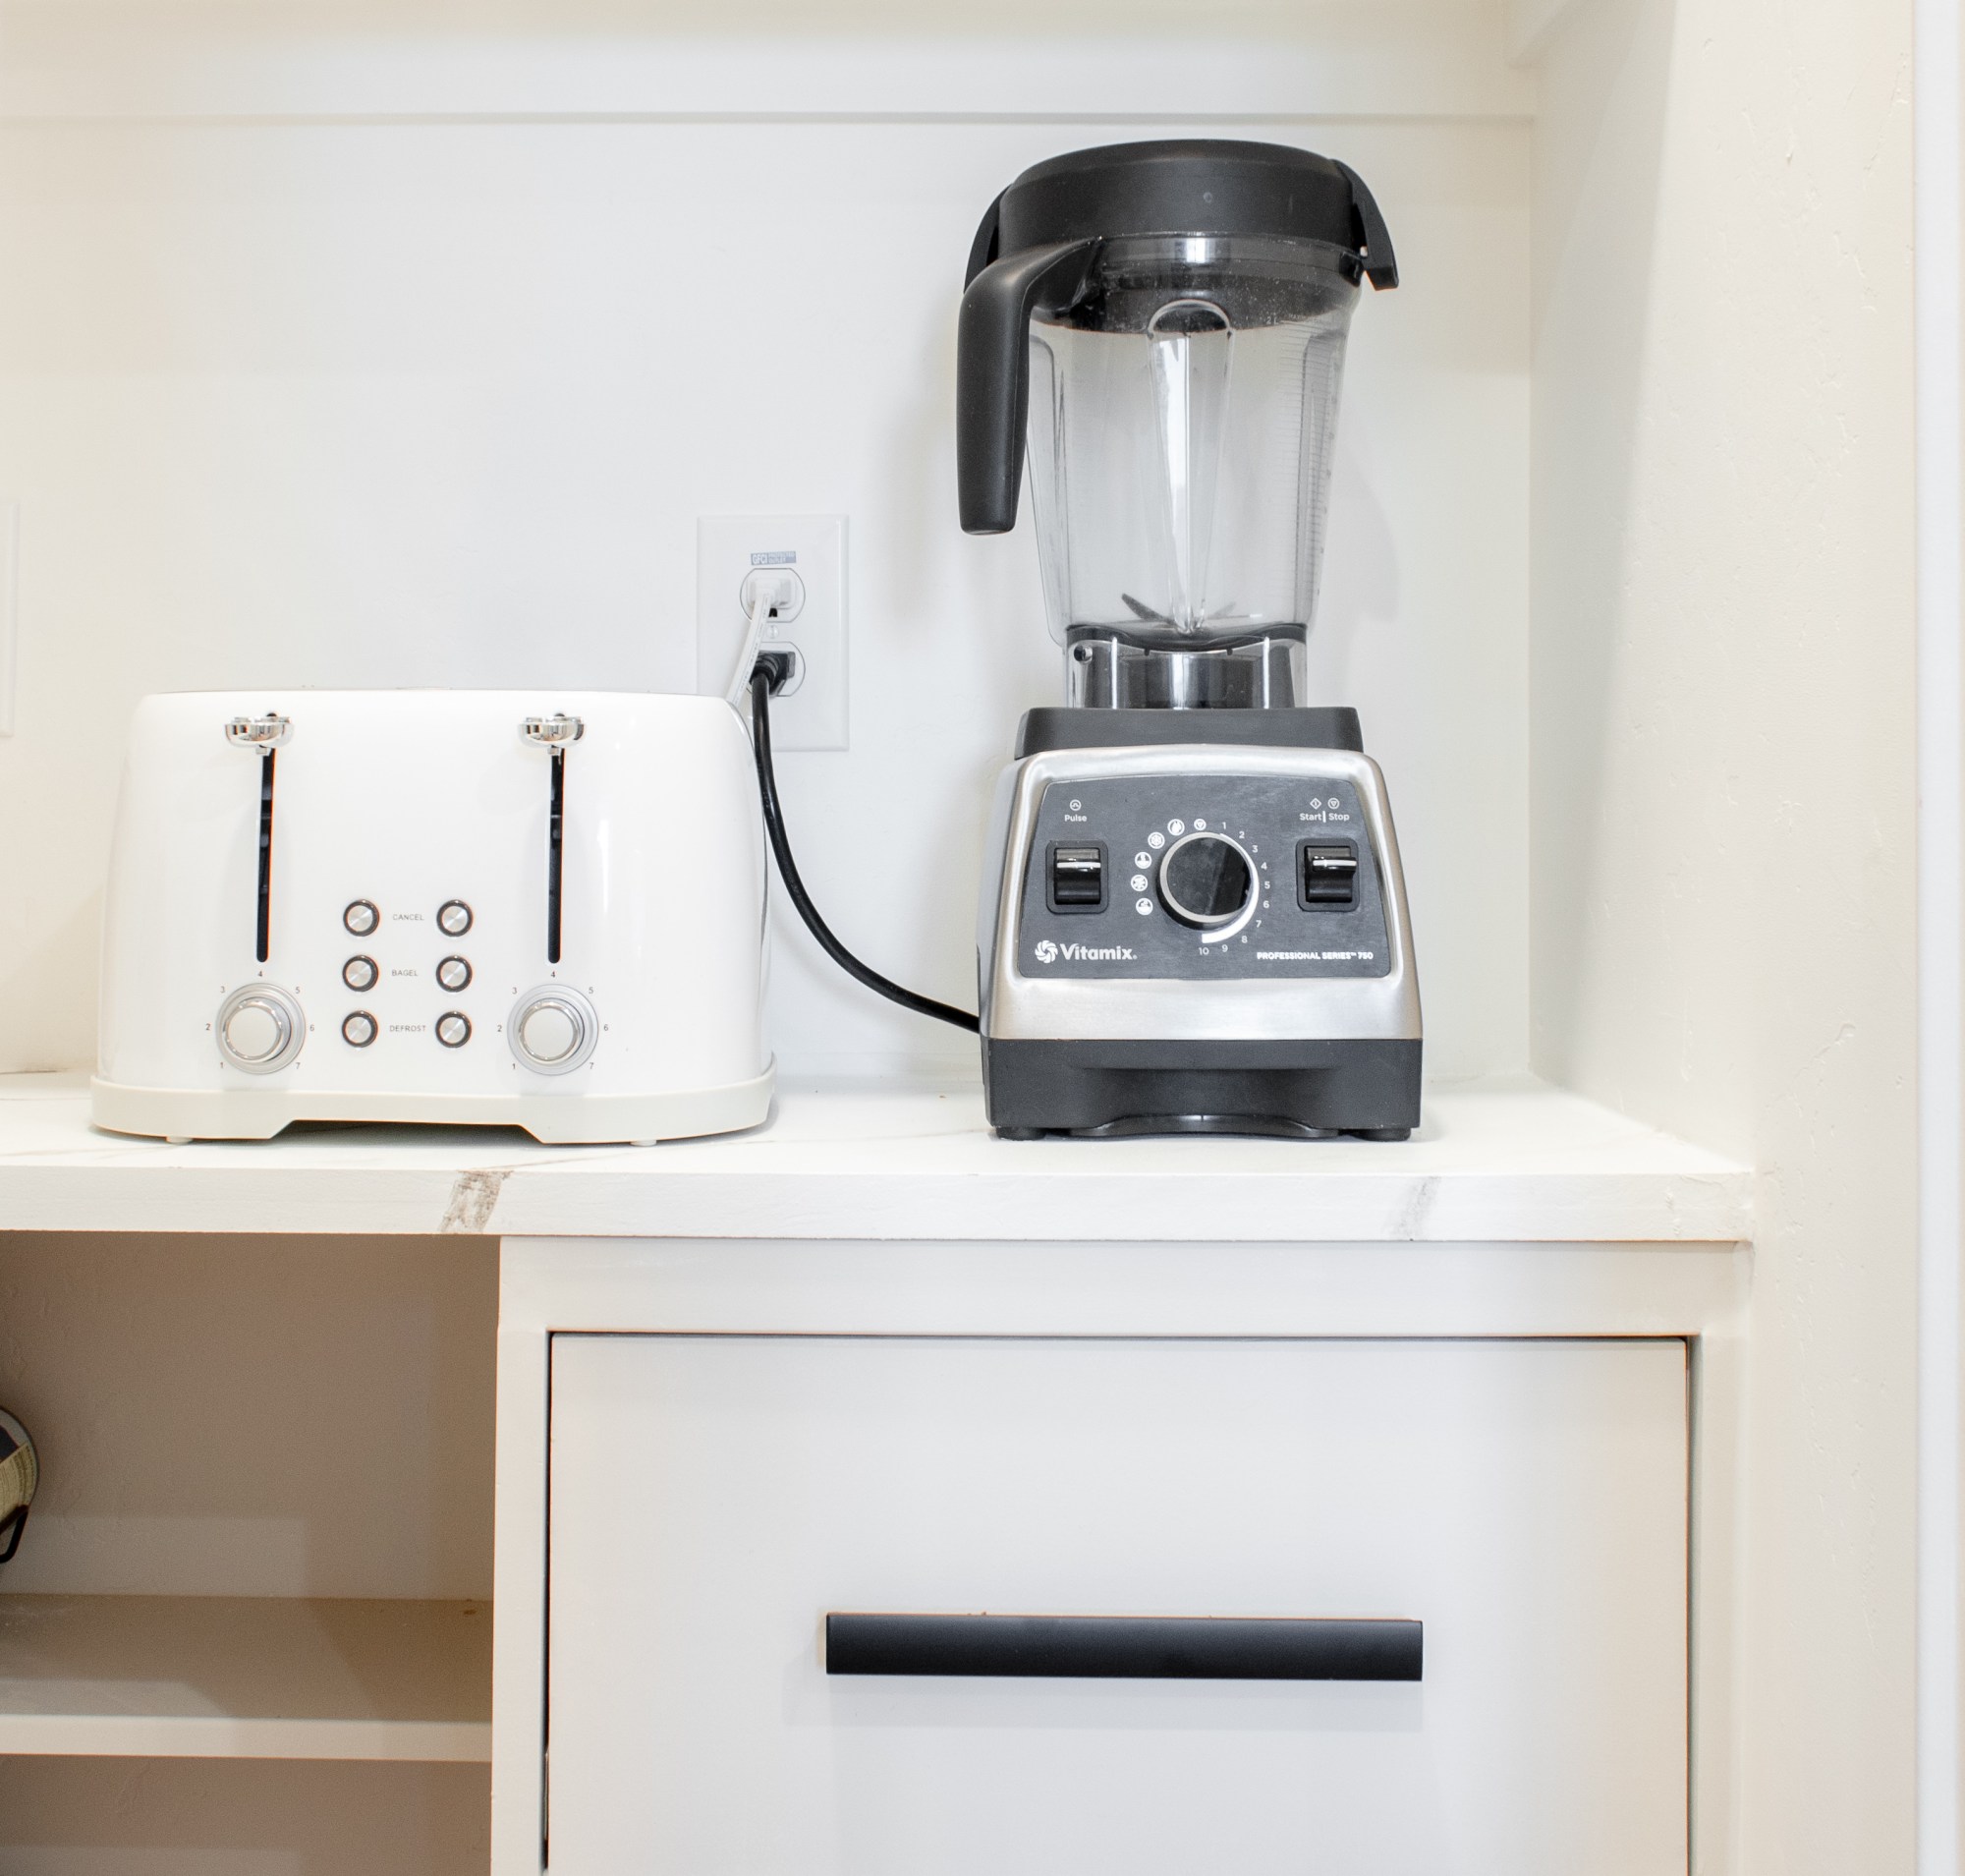
I knew I wanted a countertop where we could keep our small appliances, so I had an electrician come out and install a few outlets as well as a light.

Then I got to work! I build cabinets with drawers (and installed some wire basket drawers that I’m obsessed with) and replicated the faux marble counters I did in my parent’s kitchen for them.

Instead of wire shelving, I installed some nice melamine shelves to finish it all off.

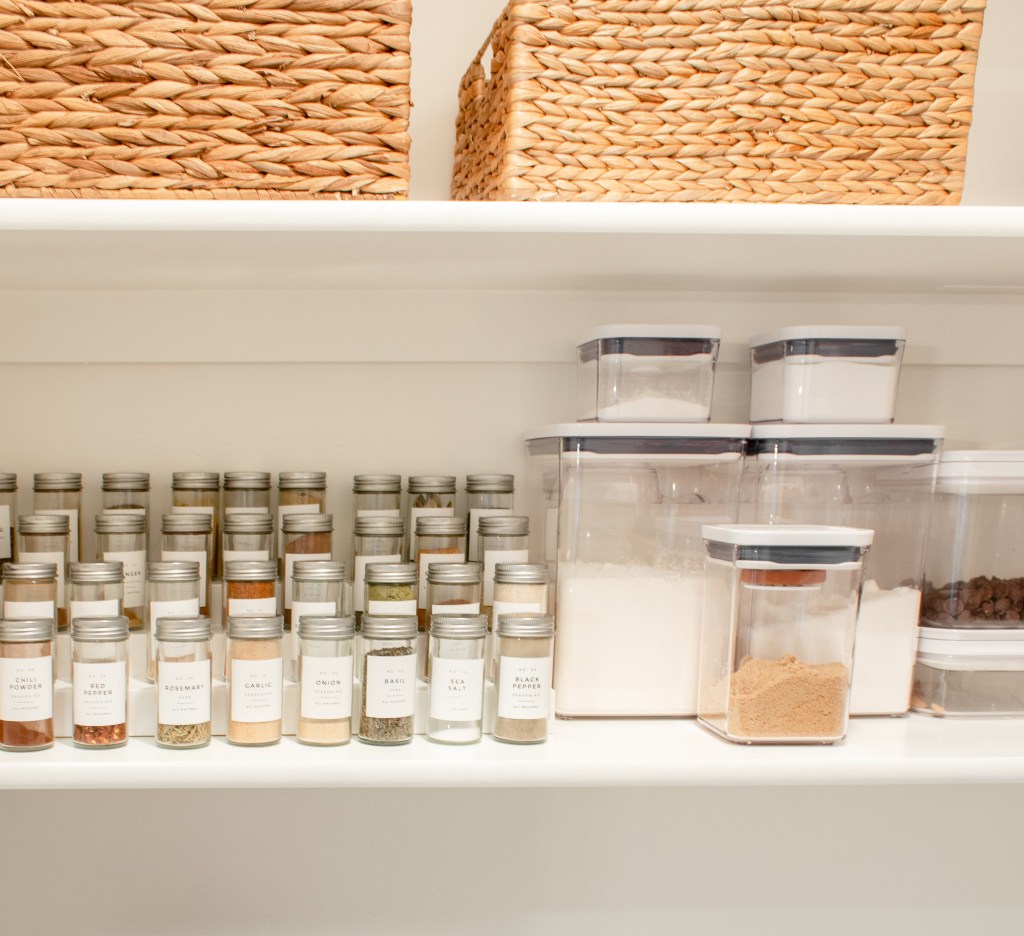
Now my pantry is a dream! Seriously, I cannot believe I fit all of this into such a small space and how well it functions for us. If you’re looking for any of the organization items I used, you can find them here!
Materials
- 2x4s
- Eucaboard
- 3/4” MDF
- 1/2” MDF
- 1×2 pre primed MDF
- 1/2” plywood
- Screws
- Nail gun
- Wood glue
- Spackle
- Caulk
- Drawer
- 1×3 pre primed MDF
- 1×12 melamine shelves
- Primer
- Paint
- Wire basket drawers
- Mending brackets
Tutorial
Your space will vary from mine, but hopefully you can take what I did and translate it into your home!
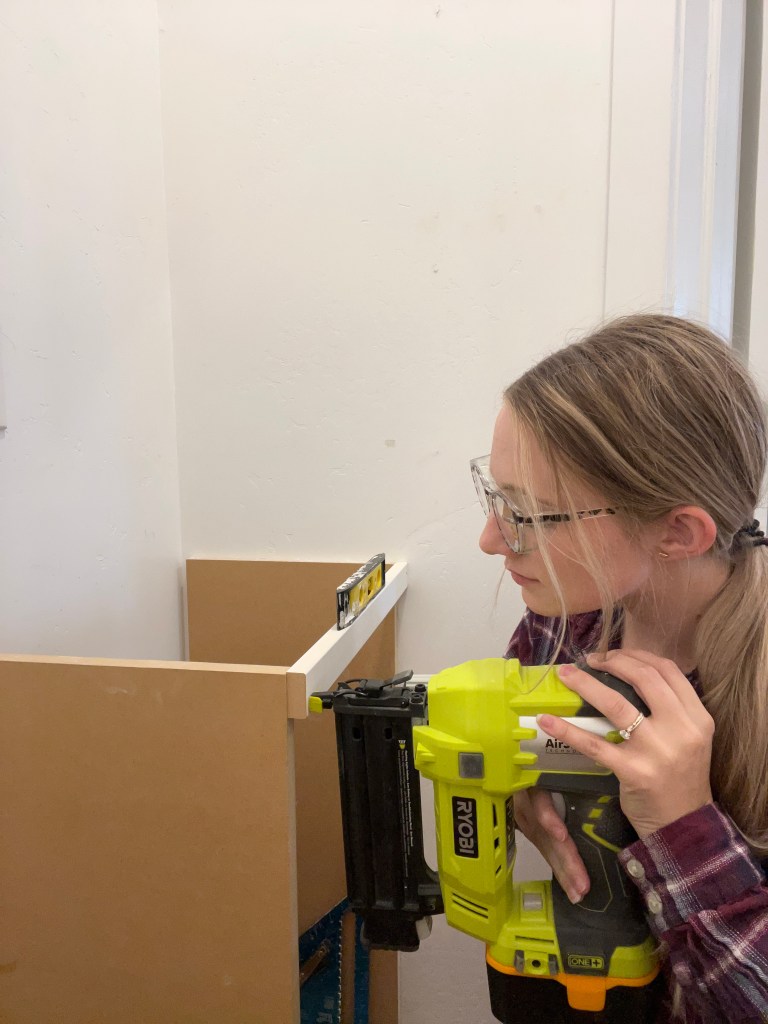
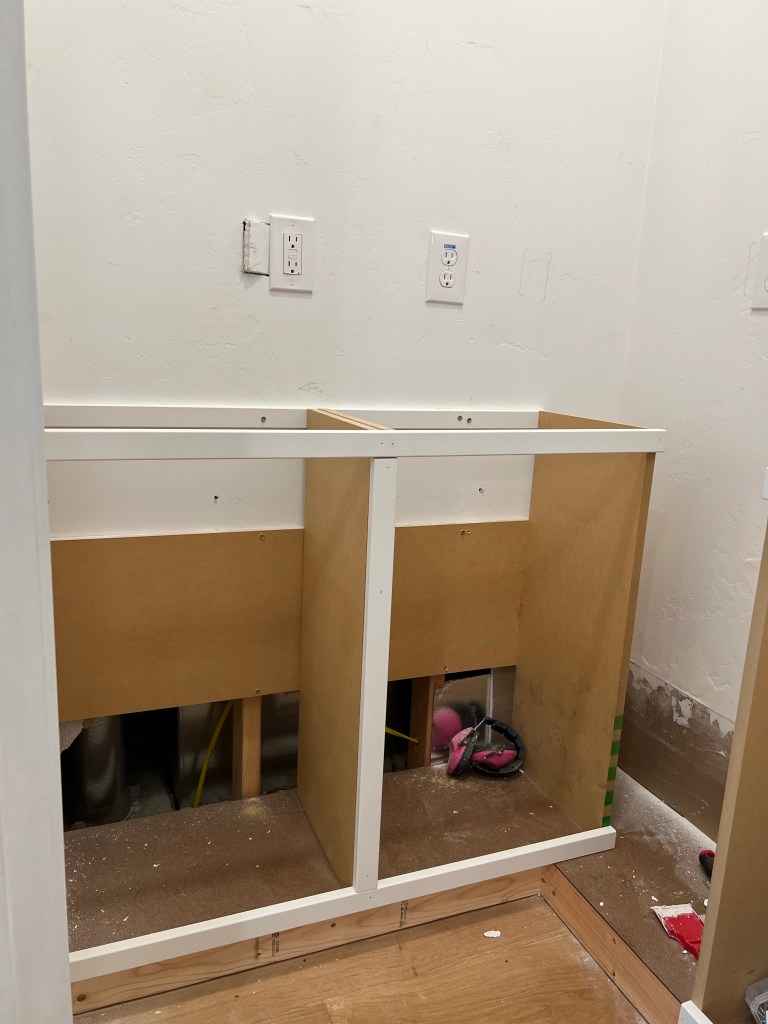
We’re going to start from the bottom and build our way up. First, I built a base for the cabinets with 2x4s. I wanted my counters to be 14” deep with 1/2” overhang, plus I wanted the 1/2” thick baseboards to be set back about 1” from the cabinets to create a toe kick, so that meant that the frame for my cabinets needed to be 12” deep (14 – 0.5 – 0.5 – 1 = 12). I installed the base with cross supports where the vertical pieces of the cabinets would sit.
I finished off the base with some Eucaboard because I have a section where cabinets don’t cover and it needed a floor.
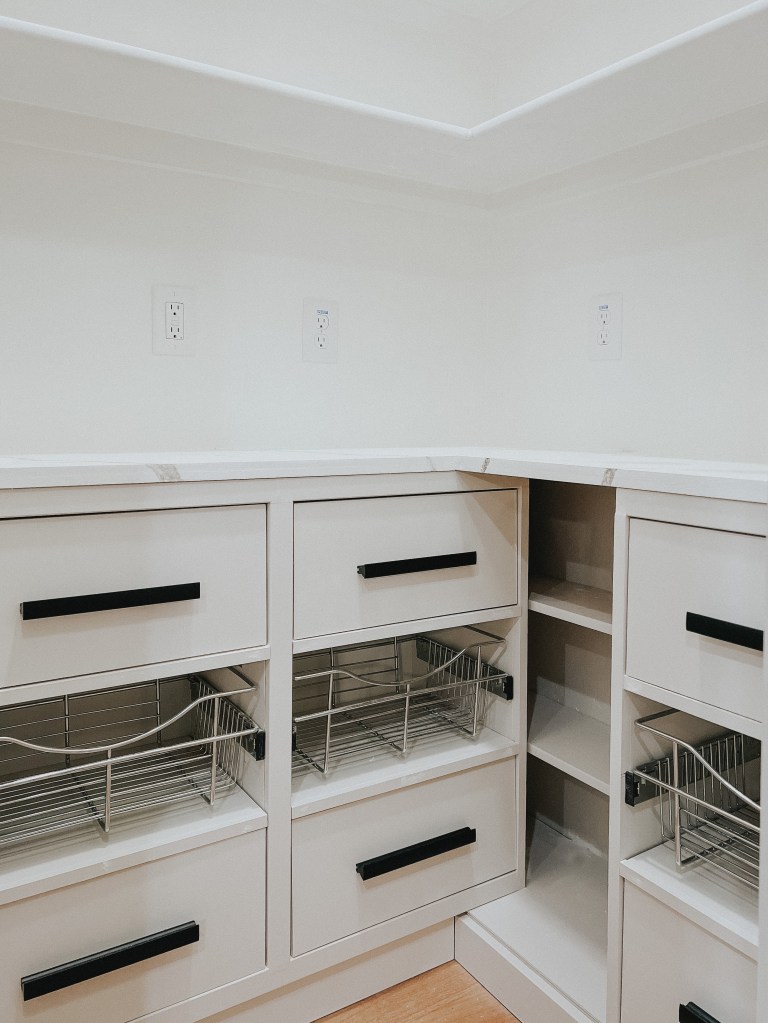
Next I built the cabinets. I made them so that the opening was 18” wide (which is what was needed for my wire basket drawers to be able to be installed) and they were 29.5” tall so that the finished height of the counters is 34”. To build the cabinet boxes, I used two pieces of 3/4” MDF that I cut to 29.5 x 13.5 and attached them together on the back with another piece of 3/4” MDF. I didn’t need a full back panel so I could use the scraps that I had to provide a back for just the space that the wire shelves would leave it open. The other drawers hides the exposed areas, so in the end it still looks nice and finished.

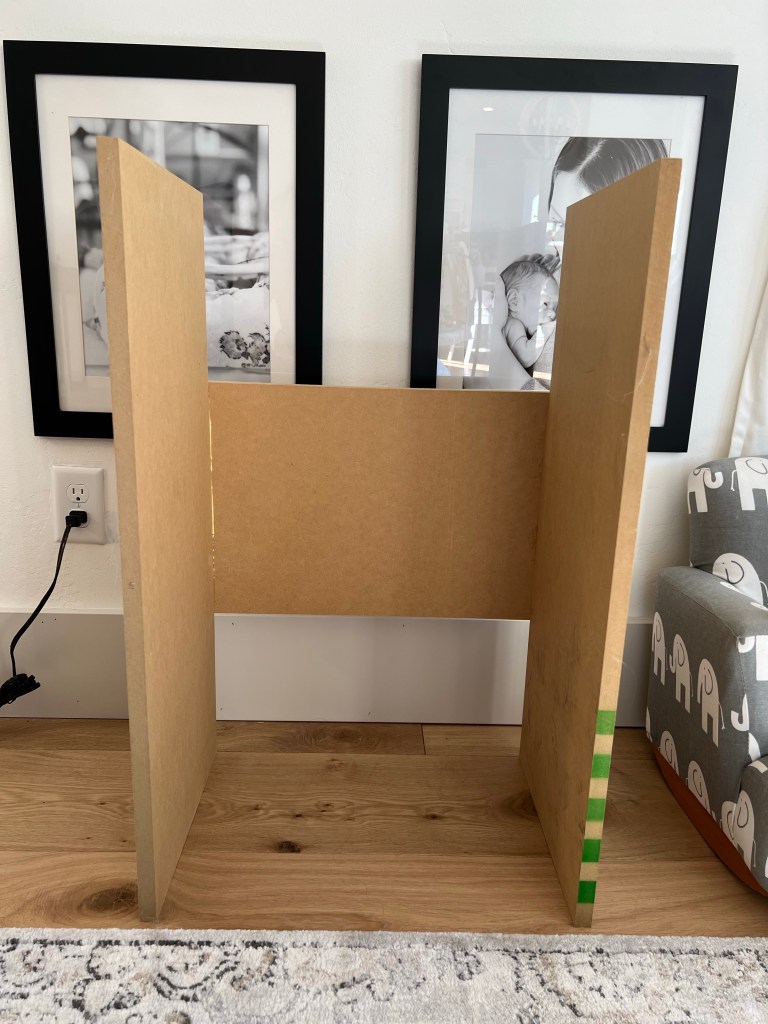
I added 1x2s along the front to trim the cabinets out and along the backs for support for the countertops. The counters will sit on the cabinets as well, but I felt like they still needed a back support – especially where the bottom shelves are! Then I cut some more 3/4” MDF to use as dividers and mounted them with small corner braces. They aren’t meant to bear any weight, so I didn’t need anything too heavy duty. I also added some simple baseboards along the toe kick area.
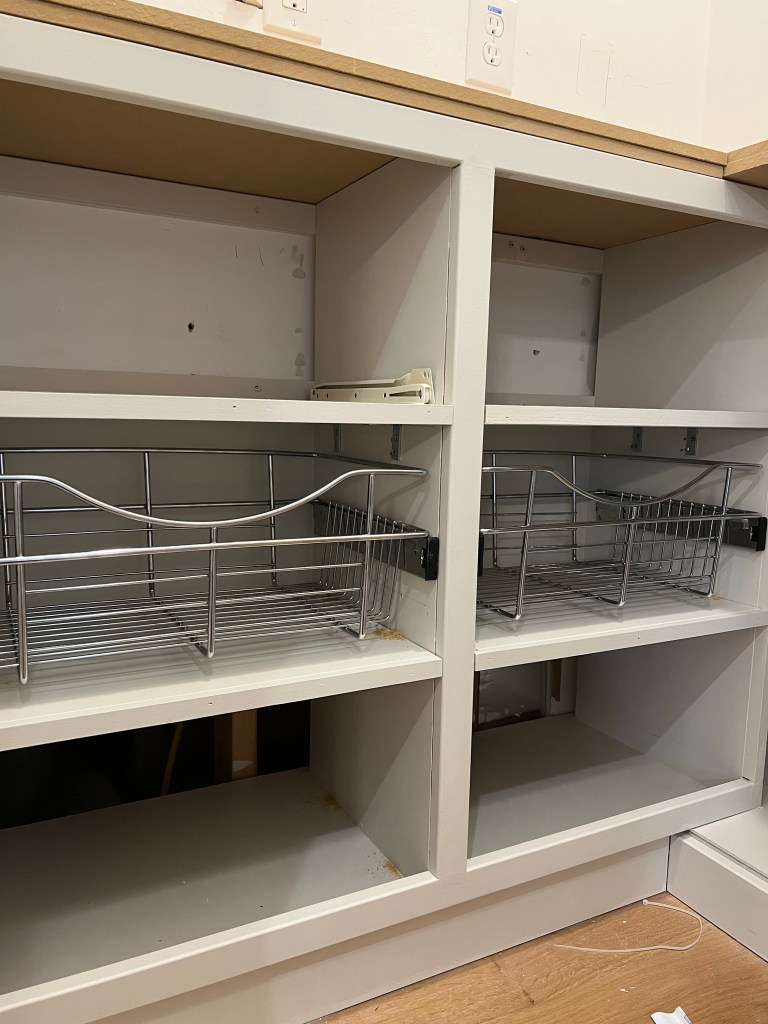
Onto the drawers! I have a whole post with a detailed tutorial on how to build drawers. I added in these wire basket drawers from Rev-a-Shelf to add a little bit of texture. I love them! Then everything (except the counters) got a coat of primer and a couple coats of paint – the color is Benjamin Moore Pale Oak.

I used 2 pieces of 1/2” MDF to build the counters. I screwed the first piece into the support pieces, then I added the second piece and nailed it in. I meant to put adhesive in between the layers as well, but I forgot – whoops! I used spackle to fill holes and seams and caulk along the edges. Then I painted them to look like faux marble (you can find that tutorial here).
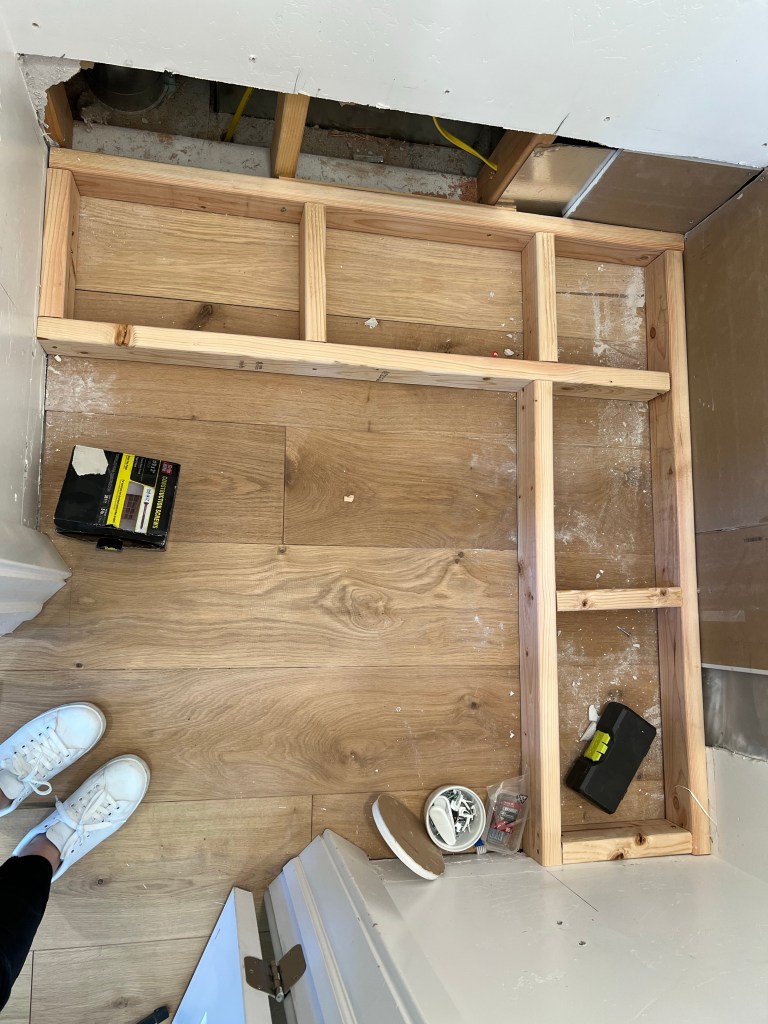
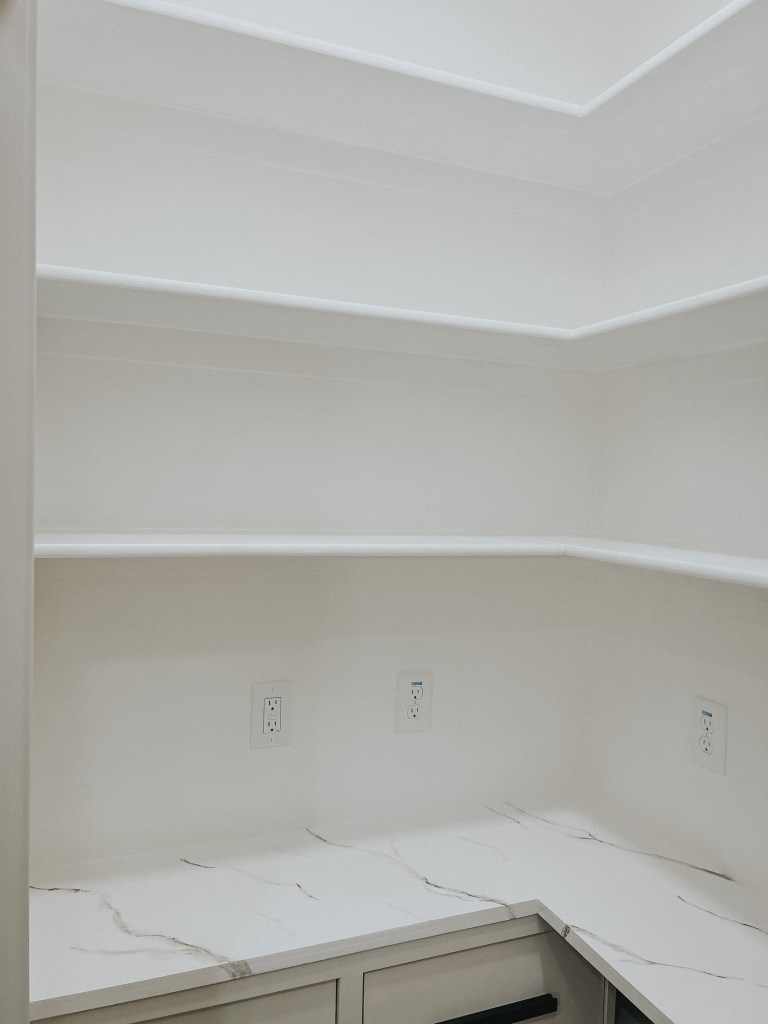
In the corner behind the cabinets, I ran a couple of shelves to hold cans. I ran a few 1x3s along the wall (screwed into studs) to act as braces and used a 1×8 that I cut to size for the shelf.
Next, I added the shelves. I have 3 corner shelves in here 14” apart (the distance between the counter and the first shelf is 22”). I used 1x3s and ran them across the back and 1x2s along the edges where the shelves sit, then I cut my 1×12 melamine boards to size and set them on the supports. Because they hit a corner, there is a seam and one of the boards doesn’t have an edge support, so I used some mending brackets to attach it to the other shelf for support. Then I caulked the seam and painted everything to match.
The walls got a fresh coat of paint and I filled it back up! I’m so pleased with how this pantry turned out! If you’re looking for any of the organization items I used you can find them here. Comment below and let me know what your dream pantry would include!
With love,
Mercedes ♥

2 thoughts on “How I Built my Dream Pantry”