
Adding a fireplace to our primary bedroom has been on my dream wish list since we moved into this house. Something about the vaulted ceilings just made me feel like a fireplace belonged in here. I say my dream wish list because for some reason I didn’t think it would ever be realistic to install one, but dreams do come true!!

It took me a long time to figure out the plans for this bedroom because for some reason I wasn’t allowing myself to include things I know I really wanted (like the fireplace and beams), but once I just let myself have those things it all came together. In my opinion, the layout of the room is not ideal due to door and window placement, but adding this fireplace is going to give the room a focal point, which I think will drastically change my feelings about its’ layout.
Below I’m sharing how I built the framing for the fireplace insert to go in. Be sure to subscribe so that you don’t miss the final fireplace reveal and follow me on Instagram to watch it in real time!
Materials & Tools
- 2x4s (I used 16)
- 3” construction screws
- 1/2” drywall
- Drywall screws
- Drywall tape
- Joint compound
- Drywall taping knives, trough, & sanding block
- Vinyl corner bead
- Spray adhesive
- (Fireplace insert)
- Miter saw
- Tape measure
- Drill
- Level
- Pocket hole jig (optional – I didn’t use)
- Stud finder
Tutorial
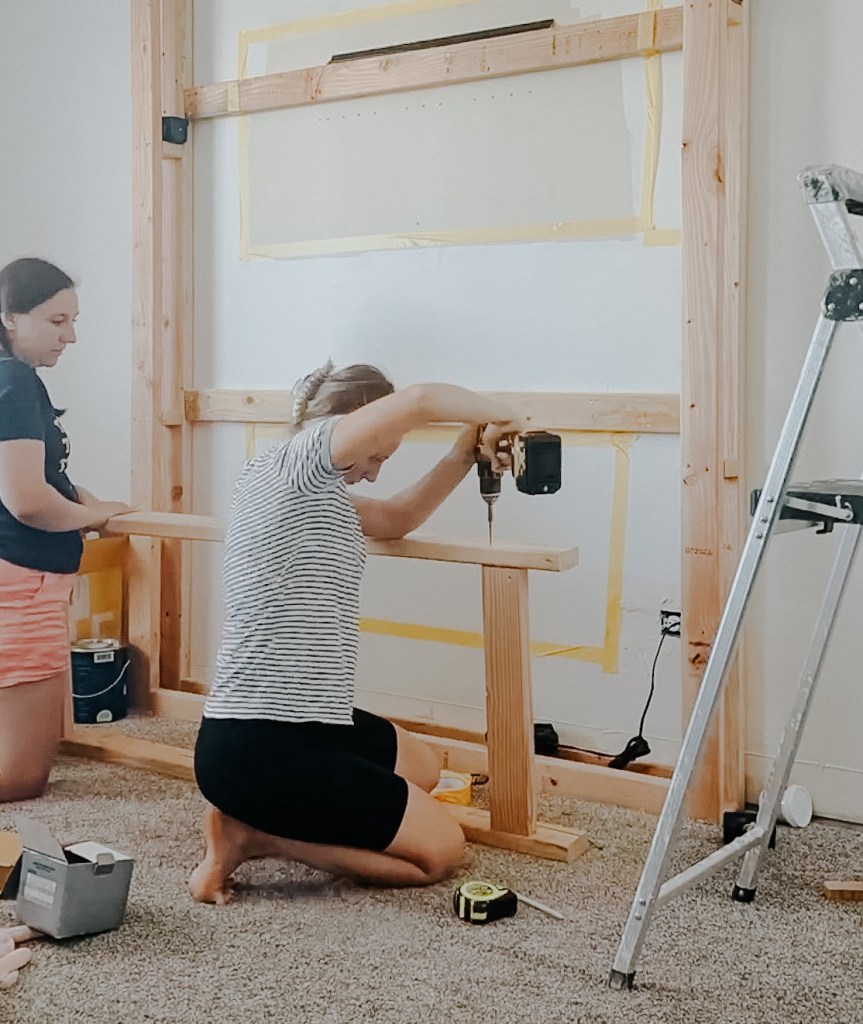
First things first I needed to get the framing up. The most important part of this as far as precision goes is the opening for the insert. I’m using a 50” insert from Touchstone and they provide the dimensions for the rough opening (that’s what you’re building). For this one, my dimensions need to be 47 1/8” W x 20 1/2” H x 5 1/4” D. So I started there and then figured out what I wanted the rest of the dimensions to look like.
Tip: If you’re drawing your own plans, be sure to plan for the dimensions of the fireplace cover plate as well!

I built the sides first and then screwed them into the wall. You don’t need to worry about hitting studs here (and you probably won’t) but you should make sure everything is super level! The placement of the cross supports here doesn’t really matter, just try to get them semi-evenly spaced.
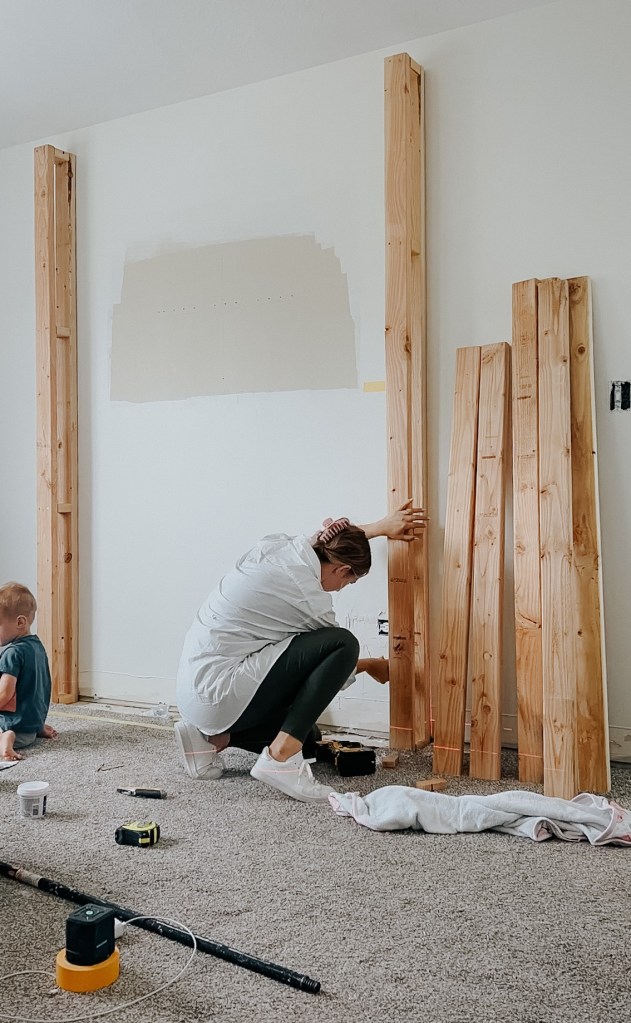
Then I cut the boards that went along the back (4) and the top front/bottom front ones. These are all the same length. I screwed in the top back/bottom back ones and secured them into as many studs as I could. Then I screwed them to the side pieces by angling my screw at an angle.
Another option is to drill pocket holes first and use those to guide the screws. This is definitely a cleaner option and in some ways easier since you don’t have to manually angle the screw, but it is an extra step. Either way is equally as secure!
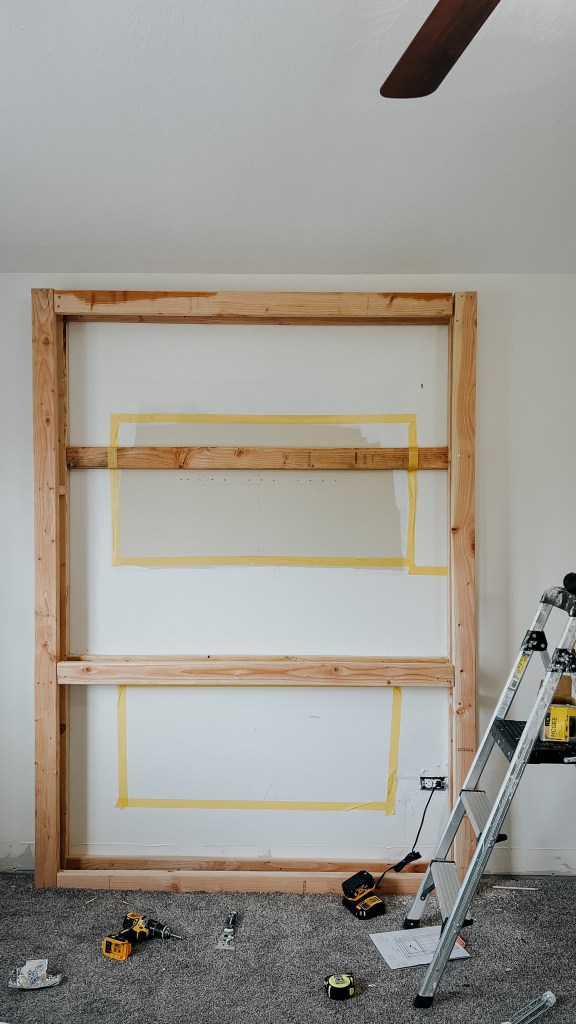
I did the same thing with the other boards so that I had a total of 4 along the back attached to studs and a header and footer in the front.
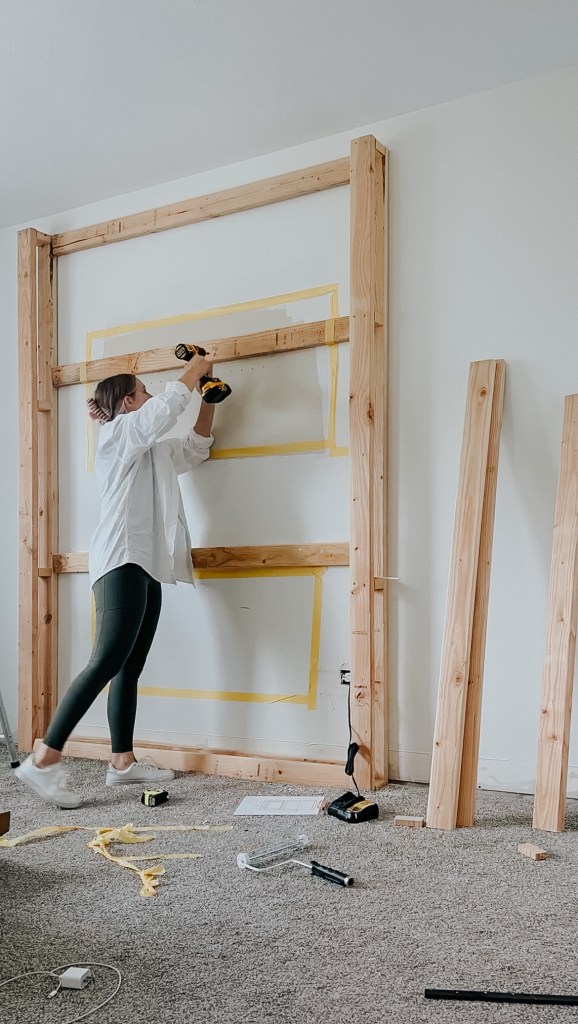
Next it was time to build the frame for the insert. I highly recommend building this on the ground first and then sliding it into the frame you have on the wall. Orienting the top and bottom boards horizontally makes it a little easier to get the screws in for the next support screws because you won’t need to drill them in at an angle.
My original plans called for the insert to sit a little lower, but I adjusted it because it felt too low. I cut the bottom support boards and set the insert frame on it to space them out. I screwed the support boards into the bottom board, then the insert frame into the side pieces and into the bottom support pieces-0p[8.
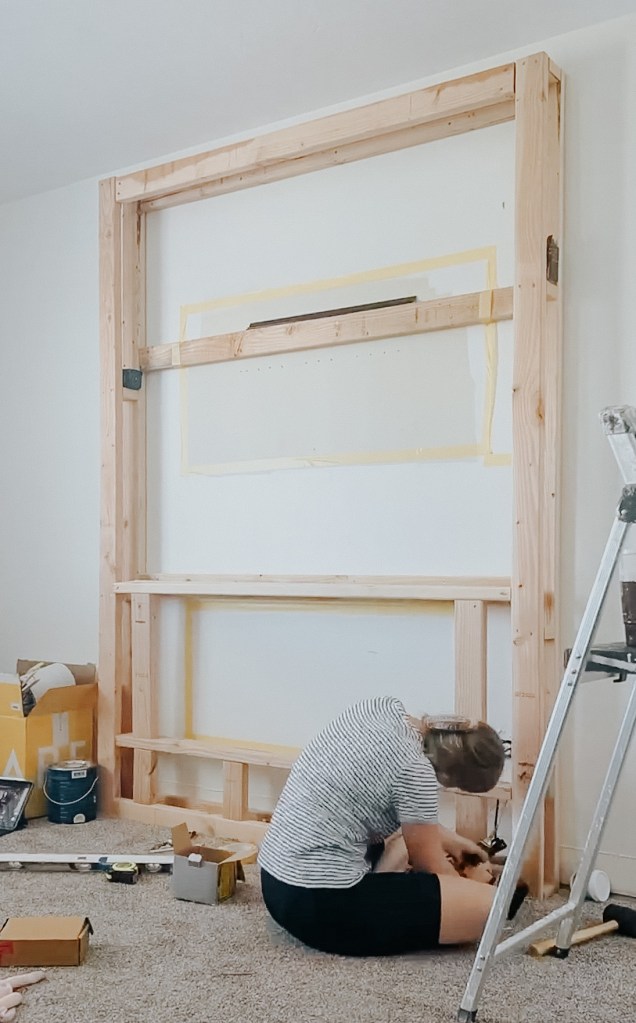
The last piece of framing was adding drywall support into the abyss at the top! You need a stud at least every 16” or so and you want one of those to be running down the center.

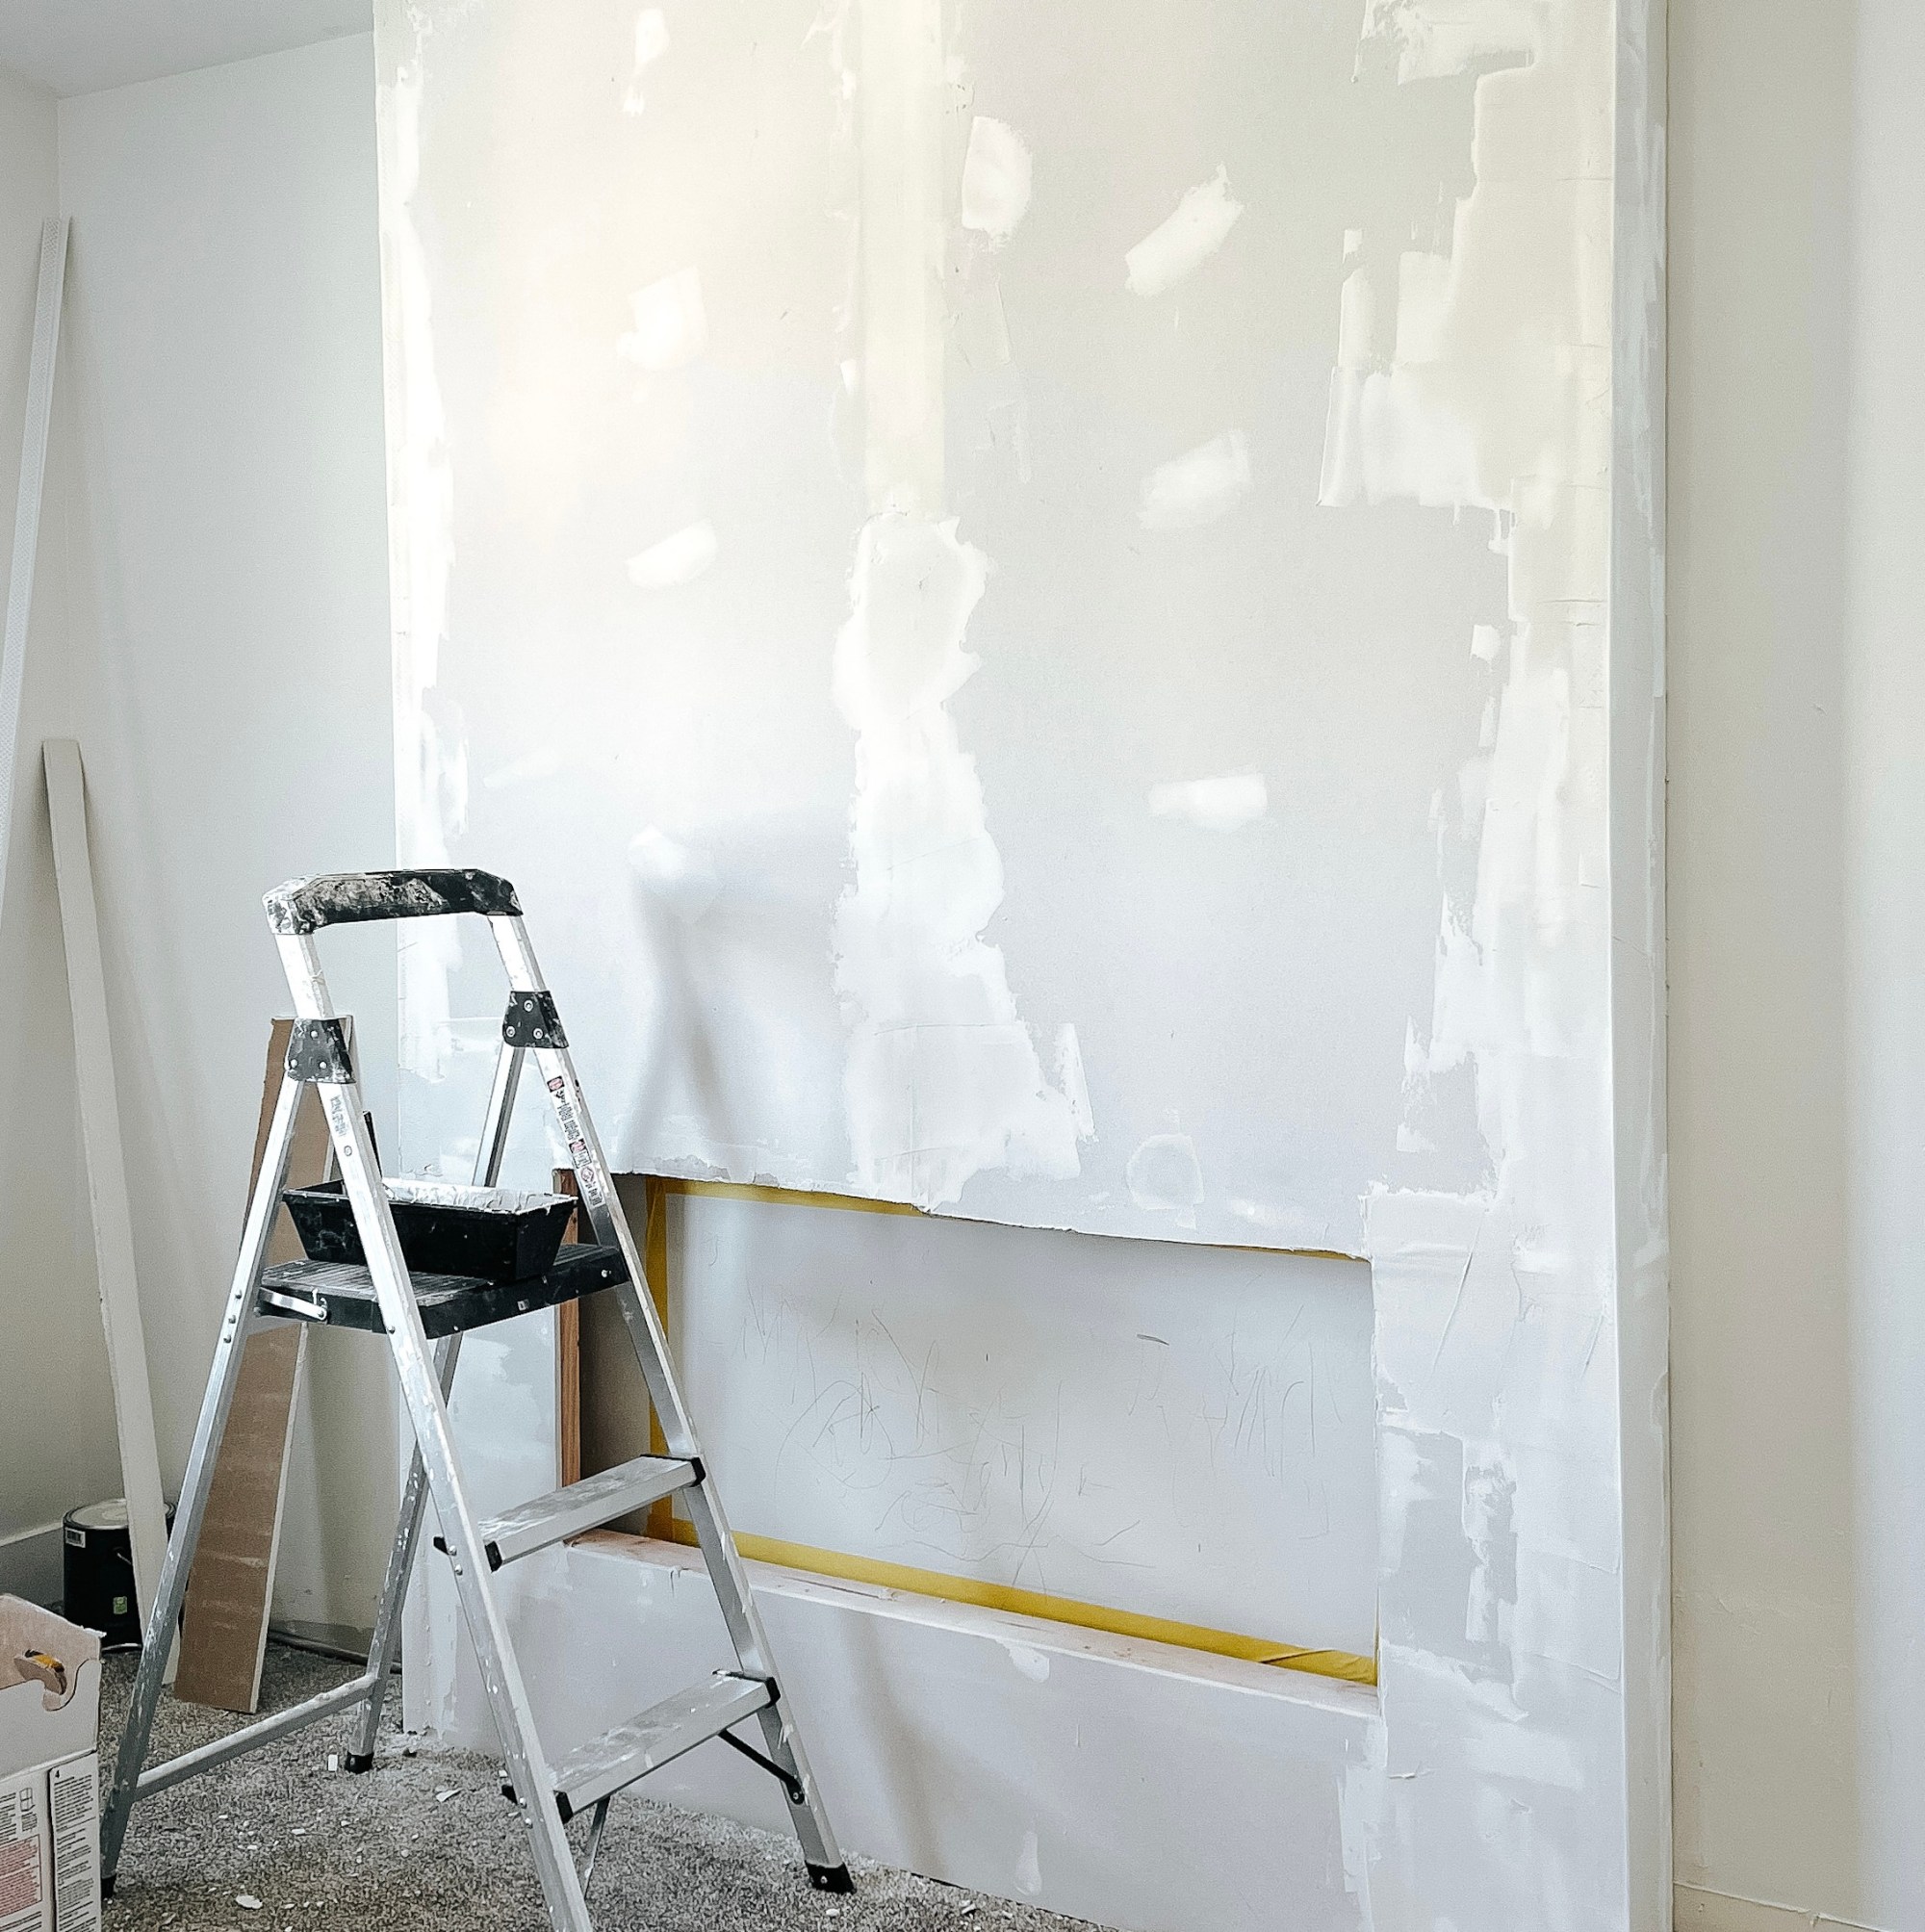
Now that everything is framed, time to drywall! I cut the drywall by scoring (using a straight edge and utility knife) and snapping it. Then screwed it into the framing, slightly sinking the drywall screws without breaking the paper.
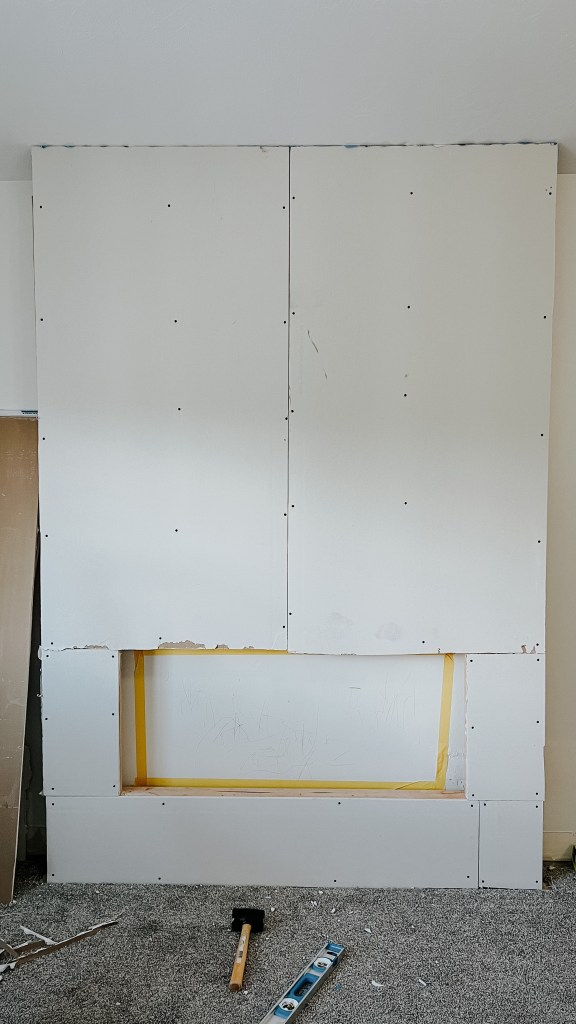
I slightly overlapped the drywall a little on the corner. To add the corner bead, I sprayed the drywall with this craft adhesive spray and stuck the corner bead on. The adhesive keeps it in place so I didn’t have to worry about it shifting while I mudded around it.
To get a perfectly smooth finish, I taped all the seams and mudded the seams, corners, and over the screws. I needed 3 coats in some places and 4 in others. Don’t worry about laying the mud down perfectly on the first couple passes. Those are mostly about coverage and then passes 3 & 4 at for getting that perfect finish. I sanded out any imperfections with each round.
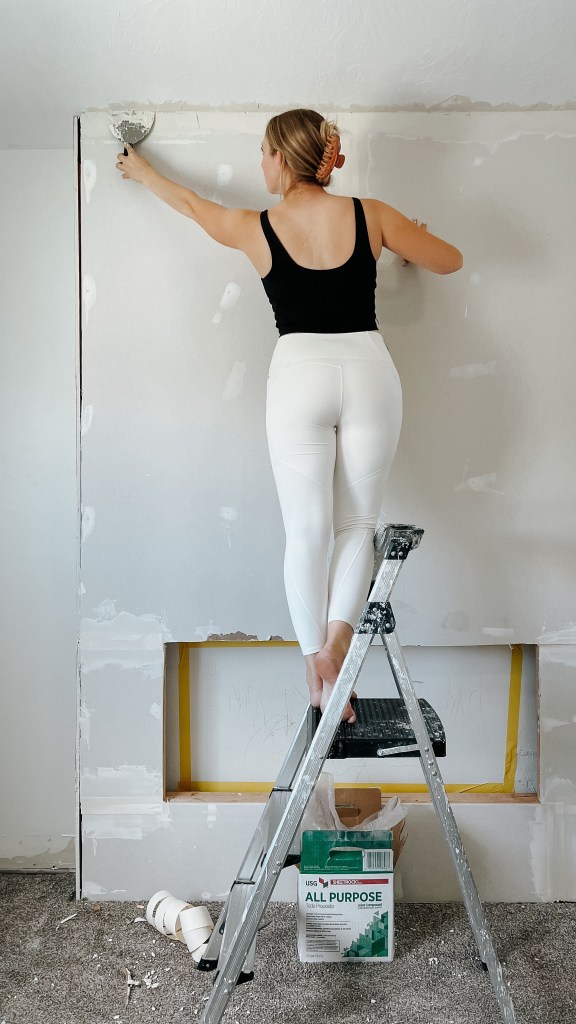
Once I was happy with it, I primed with a drywall specific primer. Don’t just use any primer you have laying around – it needs to be specific to new drywall or any paint you put on it will peel.
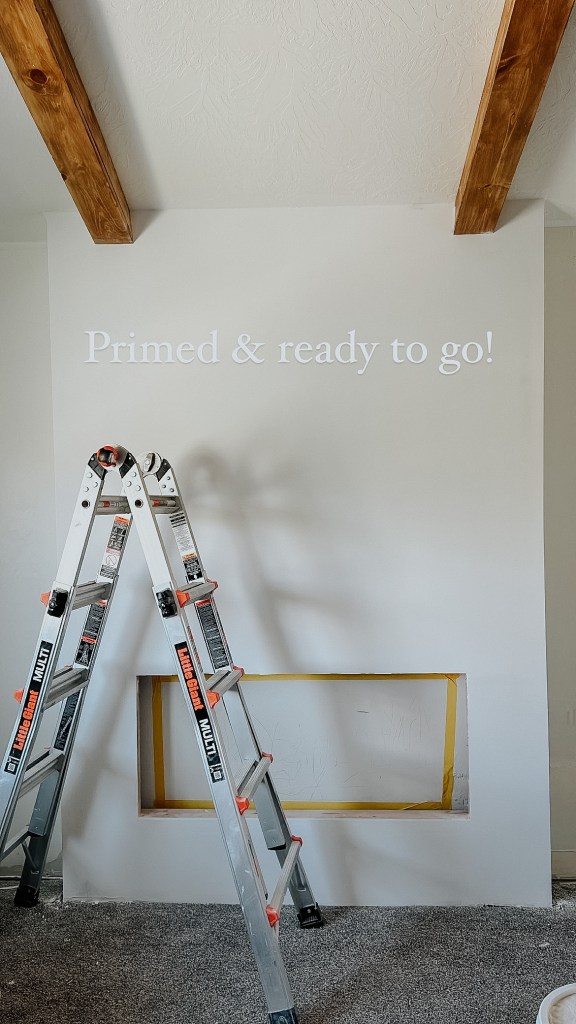
Now it’s ready for me to finish it off (subscribe so you don’t miss that post) and install the insert. It’s already adding so much to my bedroom and it’s not even done! I can’t wait to see it finished.
With love,
Mercedes

Did you cut the carpet out before you framed? Or did you just frame on top of it?
LikeLike
I cut it back first.
LikeLike