

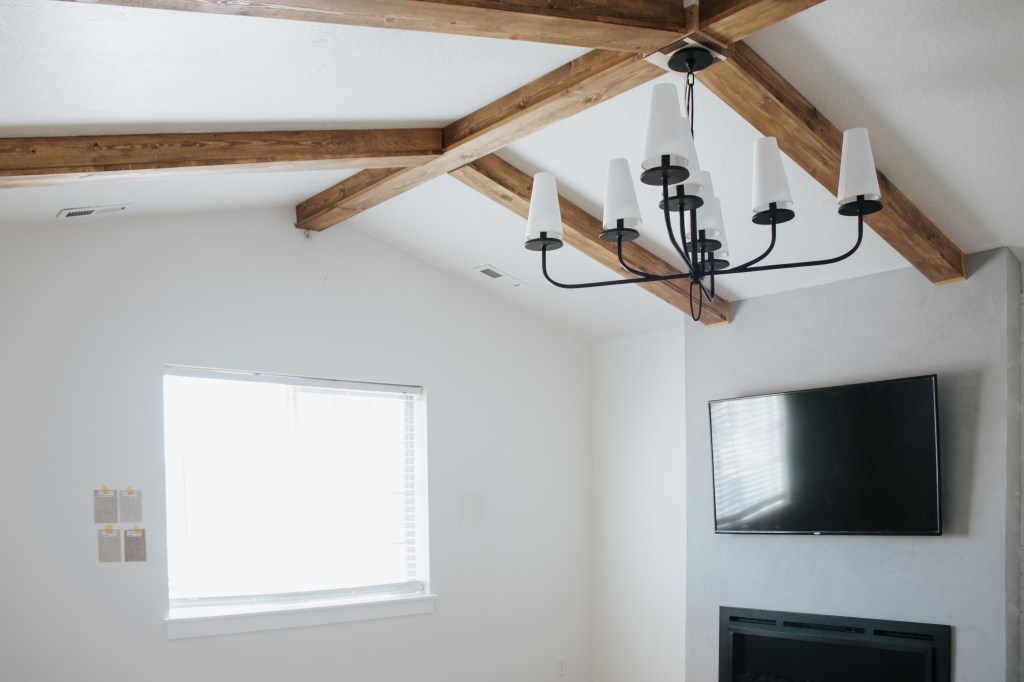
For years, I have been wanting to learn how to build and install faux ceiling beams. They just seem to inject an amazing amount of character! We were actually going to add beams in our last living room, but we moved before I could get around to it. When we moved into this house, this bedroom screamed beams to me!

A few takeaways I have from this project – (1) the install was a lot easier than I thought it would be (2) the measuring and planning was more intense than I expected (3) the payoff in added character exceeded all expectations!
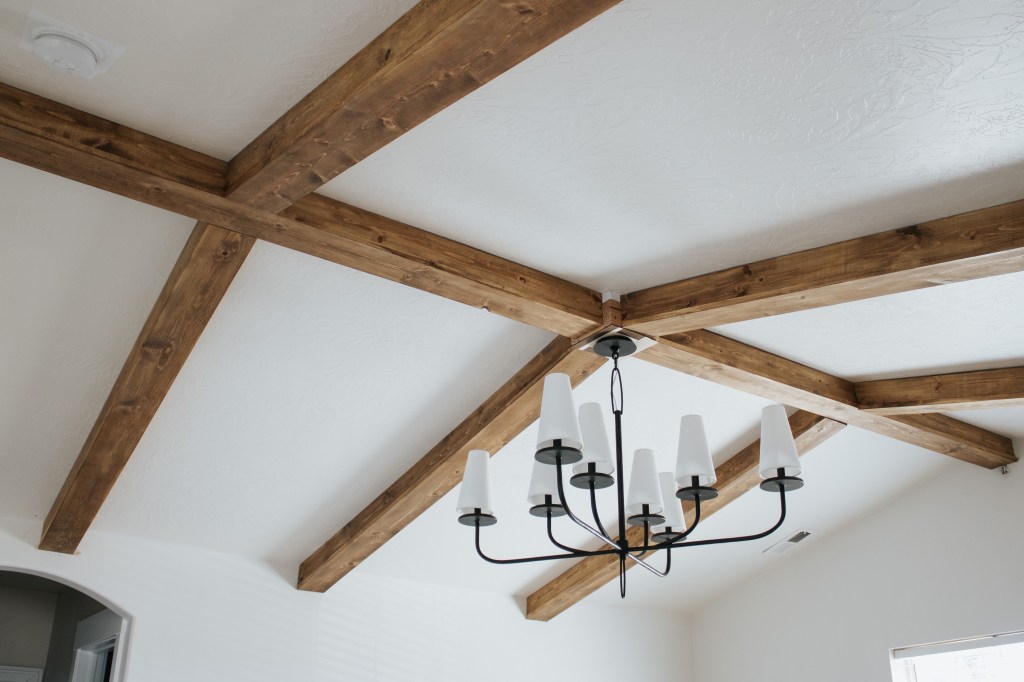
And how about that light fixture?!? It totally finishes it off so beautifully for me.

You can find videos of the install over on my Instagram, and be sure to follow me there to see my latest projects in real time!
Materials & Tools
- 2x4s
- 1×4 pine (I used 16)
- 1×6 pine (I used 8)
- Wood stain (I used early american & weathered oak)
- 3” coarse screws
- Brad nails
Tutorial
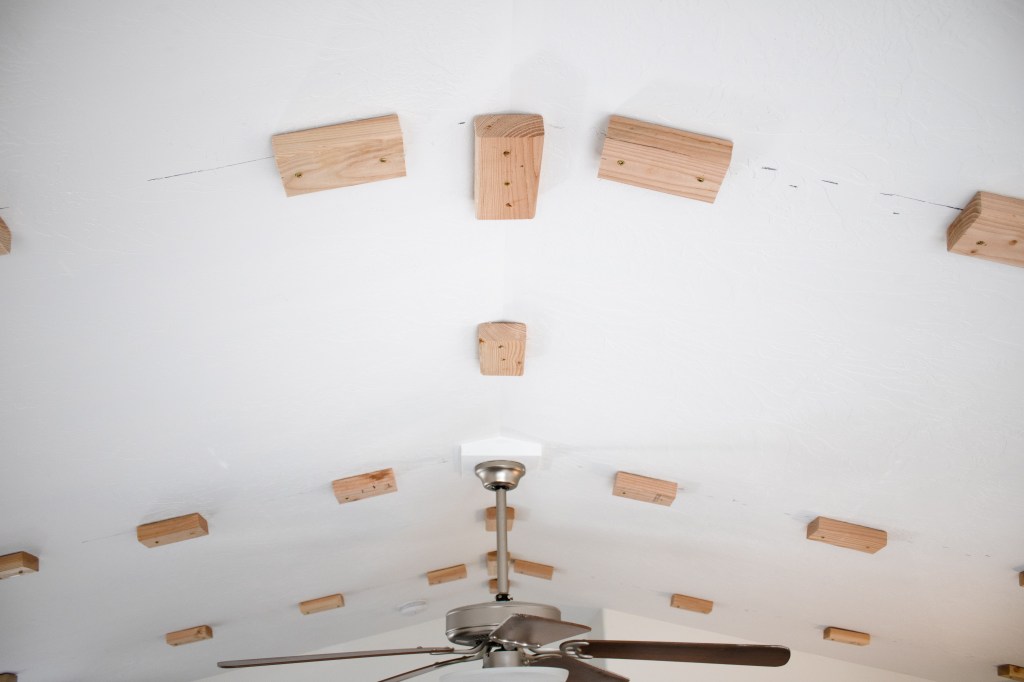
The first step is the hardest, in my opinion. Figuring out exactly how many beams I wanted wasn’t difficult, but getting them all spaced out evenly and straight… that was tricky. It just took some trial and error, measuring, and then measuring again to make sure I had everything straight.
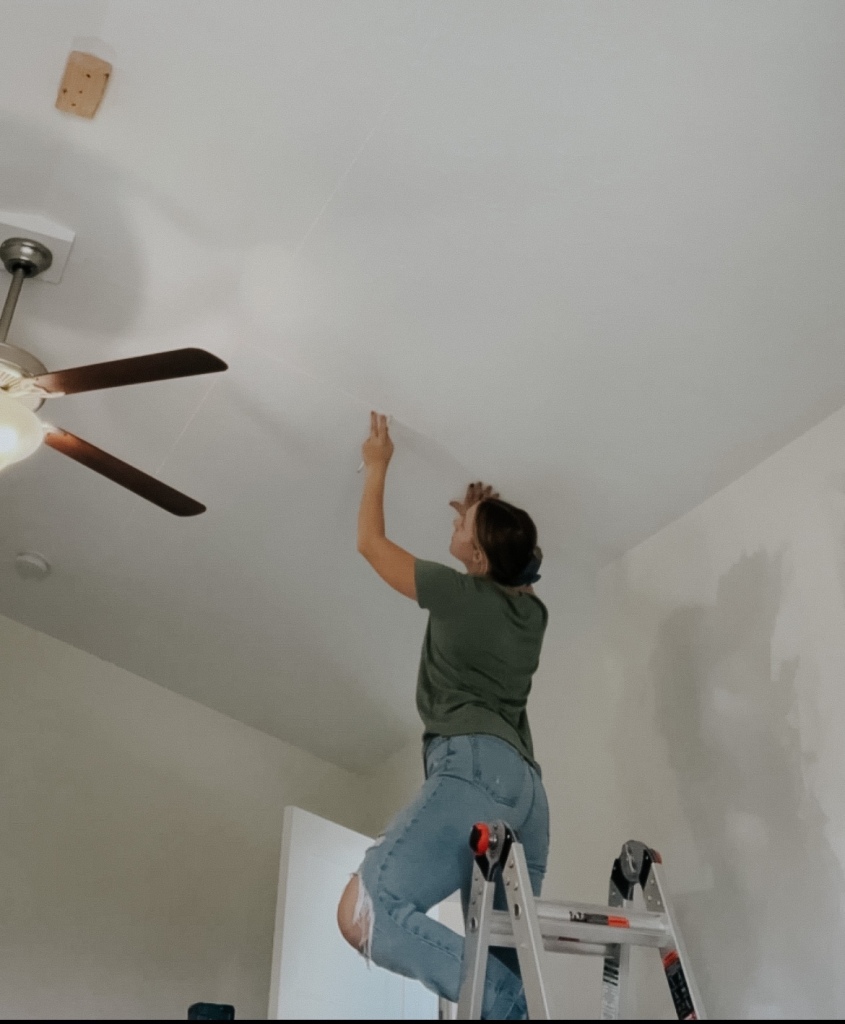
I marked my desired distance from the wall in two spots and then projected my laser level onto the ceiling helped me mark straight lines between those two points.
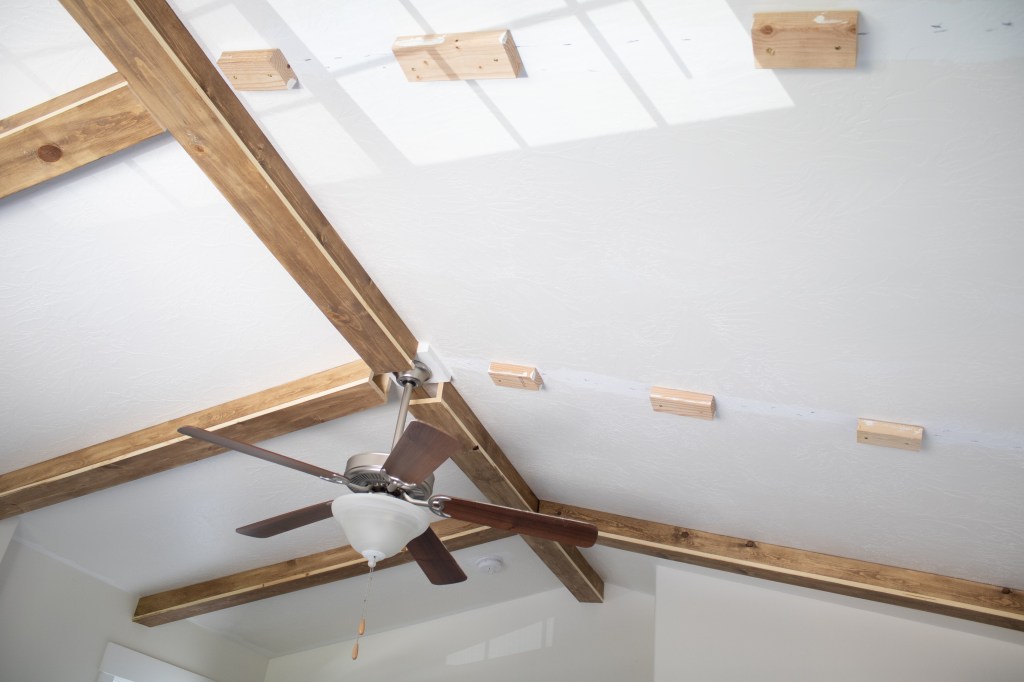
I cut small blocks of 2×4 instead of using a full board to help with the install (since I did 99% of this as a one woman show), but if I were to do it again I would use full boards. It was really difficult to get all of the mounting blocks in a perfectly straight line with each other and each block not crooked.
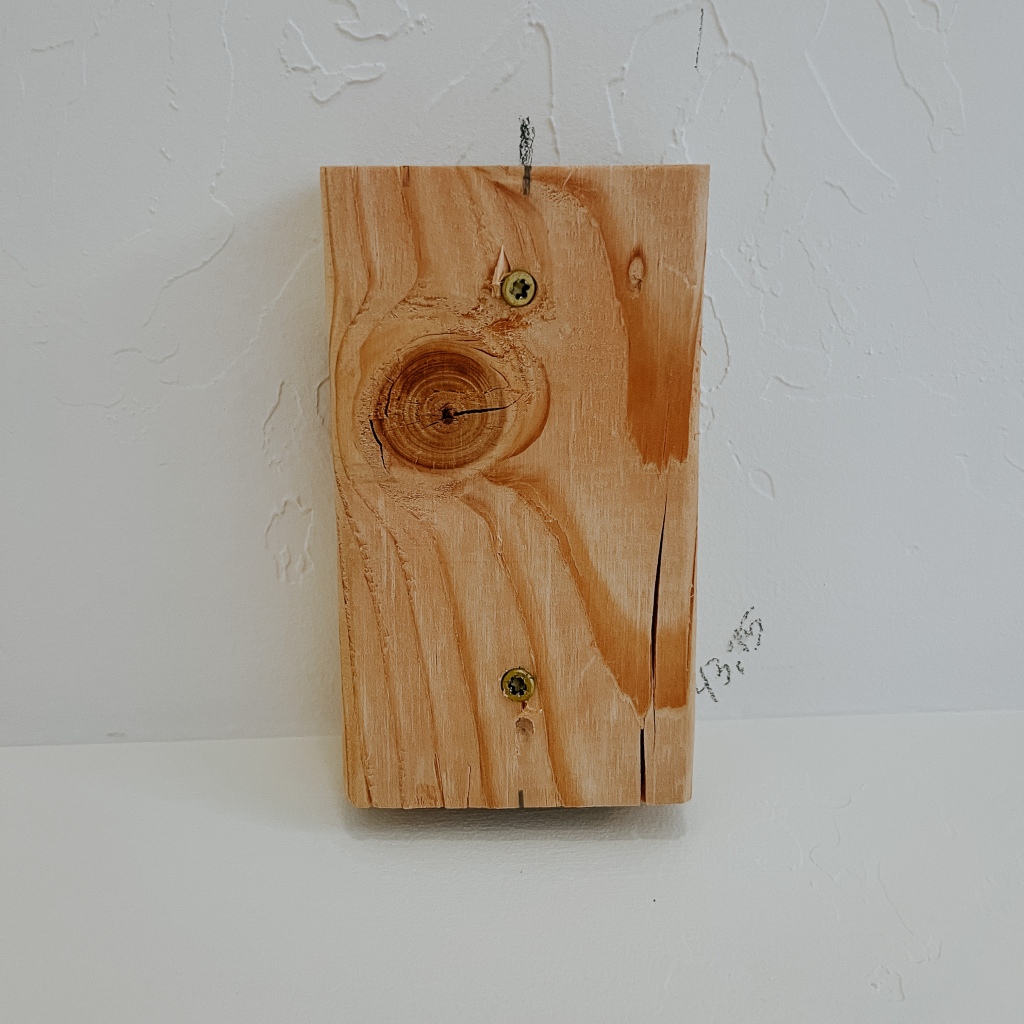

Whichever way you choose, if your mounting blocks/board is running parallel to the ceiling joists like nine, you won’t be able to hit studs. Luckily it’s pretty easy to lock the board into the drywall. The beams themselves are relatively lightweight, so as long as you use coarse screws and drill them in at opposing angles, it’ll be plenty strong to hold the beam.
(The center beam in this room is attached to the studs since there’s a joist right there.)
Once you have the blocks/boards installed, it’s time to get the boards you’ll actually see ready.
Sand them down with an orbital sander and 180 grit sandpaper. Most boards – and especially pine – have a yellowish tint on top from the various oils and grime they encounter in the factory. Sanding that yellow off can help you to get a more accurate stain color!


Once everything is sanded, go ahead and stain it. I used early american, let it dry, and then did a coat of weathered oak.

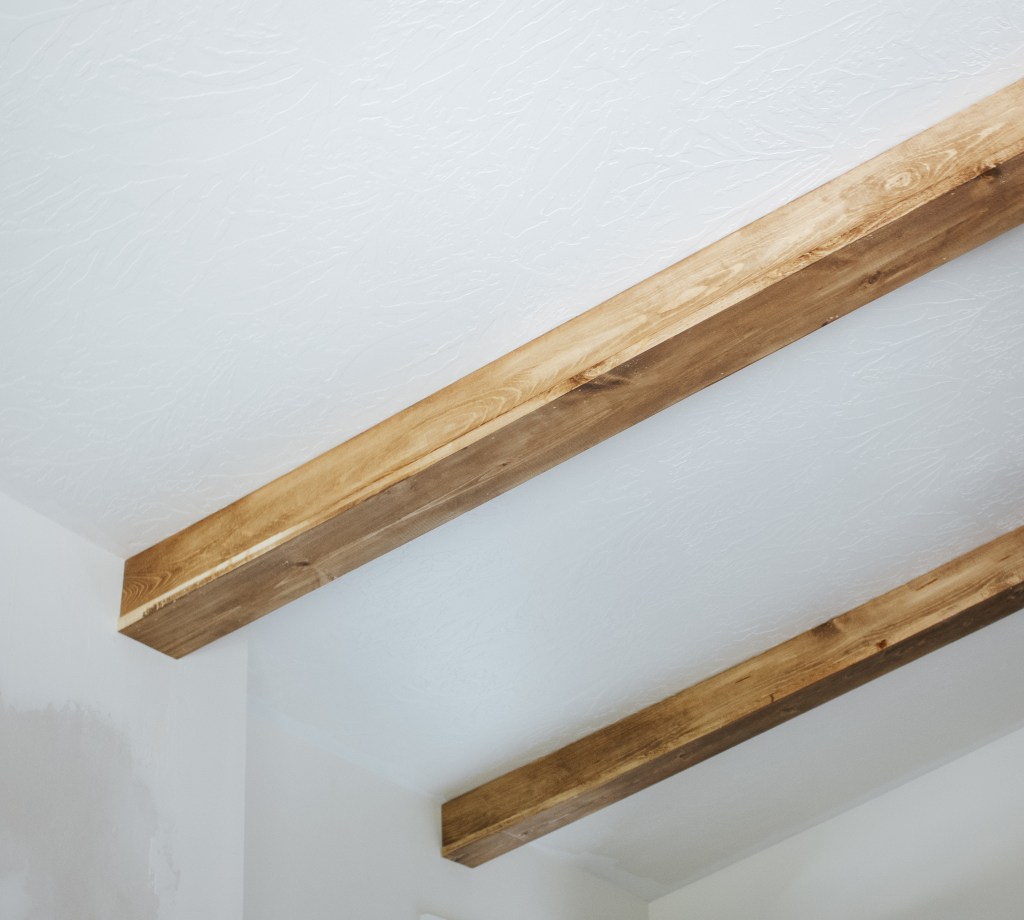
To install the pine boards, start with two 1x4s. Cut them down to the right size. If you have a middle beam like I do, be sure to do that one first! With the middle beam I didn’t need to miter any of my cuts, but I did with the others. So if you have a vaulted ceilings, find the angle using an angle finder or a folded piece of paper.
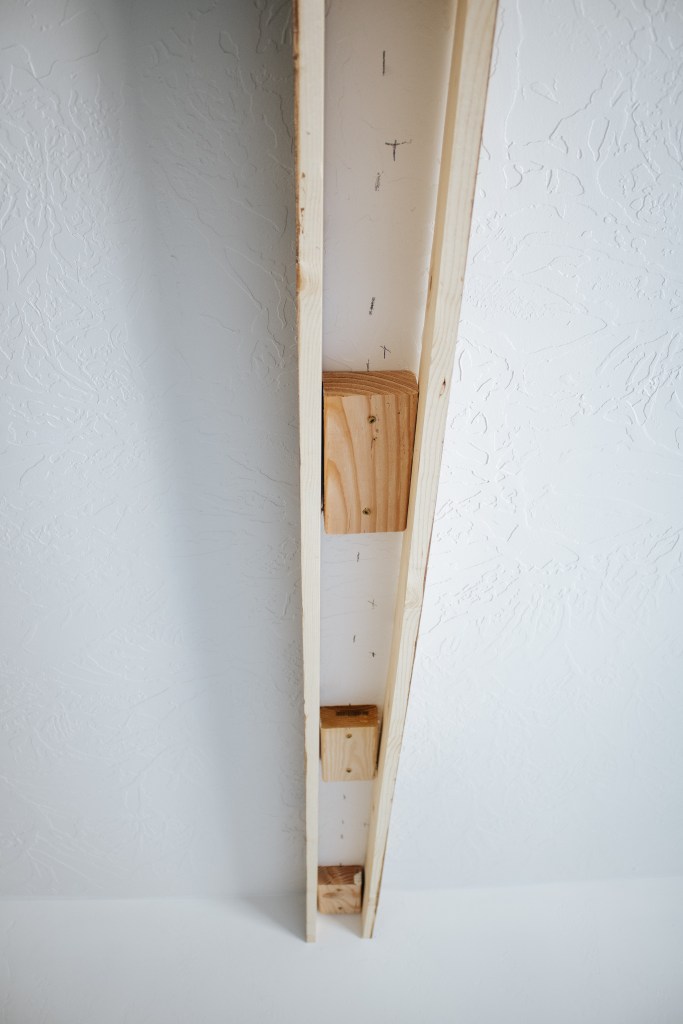
Once you have the 1x4s cut, nail them into the mounting blocks/boards. I varied the angle of my nail to help secure them even more.
Now measure again and cut your 1×6. Keep in mind that you’ll need to bevel the edge if it’s coming off of a vaulted ceiling. Line the 1×6 up in the center of your 1x4s and put a few nails up through the 1×6 into the 1×4. Move along the beam to add nails every 18” or so, securing the 1×6 tightly to the 1x4s.

Note: There will be a small lip, but I prefer this look over having a seam on the bottom face. Another way to do this is to use a 1×4 on the bottom instead of a 1×6 and slip it in between the boards. That leaves you with 2 seams along the bottom, and I preferred having that bottom face be continuous.
The right way to do this is to stain the edges while you’re staining the rest of the boards, but if you’re impatient like me and wanted to see them up, go back now and stain the edges!
Before I hung the light, I had to build a little box to drop it down to the height of the beams and I’m still waiting on the veneer to come in so that I can stain it to match the beams, but it will match in the end.
That’s it! Now lay down and admire your handiwork. If you have big gaps between the boards and the ceiling, you can caulk but I didn’t.
Let me know if you have any questions and tag me on Instagram in your beam projects! I’d love to see them.
Total cost $266 :
- 2x4s : $0 (scrap)
- (16) 1×4 pine : $140
- (8) 1×6 pine : $104
- Stain : $14
- Screws : $8
With love,
Mercedes 🖤

One thought on “DIY Faux Ceiling Beams”