
Disclosure: Some of the links provided are affiliate links, which simply means I may earn a small commission (at no additional cost to you) if you shop through one of my links.
When I set out on the massive closet overhaul project, building the drawers was hands down the most daunting part for me. Everything else seemed straight forward and I was confident I could execute it well, but I have never built drawers before this. In fact, my only experience with anything resembling drawer construction was trying to replace a set of broken drawer slides on one of our kitchen drawers at about 6 months pregnant. That story ended in me breaking down in tears and calling Jordan, who had to leave work to come home and help me. Needless to say, when I started the drawers I was just crossing my fingers and praying that it worked out okay – and it did!
I’ve included a step by step tutorial for how the build at the bottom of this post, but I wanted to include a section on how to best organize your drawers since that is something you could tackle while quarantining.
ORGANIZING CLOSET/DRESSER DRAWERS
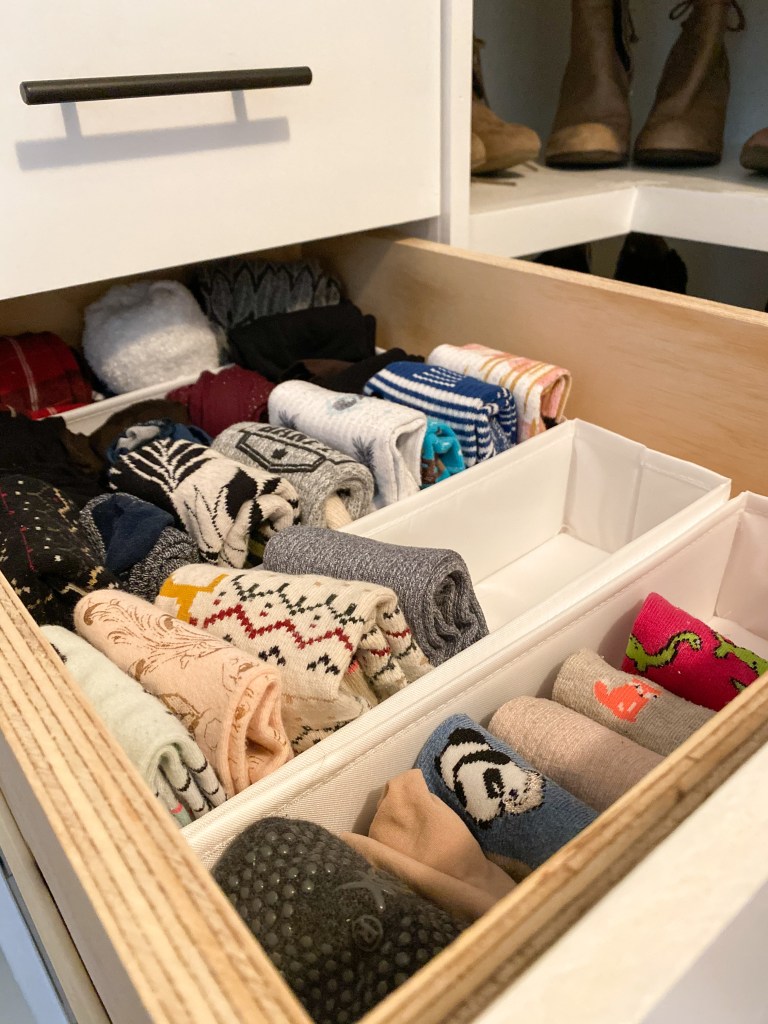
If you haven’t watched Tidying Up by Marie Kondo on Netflix, do it now! I use her method of folding my clothes and filing them in the drawers, that way nothing is buried under a stack of clothes. Here’s a really quick synopsis : fold shirt sleeves and edges into the middle, then fold in thirds. Fold pant legs together, then in half, then in thirds). This will allow them to kind of stand up on their own in your drawer.
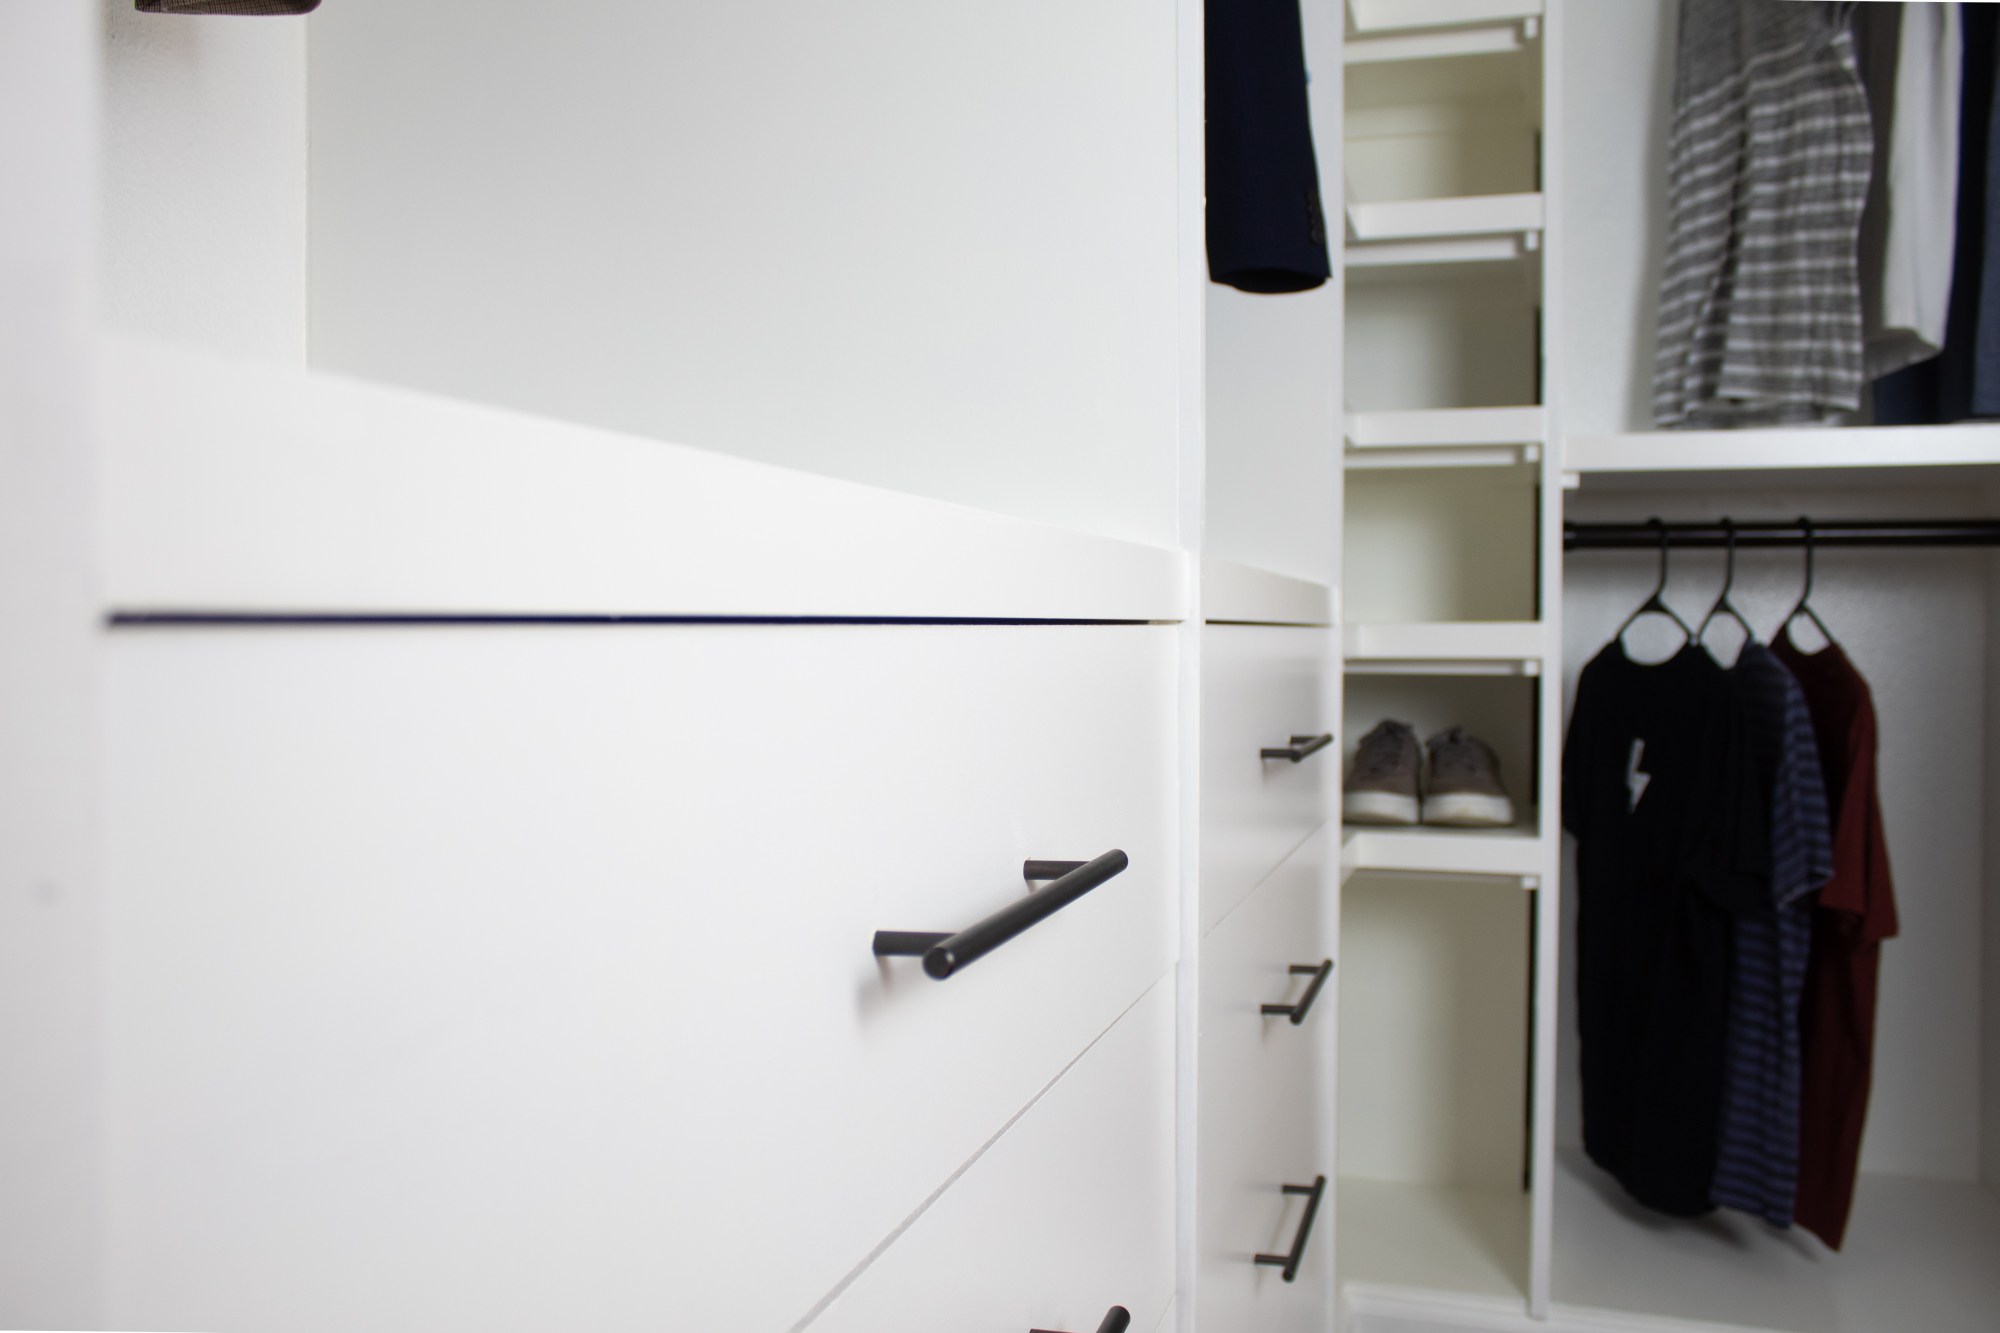
I also like to have everything put into organizer boxes to help contain things and keep the drawers from falling into utter chaos. I used some from Ikea and some from Walmart in my closet, but I’ve linked some great ones below from Amazon that you can have delivered to you.

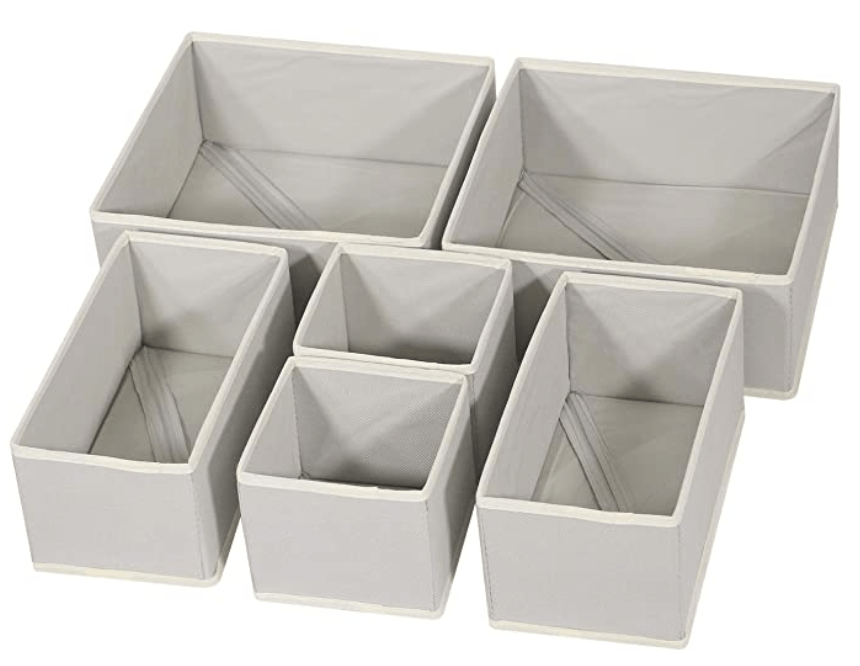


These organizer boxes give everything in my closet a home, making it ten times easier (and keeping me motivated) to keep everything from falling into utter chaos.
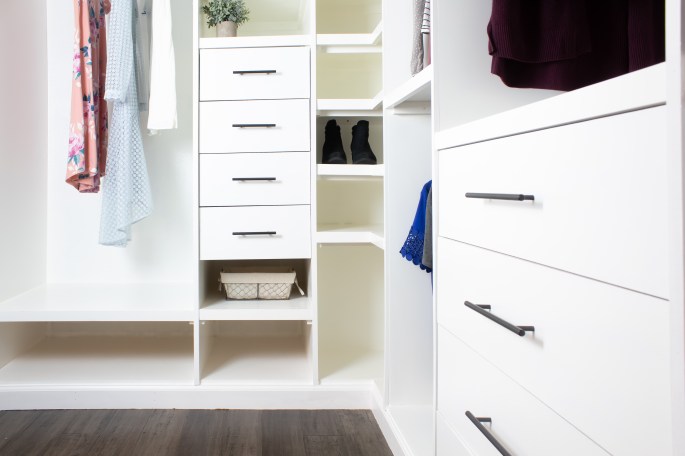
In my small drawers I keep my bras, underwear, socks, and jammies.
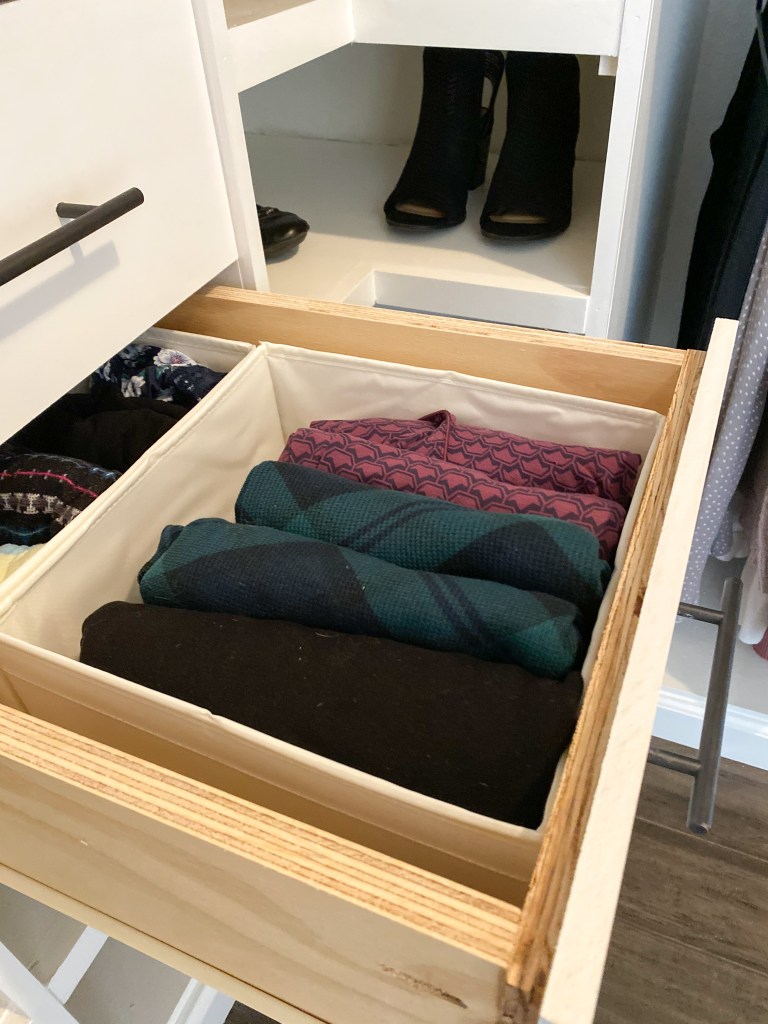
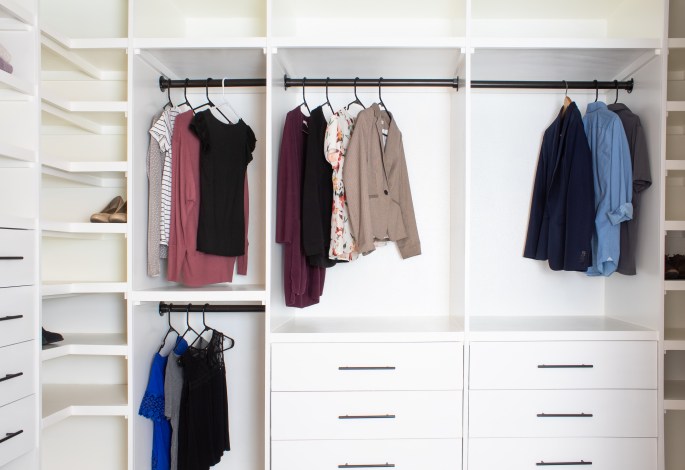
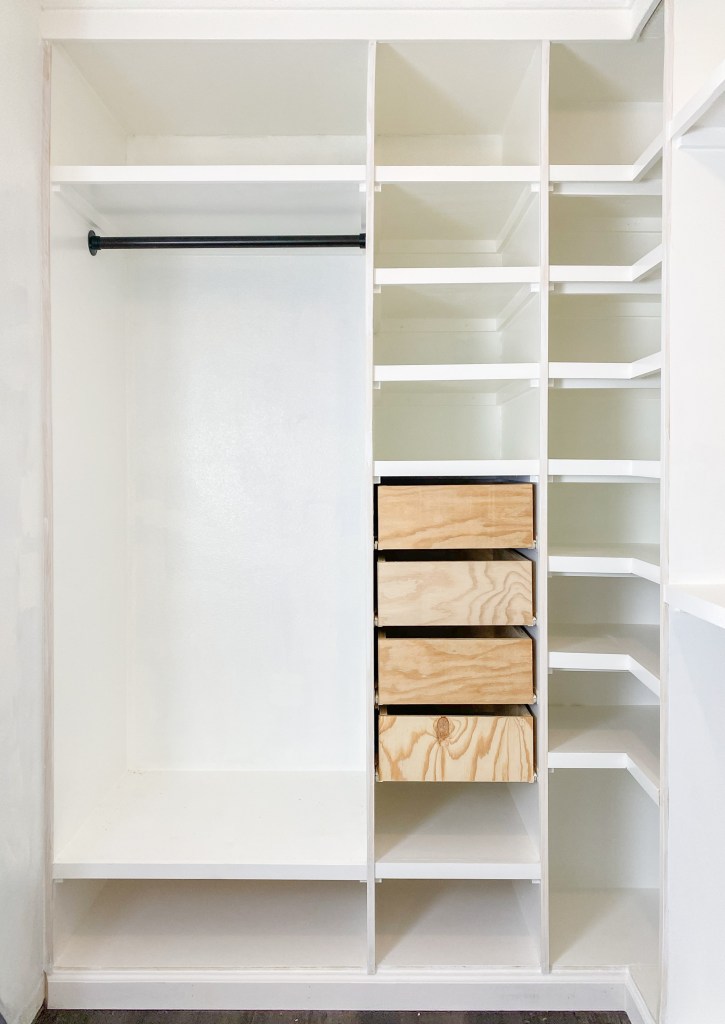
In the bigger drawers I have my project clothes, workout clothes, pants, and an empty drawer. I like to have the category of things I use most frequently in the top drawer and then work my way down to my least used items.


Jordan doesn’t have any small drawers (sorry, babe!), but he keeps his underwear and sock/belts in one drawer, then his workout clothes and swim stuff in another, and finally all of his pants in the third. We both have an empty fourth drawer – I’m telling you, we have so much space in this closet. It is amazing!
Building Drawers

The first step in building your drawers is installing the slides. On the cabinet box, I marked where the drawer faces would hit and added another mark 1/4″ up (since the face will hang over the edge of the actual drawer 1/4″).

I used the mark indicating where the slide would need to be and drew a level line to the back of the box. My mom and I then clamped a scrap piece of lattice (any scrap wood would do) lined up with line to give us a guide. Then she held/clamped the slide in place, resting it on the lattice and I screwed it into the frame. I am happy to report that there were no tears! I used 22″ slides because my cabinets are about 24″ deep and you want a little space in the back so your drawer isn’t hitting the wall every time you close it.


I ended up moving these slides back a bit so that there is a 1/2″ gap for the face to sit in so that it is flush with the divider.
With those installed, it was time to measure for the drawers. I found this tip online and it worked like a charm. I slid the unattached piece of the slide onto the part I had just attached and I measured the distance between the two sets to get the width that my drawer would need to be. This gave me the exact measurement for the width of each drawer!
I used a table saw for the first time to get my 60 different cuts made. I did learn a couple of things using a table saw – 1) always use a push stick or crowbar – duh. 2) Never stand behind your wood, always stand to the side. 3) Always set it up so that the bigger portion of your wood is against the fence and the smaller portion is free. 4) Enlist someone to help catch the wood when it comes out the back side. I sent a couple of pieces flying across my garage so… I’m kind of nervous to use one on my own. I’m sure I’ll get better though!
Anyway, here are the cuts I made. I had 12 drawers total, so 24 side pieces (6.25″x21″). For the smaller drawers (4), each base was about 14″x21″ and each front/back piece was about 6.25″x15″. For the larger drawers (8), each base was about 28″x21″ and each front/back piece was about 6.25″x29″. I cut the fronts later, so we’ll get to that.


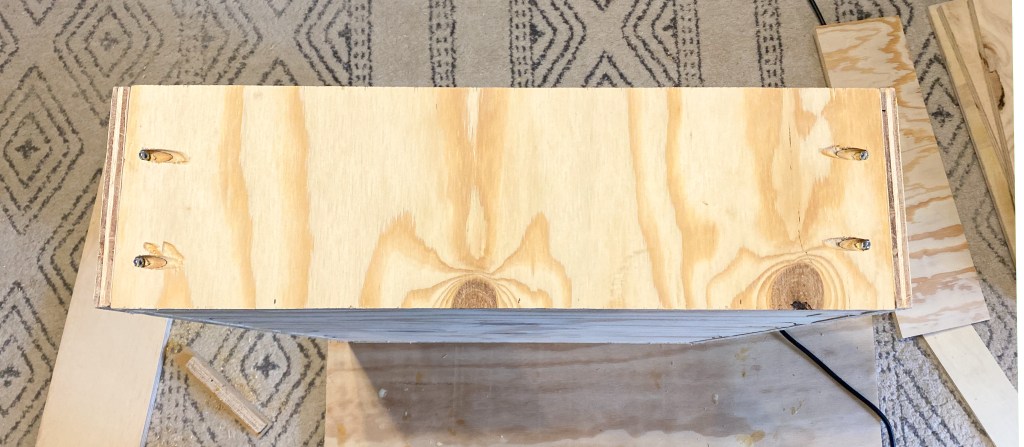
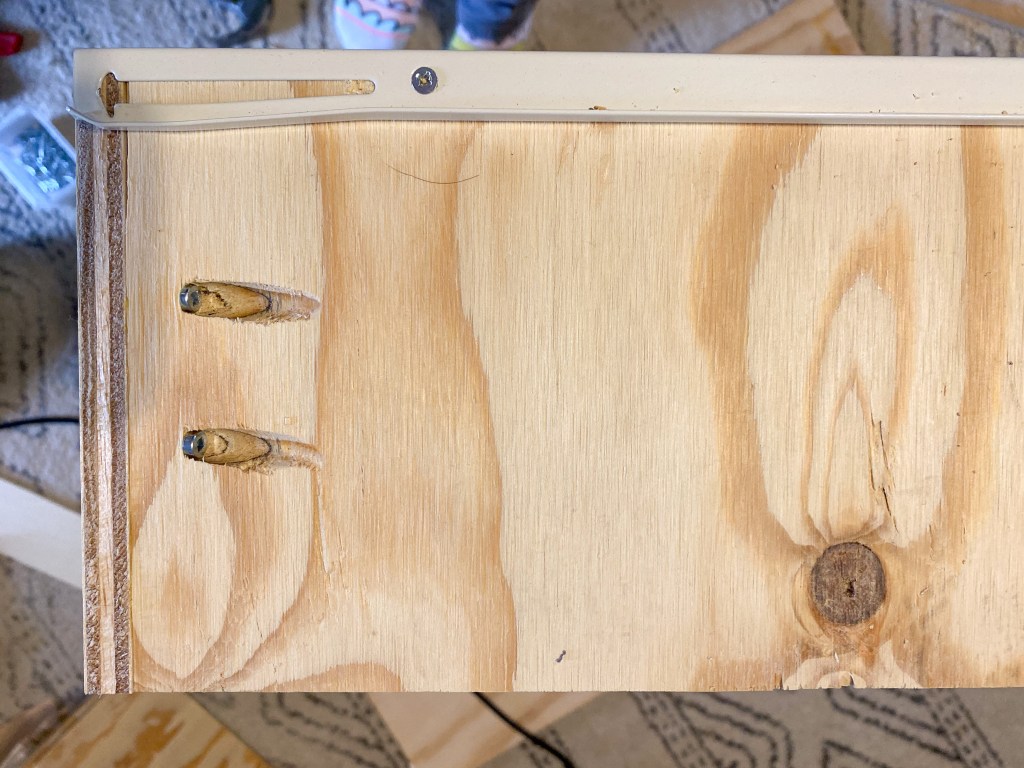
Assembling the drawers is not complicated, but it does take some time. I drilled pocket holes in my bases and each of the side pieces. Then, because I wanted the pocket holes to be hidden, I assembled the drawers upside down. I propped the bases up and lined up the fronts/backs. I used wood glue and 1″ pocket screws to attach them. I love this mini Kreg Jig because it is super budget friendly but gets the job done!
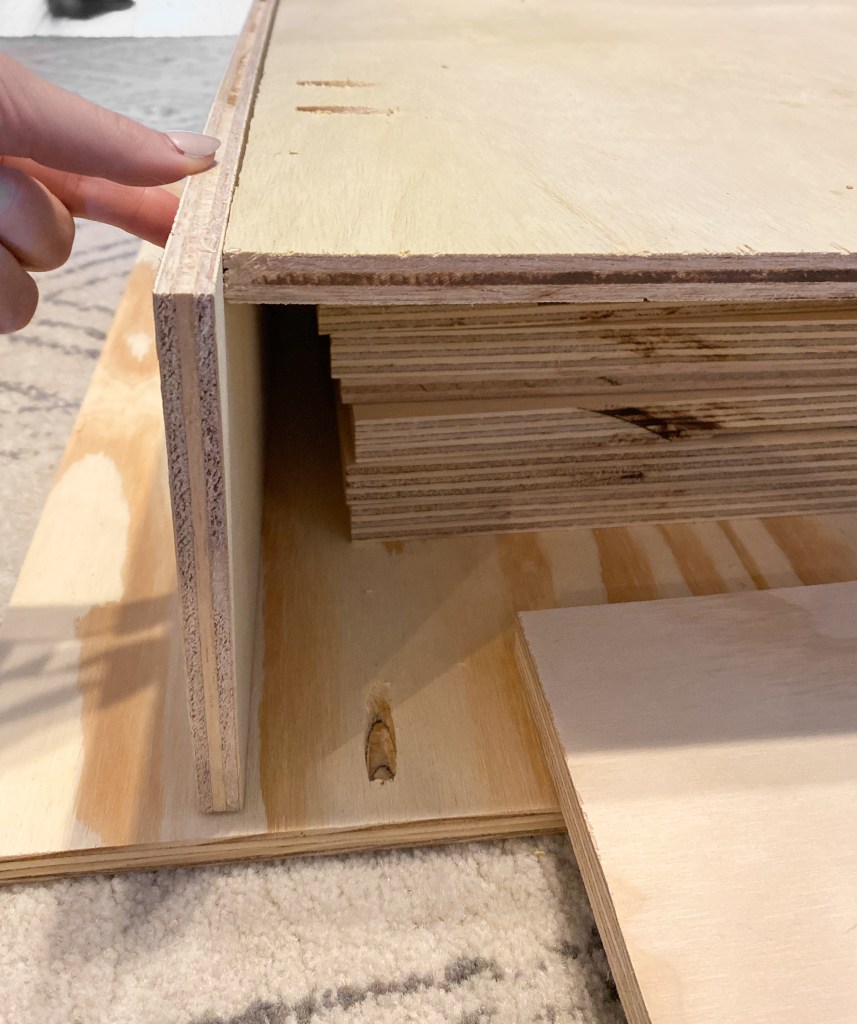
After the bases were attached to the fronts/backs, I slid in the side pieces and attached them with wood glue and more 1″ pocket hole screws. I did go along the edges and throw a couple of nails in (with my favorite nail gun) just to hold everything tight and help the wood glue bond.


Then I attached the slides to the drawer boxes, lining the edge up to the very front of the box. For the most part they all fit – it felt like a miracle!
There were a couple that I had to really drive the screws in on the slides because the fit was pretty snug, so I would probably take 1/16″-1/8″ off the total width if I were doing this again just to give the wheels a little more breathing room.
With them all in and working properly, I could attach the faces! The best part about attaching the faces separately is that if the drawer boxes and slides are attached ever so slightly askew or anything doesn’t perfectly line up, it is all hidden by the fronts. I still tried to get everything perfectly lined up but if it wasn’t, I’ll never know! I cut 1/2″ MDF into 7.5″ strips, then I took those home and cut them to length with my miter saw.
To attach the fronts, first I predrilled holes for screws in the drawer boxes. It doesn’t really matter where these screws fall as long as they won’t interfere with your hardware. I used these floor spacers to space the fronts 1/8″ on each side, then I held it on and hooked my fingers on the pocket holes underneath to carefully pull the drawers out.

After some trial and error, I found that putting a couple strips of double sided tape onto the drawer box really helps with added stability while aligning these, so I highly recommend doing that. Jordan then clamped the fronts on before they could slip. With the very bottom drawer, I ended up making little pulls out of duct tape that I attached to the slides to pull it out because I couldn’t get my fingers under the drawers.


I used my favorite primer and Benjamin Moore Advance paint to paint the fronts before I installed them and added this really great, budget friendly hardware (6″ ones for the smaller drawers and 9″ ones for the bigger drawers). I already had some leftover from our kitchen makeover, so for me it was free! Woot woot!


I still need to add this edging to the raw edges of the plywood, but I am just patiently waiting for it to come in the mail.
Even with very little DIY experience, I would say you can totally tackle building drawers. As long as you measure carefully and take your time, you’ve got this!
With love,
Mercedes ♥
Read the whole closet builtins series here!
- DIY CLOSET BUILTINS : PART 1
- DIY CLOSET BUILTINS : PART 2
- DIY CLOSET BUILTINS : PART 3
- DIY CLOSET BUILTINS : PART 4
SHOP THIS ROOM
MY FAVS
Are you wanting to tackle this yourself? Here are links to some of my favorite tools used in this project.
- Ryobi Drill
- Ryobi Airstrike Brad Nailer
- Dewalt Miter Saw
- Detail Sander
- Zinsser’s 1-2-3 Primer
- Kreg Pocket Hole Jig
- Pocket hole screws
- Level
- Clamp
Disclosure: Some of the links provided are affiliate links, which simply means I may earn a small commission (at no additional cost to you) if you shop through one of my links.

This is wonderful! Thank you.
LikeLike