

Disclosure: Some of the links provided are affiliate links, which simply means I may earn a small commission (at no additional cost to you) if you shop through one of my links.
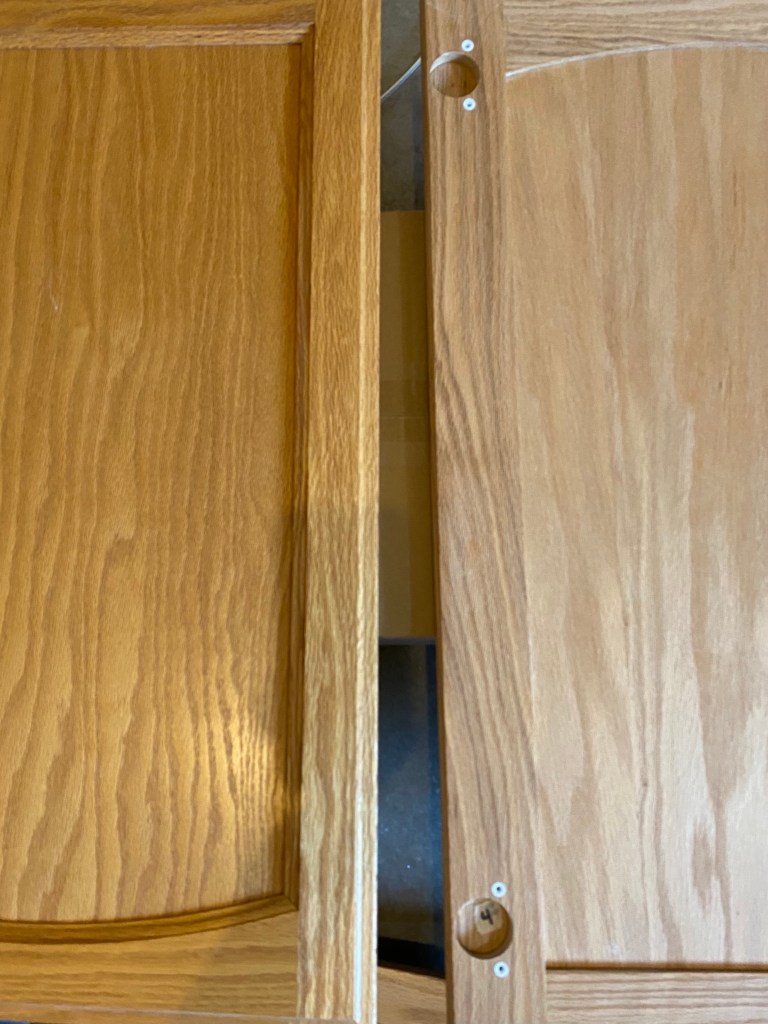
Three years ago (almost exactly) I painted the cabinets in our Arkansas home. I did more than just paint the cabinets in that kitchen but holy cow – transforming those dated oak cabinets to a clean, white color was incredibly impactful. I still remember the feeling I had after just the primer went on because even with the kitchen in complete disarray, it felt so much better because it felt like us.

Want to see what projects I’m working on now? Follow me on Instagram!
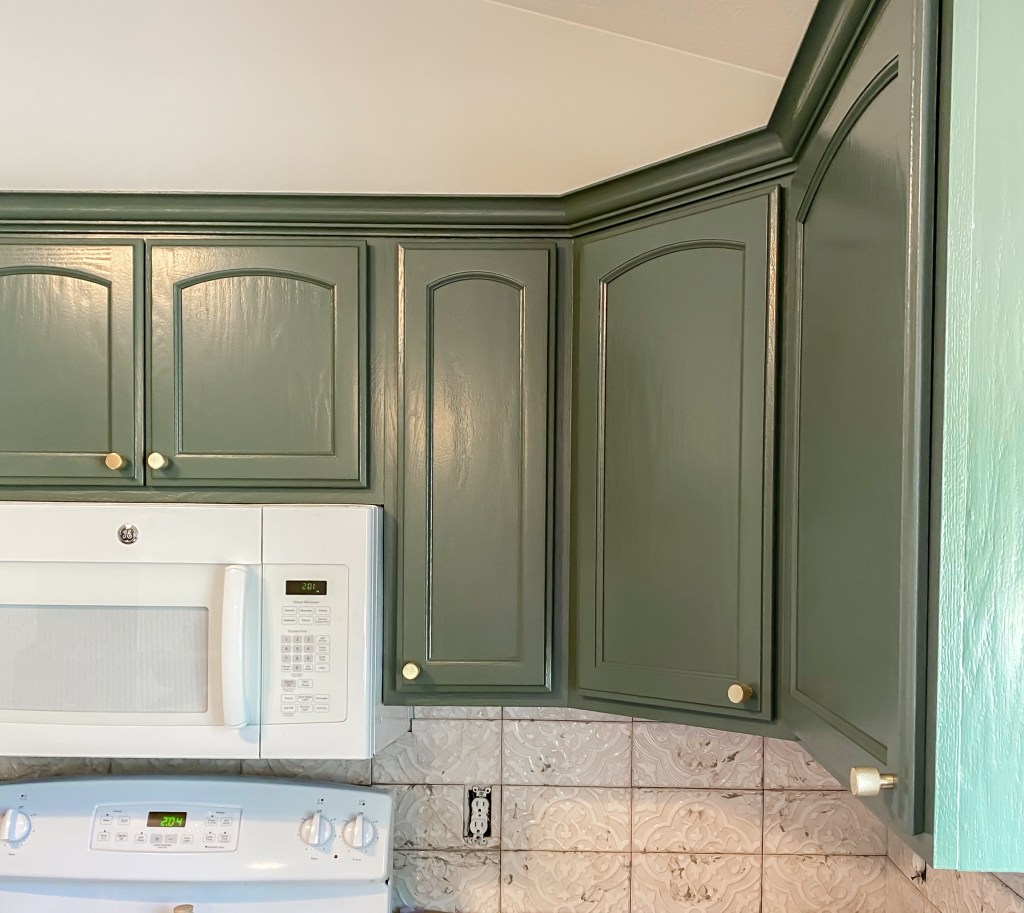
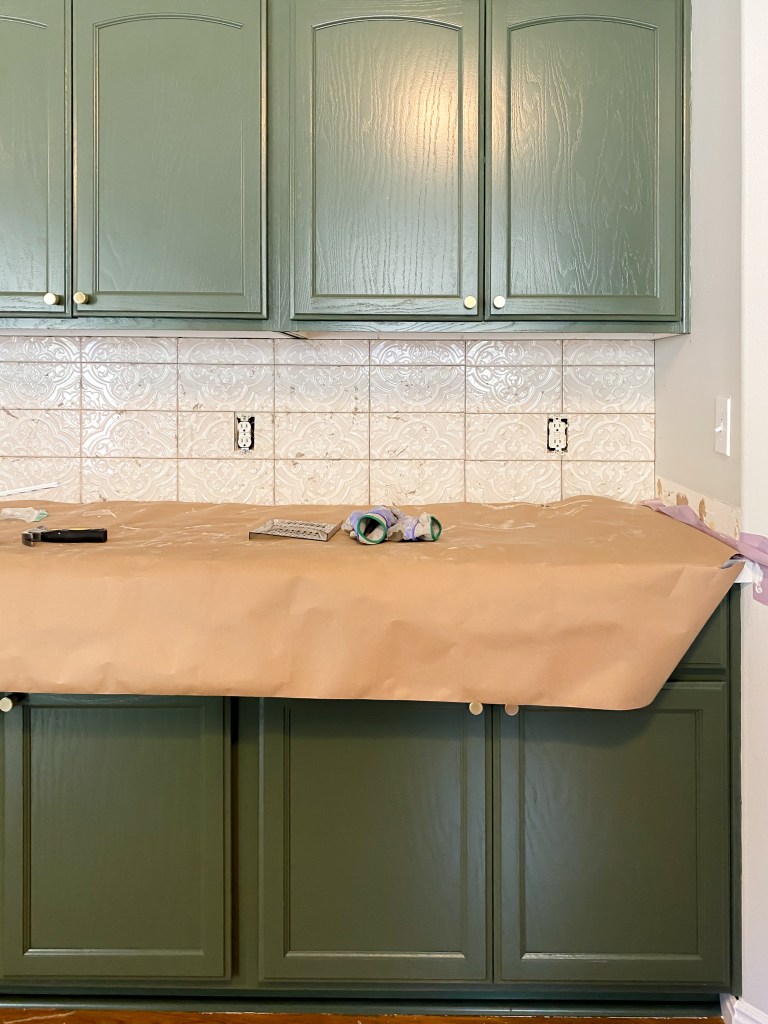
My parents have been working to put their own stamp on their home (were you here for their bedroom DIY?) that they moved into a few years ago, but they haven’t yet touched the kitchen. So as their Christmas present last year, I gave them this kitchen reno! Painting the cabinets is the first step, but there are a few other details we’re updating as well.

When I redid our white kitchen, I learned so much! Then I installed new cabinets in our laundry room and learned even more, so this paint job has turned out pretty close to perfect – I am super, super pleased with it.
Disclosure: Some of the links provided are affiliate links, which simply means I may earn a small commission (at no additional cost to you) if you shop through one of my links.
Materials
- Liquid deglosser
- Zinsser’s B-I-N Primer
- Foam roller with multiple replacement rollers
- 2 brushes (one for primer and a softer one for paint)
- 220 grit sanding sponge
- 320 grit sanding sponge
- Tack cloth (grab a few)
- Paint sprayer
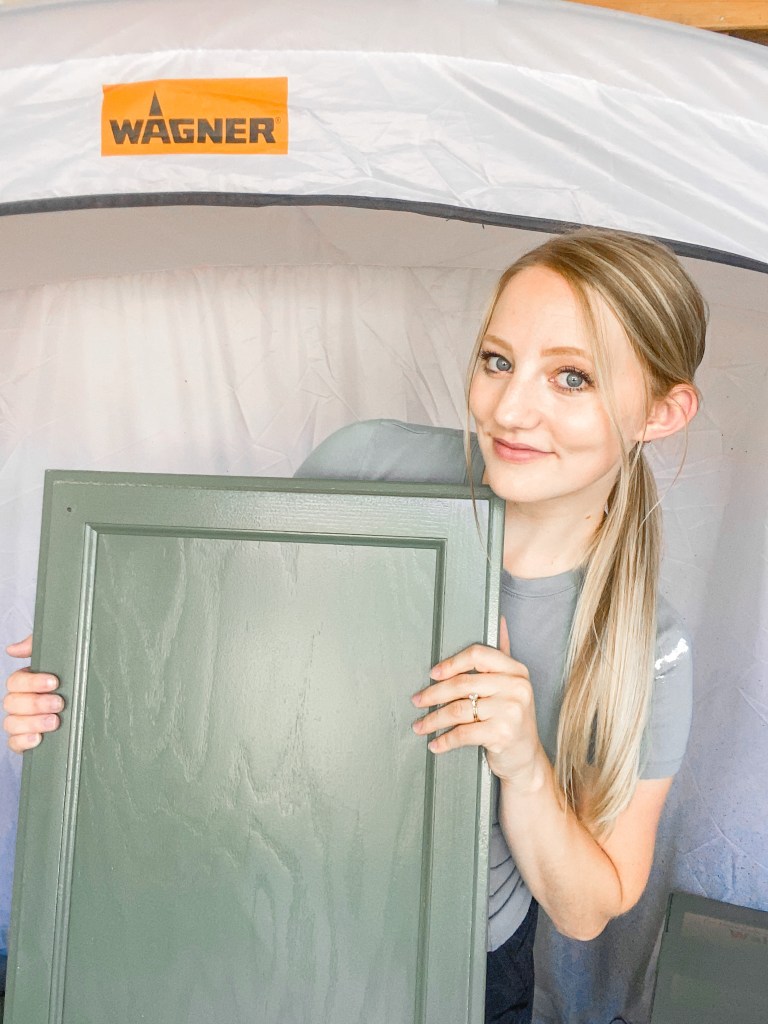
- Wagner spray shelter
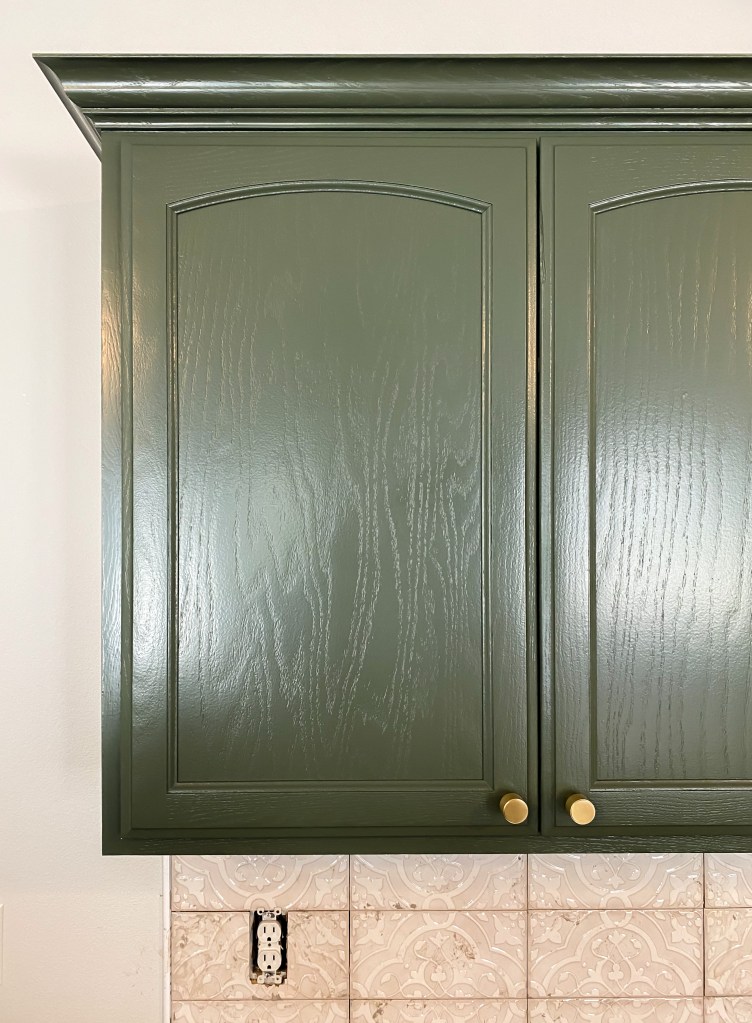
- Benjamin Moore Advance or Sherwin Williams Emerald Urethane (I used semi-gloss, color is Benjamin Moore Backwoods)
Tutorial
There are two key points to painting your cabinets. The first is that primer matters! 99% of the time if your paint is chipping, it is because the primer hasn’t been able to properly adhere to your surface. To get proper adhesion, the first thing you need to do is clean! Clean those cabinets super well. I like using Krud Kutter, but TSP works too. The bottom line is that you need all that dust grease, and gunk that naturally builds up over time to be gone. 100% gone.
Quick note : make sure to label all of your doors and where they go before removing them!
Once your cabinets are clean, scuff up the surface a little bit so that your primer has something to grip to. The primer that I recommend claims to not need any sort of sanding, but no way am I taking that chance with a heavily used item like kitchen cabinets. I want maximum adhesion here! I did try something different this time around and I’m pleased with the results! Instead of using traditional sandpaper, I used liquid deglosser to chemically scuff it up. It did exactly what it was supposed to do, was less work, and was 100% less dusty. 10/10 recommend this! Wipe it on and kind of work it in, then let it sit for about 10 minutes and wipe it off.
Now that you’ve spent hours (the prep work alone took me about 6 hours) getting your cabinets ready, it’s time to start painting. I recommend Zinsser’s B-I-N Primer. I have used their 1-2-3 primer in the past and that is still my favorite primer for general projects, but for cabinets I’m a big fan of the B-I-N primer. It’s shellac based which means it is a freaking beast to clean (you have to use denatured alcohol) and it’s stinkier than a water-based primer like the 1-2-3, but man does it work! Definitely worth using for something like cabinets (it’s also great for raw wood because it doesn’t raise the grain).

I chose to spray the doors and drawer fronts but roll/brush the cabinet boxes for a couple reasons. One, I loathe prep work and the thought of having to drape and tape an entire kitchen is basically the stuff of nightmares for me. Two, the boxes are mostly covered up by the doors and drawers anyway, so any minor imperfections are pretty unnoticeable anyway. I used a brush to cut in and a foam roller to roll all the boxes, then I sprayed the doors and drawer fronts. The shellac primer is a bit nightmarish to clean out of the sprayer, so I just have to remind myself that it is totally worth it since it is the bomb.com.
The second key to getting a super smooth finish in any paint job (except for when you’re just painting your walls) is to sand between coats. Your goal is not to sand off all your hard work, but instead just to knock down any high points or bits of dust that landed in your finish. After your primer is dry, use a 220 grit sponge and sand everything super lightly. Then wipe everything down with a tack cloth to pick up any dust you just created.
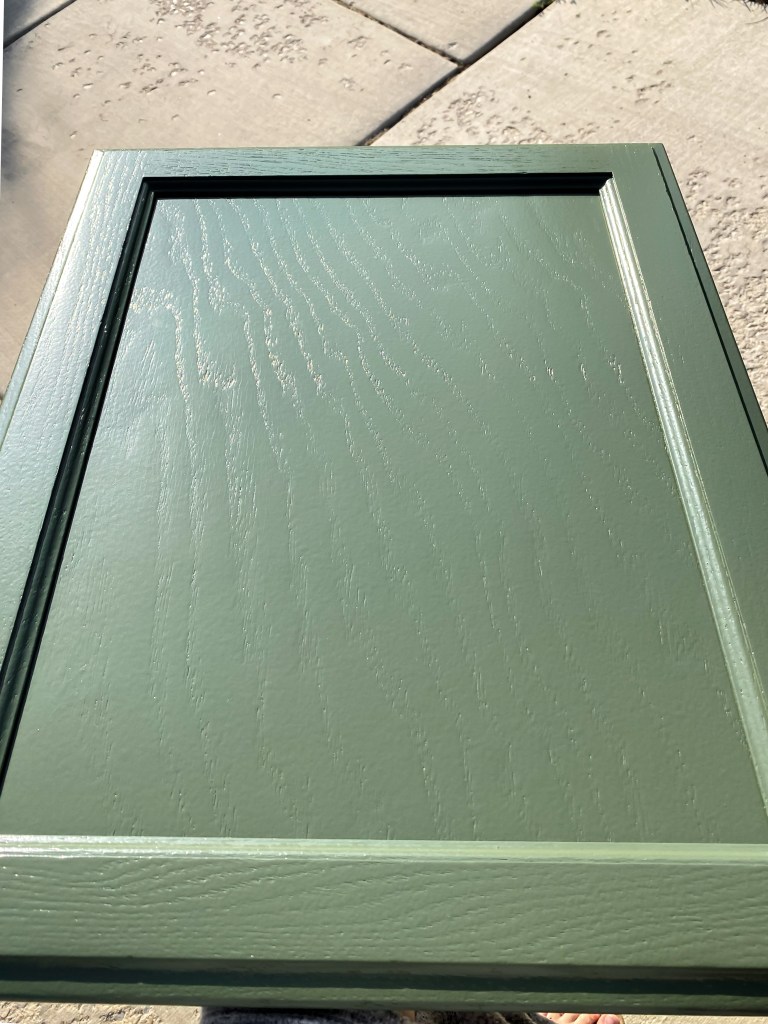
Finally, time for your actual cabinet color! We picked Benjamin Moore Backwoods here. Do not use regular wall paint on your cabinets, it’s not going to last. Benjamin Moore and Sherwin Williams both make alkyd paints, which are basically oil paint dispersed in water. What does that mean? Basically that it will cure to the hardness of an oil paint but it isn’t dangerous like oils are (they’re both low VOC) and lighter colors won’t yellow over time like oils tend to. But the best part about these paints is that they are self-leveling! This does not mean that you can do a crappy job and it will magically fix itself, but it does mean that light brush strokes and other small imperfections will disappear as it dries so that you can get a really clean finish.
Side note : I have only used Benjamin Moore’s Advance paint for cabinets, but I’ve heard great things about both so I would suggest picking your color and then getting paint from the corresponding company.
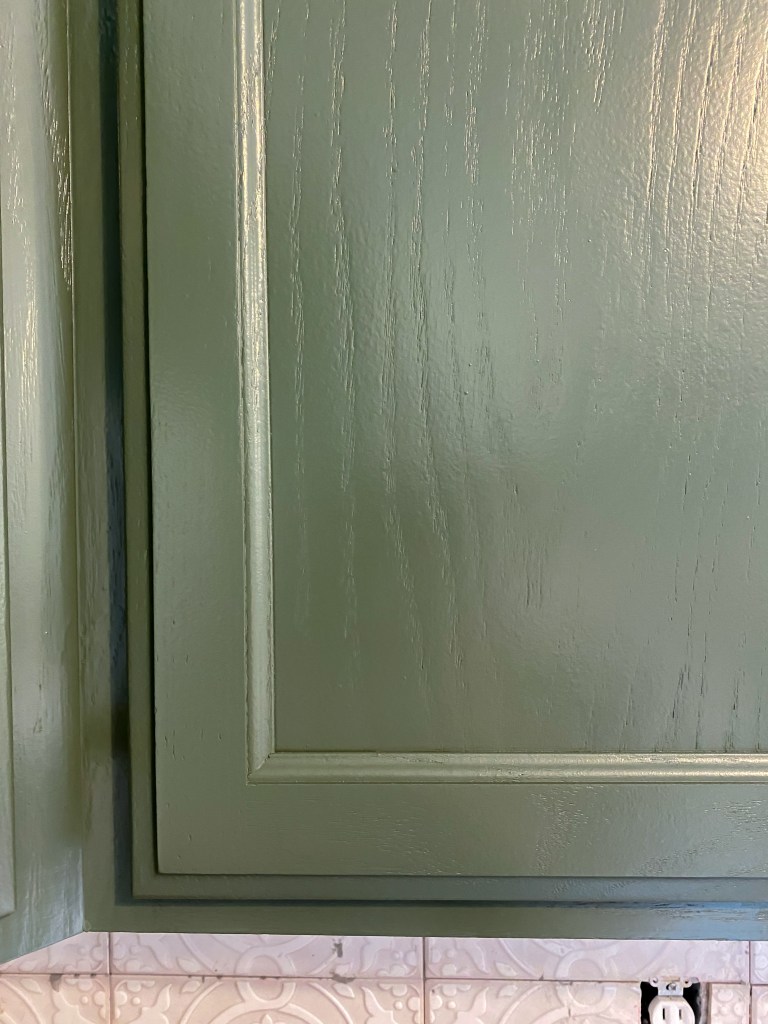
To get the smoothest finish on the boxes, I use a foam roller to spread a decently thick coat on (but not thick enough to drip) and then tip it off. This means very lightly going over the section you just rolled with a soft bristled brush to knock down any stippling left behind from your roller. You want to work relatively quickly so that the paint doesn’t start drying before you have a chance to tip off. Honestly, you can’t tell the difference between where I sprayed and where I did it by hand. Of course be sure to do two coats and sand with 220-320 grit sandpaper in between coats.
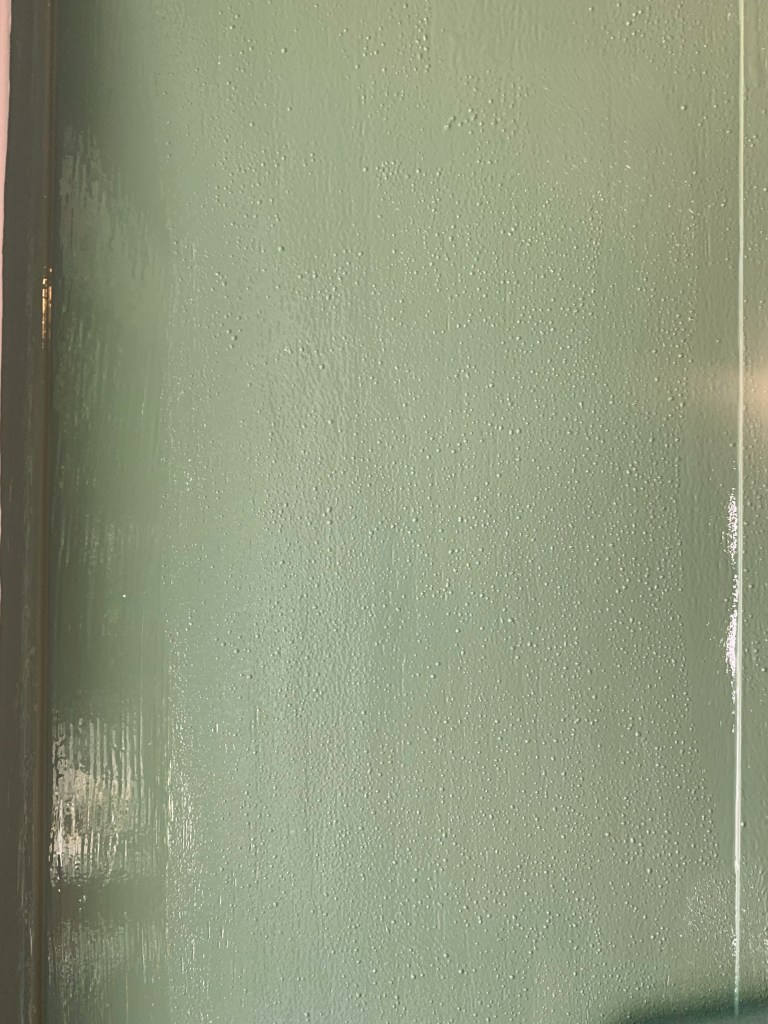
Stippling from the foam roller 
After tipping off
Spraying the doors and drawer fronts is a bit of a learning curve, but every project I spray with gets better and better! And it saves so much time – I spent about a month painting our last kitchen, this took me less than 2 weeks. These cabinets have a pretty deep grain so you can still see that (and it actually goes perfectly with my parents’ style), but the actual finish is pretty close to perfect! I’m very happy with it. Wagner sent me a spray shelter to try out for this project – it contained all the overspray without additional prep work!

Spray the back of the doors first and let them dry overnight. Then spray the front and let it dry at least overnight (if not over two nights). Then sand with 220-320 grit sandpaper and repeat the process to get your second coat.
Now reattach them and you’re ready to go! Advance paint takes about 2 weeks to fully cure, so tip toeing around your cabinets for a couple weeks is a good idea – any excuse to eat out, right?
Would you tackle this project? I promise you, it can make the biggest impact in your kitchen!
With love,
Mercedes ♥

You did an excellent job and provided great information. I thought about painting mine so I’ll use this post as my reference. Thanks for sharing this
LikeLike
Thank you so much! And if you end up having any questions while painting, feel free to shoot me a DM on Instagram 🙂
LikeLiked by 1 person
Thank you for sharing this process in detail. My cabinets are also covered in couple of layers of polyurethan, would I need any additional prep steps before painting?
LikeLike
Hello, thank you for sharing the process in detail. My cabinets are also covered in polyurethan, would I need additional prep steps before paining?
LikeLike
I would include physically sanding to scuff it up if you have poly on it, but in theory you don’t *need* to. I probably would to be safe, but others may not.
LikeLike
We are thinking about doing this for unfinished and unassembled pine wood cabinets… Would you do the painting process before assembling? Or anything else you’d consider?
LikeLike
I would not. I would paint the boxes and doors separately, but I would paint the boxes after because assembly itself will likely damage the fresh paint.
LikeLike