

Disclosure: Some of the links provided are affiliate links, which simply means I may earn a small commission (at no additional cost to you) if you shop through one of my links.
Last week I shared how I built my builder’s grade stock cabinets up to the ceiling and added a couple of farmhouse touches. While those were all exciting things, our biggest issue with the kitchen still remained – the color of the cabinets! We had what are very common in many builder’s grade kitchens, which is bright orange stained oak cabinets.
The orange-y color made the corner of our house with the kitchen in it stick out like a sore thumb and it also felt dark. I couldn’t wait to slap a coat of paint on them and change it up! Since our house is really open, I knew it would make a huge difference to the feel of the entire space.
Want to see what projects I’m working on now? Follow me on Instagram!
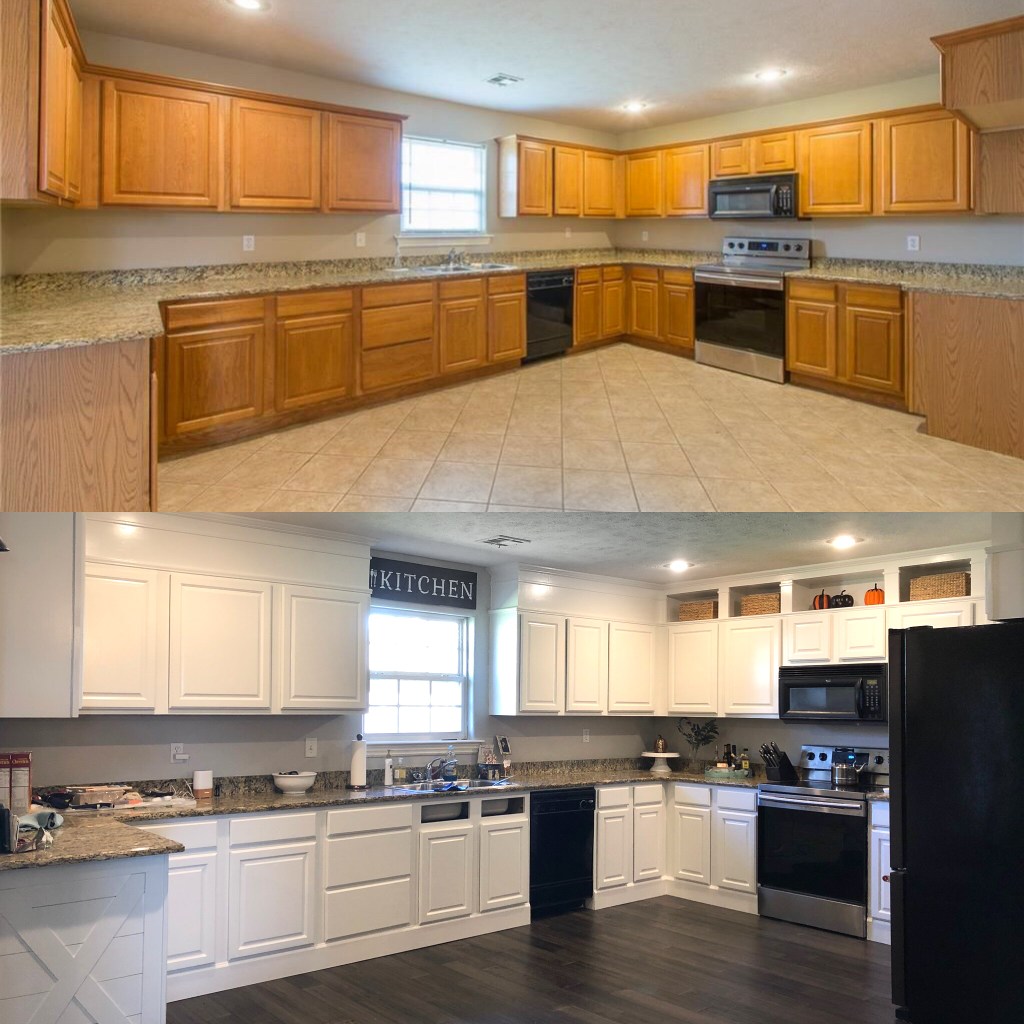
I did a lot of research on the best way to paint cabinets and I’m really happy with the result. It’s over a year later and some of the high-wear spots I’ve needed to touch up, but for the most part they’ve held up really well.
TUTORIAL
Materials needed:
- Painter’s tape
- Electric sander
- 120 grit sand paper
- Zinsser’s 1-2-3 Primer
- Benjamin Moore Advance paint in semi-gloss or gloss (I used semi-gloss)
- (2) good quality brushes
- (2) 4″ or 6″ foam or 1/4″ nap paint rollers & trays
First things first, you need to label your doors and drawers. The way that the hinges are attached can be pretty specific to the door, so by labelling everything before removing it, you won’t end up with wonky hanging doors at the end of your project. I found that it was easiest to put a label inside the cabinet box (where I wasn’t painting) and then a matching one inside the well where my hinges attach. By putting my labels here, I didn’t have to move anything to avoid accidentally painting over it.

Once you’ve labelled everything, take your doors of your hinges and, if you want, the hinges off the cabinet boxes. I chose to leave the hinges on the boxes and paint around them. If your drawer fronts come off of your drawers, remove those too and you can still use your drawers. If they don’t (like mine), you’ll need to empty out your drawers.

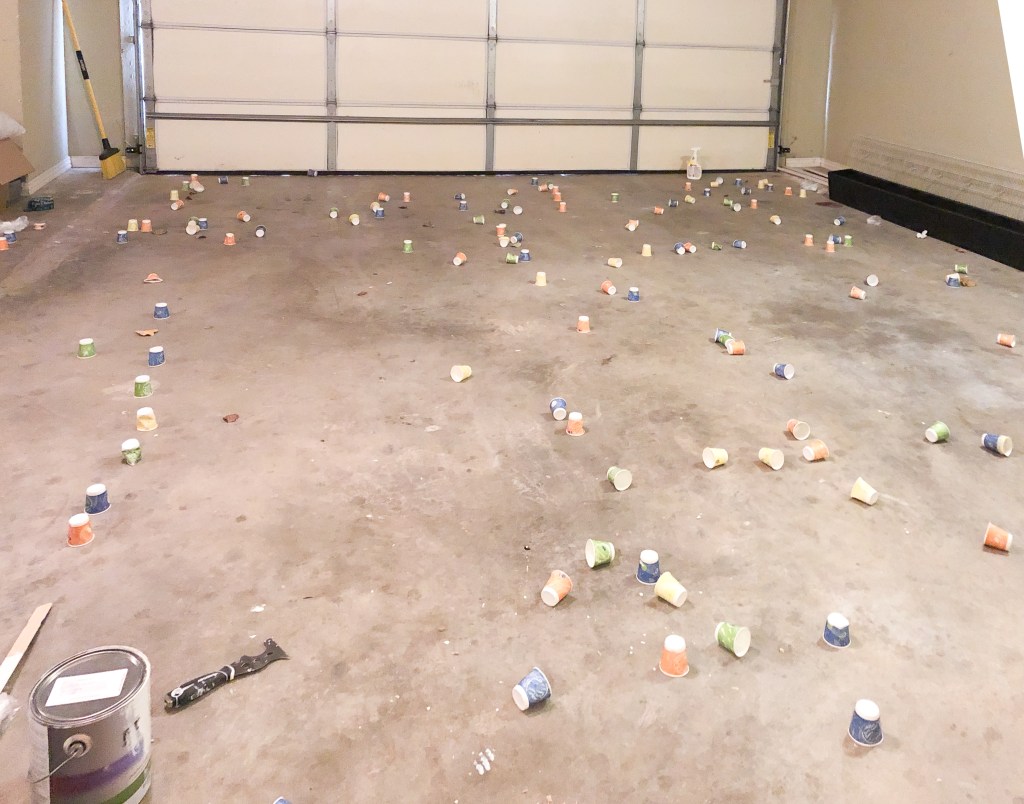
Wipe down everything really well with TSP or Krud Kutter. I prefer Krud Kutter because it is safer to use, but both will work! This will help to remove any old kitchen gunk as well as some of the finish. Once you’ve wiped everything down, lay out all your cabinet doors and drawers in your garage. Ideally, you want to do this in a garage because the breeze can blow bugs and dust into your finish.
Now for more prep… You’re going to want to sand everything. The primer I like (Zinsser’s 1-2-3) claims you don’t need to sand before using it, but that makes me nervous so I did a quick round of sanding with 120 grit paper to scuff the cabinets up a bit. Do this to the front and backs of your doors, drawers, and to the cabinet boxes. Wipe everything down with a tack cloth before painting to remove the dust from sanding.
Now you’re *almost* ready to paint! Use paper dixie cups as little platforms to hold your doors up off the floor. The dixie cups are really inexpensive and do a great job. Okay, now you’re ready!
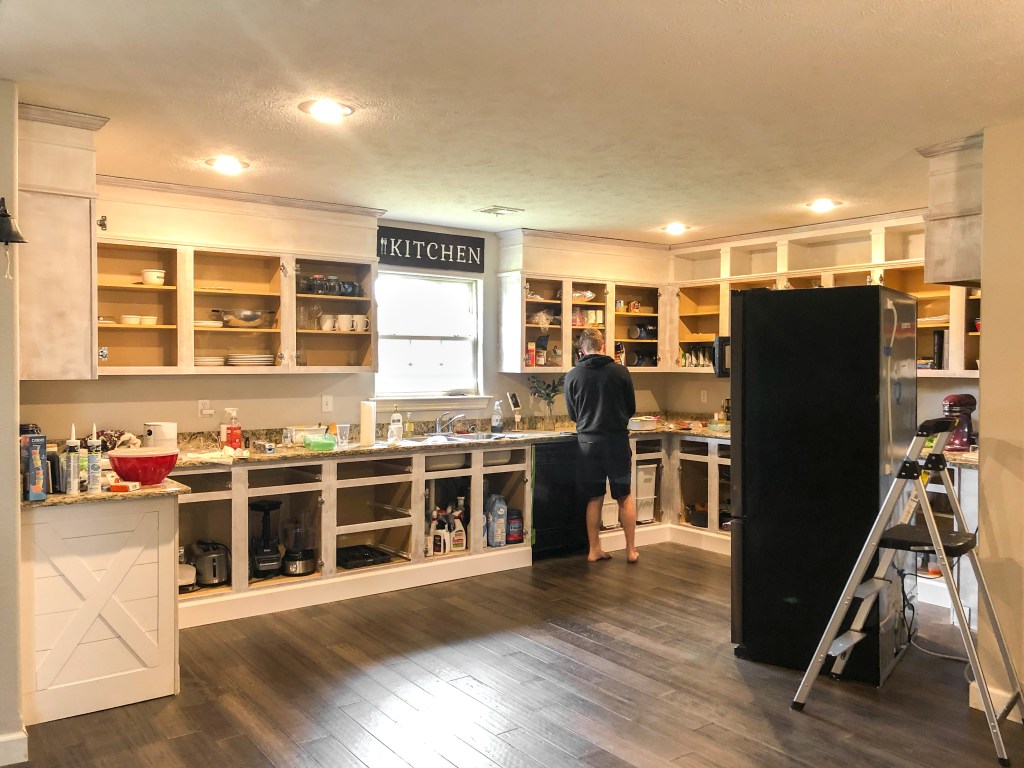
Start with the inside of your doors facing up. Use your brush to get in the grooves of the door and then the roller to roll the flat surfaces, apply a coat of primer and let it dry overnight. While it’s drying, do the same to the cabinet boxes inside. Flip your doors and do the same to the front, then let it dry again. Do this until you have 2 coats of primer on the front and back.

Now you’re going to use your actual paint color (I used Benjamin Moore White Dove). I love Benjamin Moore Advance’s line because it is water based, but it is extremely durable like an oil based paint. Also, it’s self-leveling, which is awesome. You can get a really clean, smooth finish with it but to achieve this, it has a longer dry time. 100% worth it, in my opinion. I painted my cabinets in September and it was really hot, so I do have some sections that dried too fast and the brush strokes didn’t level out. So just keep an eye on your temperatures before you start!
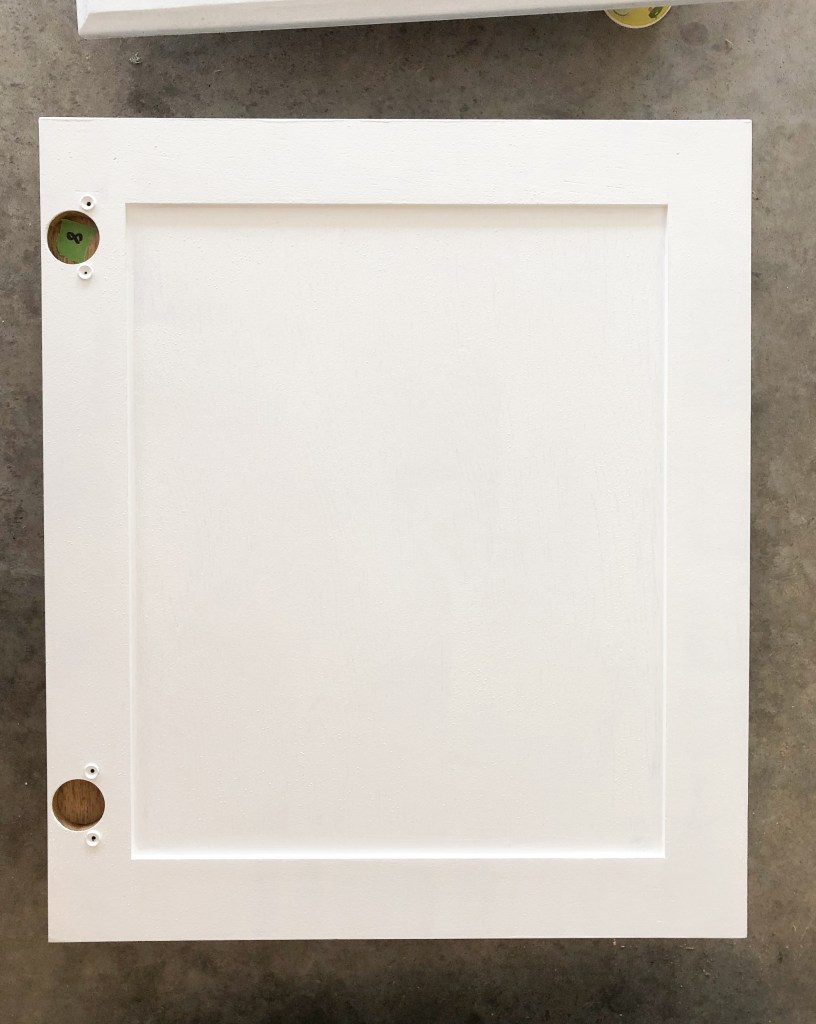
You actually want to apply a decently thick layer here because it will help it level out and help to fill your grain a little. Use the same method that you used when applying the primer by starting with the backs, letting it dry overnight, then flipping and moving to the front. I did this paint/dry/flip routine until I had 2 coats on both sides (as well as on the cabinet boxes inside), and then I added a third coat on the fronts for good measure. The third coat made a difference in hiding the grain, so if you have the time then I would definitely do it.
Once your cabinets have dried overnight, you can move them back inside if you want to, but I would recommend waiting as long as you can. It will take them about 2 weeks to cure (meaning the finish will still be a little soft and easy to ding) and moving them is a great way to ruin your newly painted cabinets. We were headed out of town, so I waited until we got back – about a week – to reattach everything.

When you are ready to put your kitchen back together, I highly recommend commandeering a second set of hands. Some of those hinges can be finicky!
It took be about two weeks to paint my cabinets, not including the week I waited to bring them in. Using a sprayer definitely would have been faster, but I don’t have a sprayer and have never used one, so I didn’t want to risk messing up my kitchen. I painted almost everyday and have about a gazillion doors/drawers (okay, it’s more like 45), so I easily spent 3-4 hours a day on them. If you have fewer pieces, it would take less time, of course.

Now go and paint your kitchen cabinets! It is totally worth it. And if you do, post a picture on Instagram and tag me (@with.love.mercedes) because I would love to see your hard work!
You can read the first part of my kitchen makeover here.
With love,
Mercedes ♥

Beautiful kitchen! What type of flooring and color?
I just sealed my cabinets and am going to start painting. Flooring is next!
LikeLike
Thank you! I’m not sure about the floors – I do know it is laminate, but it’s about 20 years old.
LikeLike
Oh my goodness sorry, I thought this was in response to a different post, this my original reply! This flooring is linked on a blog post all about it, just search floors and it should pop up!
LikeLike
They turned out so well! We are about to move and we needed to update our kitchen to add a little more value. We decided to have our kitchen cabinets repainted. kitchen cabinets painted Seriously crazy what a difference a coat of paint can make! In our new home, we will finally have enough space to paint them ourselves- definitely saving this post for the future! Thank you!!
-Kara P.
LikeLike
Good luck!!
LikeLike
Just stumbling upon this; I really like the way you extended the cabinets as well as the faux hood vent! I think I plan to do the same in my kitchen now. My question is, how did you paint the cubbies up top after they went in, and did you paint the walls behind them as well?
LikeLike
Hi James! I painted them with a brush and roller using BM Advance. And yes, I painted the wall behind the cubbies as well 🙂
LikeLike