
Disclosure: Some of the links provided are affiliate links, which simply means I may earn a small commission (at no additional cost to you) if you shop through one of my links.
Last week I took a break from blogging because while I worked a TON on projects, I was split between a couple of different ones and felt like there wasn’t quite enough progress anywhere to merit a full post. Funny how that happens sometimes, huh? But this week I have made some amazing progress on the closet – I’m in love with how it’s taking shape!!
Want to see what projects I’m working on now? Follow me on Instagram!
This week I added the brackets for all 29 shelves. I know, it’s a lot of shelving. About half are shoe shelves that are going in each corner, so I feel like that justifies it a bit. A lot of closets either completely close off the corner or have unusable rod space, so I’m pretty geeked about the shoe shelves I’m installing there.
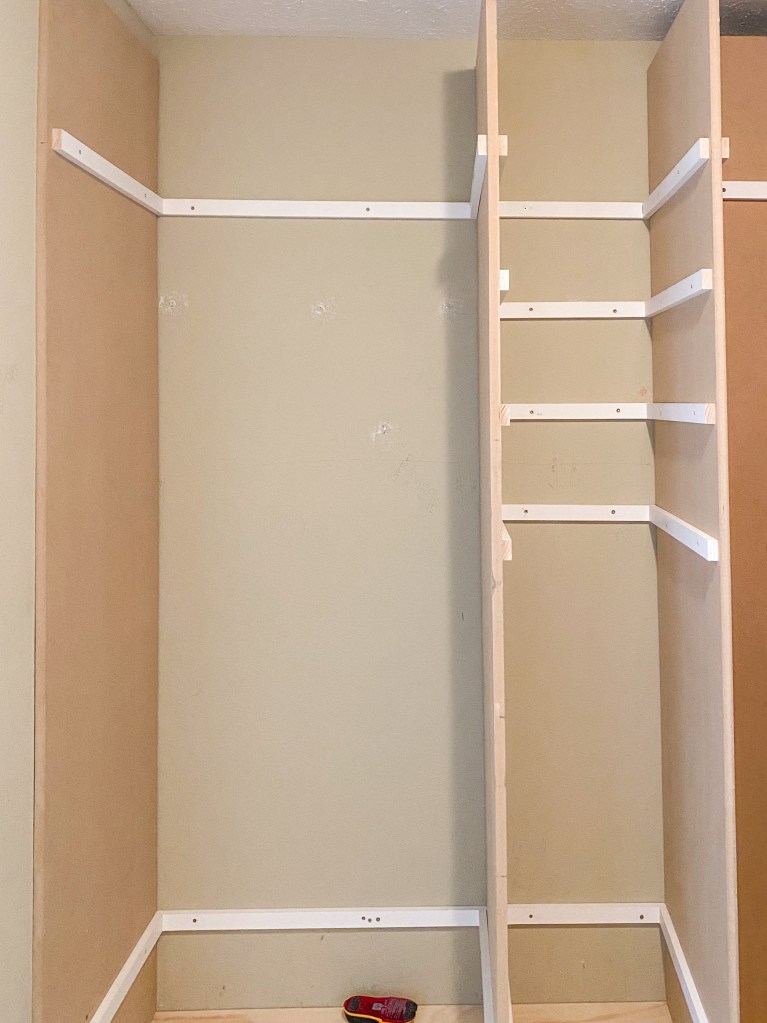
Adding the brackets may not seem like a big step, but it takes a lot of work. So much cutting and clamping and pocket hole drilling and leveling and fastening with screws goes into each one… it’s a big task. So getting all of this done was a huge win. It also meant I could finally move my miter saw back into the garage where it belongs (okay, J moved it back for me because it’s heavy and I’m a wimp) and I no longer need to barricade my closet off from my toddler. I used 1×2 pre-primed pine to build these, and I talk more about how I did that in part one of the closet project.

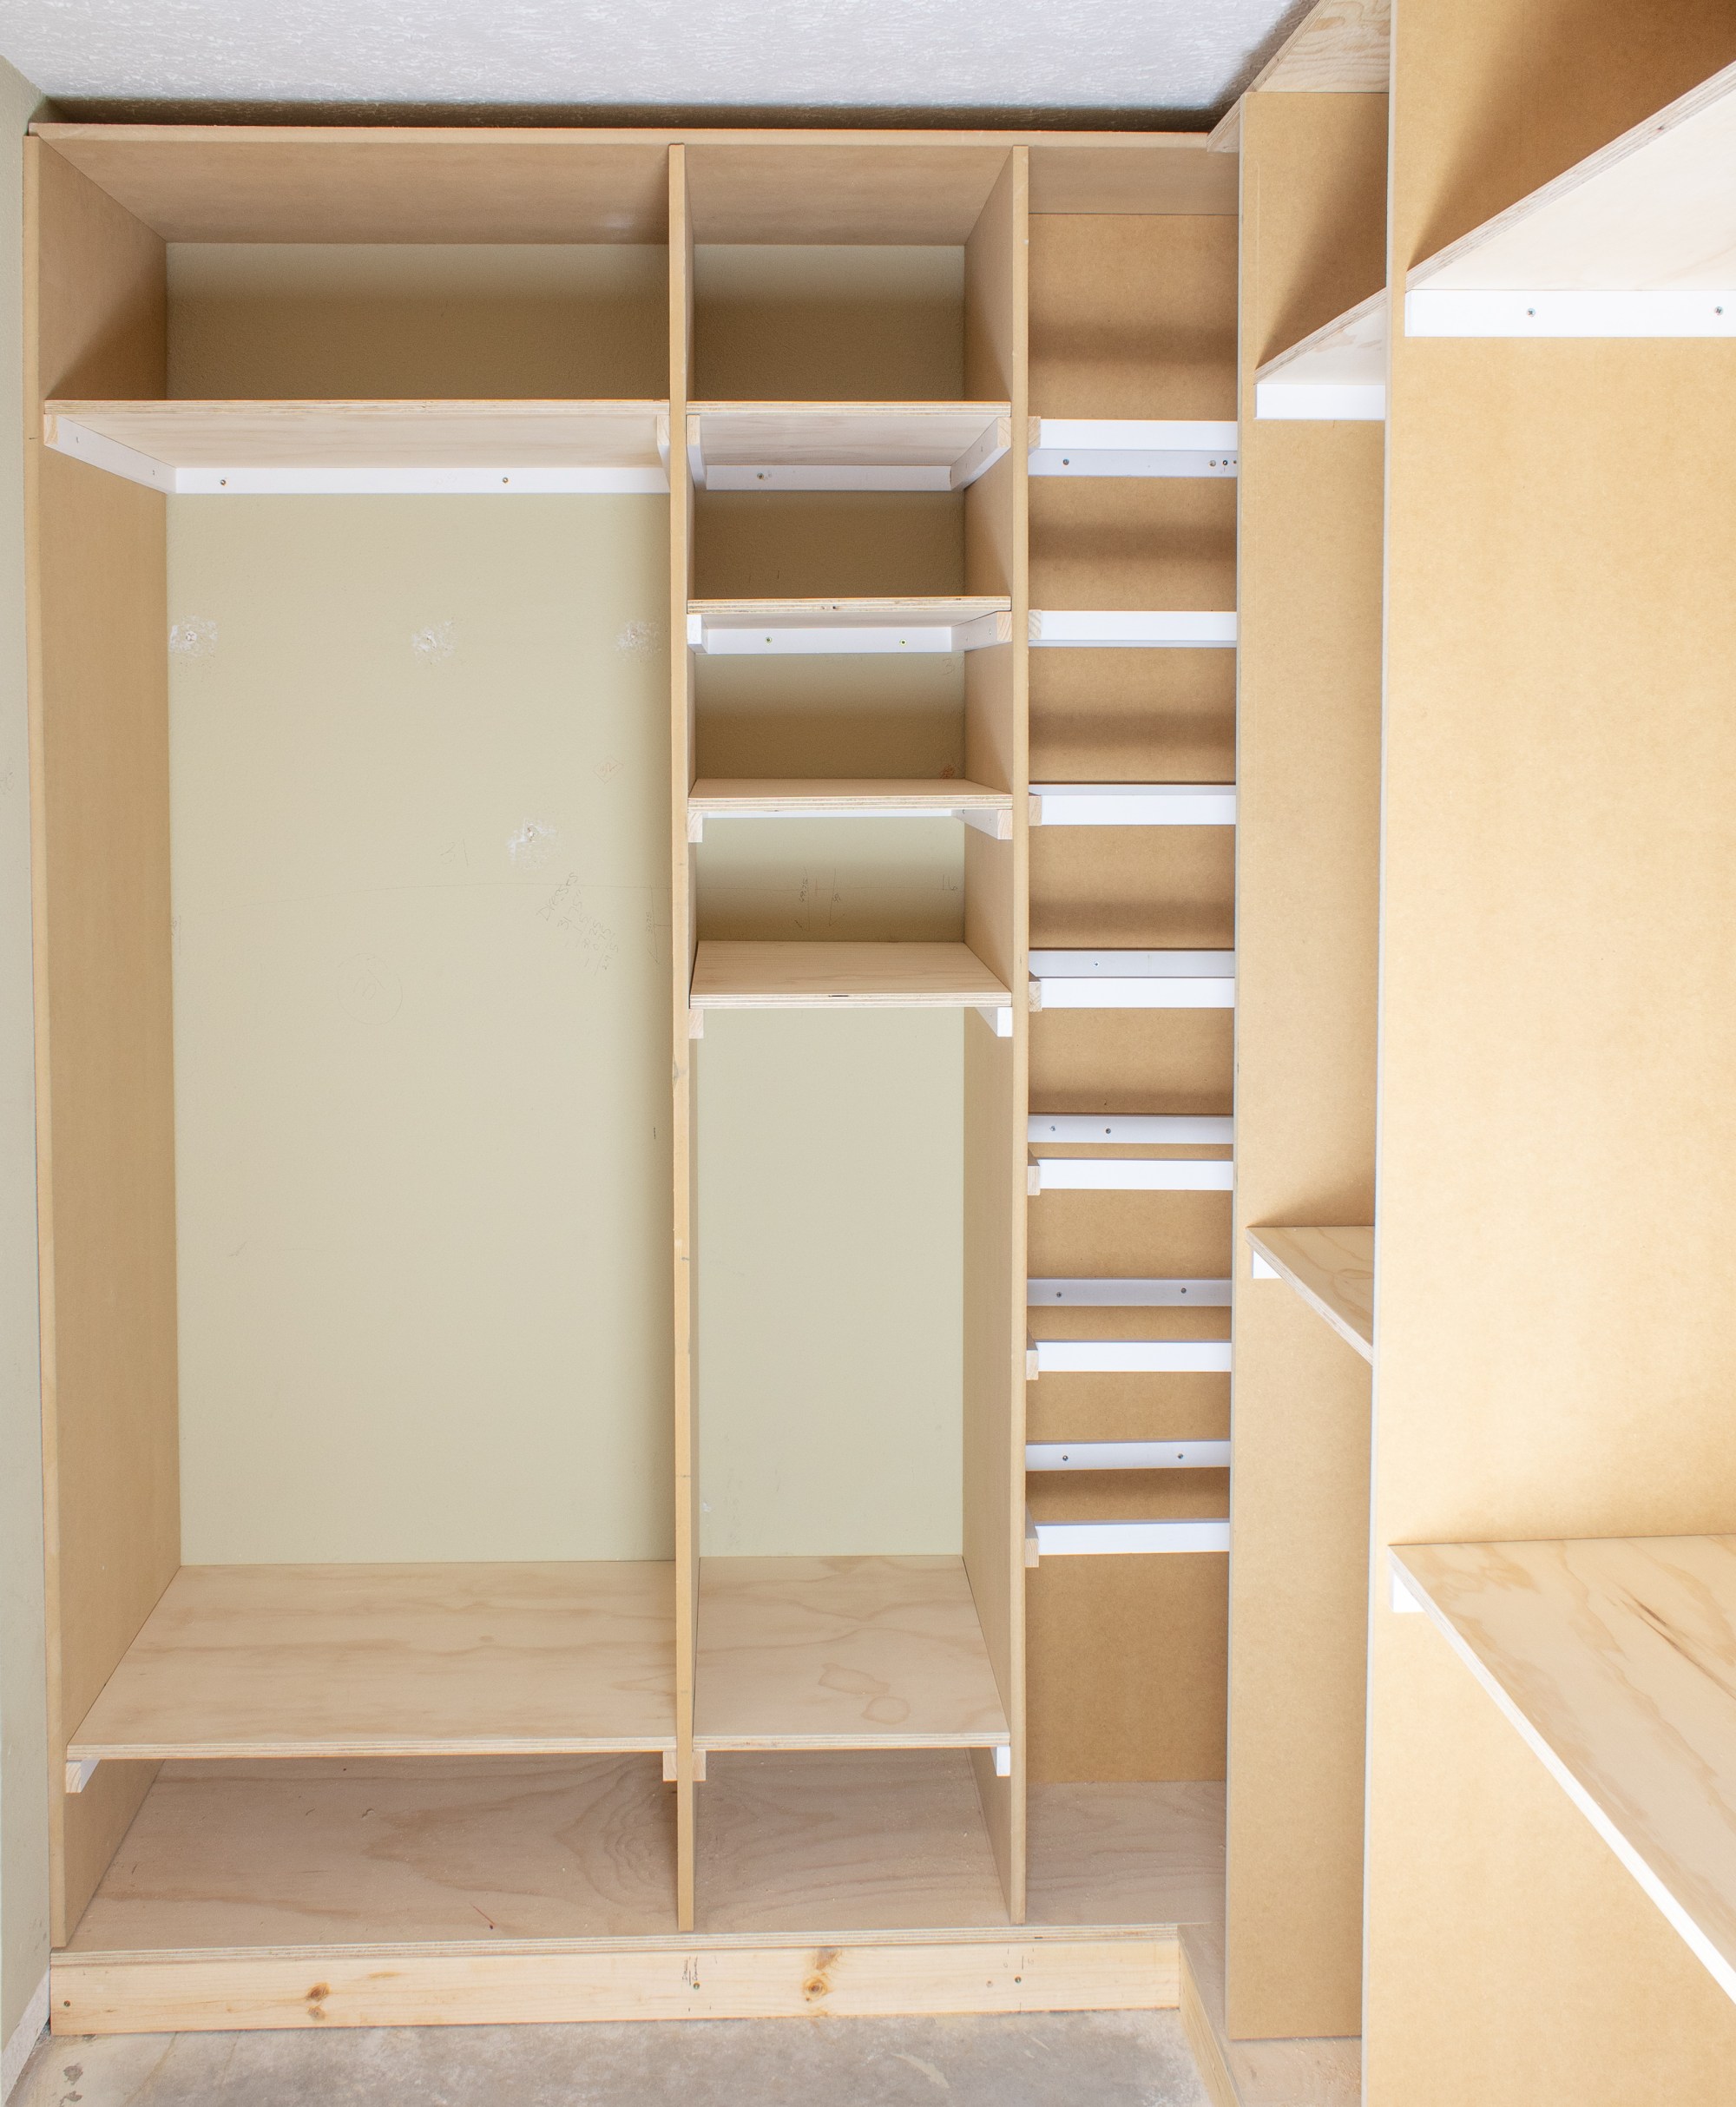
After the brackets were up, it was time for shelves! Each shelf is 23″ deep and they vary in width from 30.5″ to 16″. I took my measurements with me to Home Depot and a very nice worker cut 2 sheets of 3/4″ plywood down to size for me. I only had him cut the 15 normal shelves and not the shoe shelves because those will be a little more complicated.

I was trying to decide between plywood and MDF and finally settled on plywood, but here is my pro/con list. MDF pros – super smooth. Cons – can sag over time with heavy load. Plywood pros – won’t sag over time. Cons – not perfectly smooth. The price difference was negligible and even though I don’t think any of these shelves will bear any serious weight, I want it to stand the test of time so I decided to tackle the sanding and go with plywood to avoid any future sagging.

When I got my shelves home, I put E down for a nap and started sanding. Sanding is probably my least favorite part of any project and there was a lot of it to do, but I cranked it out, trashing my arms, but at least it’s done! With everything sanded I brought my shelves inside and they all fit perfectly the first time. Amazing! When does that ever happen? I haven’t secured them yet because I want to paint them first, but they are beautiful just sitting there.

With my dividers secured by 8,574 brackets (okay fine, not that many) it was time to add on the “ceiling” of the builtins. I used left over sheets of MDF and plywood to create the top of the builtins and just used some liquid nails to secure it. I made sure to cut them so that the seams will be hidden by dividers, but there is a visible seam in each corner. So worries, I’ll just end up filling it with wood filler. The small gap between the top and the ceiling will be covered by crown molding, which will hopefully give it a nice finished look.
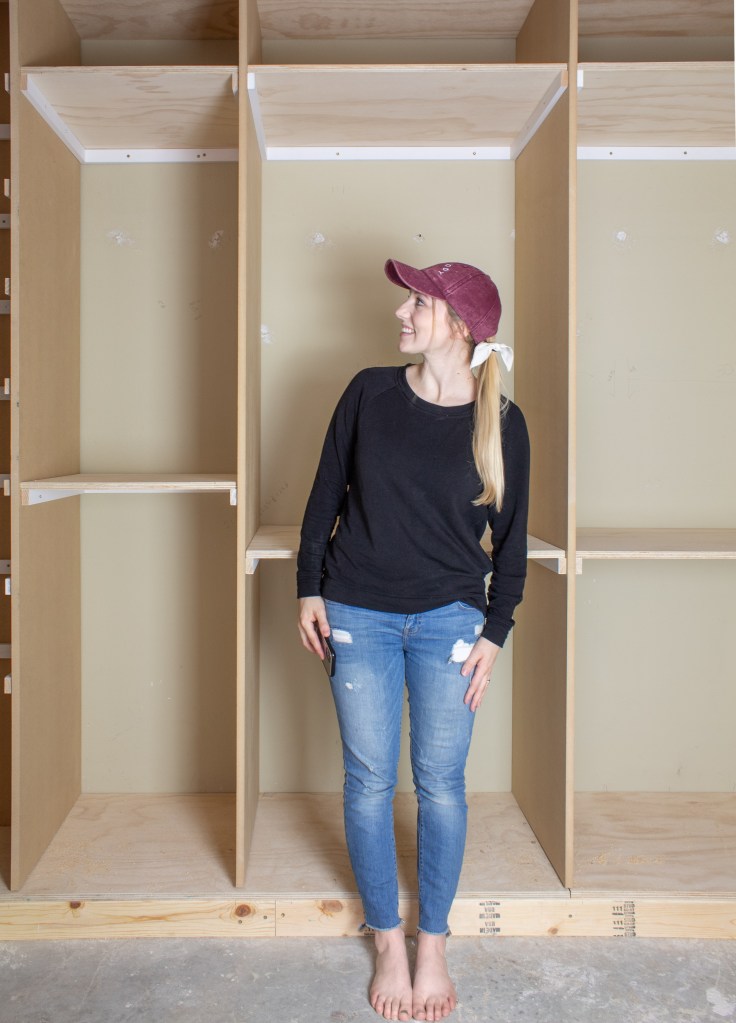
With the shelves and the ceiling up, the closet is really starting to take shape. Now my to do list is :
– Cut the shoe shelves
– Attach crown molding
– Prime & paint
– Attach shelf faces
– Attach rods
– Install flooring
– Add trim
– Build drawers
I think I’m going to do it in that order… but we’ll see where the wind takes me. Right now, I just want to stand in there for hours and stare because all this hard work is starting to be worth it!
With love,
Mercedes ♥
← DIY CLOSET BUILTINS : PART 1
DIY CLOSET BUILTINS : PART 3 →
MY FAVS
Are you wanting to tackle this yourself? Here are links to some of my favorite tools/materials used in this project.
- Ryobi Drill
- Ryobi Circular Saw
- Dewalt Miter Saw
- Level
- Stud Finder
- Clamp
- Kreg Pocket Hole Jig
- Pocket hole screws
- 2.5″ self-drilling screws
Disclosure: Some of the links provided are affiliate links, which simply means I may earn a small commission (at no additional cost to you) if you shop through one of my links.

That is sooooo much work!!! It looks great though. How are you handling lighting in the closet?
LikeLike
Great question! Right now there is a single light fixture with a really warm and low lumen bulb. I’ll replace it with a 2-3 light fixture with brighter and slightly cooler lights and that’ll make a big difference!
LikeLike
This seems like a very ambitious project. I never cease to be amazed by what you can do. It is looking really AMAZING so far. Can’t wait to see it in person.
Great Job!
LikeLike