
Disclosure: Some of the links provided are affiliate links, which simply means I may earn a small commission (at no additional cost to you) if you shop through one of my links.
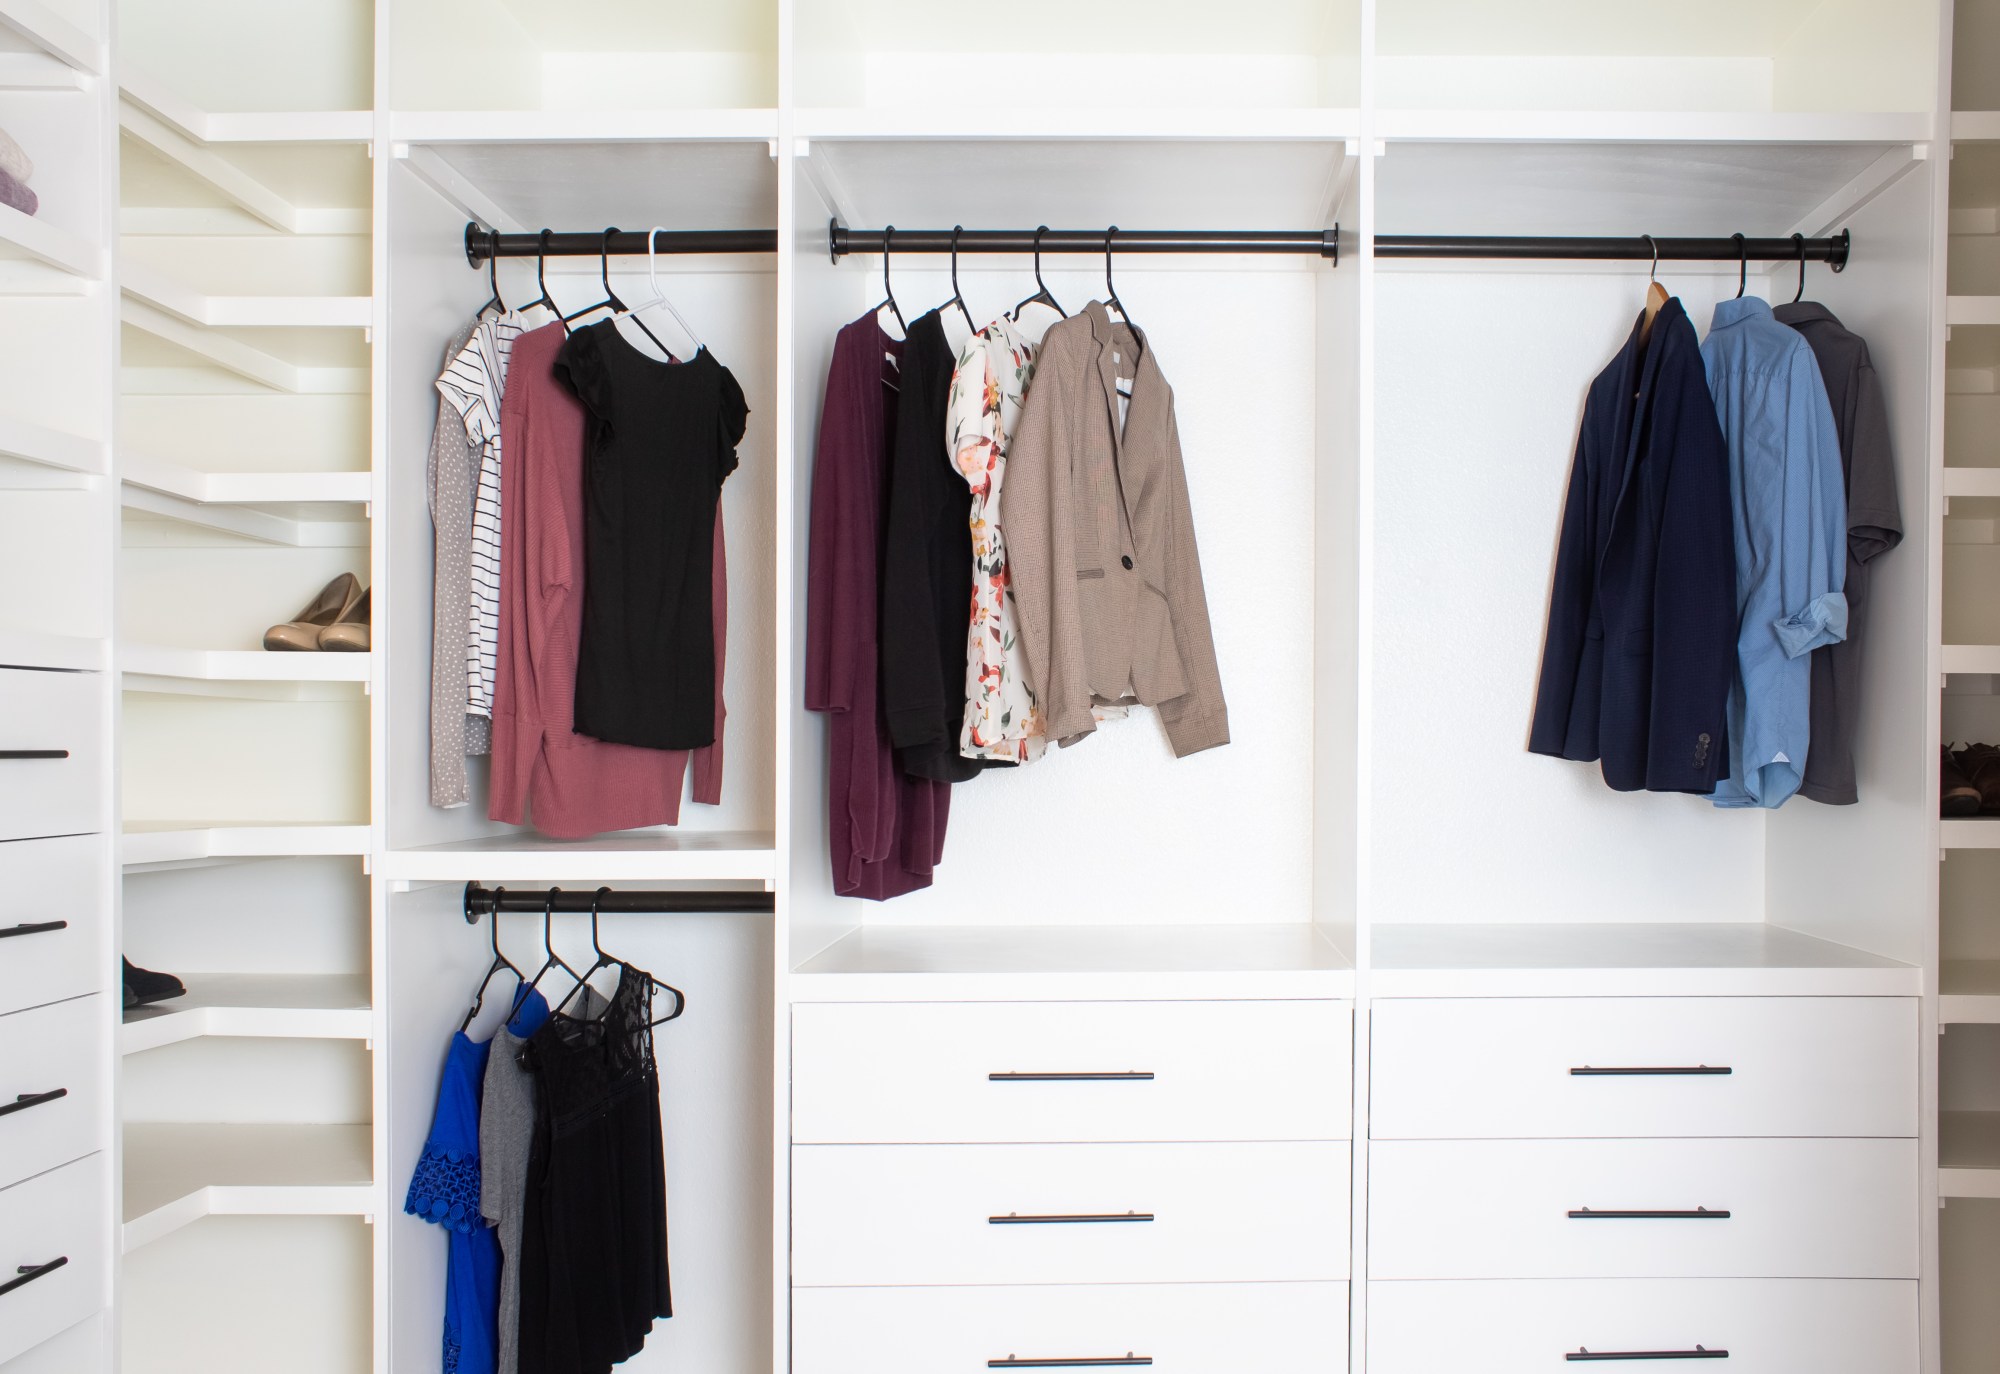
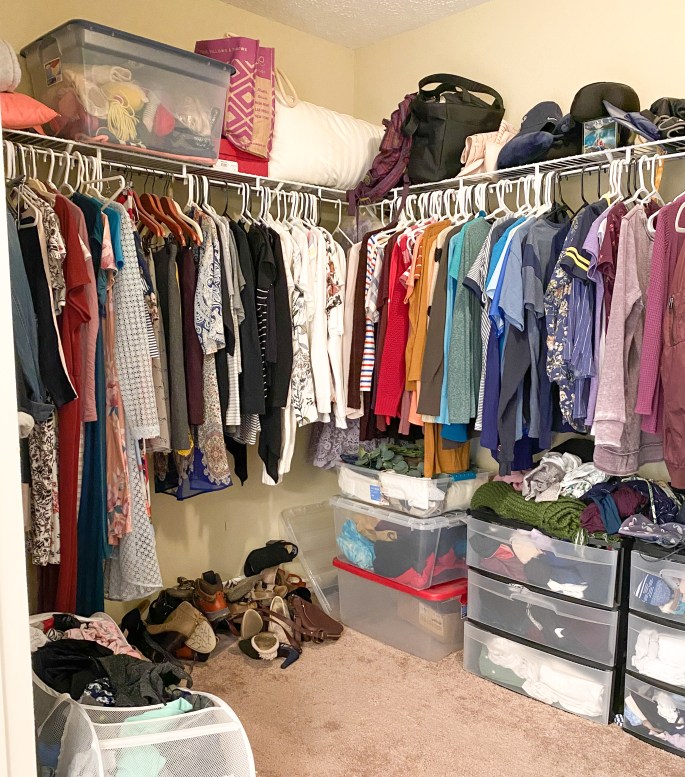
After countless hours spent working on this project, the closet builtins are finally finished! I don’t want to sugarcoat the amount of time and effort this beast of a project took, but I will say that it was 100% worth it. My closet is now a crazy luxurious room, taking the place of the embarrassment that was there before. Here’s how bad it used to be :
Want to see what projects I’m working on now? Follow me on Instagram!
In the last two weeks I finished up the last bits of this space with a ton of help from my mom (and some from Jordan too), so let me catch you up on what we did!
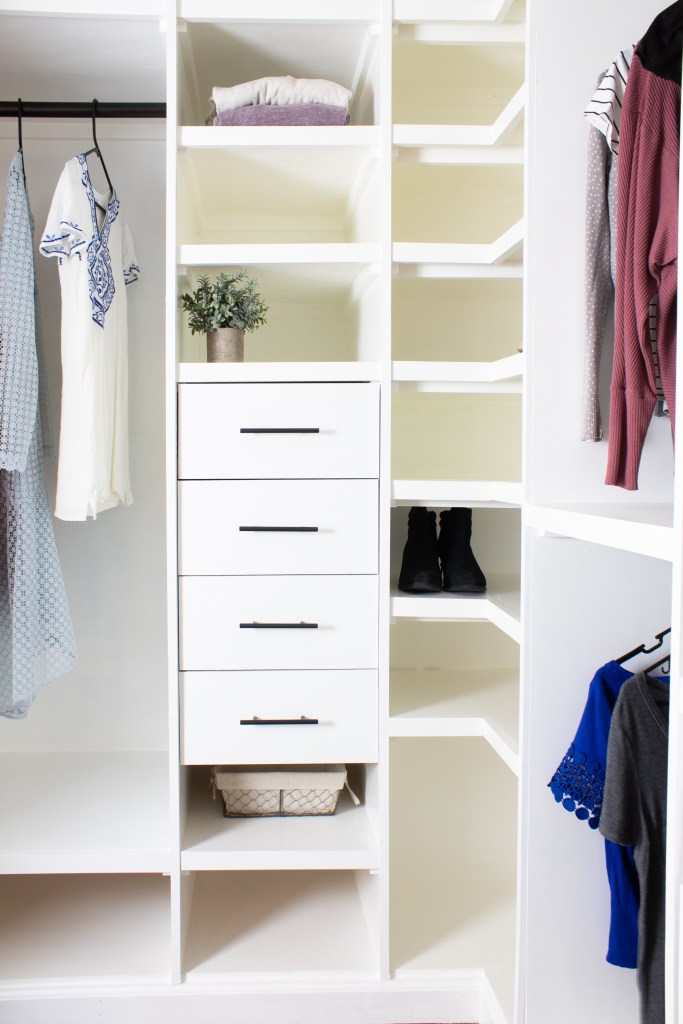
We painted everything with Benjamin Moore Advance paint with a satin sheen and I picked the color Simply White. Choosing a white felt almost as difficult as naming Elliott, but I am seriously in love with how it is so soft yet so bright! I used Advance paint on my kitchen cabinets as well and I love how it is self-leveling and it dries to a really hard finish. I have found that with this paint, I prefer a 1/4″-3/8″ nap roller over a foam roller.

Then we installed the floors! I kind of spontaneously ripped out the carpet in here while we were demoing…much to Jordan’s surprise! Reasons I took it out : 1) The carpet is really poor quality and I hate it. 2) I knew building these builtins on the concrete slab would be more stable. 3) I found just enough left over hardwood from our main floors to put beautiful hardwood in here. Best. Decision. Ever! Floating floors are really fast to install, so this was a breeze.
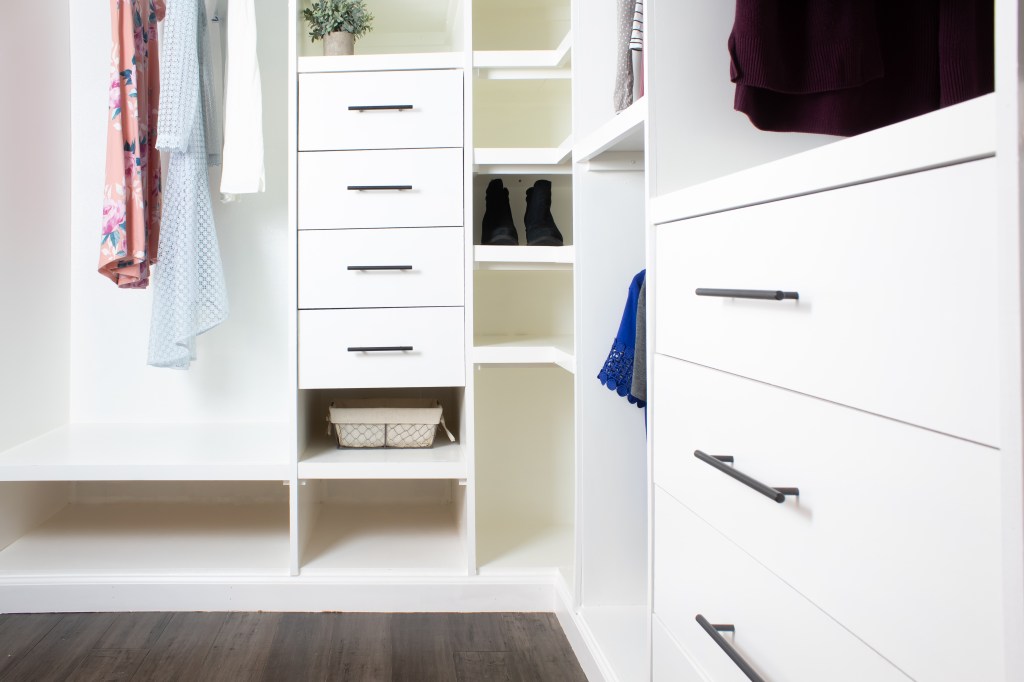
Next came the bulk of the work – building the drawers. We spent a full day just cutting the wood (all 60 pieces) and then I spent another 2 days assembling and installing them. Thank goodness for my mom! I learned I do not yet have the skill to use a table saw by myself, so I’m very glad she was here learn with me and help. This is not difficult process, but it is lengthy and time consuming, so I’ll have a post for you guys next week focused specifically on how to build the drawers.

I ran the same trim that we have in the rest of the house along the bottom. At this point it felt like every little thing I did elevated the space and had such a huge payoff! I love this part of the project. I used the same little trim piece I used in the faux crown to finish off the raw edges of the MDF and it worked like a charm!

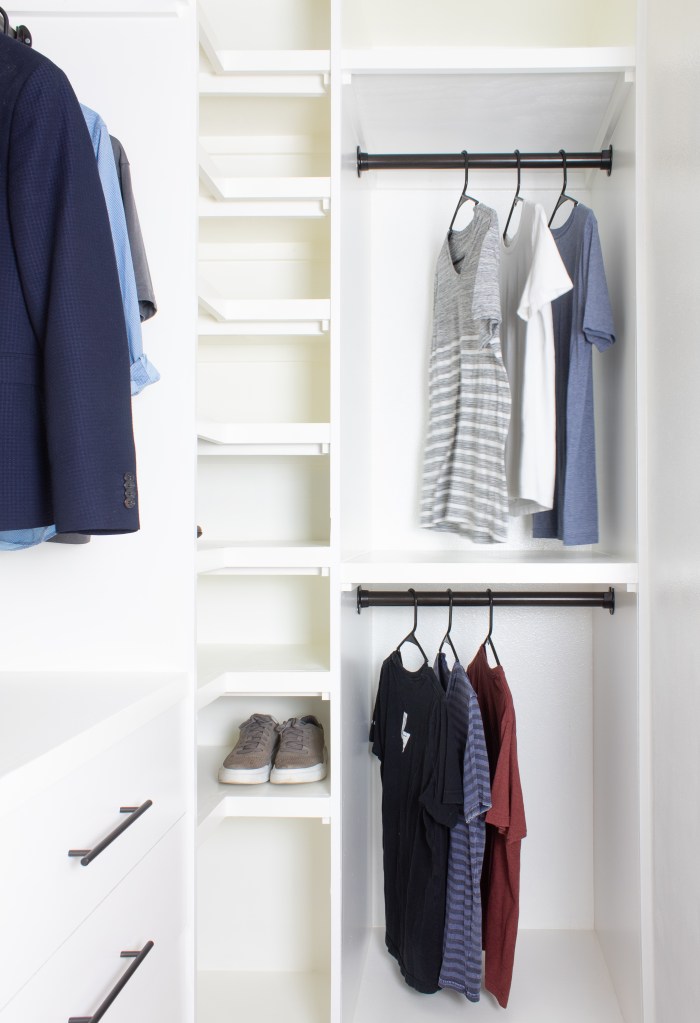
After the drawers were built and the trim was installed came the rods. I used these rods with these sockets. You cut the rods to size with a hacksaw and attach the sockets with a drill, so you need minimal tools for this step. They are so pretty and are super heavy duty (if you were wanting a quick closet update, I think switching out the classic wire rack for some shelving and these would be great! Keep in mind that if they span over 44″, it’s a good idea to add in a middle support piece). I learned a little tip for installing these bad boys. Measure the distance from wall to wall and then take off a good 1/4″-1/2″ from that. The sockets have lips to cover any gaps and if you make them the exact width you’ll end up needing to uninstall all your brackets and start over – not fun!
I was torn on what type of hardware to add to my drawers, but I remembered we had leftover hardware from our kitchen reno! It goes perfectly with the rods and it was free – win win!

With this closet 95% of the way done (it still needs a new light fixture), this weekend we’ll be able to move all our things back in here and we can stop using our bedroom floor as our closet, haha! With a closet this beautiful, hopefully we’ll feel motivated to keep it clean and organized. Thank you all so much for following along and loving on this mammoth-sized project of mine. It honestly feels surreal that it is finally finished! If you need me, you can find me hanging out in here!

With love,
Mercedes ♥
← DIY Closet Builtins : Part 3
SHOP THIS ROOM
MY FAVS
Are you wanting to tackle this yourself? Here are links to some of my favorite tools used in this project.
- Ryobi Drill
- Ryobi Airstrike Brad Nailer
- Dewalt Miter Saw
- Detail Sander
- Zinsser’s 1-2-3 Primer (water-based)
- Zinsser’s BIN Primer (shellac-based)
- Kreg Pocket Hole Jig
- Pocket hole screws
- Level
- Clamp
Disclosure: Some of the links provided are affiliate links, which simply means I may earn a small commission (at no additional cost to you) if you shop through one of my links.

IM OBSESSED!!! amazing job Mercedes!!!
LikeLike
Thank you so much! Glad you like it ❤️
LikeLike
Love the end product. It’s amazing.
Question, what are the measurements to your shoe shelves?
Awesome reno!!
LikeLike
Thank you so much! I am so sorry, I don’t have those measurements and we no longer live in this house 😦 I want to say there was about 11” of space above each shelf? But you can easily customize that to the height of your shoes and based on your shoe size.
LikeLike
You totally jumped from the closet structure and paint in part 3 to a complete finished product in part 4. L You left out how you built the drawers or did you have them special ordered? This would have been helpful.
LikeLike
Hi! I do have a separate post with all the details on how I built the drawers – just search drawers and it should pop up 🙂
LikeLike