
Disclosure: Some of the links provided are affiliate links, which simply means I may earn a small commission (at no additional cost to you) if you shop through one of my links.
While I finished the bulk of the kitchen before Elliott was born in November of 2018, there were still a few finishing touches that I wanted to do.
Want to see what projects I’m working on now? Follow me on Instagram!
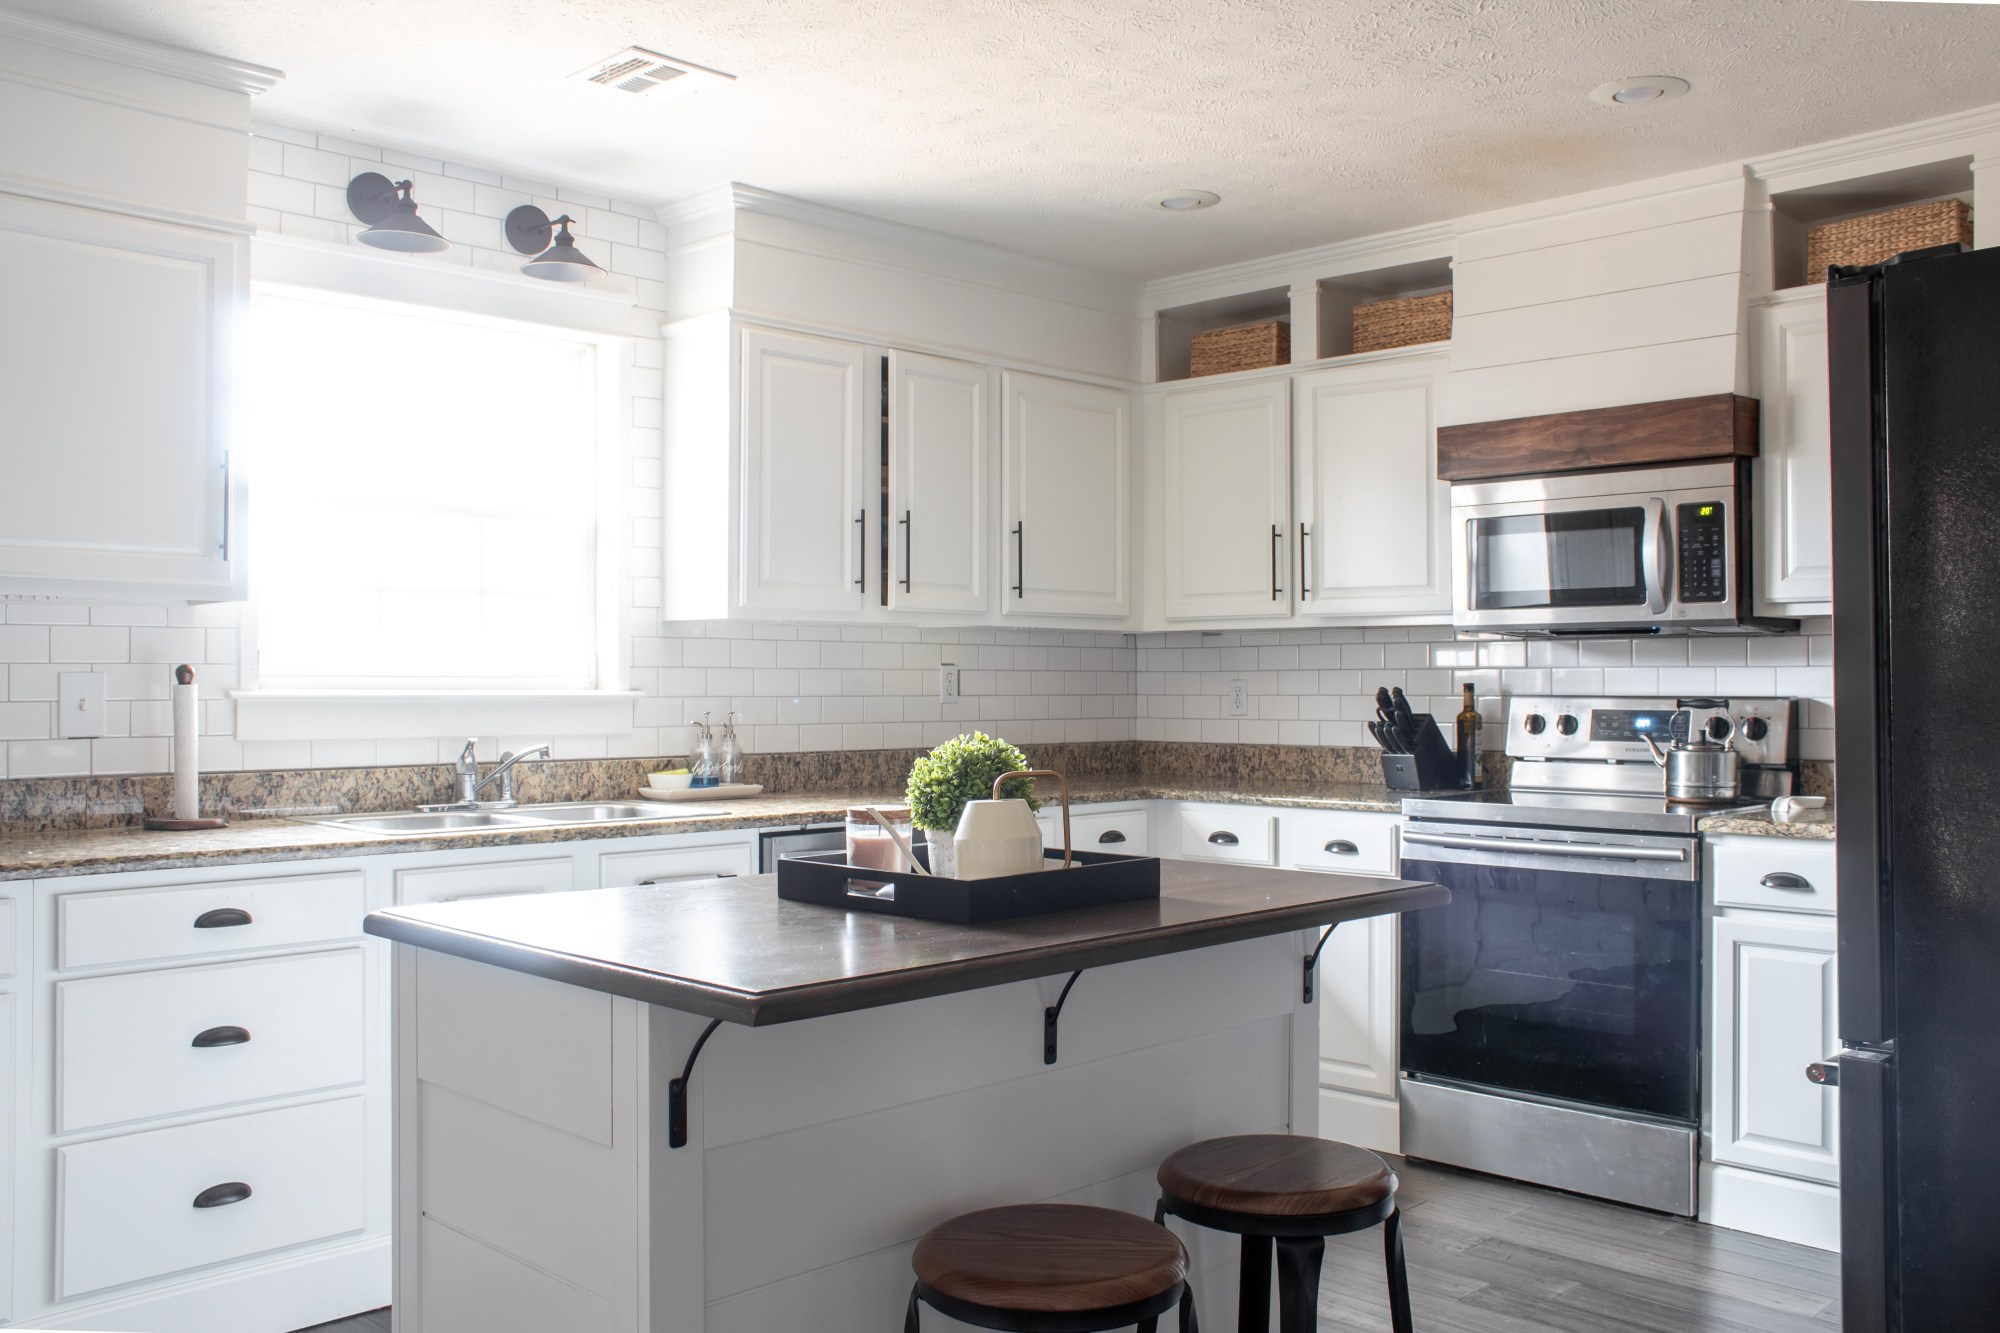
Cabinet Hardware

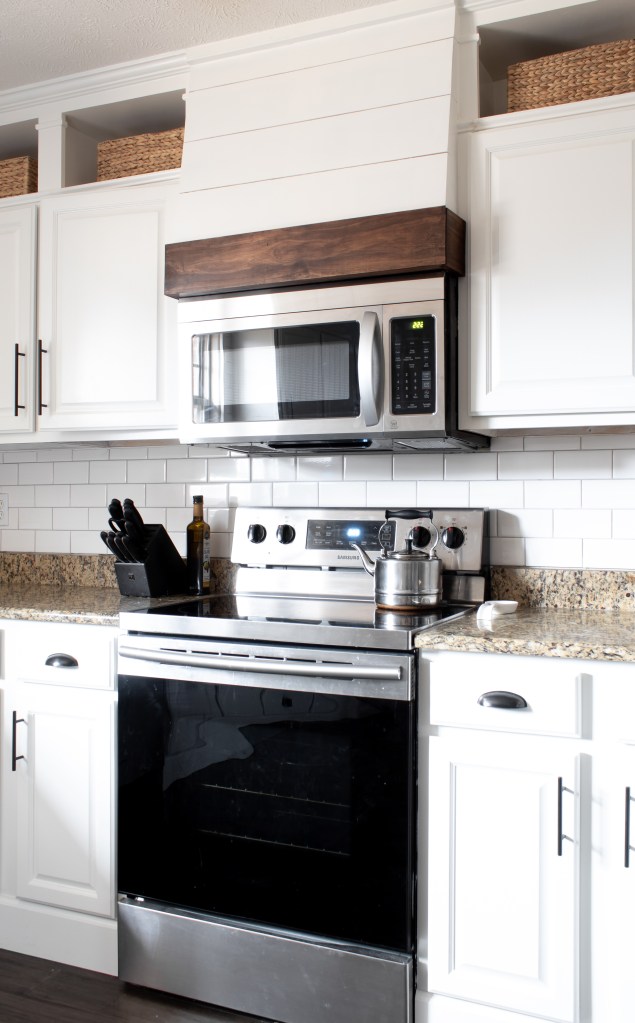
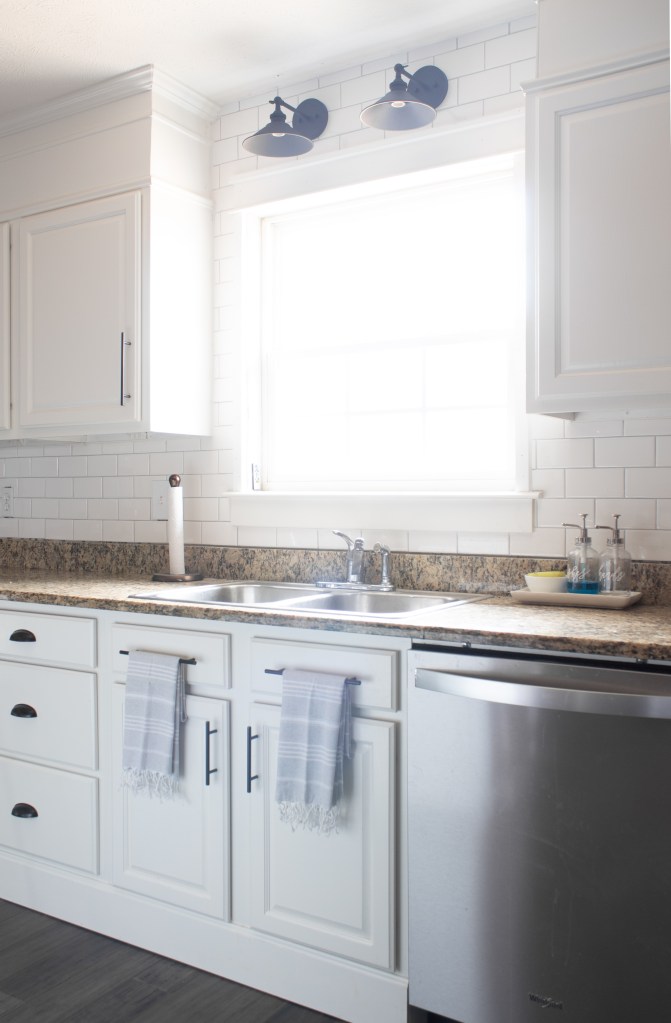
Okay, I think we added the hardware before Elliott was born, but it makes such a difference! We used these cup pulls for the drawers, these handles for the upper cabinets, and these handles for the lower cabinets. Then we added these longer handles to the sink cover to use as towel racks, which I love.

BACKSPLASH

Next I added the backsplash. This was a super inexpensive way to improve the look of our kitchen. Lowe’s sells subway tile for $0.15/tile, which comes out to $1.20/sqft. Originally, I had the tile run about 1/3 of the way up the window that sits above our sink, but after living with that for a while, I decided to add tile that goes all the way to the ceiling – best decision ever!
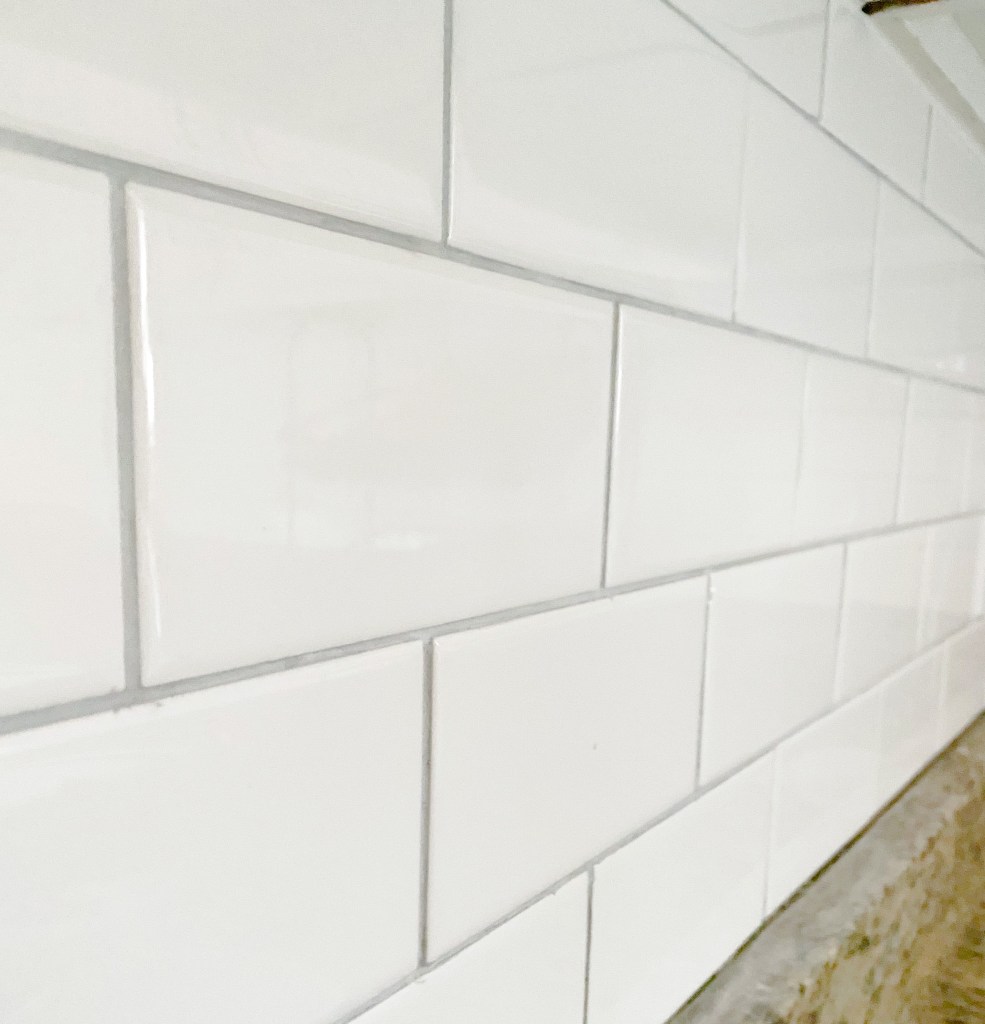
If you followed along on Instagram, then you know the top row of tiles is actually a slightly brighter white than the rest. I only had that last little, baby row to do when I ran out of tiles (I was just using left over ones from when I originally did the backsplash) and when I went to the store to get more, they had stopped selling them! Luckily you can’t notice it at all.
ISLAND
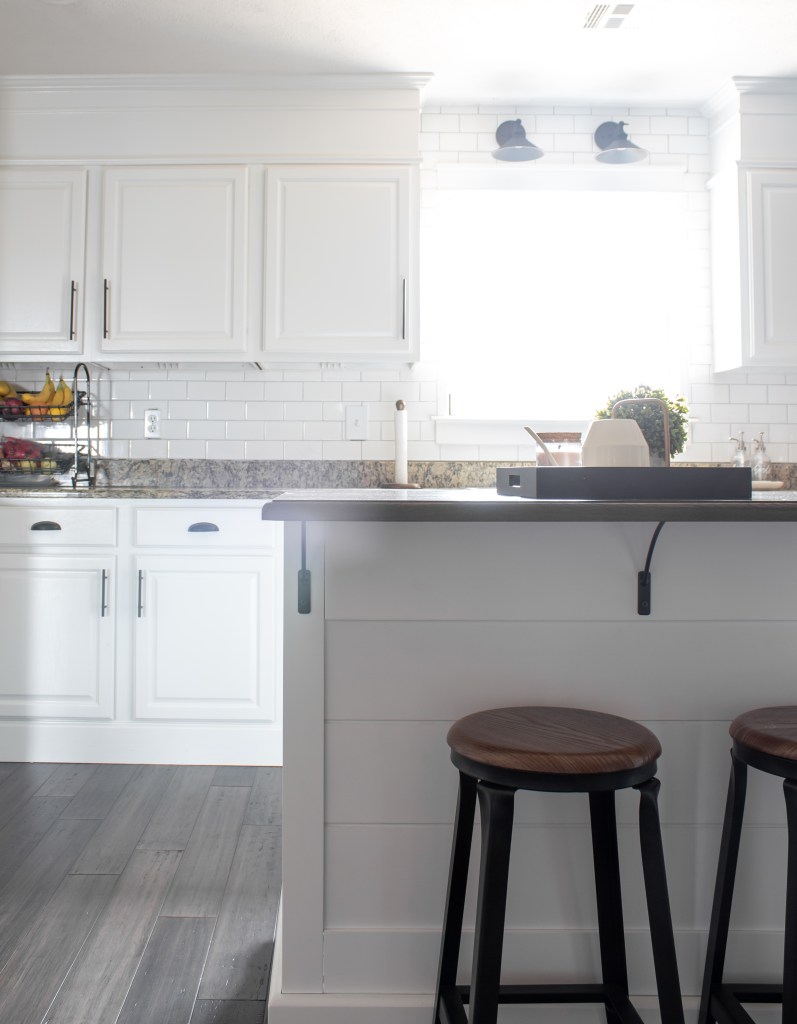
When we first walked through the house, J and I had dreams of an island so big, it might as well be called a continent. After measuring out the space, we had big dreams about the gorgeous island we were going to put in. Then, we got the fridge. Because of the way the kitchen is laid out, the fridge eats up a ton of potential island space. I seriously considered moving the fridge against the wall with the stove and microwave, but that would include taking down a wall, redoing flooring, and moving all of the plumbing and electrical for the fridge to that wall.
Instead of doing all of that, we decided to find a moveable island that we liked. Personally, I don’t love islands with wheels on the bottom, so that was my number one requirement – no wheels! Secondly, it needed to have an overhang where we could have a couple of stools. And of course, it also needed to fit our space. We found this one on Wayfair. It matches the kitchen perfectly and we’ve been really happy with it. The top does have a few scratches on it, but when it gets really bad I will probably just sand it down a bit and refinish it.
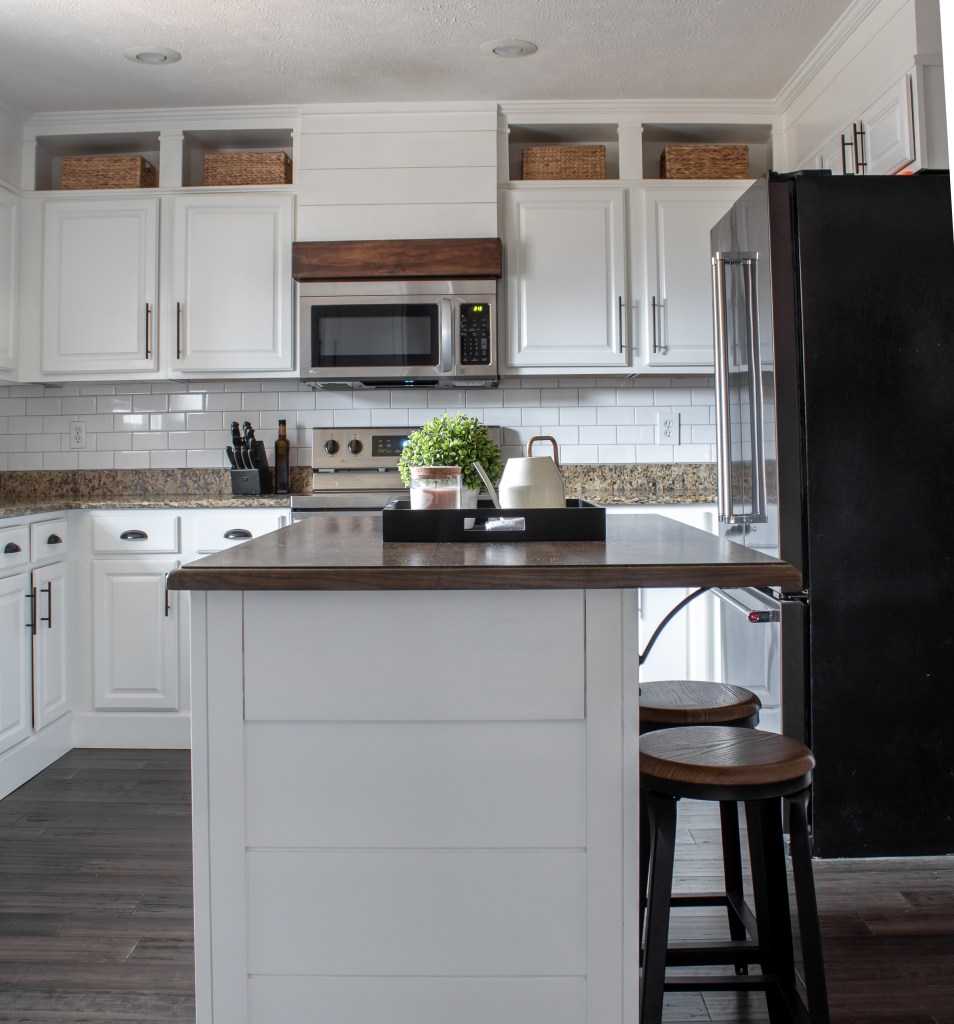
FAUX HOOD VENT

I will have a tutorial for you guys on how I did this because it is so easy, inexpensive, and such a game changer (*edit – here’s the tutorial!). If you’re considering doing this in your kitchen, go for it! When I originally built the cabinets up to the ceiling, I included 5 cubbies on this wall. I just couldn’t get the middle cubby right, so I decided to abandon it and cover it as well as the useless microwave cabinet with this beauty. I can’t stop staring at it.
SINK SCONCES

The last thing I’ve done is add these sconces above my kitchen sink without hardwiring them by pairing them with remote controlled puck lights. I think I like them, but honestly I’m a bit torn. Luckily I figured out a simple trick to hang them with a special type of command hook because I was nervous about drilling through my tile, so if I do decide to take them down it’ll be a super easy process. J loves them, so I’ll definitely give them a few weeks (or months) before making a final decision.
I love looking back at old pictures of our kitchen. The transformation that it has made is so extreme. What used to be a dark and dingy corner of the house is now one of my favorite spaces! If you want to see all of the steps we took to get here, check out my Kitchen Part 1 and Kitchen Part 2 blog posts.

With Love,
Mercedes ♥

Hi Mercedes. Your kitchen looks beautiful. Can you tell me what grout color you used for your backsplash tile? A lot of people use a dark gray but I really like the light gray look.
Thank you,
Shannan
LikeLike
Hi! Thank you. It is Platinum by Custom Building Products.
LikeLike
What size is the subway tile please?
LikeLike
Hi! We don’t live in this house anymore so I can’t measure, but it’s whatever the super cheap and standard subway tile size is! Lowe’s and HD sell them for really inexpensive and the non “standard” sizes are a little more. Hopefully that’s helpful!
LikeLike