

I seriously owe you this blog post! I know I said that when I had to stop projects due to my third pregnancy I would catch up on blog posts, but that did not happen! Better late than never though, right?
After I finished the staircase project, I started on the living room. It was…fine. I added a fireplace a few years ago, but other than that I hadn’t really touched the room. We painted the whole main floor white when we first moved in and it desperately needed an infusion of character.

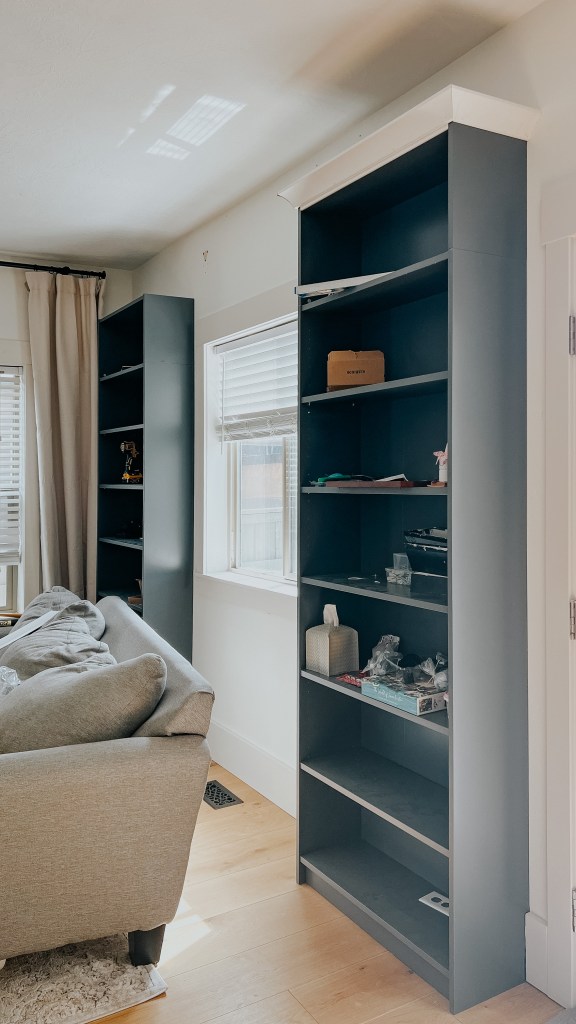
The biggest update I wanted to make was to add in some built ins behind the couch! I hoped it would add a lot of depth and texture that I wanted to bring in. Even though it took way longer than I was hoping (hello first trimester tiredness!) I am super happy with the results.

Materials & Tools
- IKEA bookcase & extension
- BIN primer
- Benjamin Moore Advance (I used the color Flint)
- Sanding sponge
- Sandpaper
- Tack cloth
- Foam roller
- Crown moulding
- Caulk
- Paint brush
Tutorial
I started by laying out all of the pieces for the bookcases and got them ready for painting.

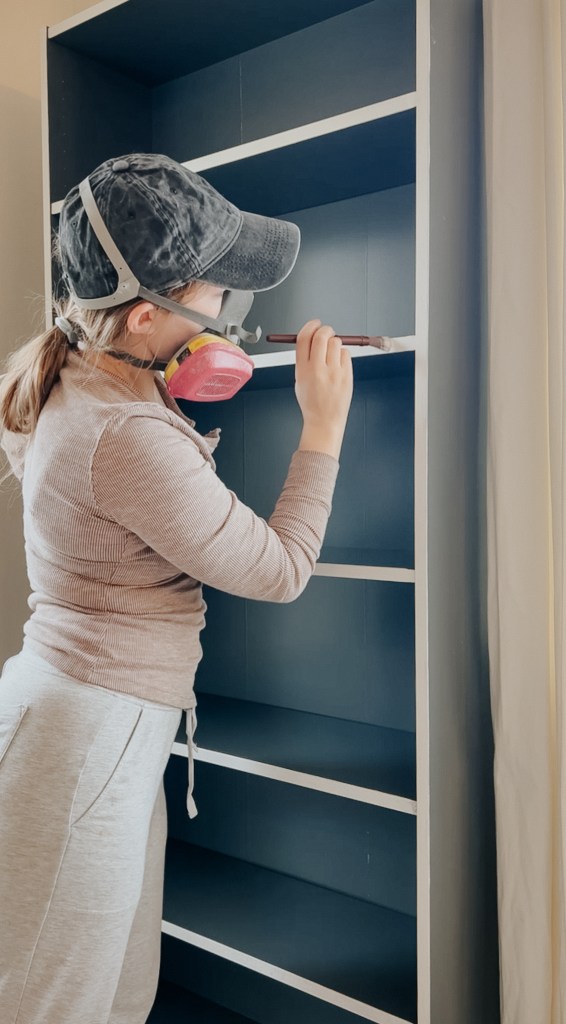
Since IKEA furniture (and any laminate furniture) is so slick, it requires a specific primer. There are a few that will work, but I love BIN primer! It is stinky so you need to wear a mask and have good ventilation, but it works super well. I also lightly sanded the surface with my orbital sander and 220 grit sandpaper just to scuff up the surface. Technically BIN primer says you don’t need to sand first and it has held up perfectly on my glossy railing that I didn’t sand… but I still like to do it! Sanding is going to improve the adhesion of any primer.

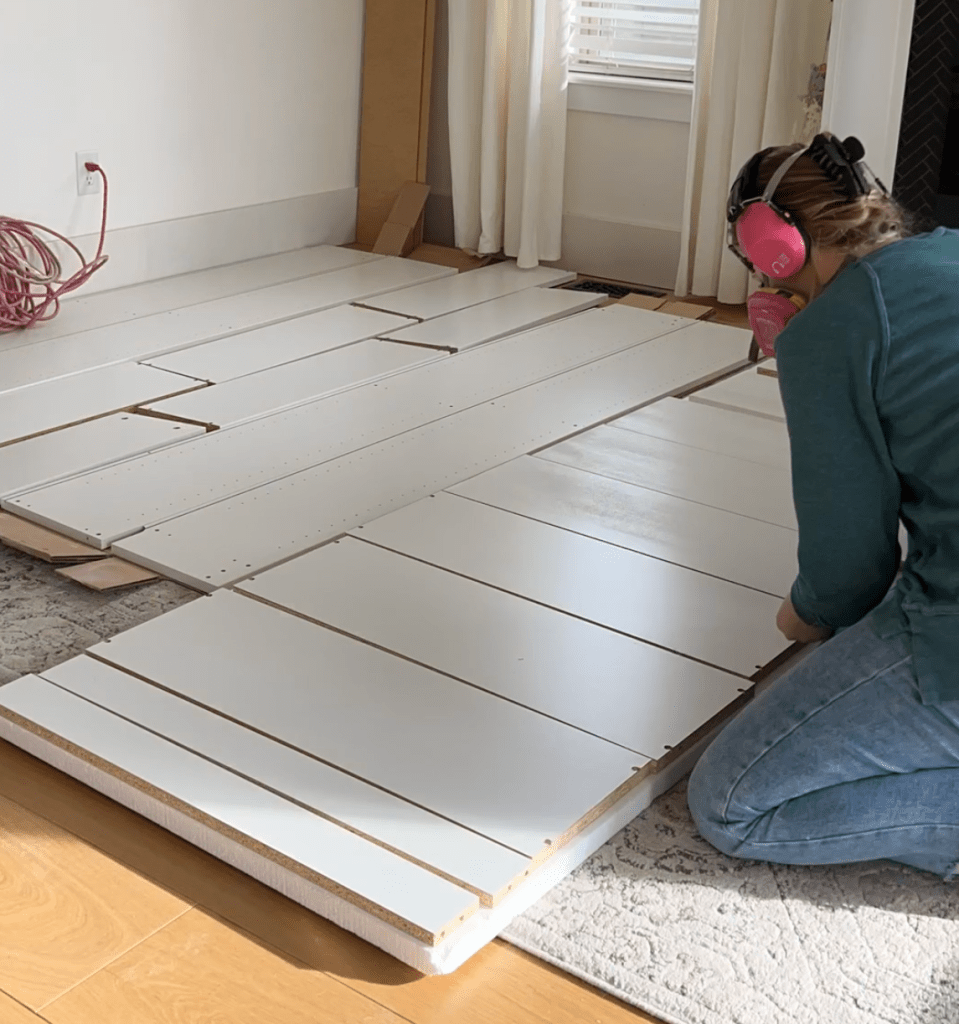
Anyway, I sanded and then wiped everything down with a tack cloth to get rid of all the dusties.


I started painting Benjamin Moore Brewster Gray on by hand instead of spraying, mainly because it was too cold to store my pieces in the garage and I didn’t want to haul them back and forth between the garage and the living room to dry. After I got one coat on, I realized that it was too light and wasn’t going to give me the look I wanted – back to the paint store!

I settled on Benjamin Moore Flint because it matches the dark blue color of my entryway rug and I liked that it would all be pulled together.

I also decided to spray because rolling it was taking longer than I wanted to spend/what naptime allowed for.

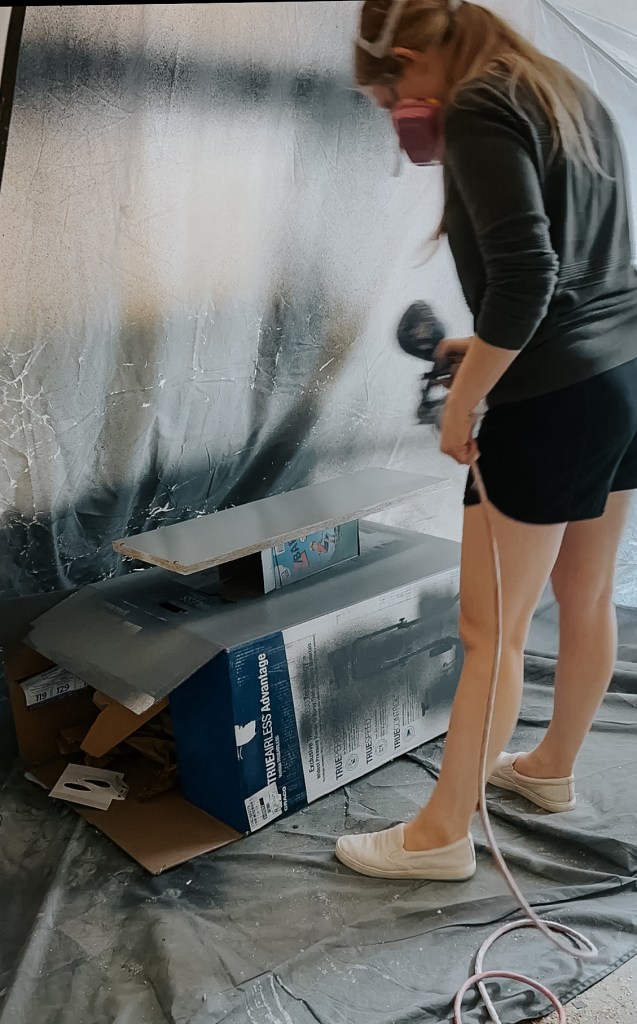
I did two coats on the fronts and backs (sanding with a sanding block in between!) then started to assemble them. I definitely could have sprayed them already assembled, but (1) I couldn’t move it to dry inside where it was warmer and (2) they wouldn’t have fit in my spray shelter.


To make them look more like builtins and less like stand alone pieces bookcases, I cut away the baseboards, slid them into place, then recaulked the baseboards.
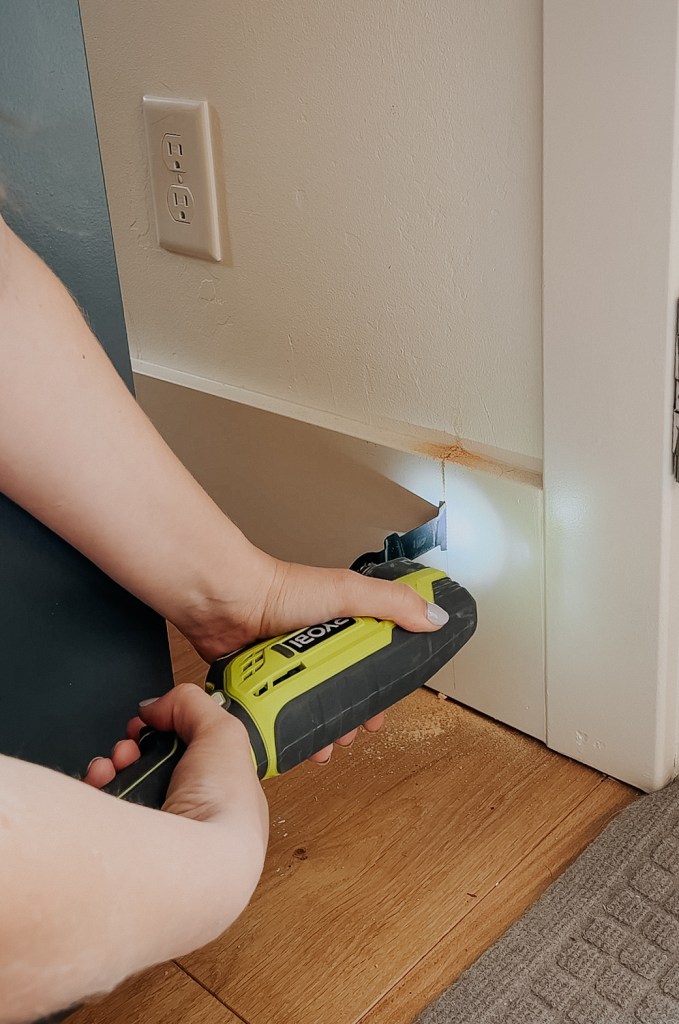

I also had an outlet behind each, so I cut a hole in the back and pulled the outlet through.

I wanted them a little taller than the standard bookcase and luckily IKEA sells these extension pieces! So cool. So I added one on top of each bookcase and then installed the anti tip hardware to secure them to the wall.

The last thing they needed to add a little oomph was crown moulding! I grabbed this from Lowe’s and installed it. This is my favorite crown molding tutorial – I reference it every time I have to cut crown! There was a little gap in between the front piece and the bookshelf, so I just cut a small piece of scrap trim I had lying around to fill that.

I caulked where the bookcases met the wall and the seams of the crown moulding. I touched up paint where I caulked and painted the fronts of the shelves and they were ready to style!

I got shopped my house and the local thrift store to fill them, so they ended up being really inexpensive to decorate. Oh, and my followers named the goose Betsy.

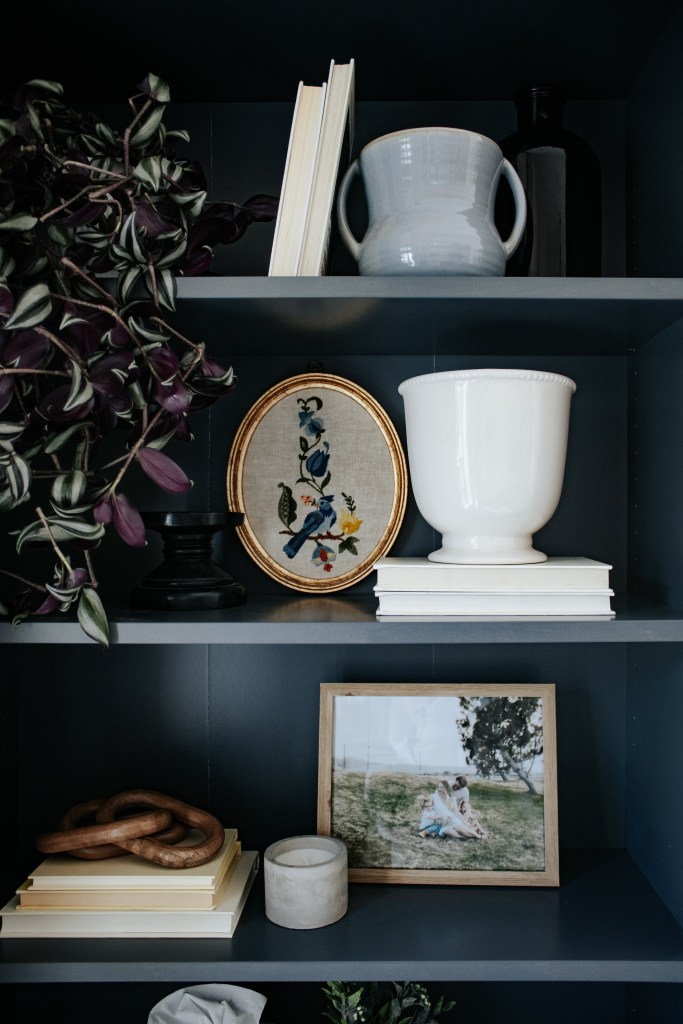
I love how everything turned out! They add so much depth to this room and I cant wait to fill them up with holiday decor!
With love,
Mercedes 🖤

What a stunning transformation! Your creativity and craftsmanship truly shine in this IKEA hack. The built-ins look like they were custom-made for the space, adding both style and functionality to your living room. Thanks for sharing your inspiring project!
LikeLike
Thank you!
LikeLike
where did you get your shades? Love the contrast they add
LikeLike
They are from Select Blinds! The color I used (Poppy) looks like it’s not currently available, but Primrose looks like a pretty close match 🙂 Here’s a link to the exact product – https://rstyle.me/+b0p6XVHqTDOW6xZk9uoC9w
LikeLike