

Disclosure: Some of the links provided are affiliate links, which simply means I may earn a small commission (at no additional cost to you) if you shop through one of my links.
I don’t think I’ve ever been more wrong about the timeframe of a project! What I thought would take me two weeks took me almost two months. To say I am relieved that this project is over would be an understatement. Don’t get me wrong, I’m super happy with how it turned out and would totally do it again, but I was also suffering from project burnout where I just wanted to be done! So thank goodness it is.

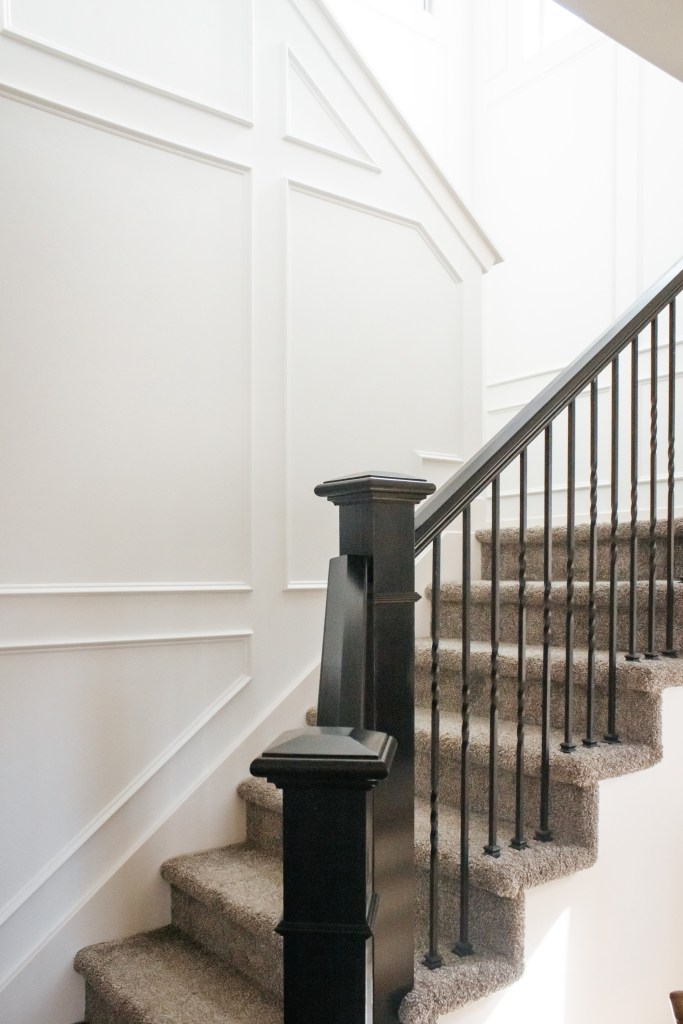
Anyway… adding this wall moulding to the stairs totally transformed the look of not only them, but really of the whole house! You can see the stairs right as you walk in the front door and from pretty much everywhere on the main floor. Before, they were nothing special with some badly done shiplap, a curtain pattern that wasn’t really me, and a builder’s grade light fixture.

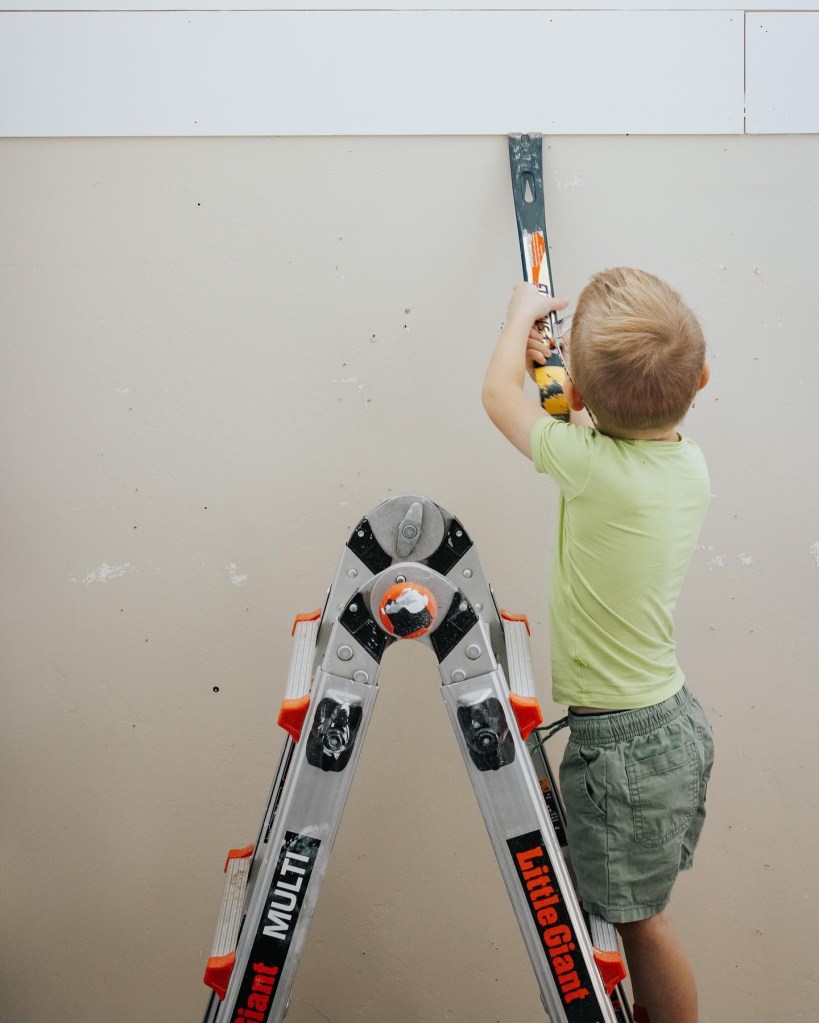
I took down the shiplap with the help of my eager four-year-old, replaced the curtain with a privacy film (more on that below), installed wall moulding, then last minute painted the banister and bam! The staircase of my dreams was born.
Materials
Disclosure: Some of the links provided are affiliate links, which simply means I may earn a small commission (at no additional cost to you) if you shop through one of my links.
- Trim (I needed 52 8’ pieces)
- Scrap wood cut to your spacing width
- Nail gun
- Measuring tape
- Level
- Digital angle finder
- Miter saw
- Miter snips
- Ladder that can adjust to stairs
- Caulk & caulk gun
- Wood filler
- Nail punch
- Tack cloth
- Primer
- Paint (I used Benjamin Moore Regal Select Eggshell tinted to Simply White)
- Paint sprayer (optional but highly recommend – here’s a more budget friendly one too)
Tutorial
To start, I knew I needed to visualize how the boxes would look on the wall, so I taped them out using cheap painter’s tape. I tweaked it, then tweaked it more and more and more. I’m so happy I physically put everything up because it really helped me to make decisions about spacing and layout. I have a whole blog post dedicated to that process here.
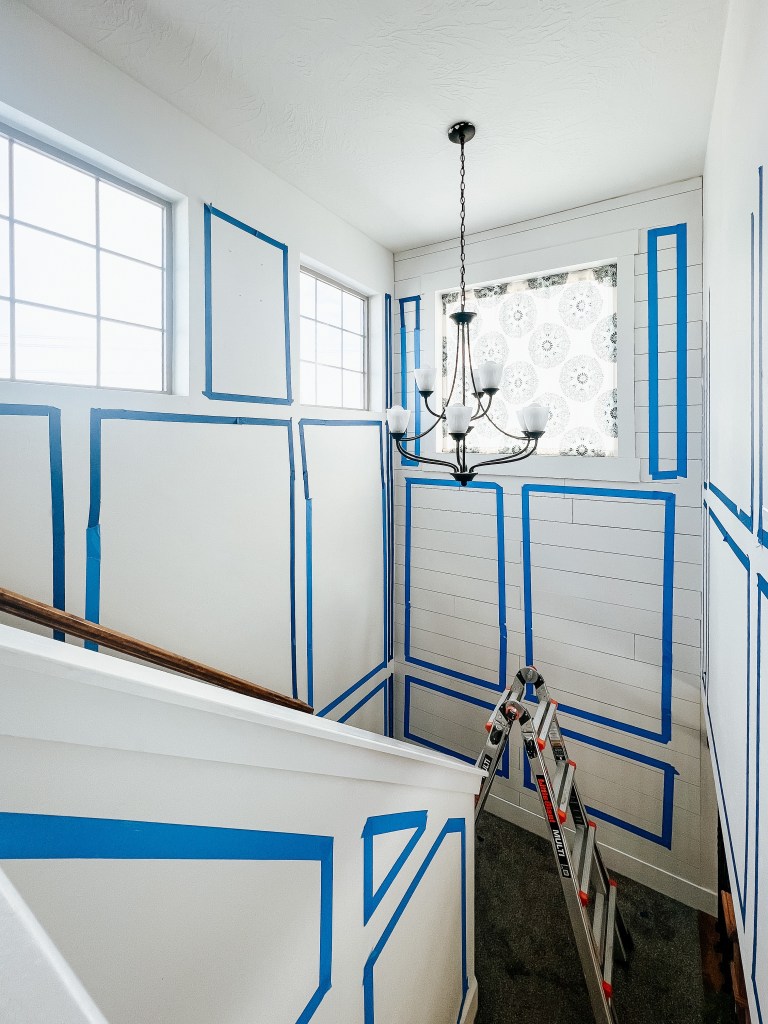
After I got the layout solidified, I had to do a bit of demo. My four-year-old helped be take down the shiplap that was here before. There were so many problems with it including boards cut to uneven widths, a bad paint job, and boards popping off the walls. Some of that would have been fixable, but there’s no saving wonky cut boards. Plus, I didn’t want shiplap there so we took it out! Then we filled approximately 8,000,000 nail holes and put some primer up to help cover the brown when it came time to paint.


To start installing boxes, I first figured out what I wanted my spacing to be. On the edge of one of the walls there is a little lip, so I used that as my spacing guide – 4.75”. I cut a scrap board to be 4.75” wide and used that to space the entire project.
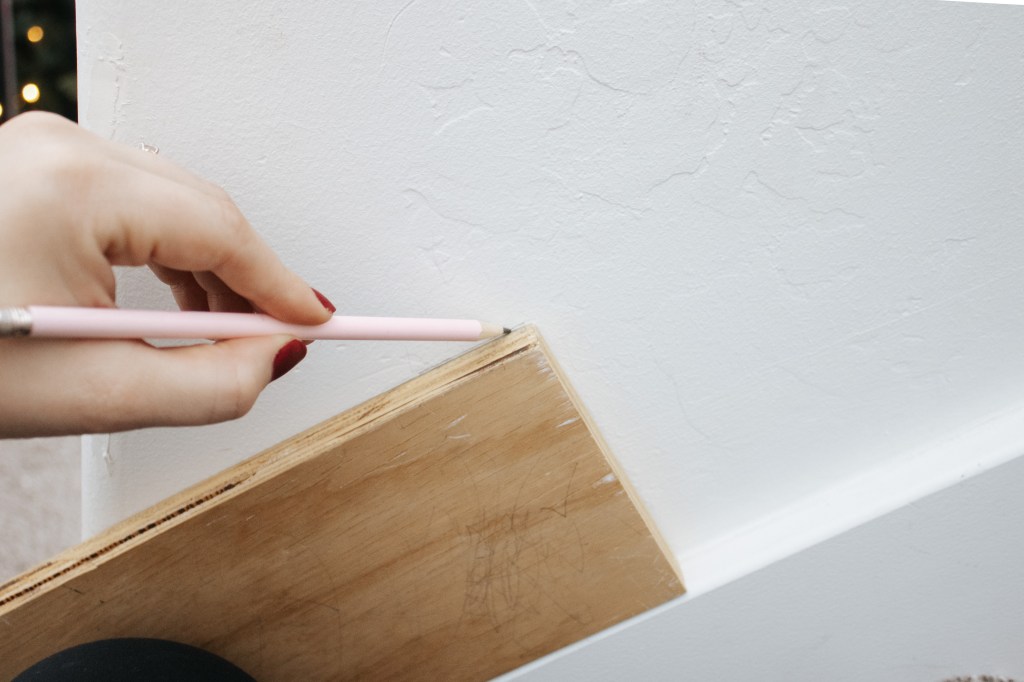
I marked the edge points on each corner then measured the distance for each segment. I don’t like to precut any pieces because walls are weird and I prefer to just measure as I go to keep the tightest seams possible.
Anytime I had a 45º angle to cut I used miter snips. These were my best friend! They give your hand a bit of a workout and in full transparency, the cut is not quite as clean as when you do it with a miter saw, but it saves so much time and energy. Plus, after caulk I can’t tell the difference between the miter saw cuts and the miter snip cuts. I highly recommend them! The only other drawback is that it is difficult to make small adjustments, so if you cut your piece 0.5” too long, you’ll need to shave off that bit with the miter saw.

Once I had a piece cut to the correct length with miters on both ends I nailed it to the wall. I lined it up to my corner mark and put one nail in, then lined it up to the other corner and nailed it in. I also used the level to make sure everything was straight! An important note though : if you are adding a board parallel to a corner, ceiling, baseboard, etc., the spacing between the trim piece and the wall is more important than it actually being level. It could be perfectly level but if the corner of your wall isn’t level, it’s going to look off. So line your spacer block up with the wall as your primary way of spacing on spots like that!

There were a few spots were I had to make angled cuts with my miter saw that were too acute for my saw’s settings. I have a reel with a tutorial on how to make those cuts on my Instagram.
After everything was up, it was time for caulking. I was dreading this from the moment I decided to take on the project, but in all honesty it wasn’t too bad. I carefully caulked the inside and outside of each box as well as the seams at each corner. If there were any nails that didn’t get shot deep enough, then I used a nail punch to set them behind the material. Then I used wood filler to fill in nail holes. I sanded the filler smooth and vacuumed, then wiped up any remaining dust with a tack cloth.


Since the trim is PVC, it needed to be primed before I could paint it. So I draped everything off and used my awesome paint sprayer to prime it all. Prep took about an hour and spraying took 21 minutes so it was definitely faster than a brush!

After primer I did two coats of paint (Benjamin Moore Simply White) in eggshell using the same paint sprayer. I also painted the baseboards to match the baseboards in the rest of my house (Benjamin Moore Dove Wing).

The curtain that has been hanging over this window is not my style, but I totally understand why the previous owners put it here. If the primary bedroom door is open and you get out of the shower, you have a straight shot through this window down to the street and into about 5 homes. So leaving it uncovered is not a good option! A few of my followers suggested using this privacy film and it turned out so well. It was easy to install and lets so much light in, while keeping our home private.

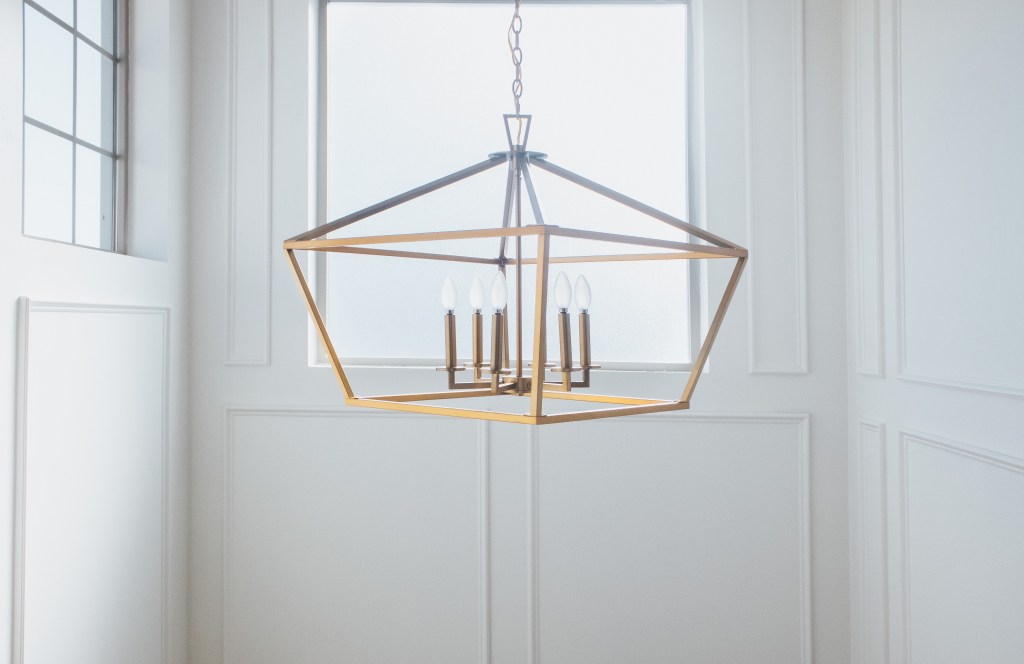
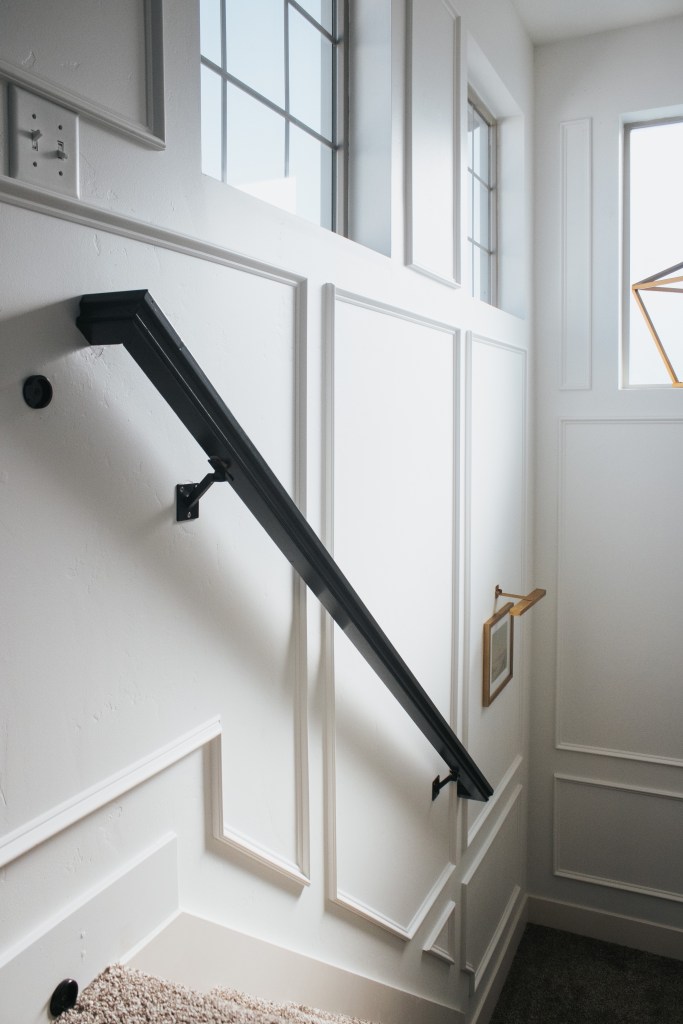
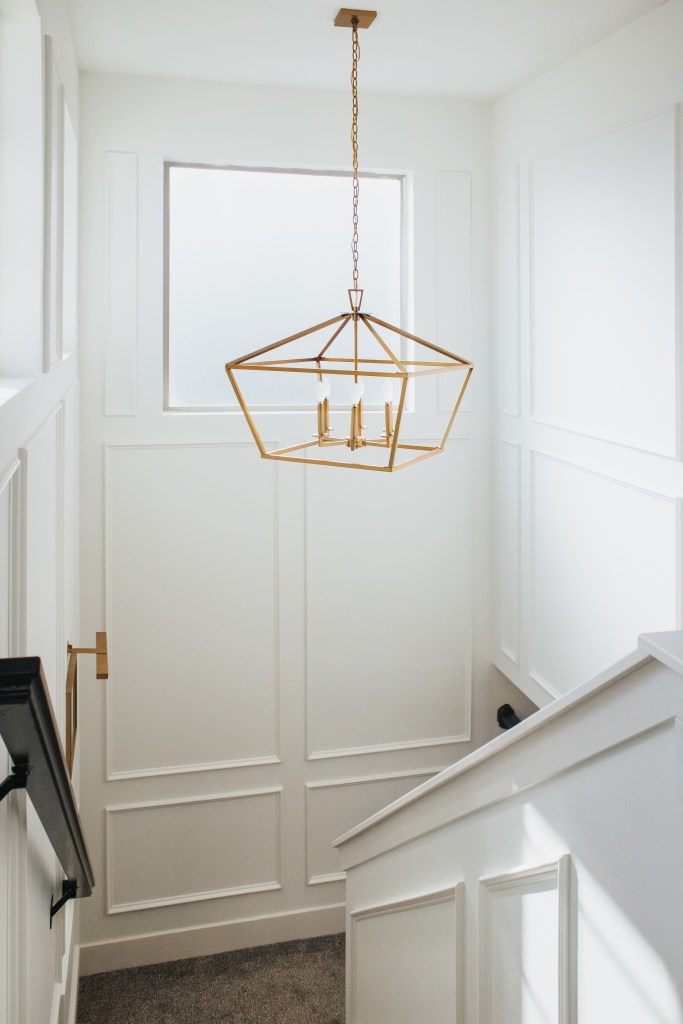
My husband and I replaced the light fixture with this more modern lantern style one. I’m actually still waiting on the right lightbulbs to come in the mail because I’m super picky when it comes to bulbs! They’ve got to be 3000K, frosted if it’s an exposed bulb, and super bright.
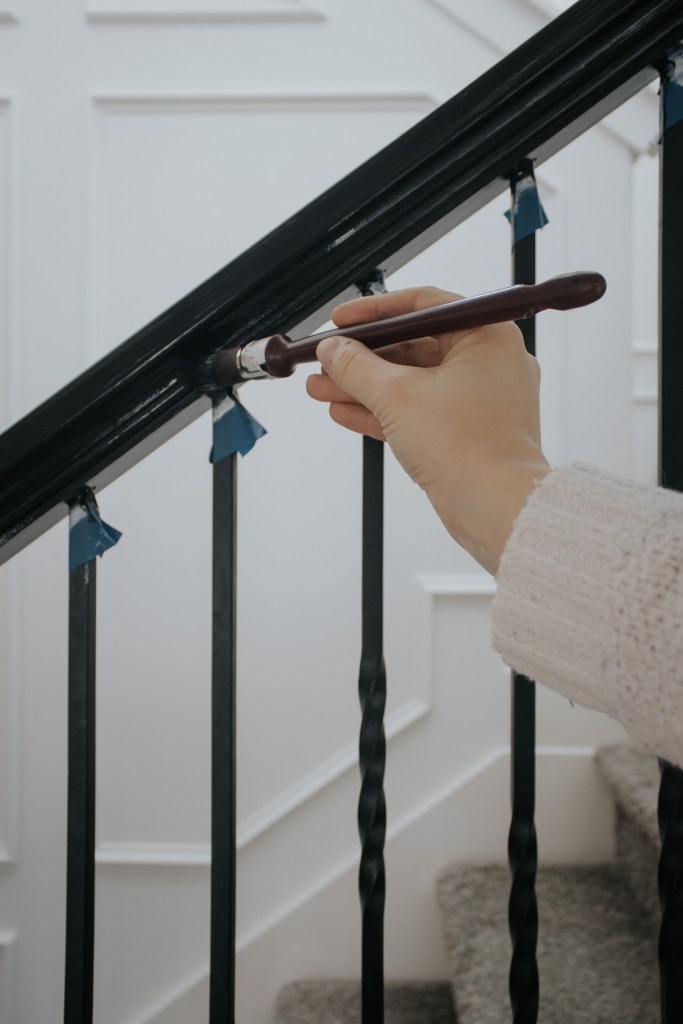
Kind of at the last minute I decided to paint the banister and hand rail and I am so glad I did! The orange tone of the wood before no longer matched our new floors or any of the other wood in our home. With a coat of paint it feels like it finally belongs! I’ll write up a separate tutorial on how I did that.
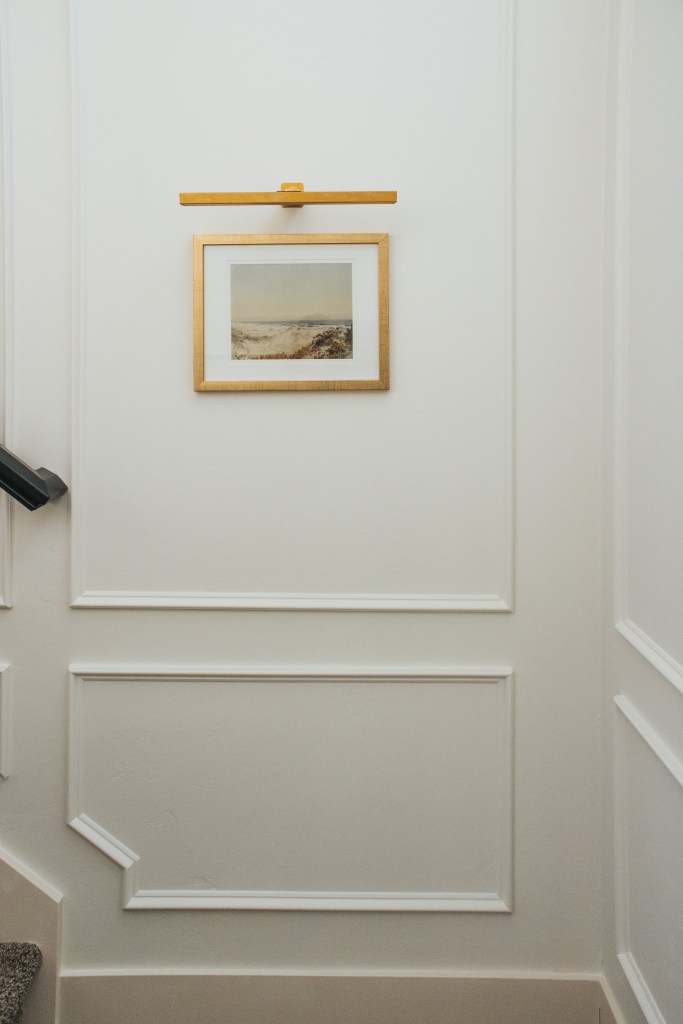
The last thing I did was hang this piece of art. I wasn’t sure about it at first, but I love the personality that it adds to the space, especially since it is a print of my hometown – Traverse City, MI. I installed a battery operated, rechargeable picture light above it. This one is awesome because you can turn it on and off with a tap instead of having to use a remote (though it does come with one). It is much more rose-y than in the listing, so I used some rub n’ buff in Grecian gold to get it to the right color.
One day I would love to take out the carpet and install wood treads with a really pretty runner, but for now I’m super happy with the upgrades we made!
With love,
Mercedes

3 thoughts on “Staircase Reveal : Trim, Trim, and more Trim!”