
Touchstone Home Products supplied the insert for this project. As always, all opinions are my own.
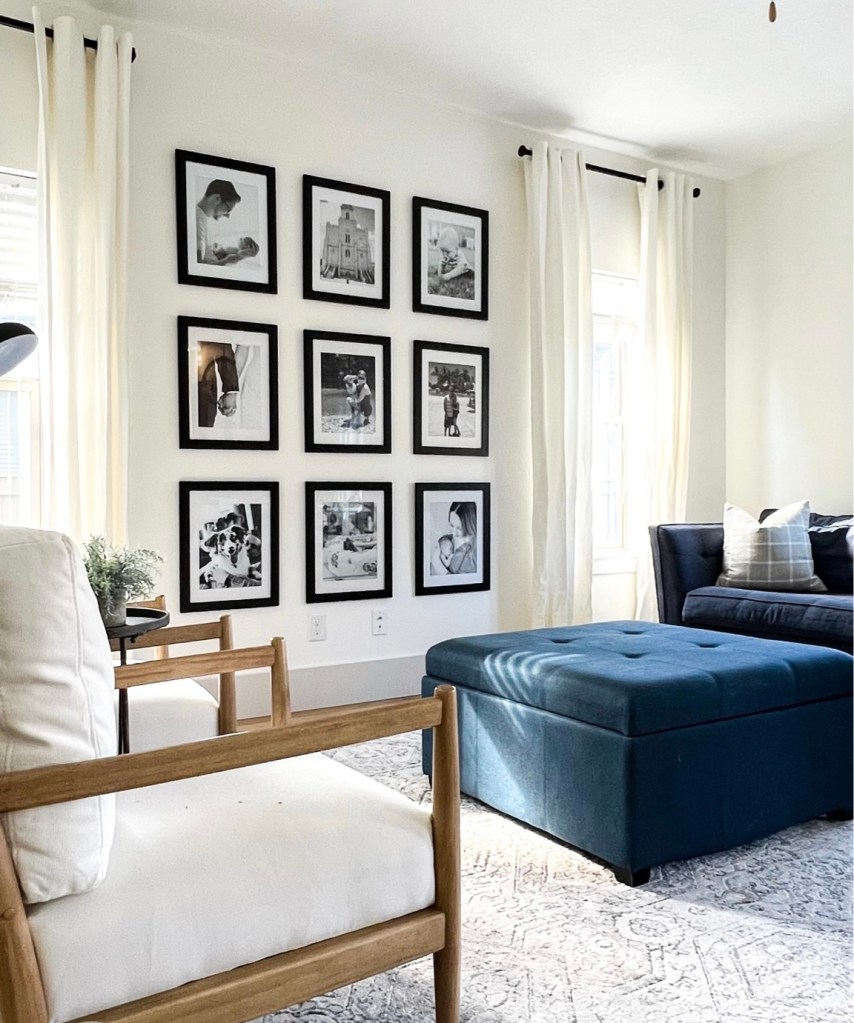
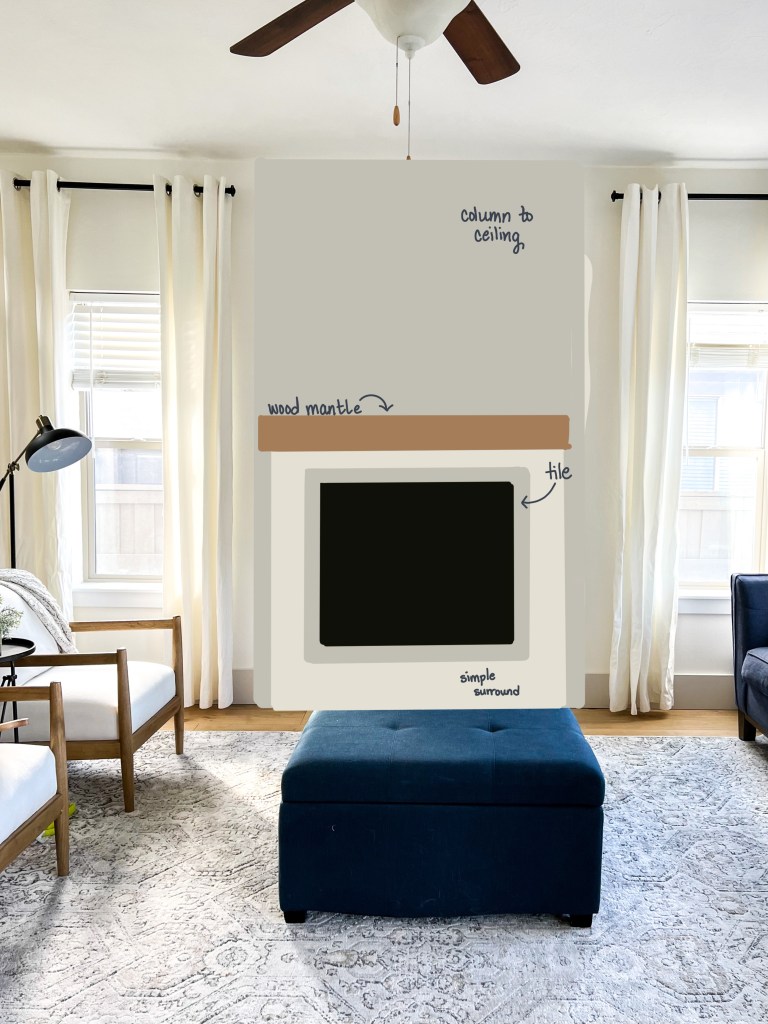
After living in our home for 14 months, I wanted to change up the living room a bit. Don’t get me wrong, it was starting to feel like home and look cute – the gallery wall of family photos is an absolute favorite of mine – but it just didn’t feel like it was living up to it’s full potential. It was lacking a focal point and just felt kind of…blah. I redid the fireplace in the living room in our last home and I knew if I could add a fireplace to this space, I could get it closer to the feeling I am going for.
Want to see what projects I’m working on now? Follow me on Instagram!
After spending a while dreaming up fireplace ideas in here, I finally decided to just do it – especially since I realized I would be able to complete it before Christmas! I drew out some plans on my iPad and got to work.
I’m obviously super pleased with how it turned out – I mean it’s gorgeous – but I also can’t believe that I built this myself and in such a short time frame – it only took me about 2 weeks! And I promise that you can do it too. Just follow my tutorial below!
Materials
Disclosure: Some of the links provided are affiliate links, which simply means I may earn a small commission (at no additional cost to you) if you shop through one of my links.
- Touchstone Home Products Forte 40” Insert
- 2x4s
- 3” screws
- Drywall
- Drywall screws
- Drywall tape
- Joint compound
- Drywall sanding sponge
- Corner bead
- Primer (you need drywall specific primer)
- Paint
- 1×6 primed pine
- Crown molding
- Wood glue
- Nail gun
- Wood filler or spackle
- Caulk
- 1x8x6 select pine
- 1x8x6 pine
- 1x2x8 select pine
- Wood conditioner and stain
- Musselbound (or mortar and trowel)
- Tile
- Tile saw (this one works really well and is budget friendly)
- Grout and grout float
- Tile sponge
Tutorial
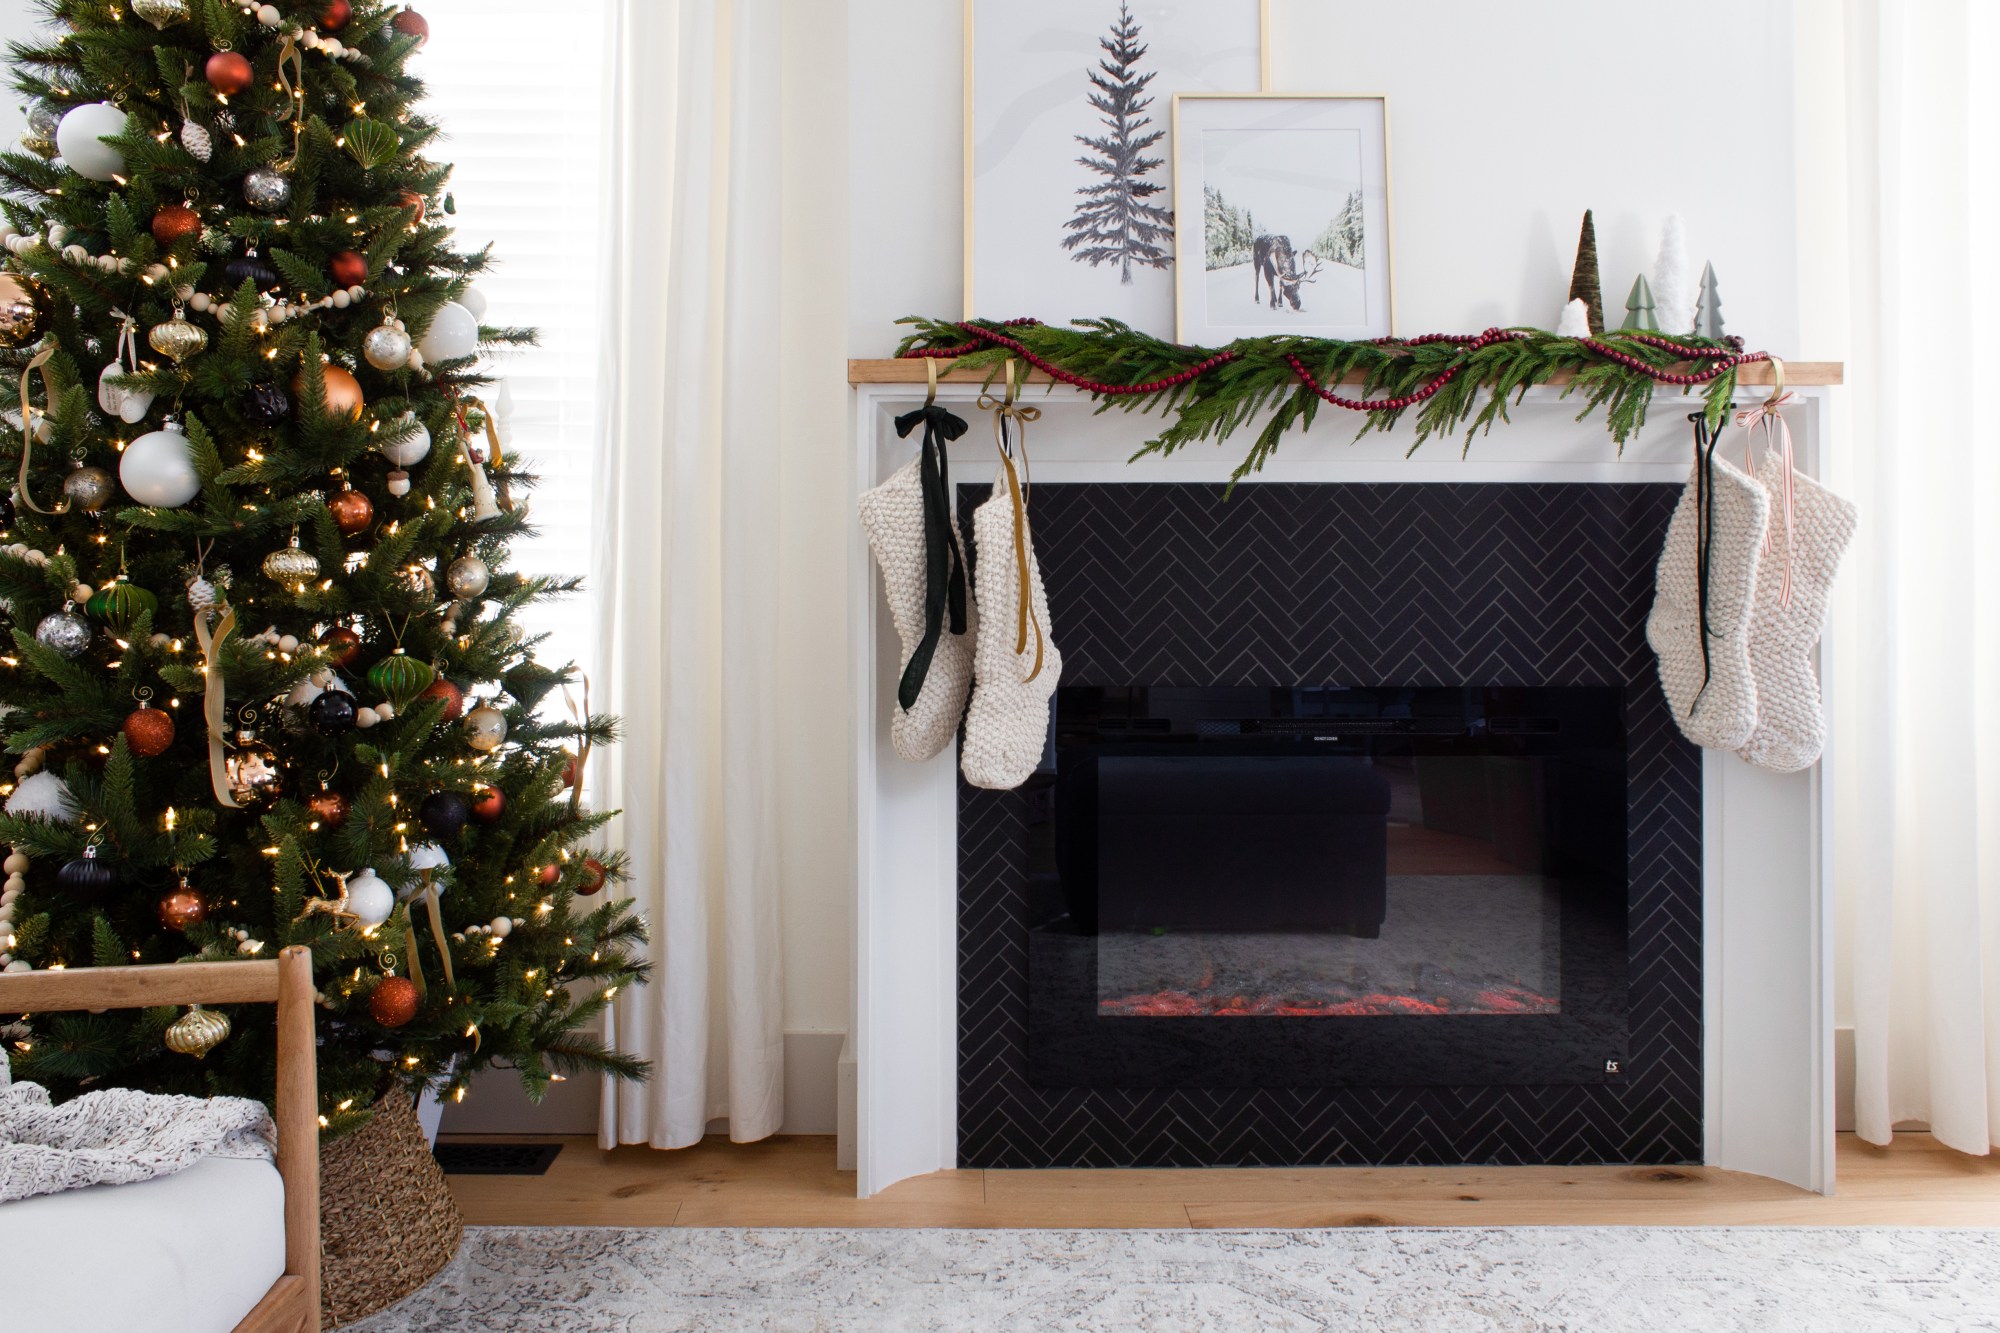
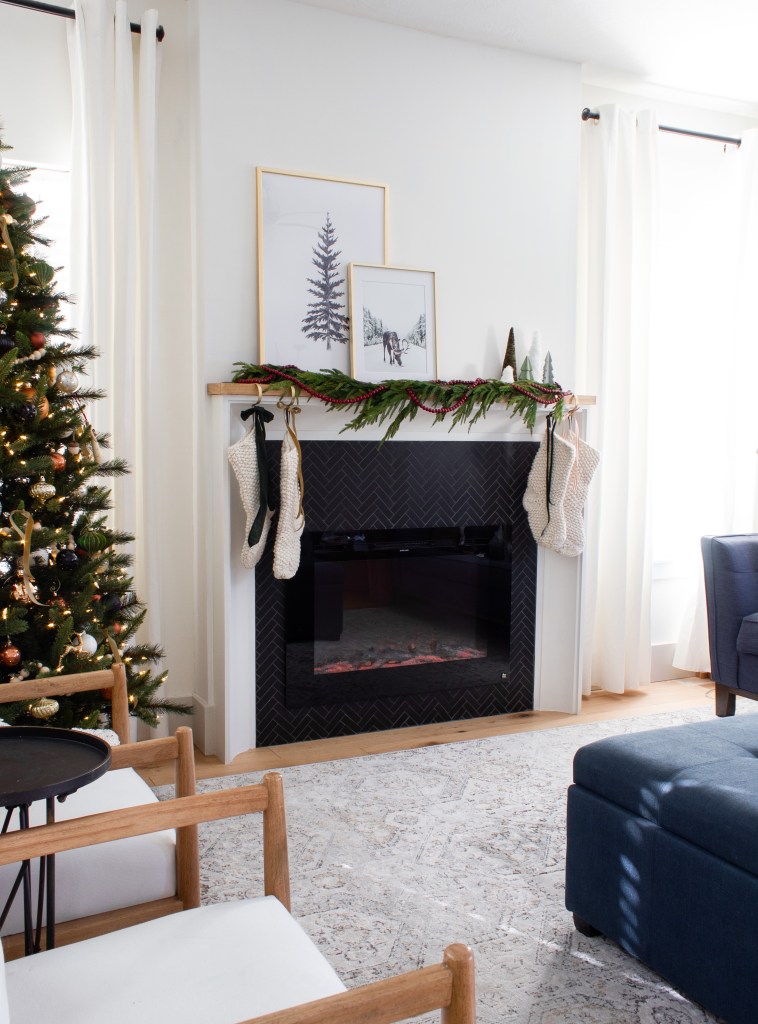
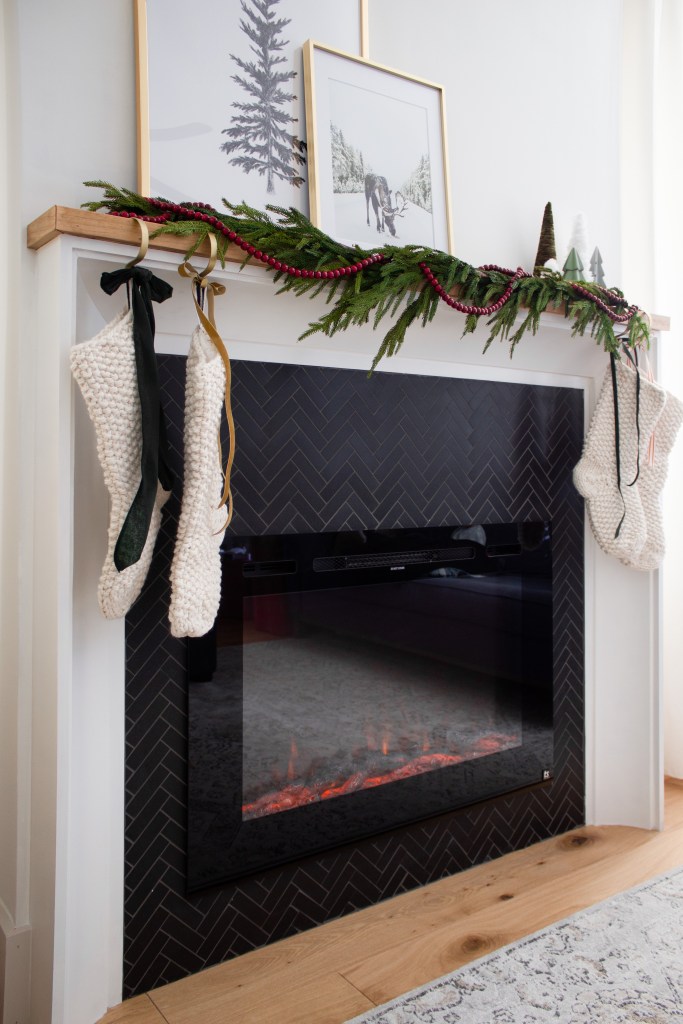
The first thing I did was figure out how big I wanted the fireplace to be. I measured everything out and chose the 40” Forte from Touchstone Home Products. This insert is awesome – you can adjust the brightness, flame color, and the heat settings (high, low, off). Plus, the heat pumps out from the upper part of the insert, so it is totally kid and pet friendly! Anyway, I used the insert measurements to figure out how big of an opening I would need and how far it would need to come away from the wall.
Luckily there was already an outlet right in the middle of this wall (where the fireplace was destined to live) that we never use, so I was able to assign it to the fireplace without needing to have an electrician come and add one.
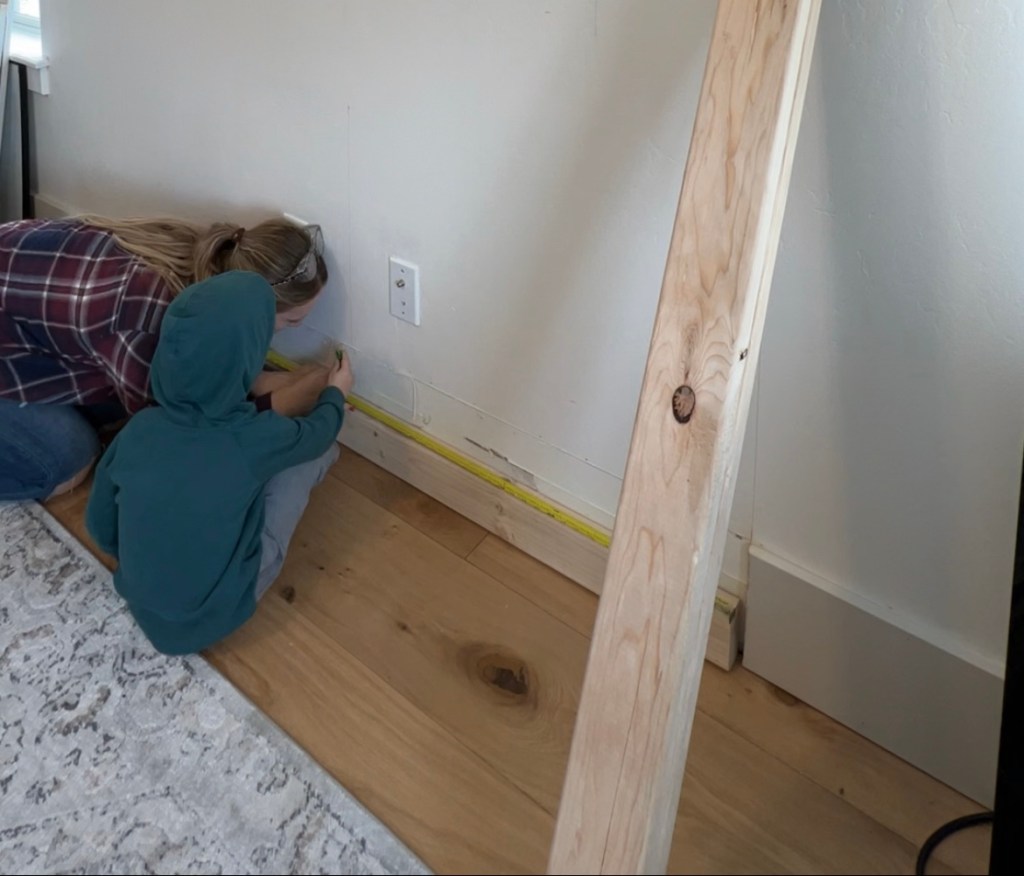
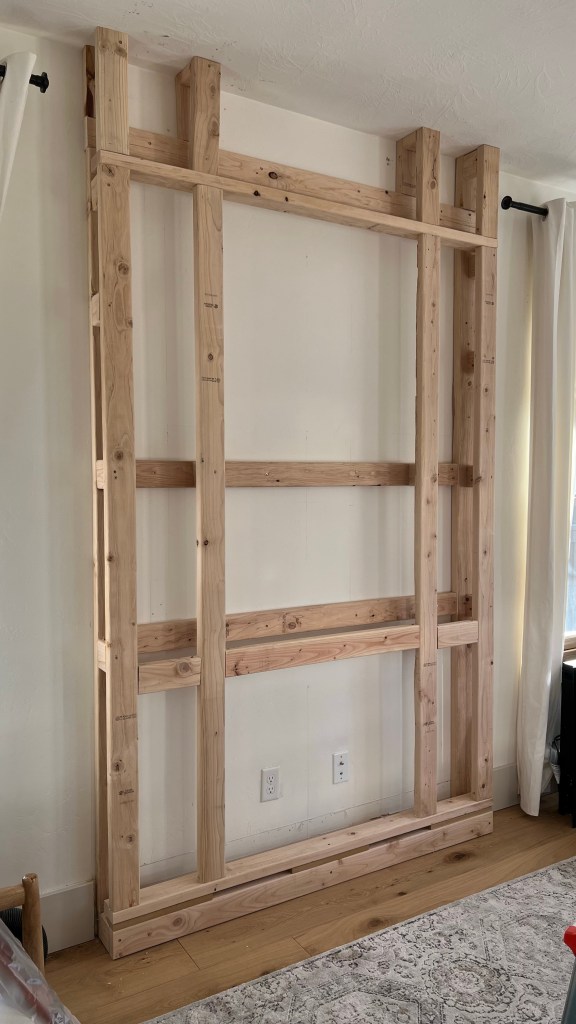
I cut away the baseboards (that I just added a few months ago) and started framing!
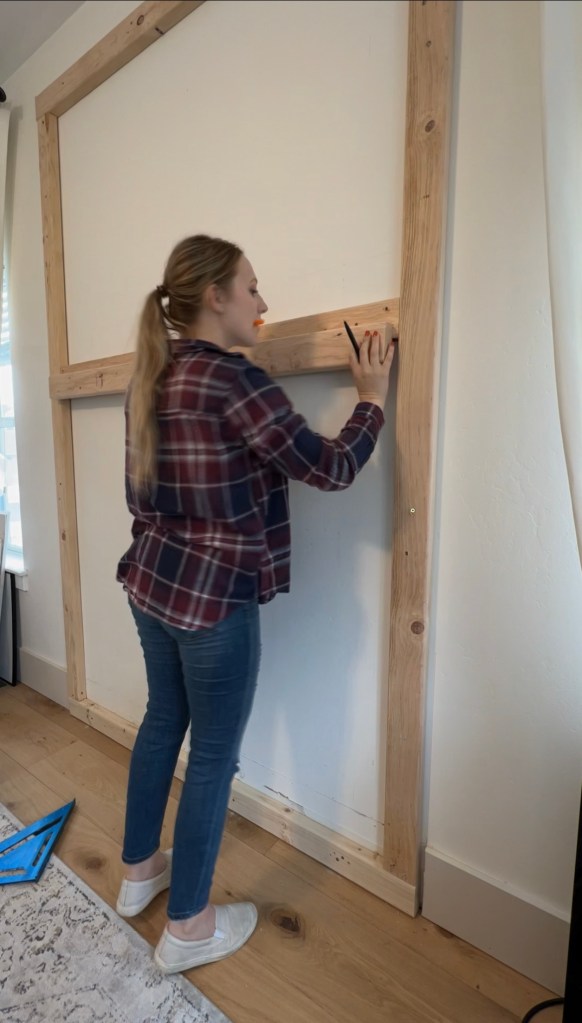
I used 2x4s and 3” screws to attach everything together. The back part of the frame is screwed into the studs in the walls in about 80 different spots (ok, I’m exaggerating a bit) so it’s super secure.
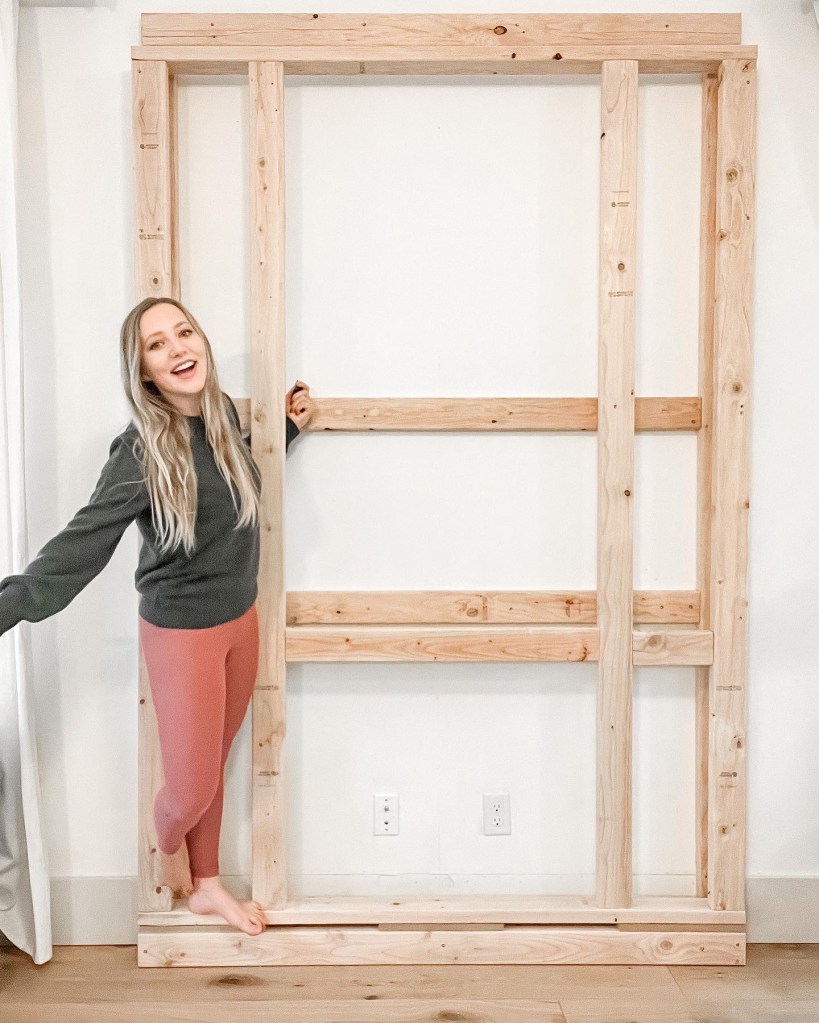
Unfortunately, due to a miscalculation my original framing didn’t make it all the way to the ceiling, so I had to puzzle in a few extra pieces to support the drywall. It’s all good though, the original structure is plenty to support the insert, so the additional pieces at the top only needed to be sturdy enough to support the drywall. I also decided to run an additional stud in the middle in case I want to hang something heavy above the fireplace in the future.
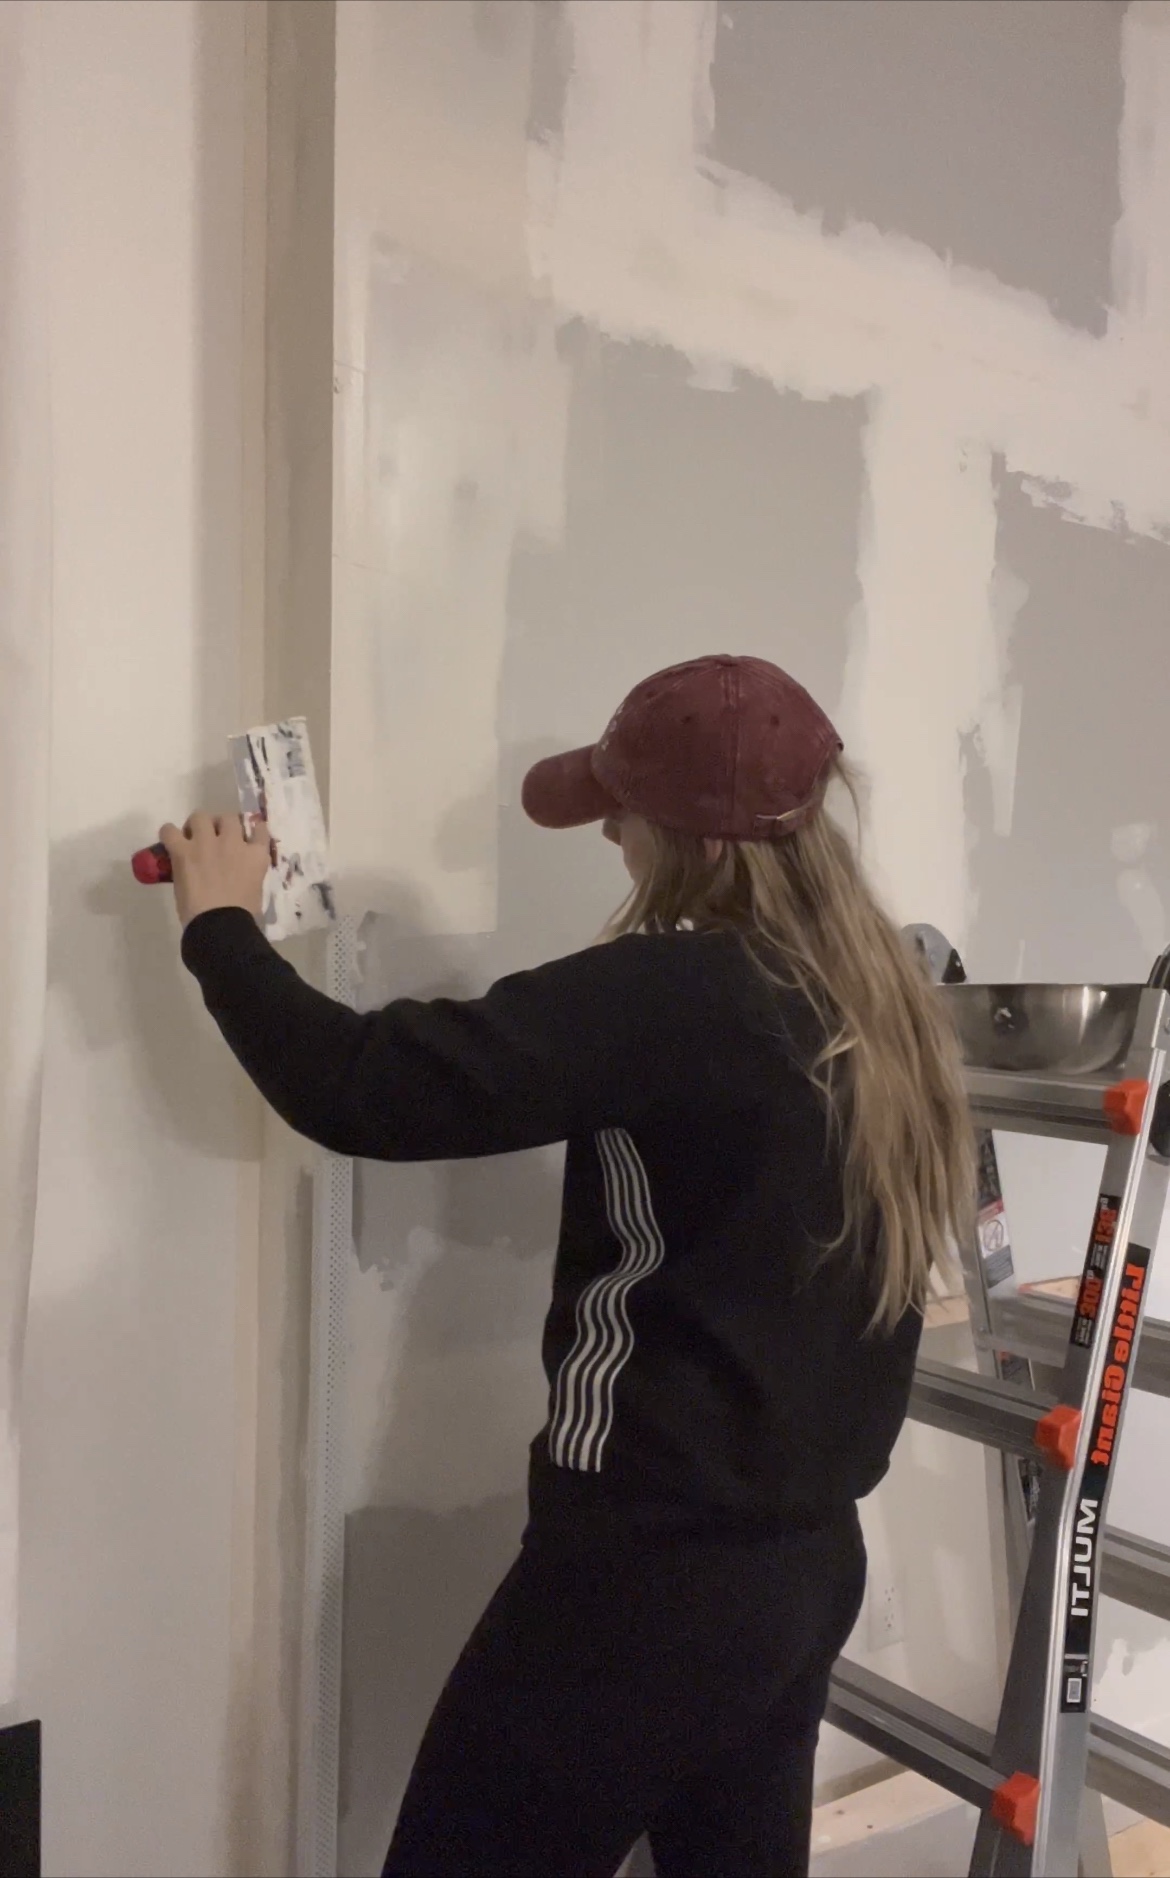
After the framing was complete, it was time for drywall! This was my first big drywall project, but it went really smoothly. I had to cut the 4×8 sheets down in order to fit in my car so there were more seams than necessary (if I had a way to transport full sheets). I recommend watching a few drywalling videos on YouTube, since I’m no expert.
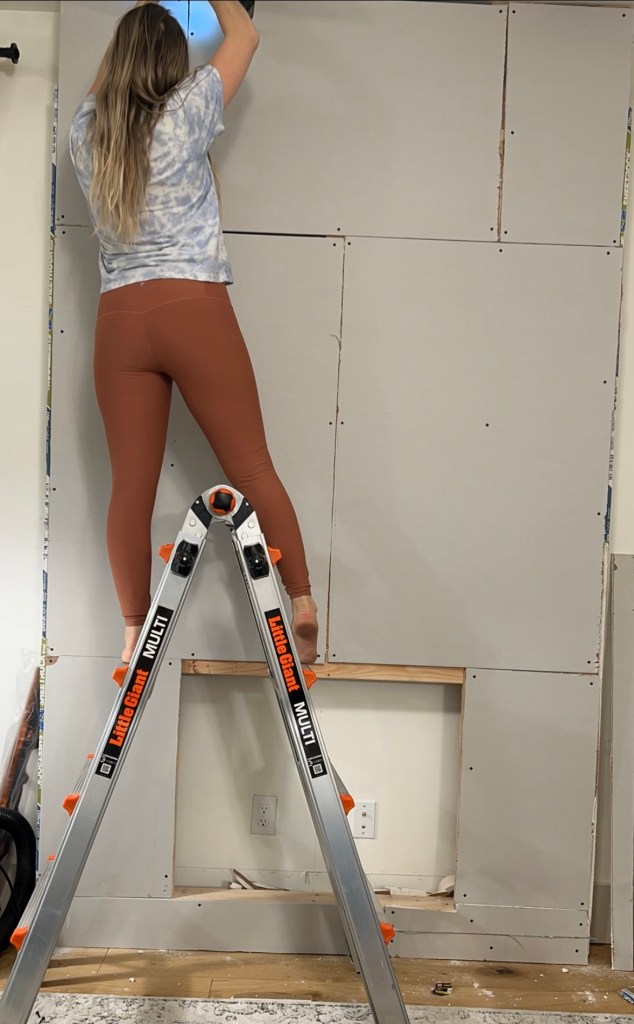
Basically, I spread a thin layer of mud over the seams and then smoothed out some drywall tape over it. Then after that was dry, I added mud over top of it, let it dry, and sanded it smooth! I did that twice and was happy with the results.

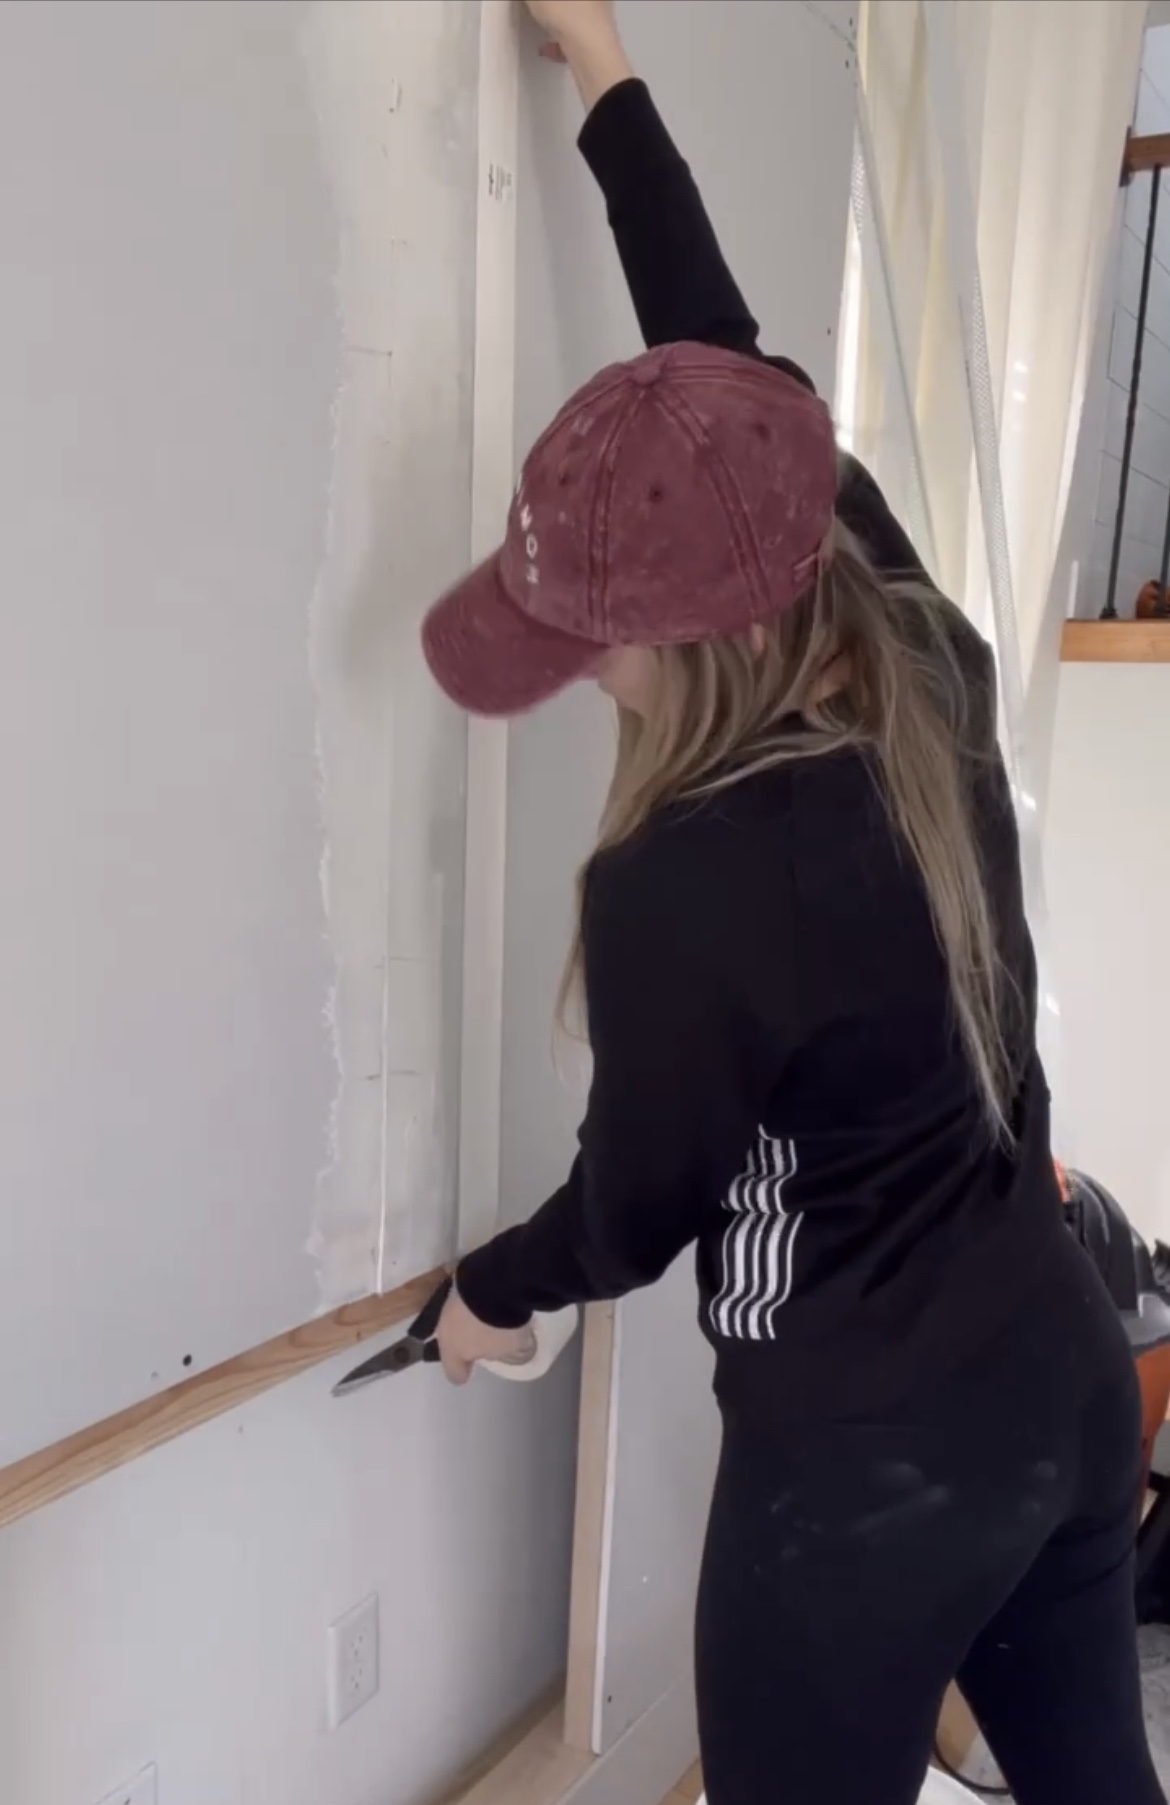
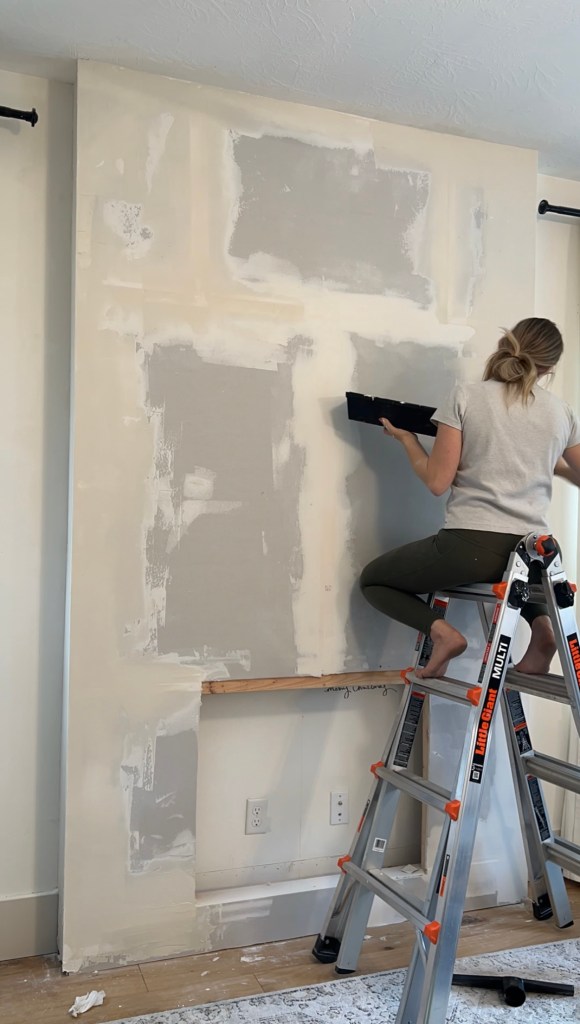
I used a corner bead in the corner and came across the coolest hack for attaching it – spray adhesive. Just spray the corner and your bead with spray adhesive and then it’ll stick. Magic! Then you can layer on your joint compound and sand…and layer…and sand…until you’re happy with how it looks.

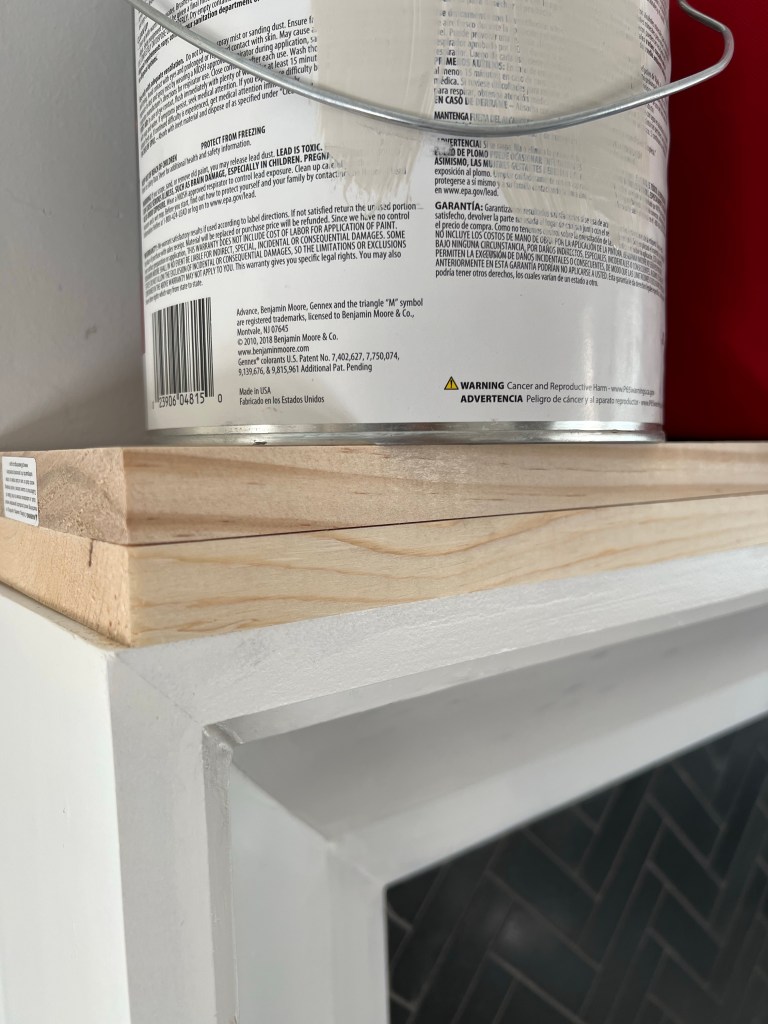
Make sure you prime with a drywall specific primer, then you’ll be ready to paint! I matched my wall color and used Benjamin More Simply White…but I’m getting ahead of myself.
Onto the mantel.
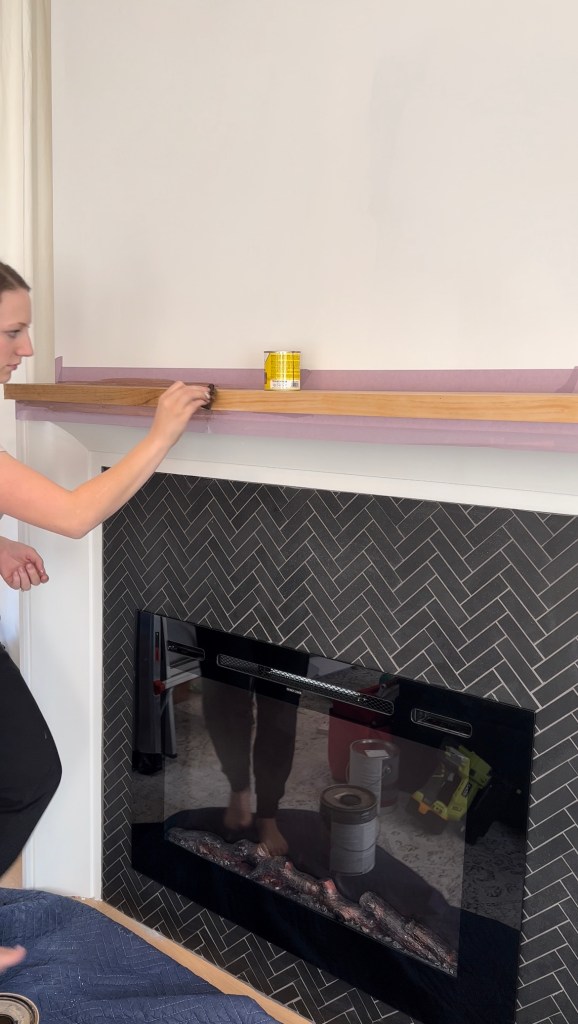
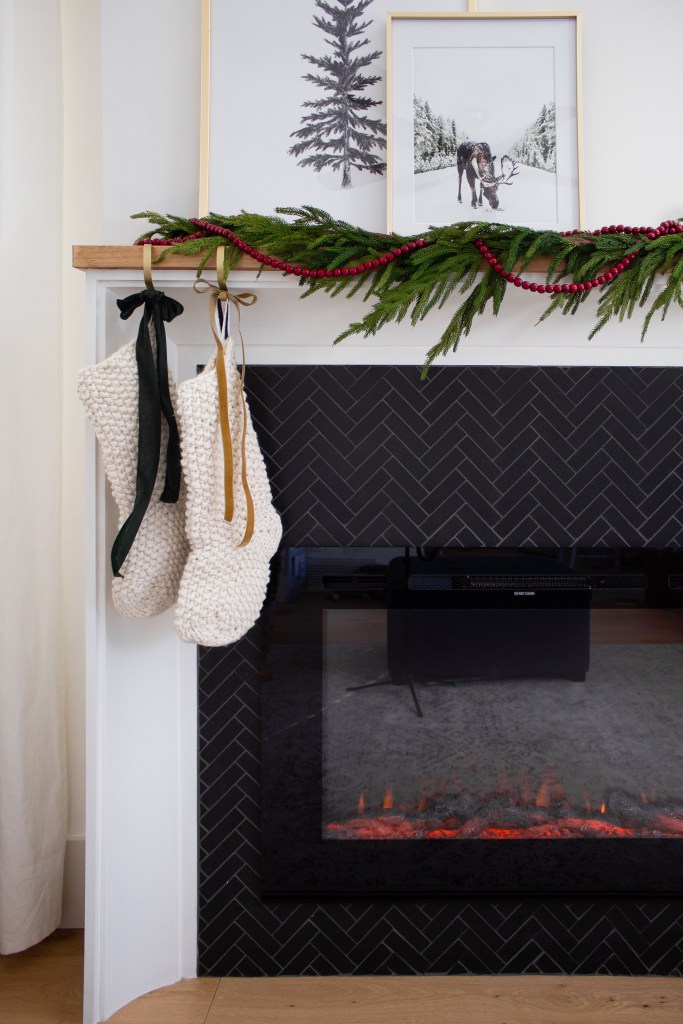
I saw Jen from Making Pretty Spaces on instagram use crown molding to build a mantel and new I wanted to incorporate that. So I built a “frame” using 1×6 preprimed pine with wood glue and a nail gun. The inner pieces just butt up against the outer pieces and then are nailed in that way. I screwed the back board into the studs of my framing for stability.
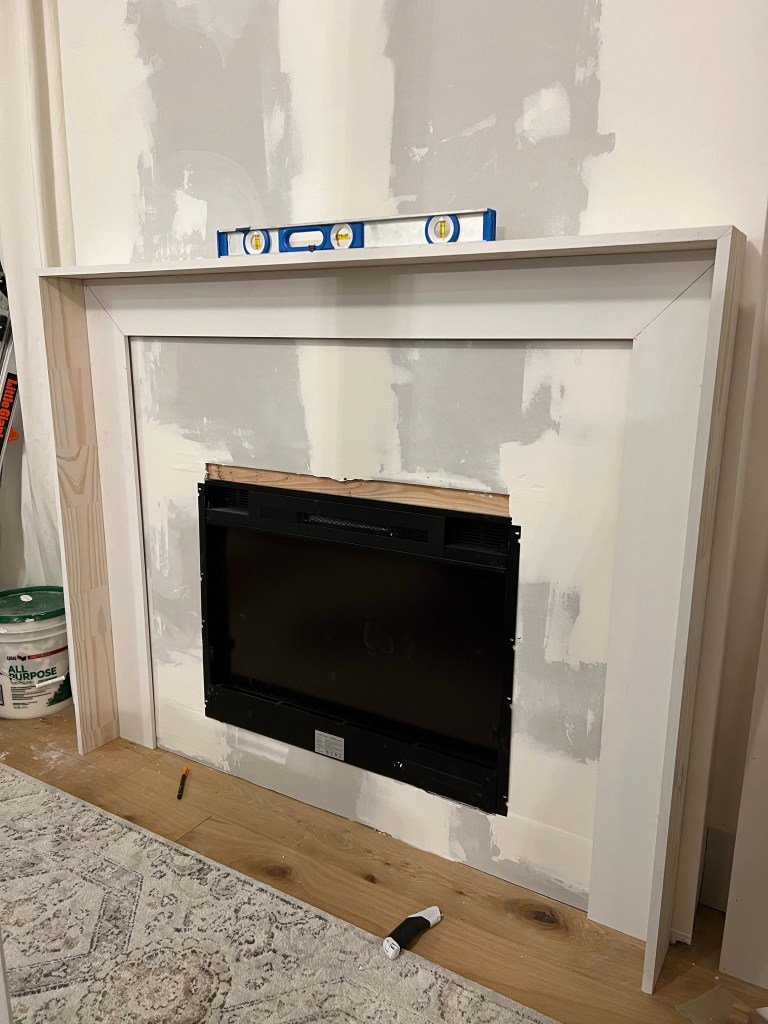
It was a little tricky to get the crown lined up correctly, so I ended up assembling it together first (well, after trying and failing to get it perfect trying to add it in pieces) and then slotting that into the frame I had made. I used wood glue and finish nails to secure it, then caulked the seams and painted it the same color (Benjamin Moore Simply White) with Benjamin Moore Advance paint.
So the tile…I accidentally got a super good deal on this amazing tile! It was mismarked and I asked a store worker to help me find the inexpensive stuff because honestly they looked identical, but she ended up just giving me the expensive, real stone tile for the same price as the porcelain tile. I’m not complaining!

I used musselbound (which is basically a giant, double sided sticker) that I had leftover from my powder bath project to attach it, so it went pretty quickly. The most important thing when working with musselbound is to make sure that your tile is completely dry. Cutting your tile with a wet saw will, of course, leave it wet, but it won’t adhere to the musselbound properly unless it’s dry. I have used my oven in the past to speed up the dry time, but this time around I went for the hair dryer as my weapon of choice and I think it was a lot quicker! Here is a blog post I wrote on how to tile, and you can use the musselbound or mortar.
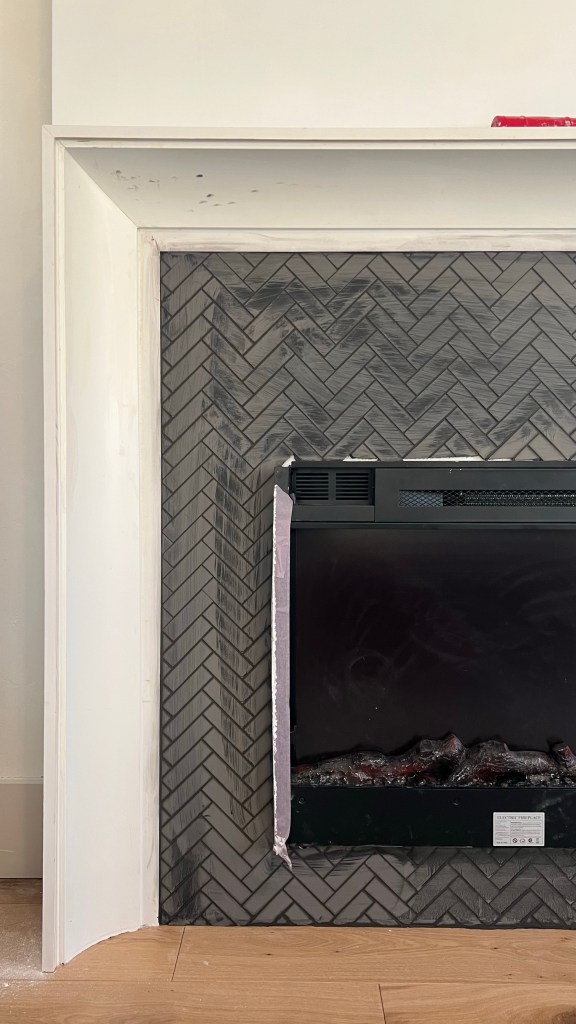
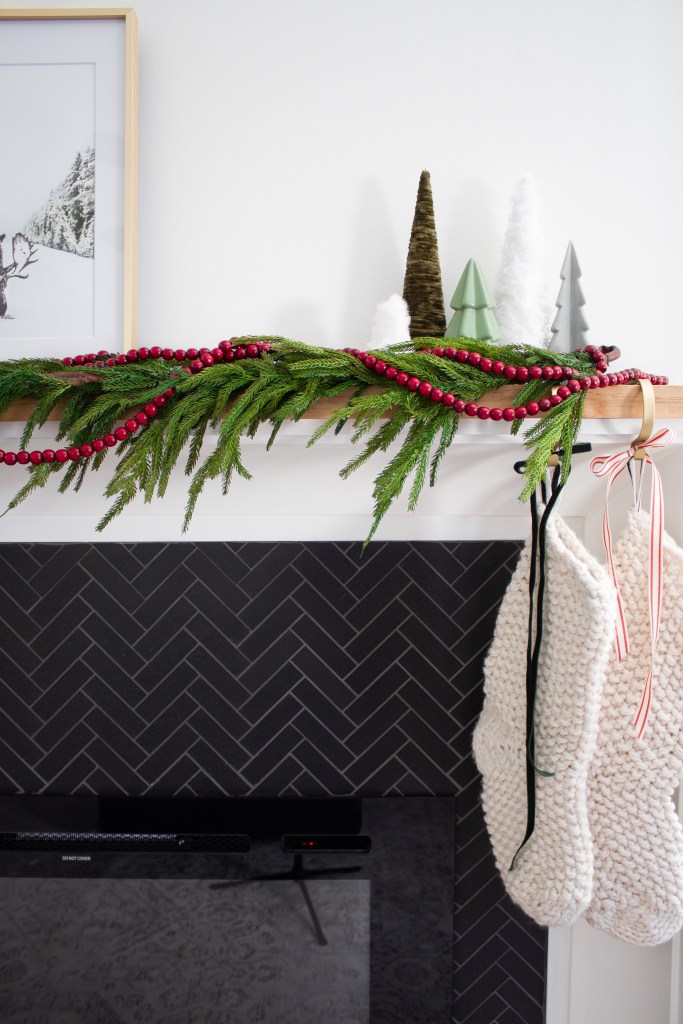
I went with a pretty dark grout, but next to the almost black tile it still shows some contrast, which I like.
To finish everything off, I added a wood top to the mantel. I took a 1×8 pine board and nailed that on top of the mantel. Then I took a 1×8 select pine board and glued that on top of the other piece. The select pine is more expensive but absolutely worth the cost since it’s the piece you can see. The regular pine is fine to use as the base piece since it’s totally buried. Then I wrapped the whole thing in 1×2 select pine so it looks like one thick piece of wood, but is more cost effective.
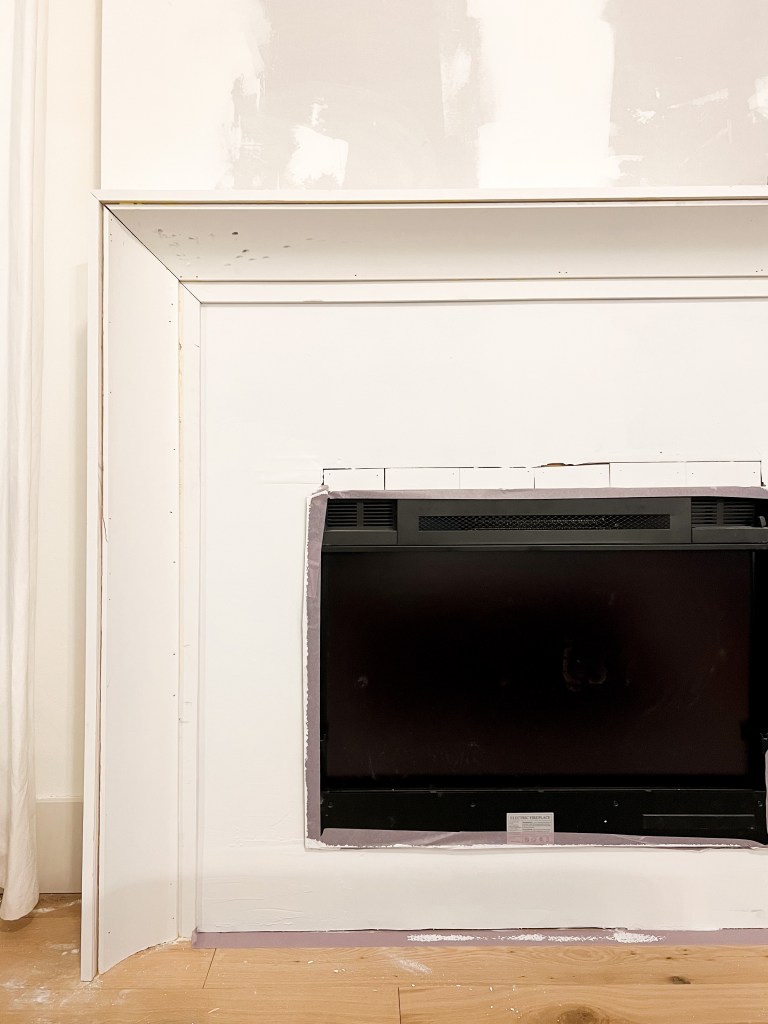
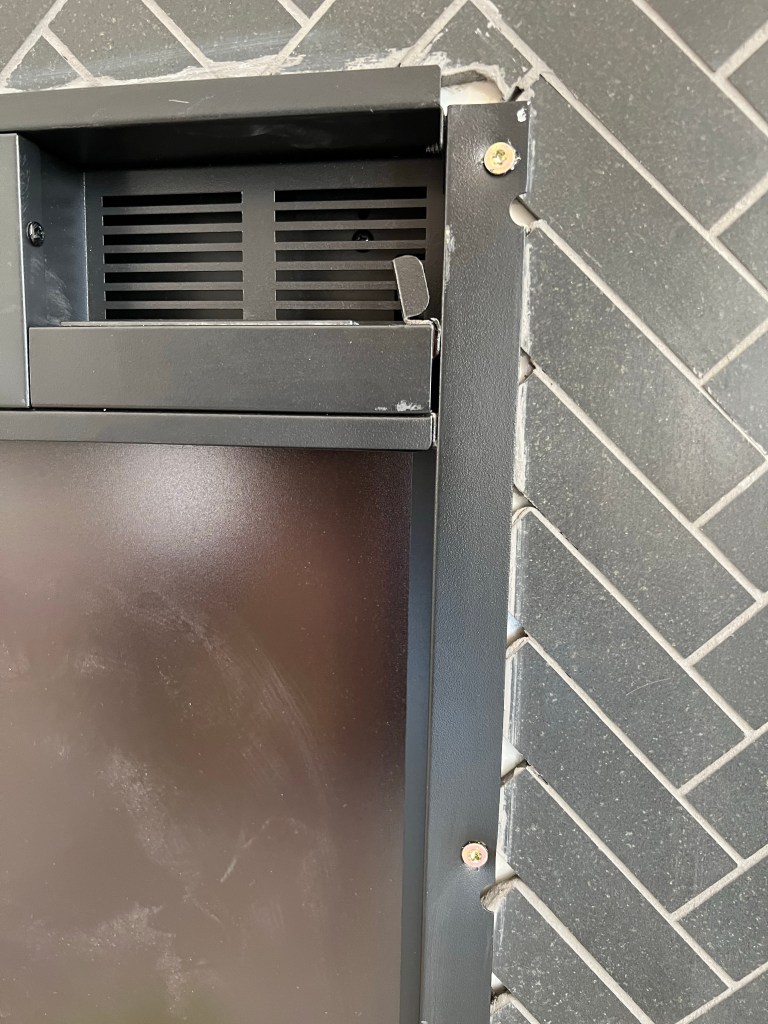
The fireplace insert from Touchstone screws right into the studs in the frame I built and then has a sleek glass panel that fits over top of it to give it a nice clean finish. You can select a few different fillers (logs, stones, or rocks) but my preference is definitely the logs.
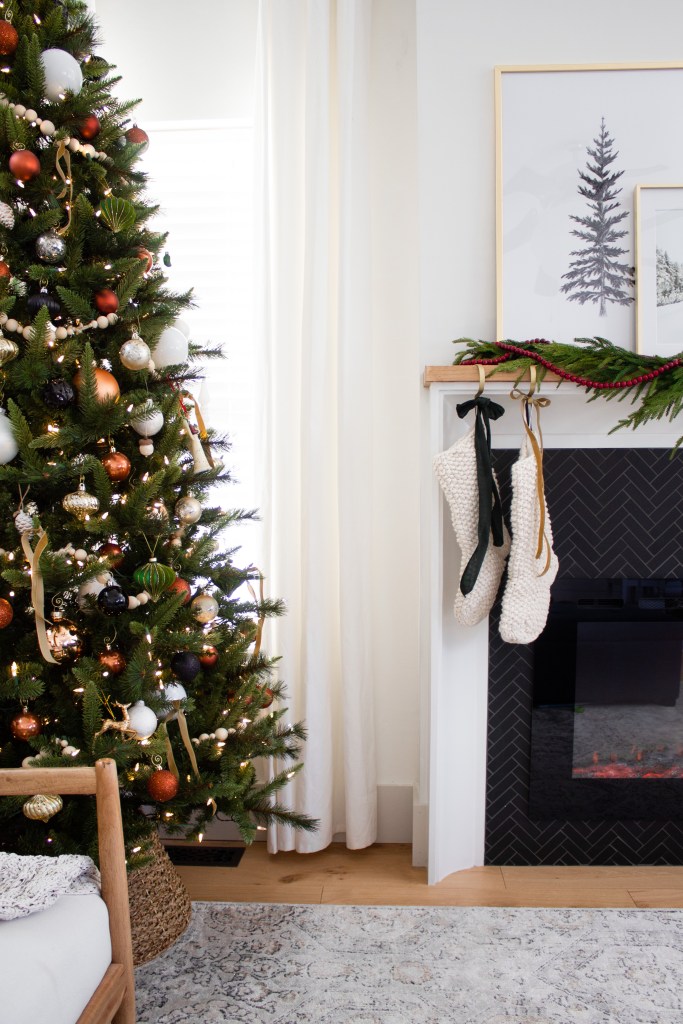
And there it is! My beautiful fireplace just in time for Christmas! Not only do I love the way it looks, but it’ll also raise the value of my home which I call a huge W-I-N!


I hope I’ve inspired you to put a fireplace in your home! It can seem so intimidating, but I promise this was one of the easier projects I’ve tackled over the last couple years.
With love,
Mercedes ♥
Cost Breakdown
Framing : $55
Drywall supplies : $73
Surround : $95
Tile and grout : $88
Mantel : $50
Insert : $550 (I was gifted this item, so my costs were lower)
Total : $911

Love this! Could you let me know what the dimensions of your fireplace surround are?
LikeLike