

Disclosure: Some of the links provided are affiliate links, which simply means I may earn a small commission (at no additional cost to you) if you shop through one of my links.
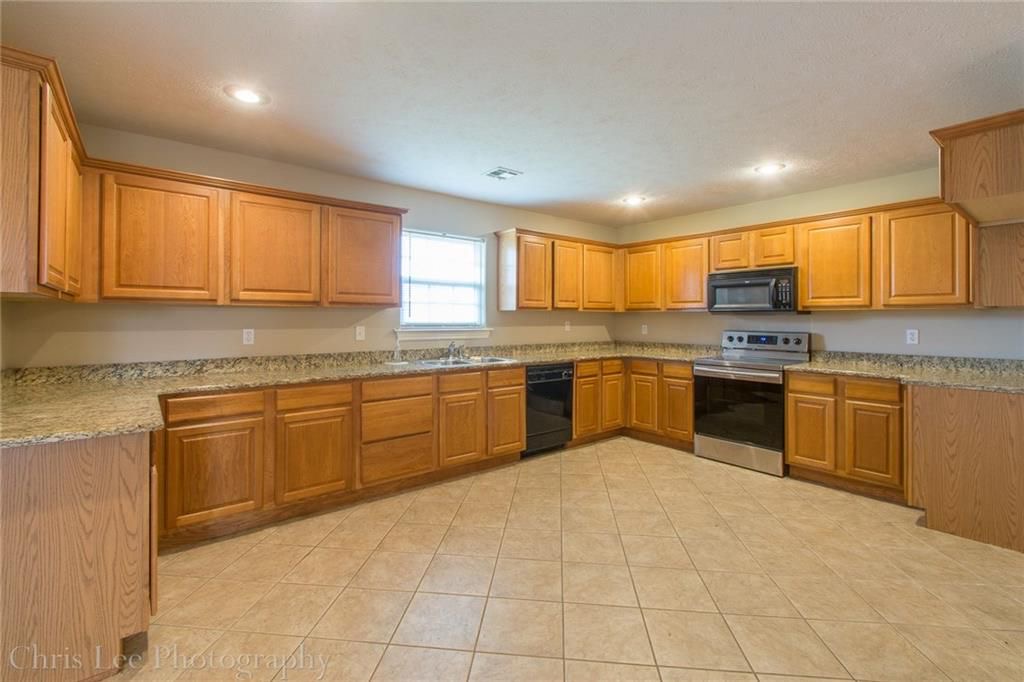
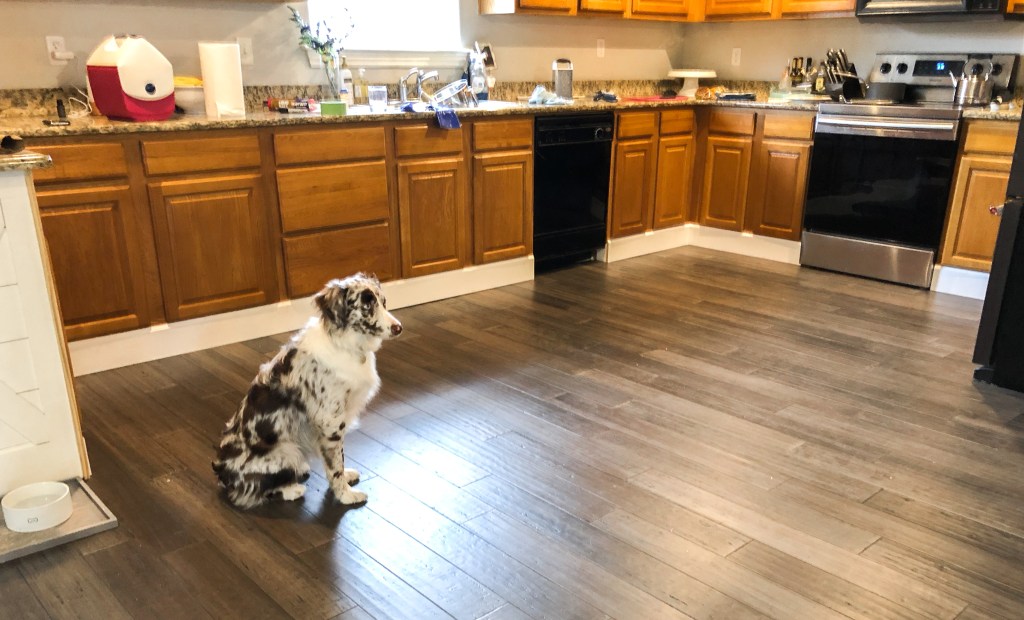
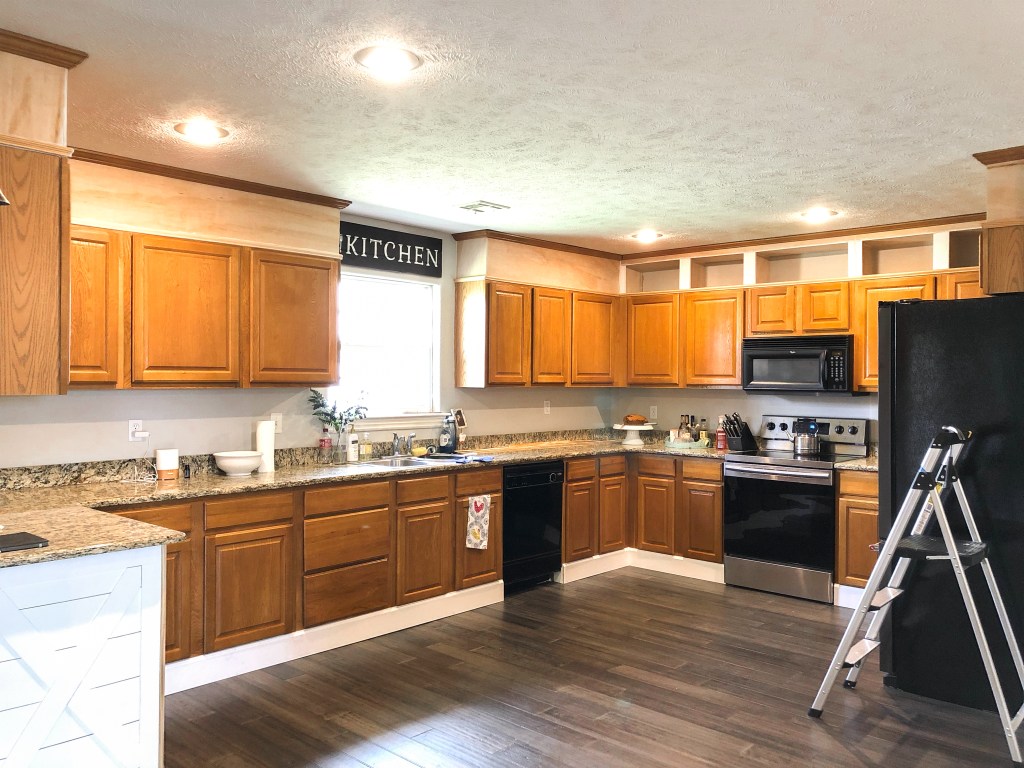
When J and I first walked into this house while we were house hunting, I just had a feeling this house was the one. There were problems that created a list of projects a mile long, but the house had just enough redeeming qualities to make me really excited about what I could turn it into. One of those redeeming qualities was the massive kitchen.
Want to see what projects I’m working on now? Follow me on Instagram!
Originally, we thought we would be able to put a massive island continent right in the middle of it, which we knew would look dreamy. After getting our refrigerator, we realized that the only way to get a big island in here was to reorient the fridge and knock a wall back a bit, something we aren’t ready to tackle yet. Especially since it would mean redoing some of the flooring, which J still has daymares about, haha.
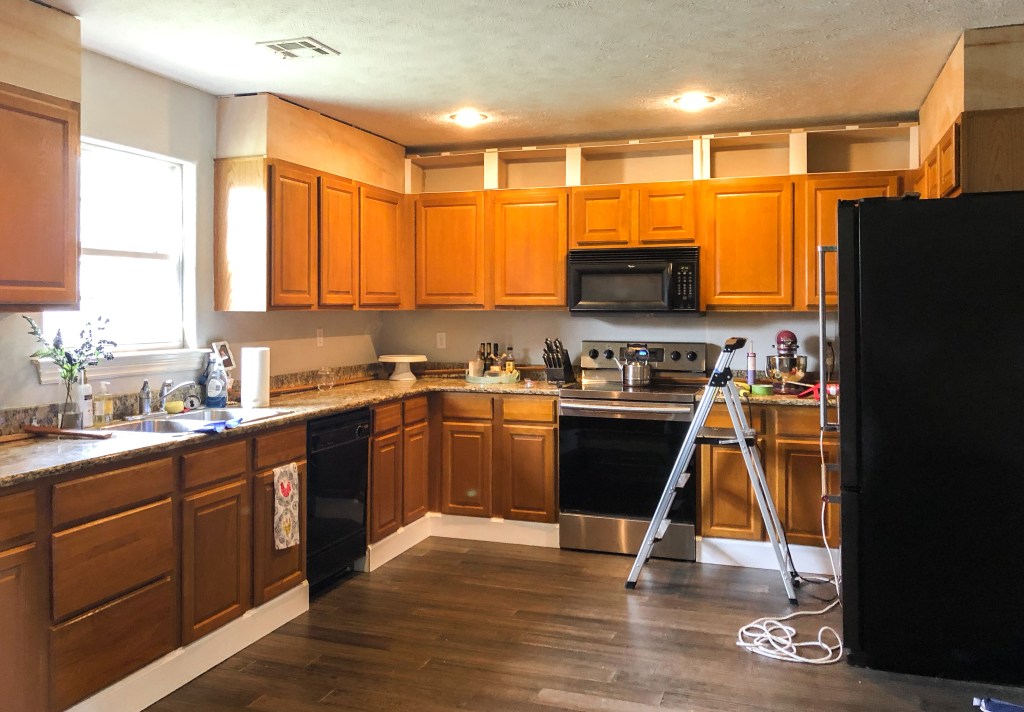
While I would have loved to replace all of the cabinets with a more modern look, I decided not to for a couple of reasons. One, the existing cabinets were in good condition. Other than leaning a little more traditional than maybe what I would have picked, there wasn’t anything wrong with them. Two, I know if I replaced the cabinets I would want to tackle the countertops. The existing granite is also not my preference, but it’s really nice, really thick stuff. That combined with the fact that there is so much counter space and so many cabinets (yay for space!) meant that the dollar sign next to that project was way to big for us.

So instead of replacing everything, I decided to use what was all ready there and give it a little more oomph! The oak cabinet color and the wrong color light bulbs really made this corner of the house feel like a cave, so the very first thing I did was replace the lightbulbs. There are 4 recessed lights and a decently sized window, but no under cabinet lighting , which is something I want to add in the future. I replaced my bulbs with new 3000K 800 lumen LED lights. This post from Chris Loves Julia is incredible to help you determine what color and lumen bulb you need – you’ll be shocked how different a space can look simply by changing out a couple bulbs.
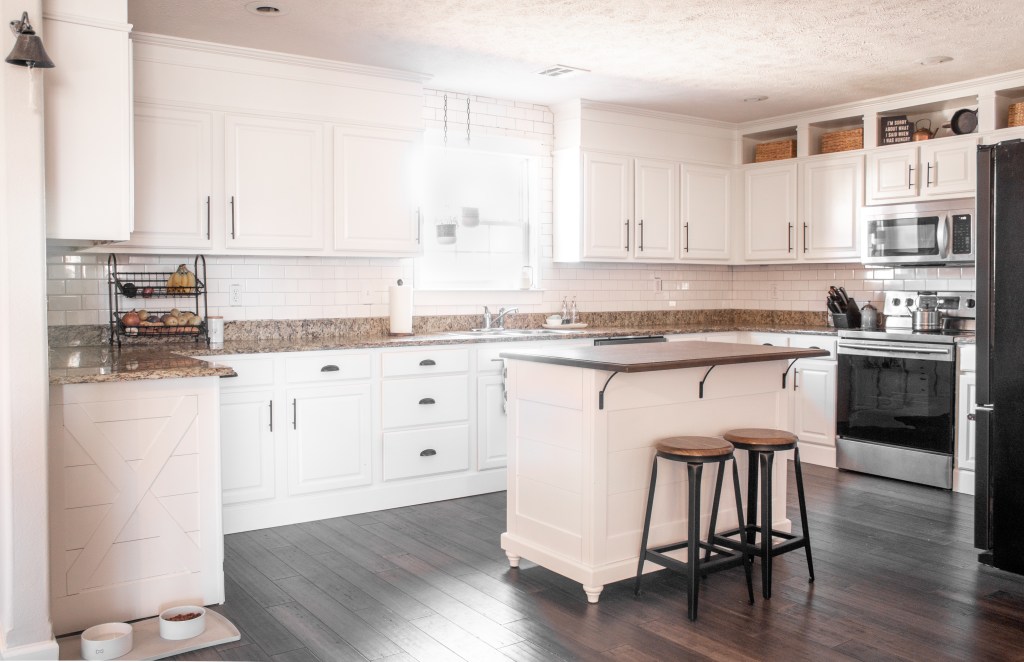
In addition to lighting, this was my to-do list in the kitchen:
- Trim out toe kick
- Build cabinets to ceiling
- Shiplap end cabinet
- Paint cabinets
- Add hardware
- Add backsplash
- Solve island problem
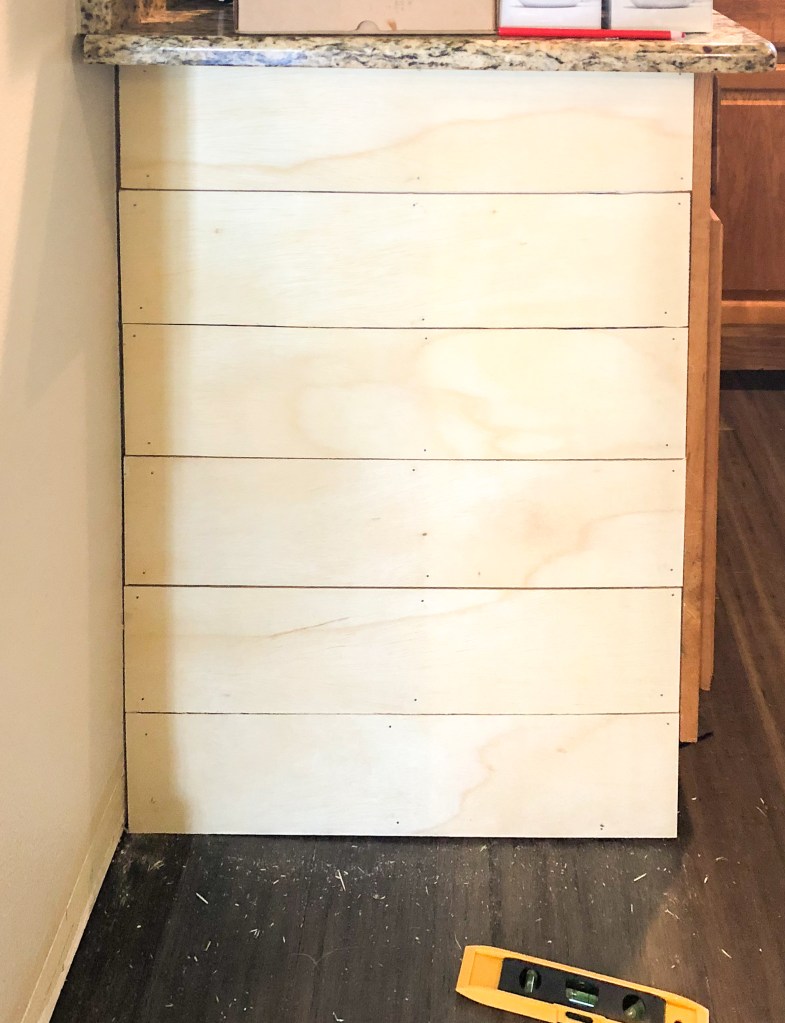
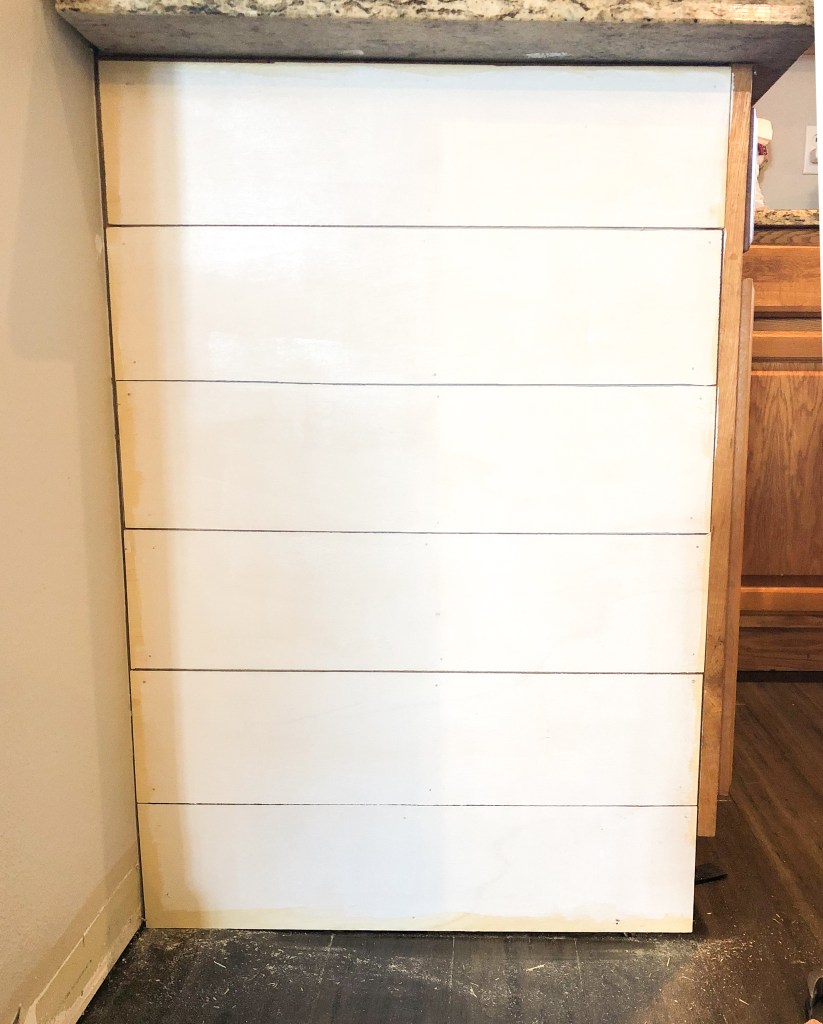
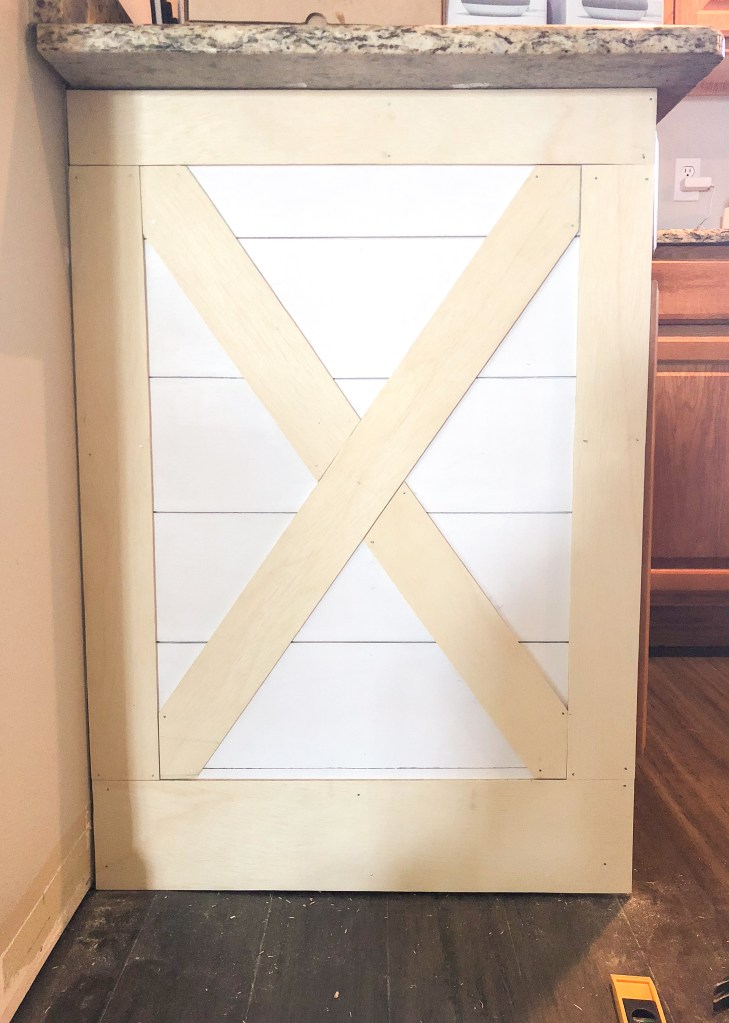
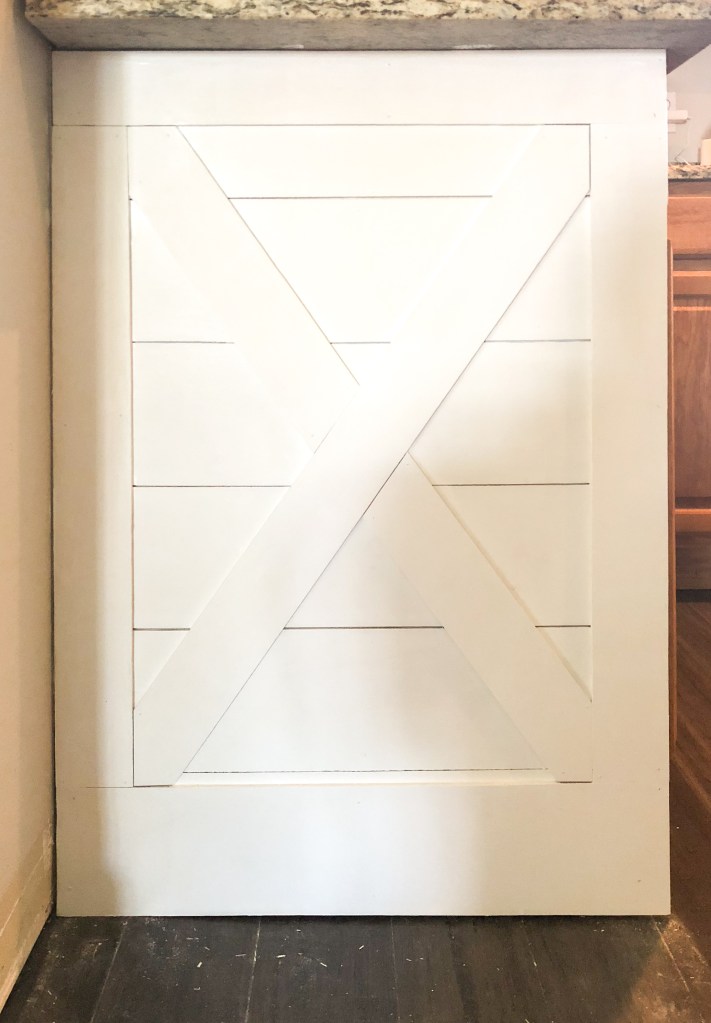
shiplap cabinet end
The first thing I did was one of the easiest – I added a fun farmhouse touch to the end of the cabinet run. We only have one end cap, so it only took me a few hours to do this. I used plywood cut into 6″ strips and nailed them on using tiny 1/4″ nails so they wouldn’t poke through the other side of the cabinet. I used the same plywood (cut down to about 4″) to add a frame and an X through the middle. Then I primed and painted it. It was literally that easy! Maybe I’ll do a more in depth tutorial on how to do this sometime…
building out the toe kick
I really wanted to add trim around the toe kick area to dress the cabinets up a little and make them feel a little more custom. In retrospect, I wish I would’ve cut an arch out of the area under the sink. That spot bothered me a little, but I don’t notice it any more.
I nailed support blocks to the toe kick so that we had something to nail the baseboards onto. I used scrap wood for these, which meant mostly 1x2s, but in areas where it might be kicked more, I used 2x2s. It’s been over a year and I haven’t noticed a difference in stability between the two types of blocks. I also added a small piece of wood cut to fit the spaces to the sides of the dishwasher so that when we added the baseboards, there wasn’t a gaping hole there.
The baseboards throughout the rest of our house are 4.25″ tall, but we chose the 5.25″ version for the kitchen. That height allowed us to nail the top of the board directly onto the front of the cabinet box without hitting the doors.
After nailing the boards on, I caulked the seams and filled the nail holes. We had a great little helper for this project!

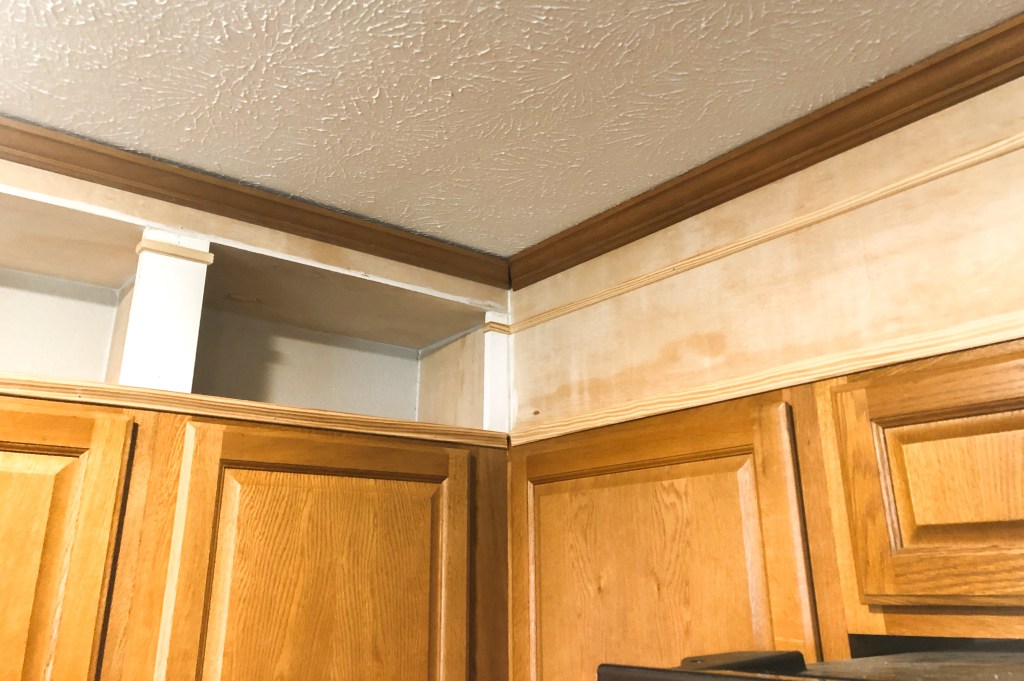
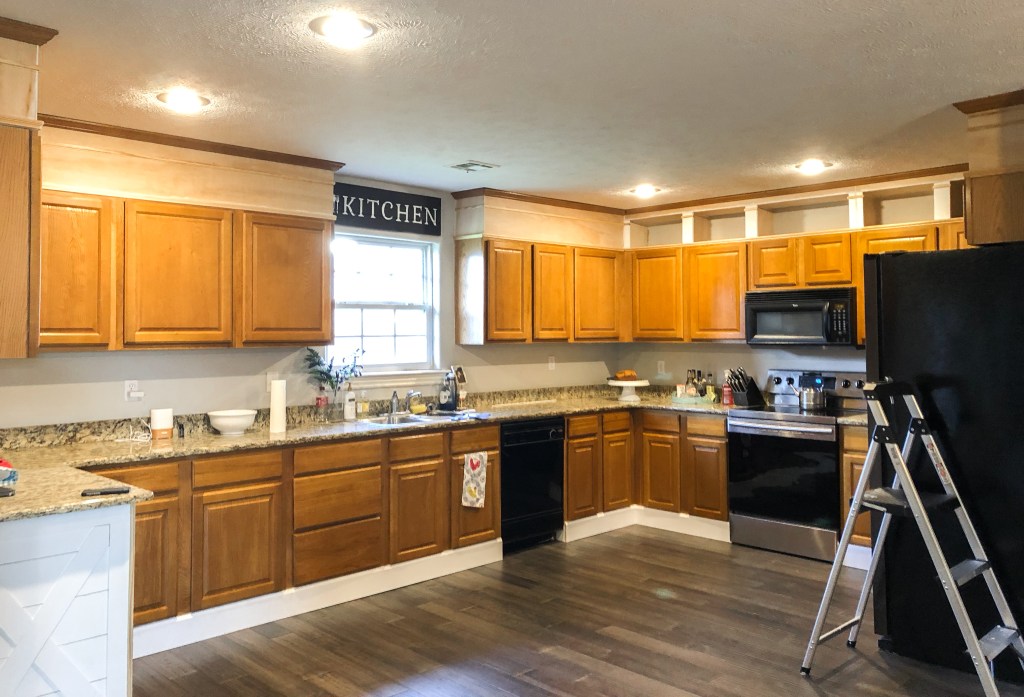
building cabinets to ceiling
(If you’re going to tackle this project, I highly recommend this nail gun. It doesn’t require an air compressor and is budget friendly!)
This is where the story gets kind of funny. The day after we added the baseboards, we were FaceTiming J’s parents and showing them the kitchen. I mentioned to them that we would love for the cabinets to go to the ceiling, but it wasn’t a project I was going to tackle anytime soon. J agreed, but then the wheels in my brain started turning. What can I say, I like to solve problems! After doing some research, I figured out that I could get the cabinets build up to the ceiling for less than $100, so I decided to do it and surprise J.
First, I removed the crown molding that was attached to the top of the cabinets. Then I glued and screwed support blocks to the studs in the ceiling and glued support blocks to the tops of the cabinets. I cut thin plywood to the right size and nailed it onto the support blocks.

When I was about 75% of the way done with this step, J came home from work to find his 5-month-pregnant-wife standing on top of a ladder/countertop nailing up plywood. Surprise! Haha.
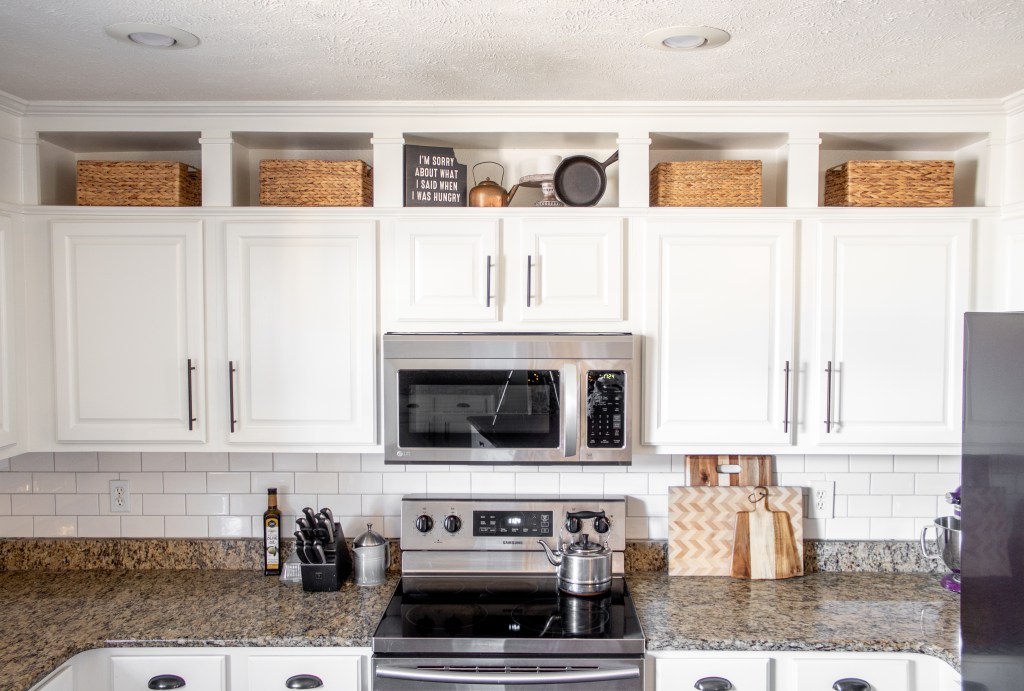
I thought that if I did this plywood around the whole kitchen, it would be a little too boring. I’m all about clean lines and simplicity, but I felt like it would turn into a giant white slate with no interest. To combat that, I built some cubbies to go on the top of the cabinets on the appliance wall. I love the four cubbies that I’ve put baskets in, but honestly I don’t love the one above the microwave, so I have some ideas on how to modify that…. coming soon!
To build the cubbies, I built boxes out of the plywood and trimmed out the front with 1x4s. On each end, I used a 1×2 so that proportionately, it was the same as the 1x4s in the middle.
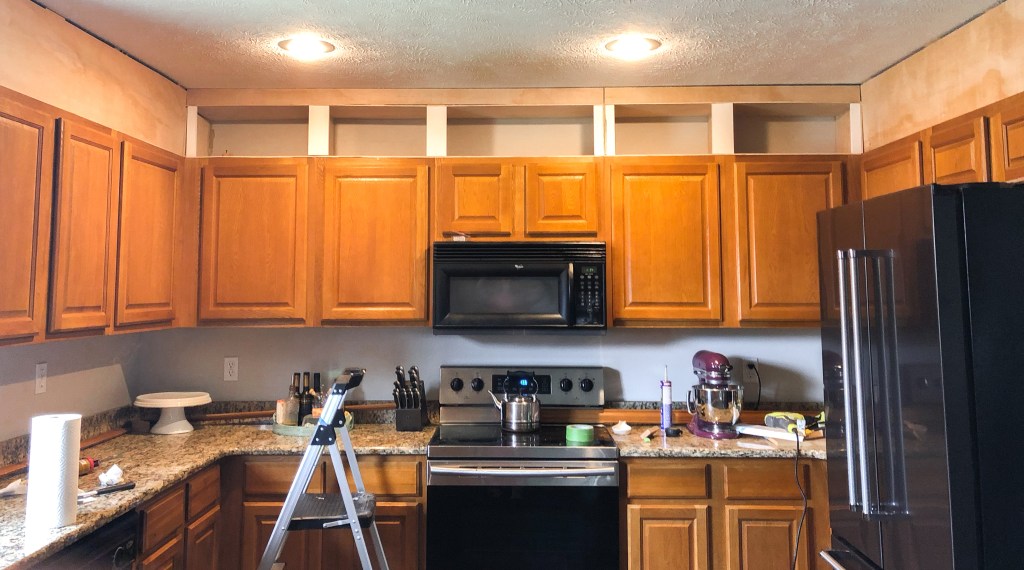
Then I cut a skinny strip of plywood to fill the space between the top of the boxes and the ceiling and attached it the same way I had the rest of the plywood strips.
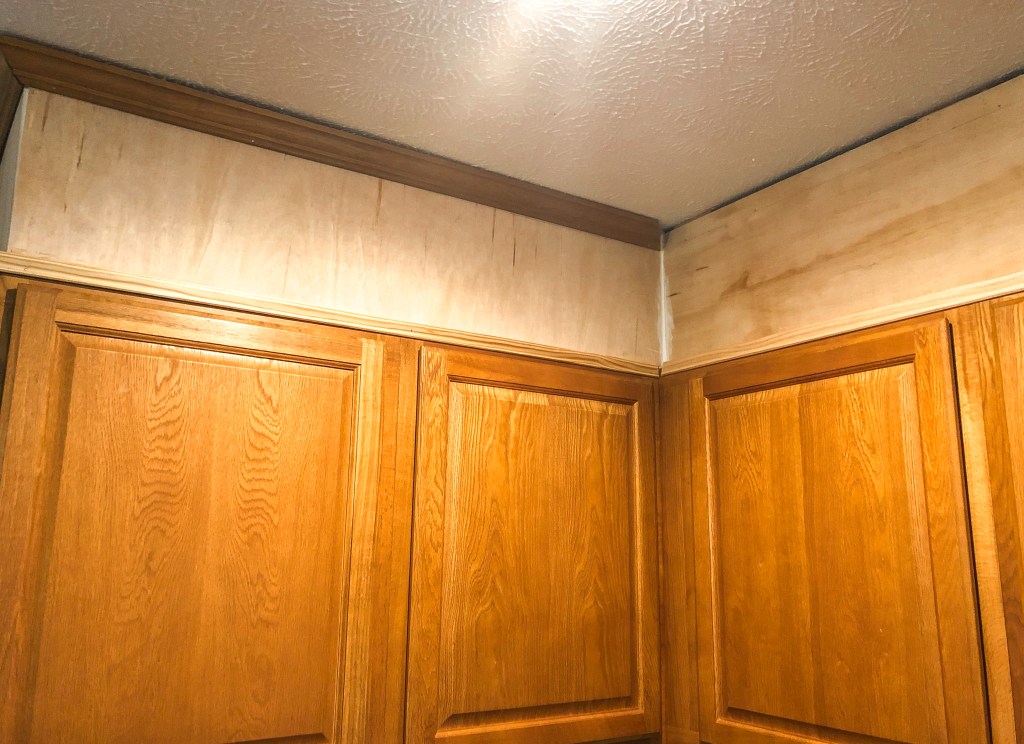
I reattached the crown molding to the top. This process taught me that I hate cutting/attaching crown molding up and I’m pretty sure I never want to do that again! I also added some chair rail trim around the seam between the plywood and the cabinet.
To make the crown molding feel a little chunkier, I added a run of thin trim below it. I also continued this thin trim and wrapped it around the 1x4s that border the cubbies.
Lastly, I sacrificed my fingers and caulked all of the seams and filled all of the nail holes. Caulking makes such a big difference, but caulking a massive project like this makes my fingers raw!
Of course everything was screaming to be painted, but there’s no way I could cram all of that into one post! Check out that post here.
With love,
Mercedes ♥

Wow! That looks wonderful!!
LikeLike
Thank you!
LikeLike
Hello I love your kitchen!!! Did you use BM White Dove your cabinets and trim?
Thanks
LikeLike
Thank you so much! Yes, I used White Dove on the cabinets and the trim throughout my house.
LikeLike
What color grout did you use with the backsplash?
LikeLike
Platinum! By Custom Building Products, available at Home Depot 🙂
LikeLike
Looks amazing! Can you provide details on the backsplash please?
LikeLike
Yes! It’s subway tile from Lowe’s, just 3x6s!
LikeLike
Can you tell me what color the granite is. I love it
LikeLike
Thank you! It was here when we bought the house so I’m not entirely sure, but my best guess is that it is Venetian Gold granite.
LikeLike
Hi there! I am going for the same color theme for my kitchen! For the cabinet hardware, do you have the specs for the cup pull (the dome shaped cabinet pull)?
LikeLike
Yes! They are linked in the my kitchen makeover part 3 blog post!
LikeLike
The nail gun link is expired. What is the brand and type of nail gun you used?
LikeLike
So sorry about that! I updated the link in the post and here it is too https://rstyle.me/cz-n/fwtg99dm2yp
LikeLike
Where did you get the baskets?
LikeLike
The Container Store
LikeLike