

I painted this striped design on the walls and ceiling of the water closet in the kids’ bathroom and I won’t lie, it was quite the time consuming project. Especially for someone like me who would trade a limb (okay so maybe not a limb but perhaps a kidney? Half a liver?) if it meant I never had to tape again. But I will say that the finished project was 100% worth it!
Want to see what projects I’m working on now? Follow me on Instagram!

I wanted to do something fun in here for my kids. Water closets are such a great opportunity to have a fun design moment. They’re small so you can go a little bolder than other areas and it won’t overwhelm the space. I fell in love with the idea of putting using a thin striped wallpaper and carrying it up onto the ceiling, but then I thought…why not paint it? So that’s what I did.
Materials
Disclosure: Some of the links provided are affiliate links, which simply means I may earn a small commission (at no additional cost to you) if you shop through one of my links.
- Tape (I used 3 rolls)
- Laser Level
- Paint
- Paint brush (roller optional)
- Measuring tape
Tutorial
Luckily even though the taping part is time consuming, this tutorial is pretty straightforward.
Before you begin, you need to decide how wide you want your stripes to be. Originally I thought I wanted 1” stripes but after a few rows of tape, they seemed to wide so I cut that width in half and went with 1/2”.


I started where my tub insert ends that way I didn’t end up with a weird half-stripe there. Using my laser level, I projected a straight line onto the wall and taped along the edge of it.

My laser line was too faint towards the top half of the wall to do it all in one go, so I did the bottom half of the wall first and then the top.

Once my first line was taped, I measured 1/2” from the edge, readjusted my laser, and kept taping until I had completed the entire room.
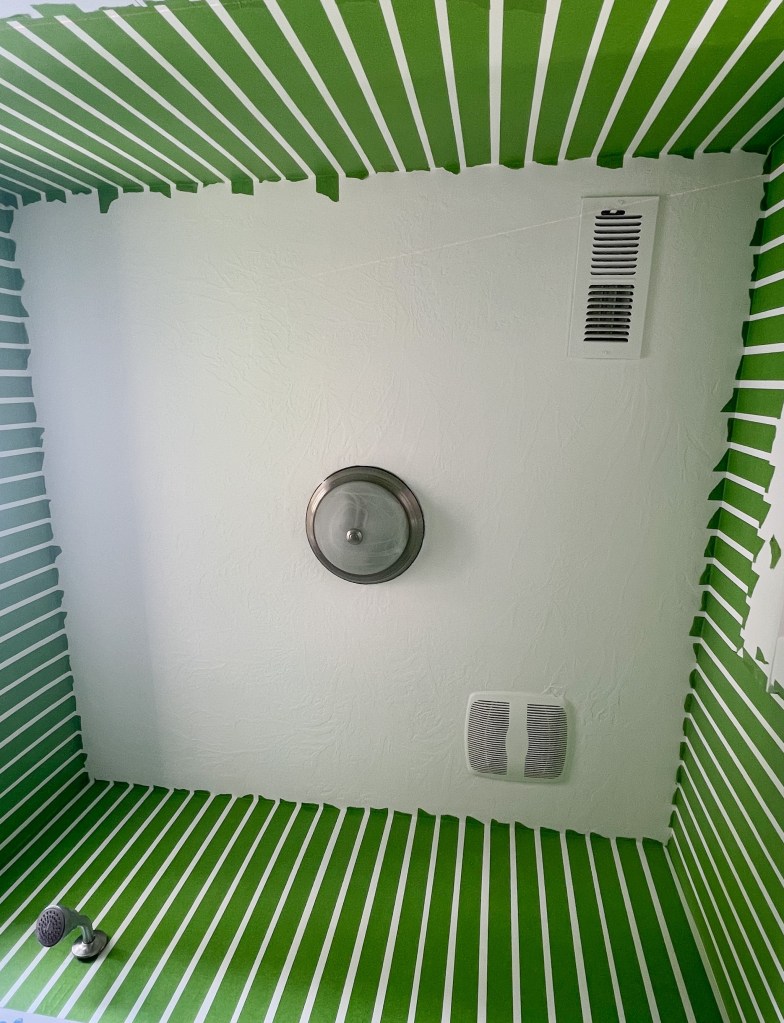

With the walls done, time to move onto the ceiling. If you’ve ever done a DIY project before, then you’re probably aware that walls and ceilings are hardly ever square. I wanted the stripes to connect across the ceiling, meaning that the stripe on the left wall would continue onto the ceiling and then down the right wall.
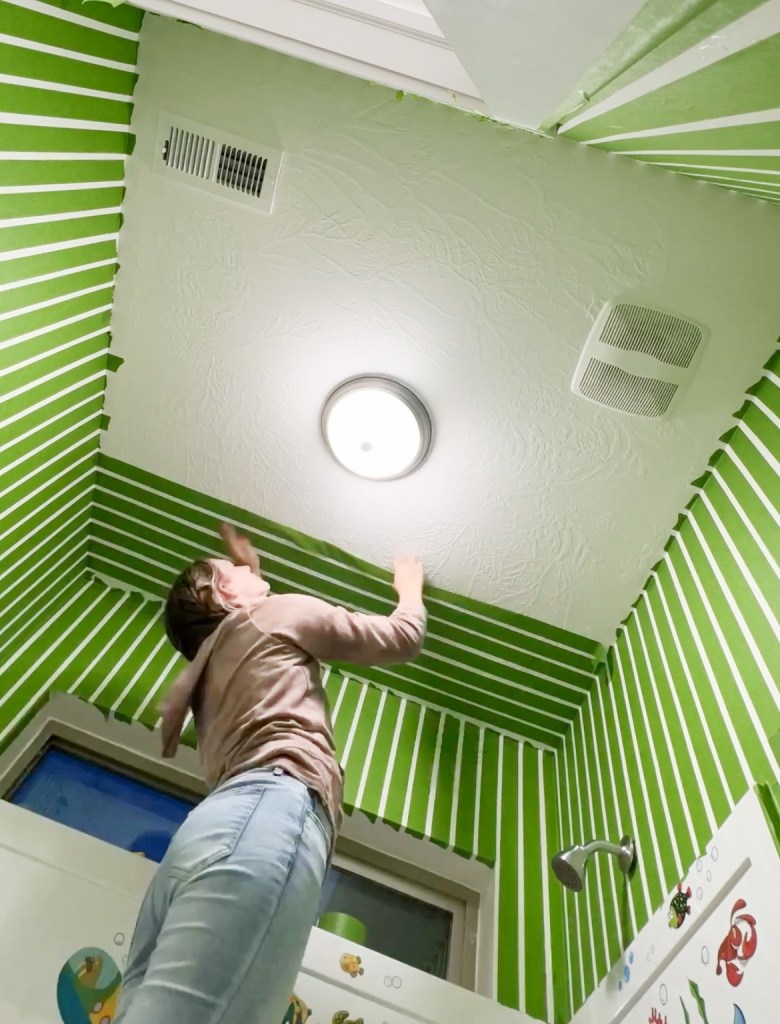
This proved to be a little bit tricky due to things not being square, but it was less complicated than I was expecting. I started my tape on one end, lining it up with the tape on the wall. Then, following the line of the ceiling to keep it relatively straight, I taped all the way over to the other side and connected it there. I continued that method – just eyeballing the distance between tape strips to keep it even – until the ceiling was done.

I stepped back regularly to see if what I was taping was looking straight and I had to readjust some spots a few times, but it worked!
After spending so much time taping, I really wanted the stripes to come out nice and crisp. So I sealed in the tape with the existing wall color. I painted the white color (simply white) over the edges of the tape and let it dry. Any paint that seeps under doesn’t matter because it’s the color of the existing wall and it seals it in so none of the contrasting paint can make it through.

Once that was dry I painted two coats of blue (Benjamin Moore Breath of Fresh Air) on top.

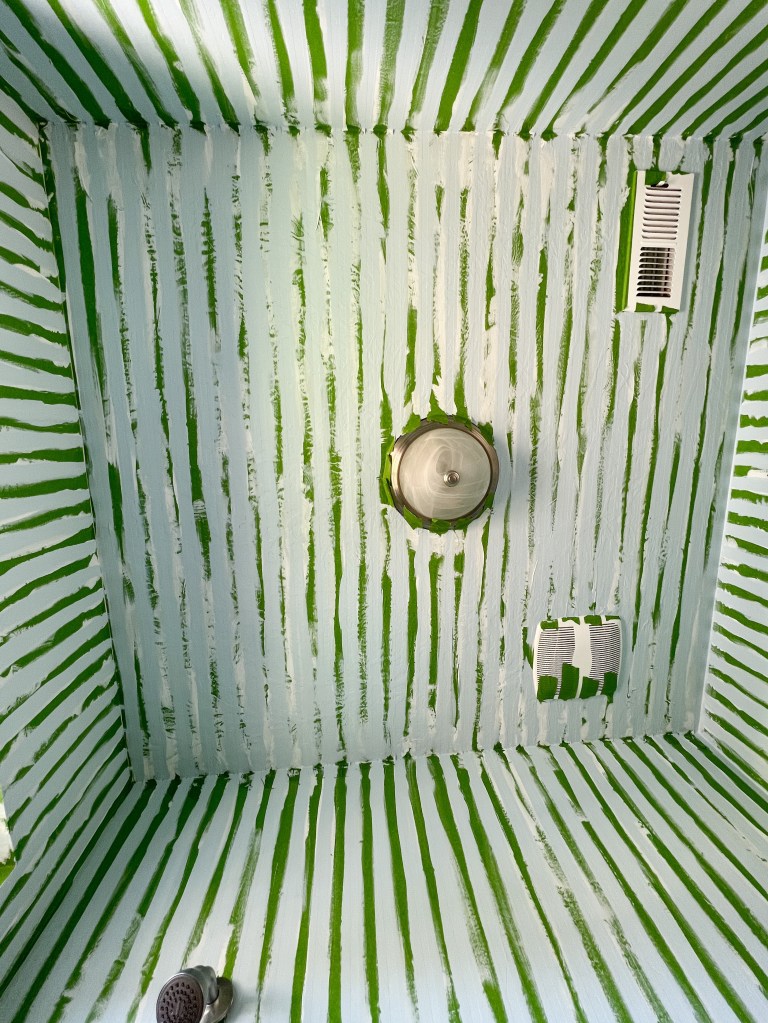
Now for the tape peel – this was the most satisfying tape peel of my life because it went from one wall all the way across the ceiling and down the other. And look at those crisp lines!

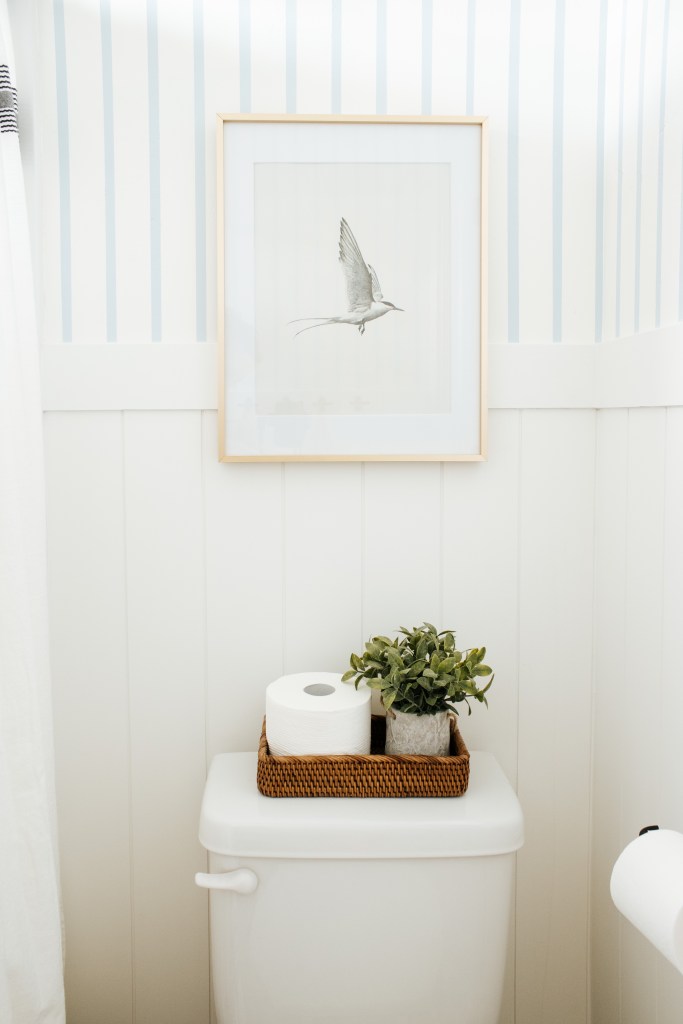
To finish it off I added this vertical shiplap paneling – more on that coming soon – and switched out the boob light (#deathtobooblights) for this more modern brass flush mount.


Do you want this look but would rather put up wallpaper? This is a great option.

If you want to see what I have coming next, don’t forget to subscribe and follow me on Instagram!
With Love,
Mercedes ♥

I love this, it looks great! I’m curious how many rolls of tape it took (approx) and if you saved money vs. wallpaper? About how long did it take you to tape and paint?
LikeLike
I don’t remember exactly how many rolls, maybe 3 or 4? Sorry I can’t remember better! A roll of tape is about $10, so if I spent $40 on tape and another $25 on a quart of paint, that puts me at about $65. Sooo much cheaper than spending a couple hundred on wallpaper!
LikeLike
Hi! I love this tutorial! I am planning to follow it for my baby’s nursery 🙂 Did you wait until the blue paint dried to take off the tape or did you take it off while it was still wet? Thank you!
LikeLike
I did two coats of paint and peeled while the second coat was dry but not cured. Pretty shortly after I painted it 🙂
LikeLike