
I have found a new obsession. If you have never painted floors before, go find yourself a floor to paint! Why is it so fun? I don’t know. Maybe it’s the soothing feeling of painting walls but without the achy shoulders the next day. Maybe it’s the thrill of painting on the floor, a spot we normally try to avoid getting paint… I don’t know. But really – so fun!

Follow along on Instagram so you don’t miss anything!
Tell me in the comments below if you’ve ever painted your floors and if you thought it was as enjoyable as I did! And now that you’re all hyped up for your next floor painting project, keep reading for a tutorial on how to do it!

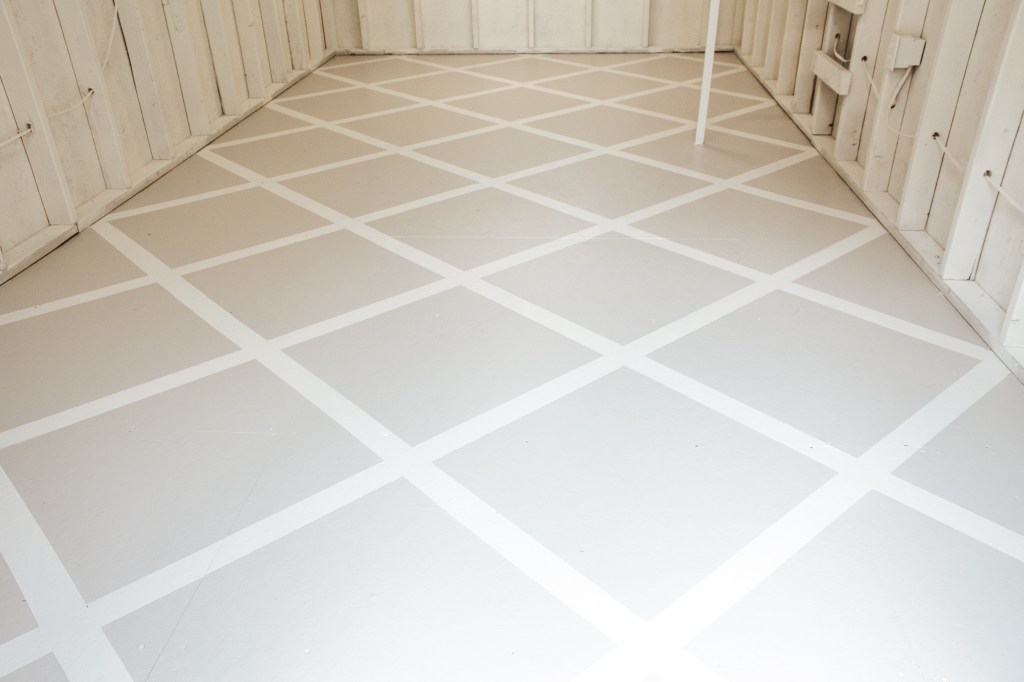
While I’m starting to feel like the paint work in this she-shed is never ending (I still haven’t touched the exterior), I am super happy with how these floors turned out. I used the same pattern that Jenni from I Spy DIY used in one of her kitchen remodels and I think it translated so well into this space!
Disclosure: Some of the links provided are affiliate links, which simply means I may earn a small commission (at no additional cost to you) if you shop through one of my links.
MATERIALS
- Primer
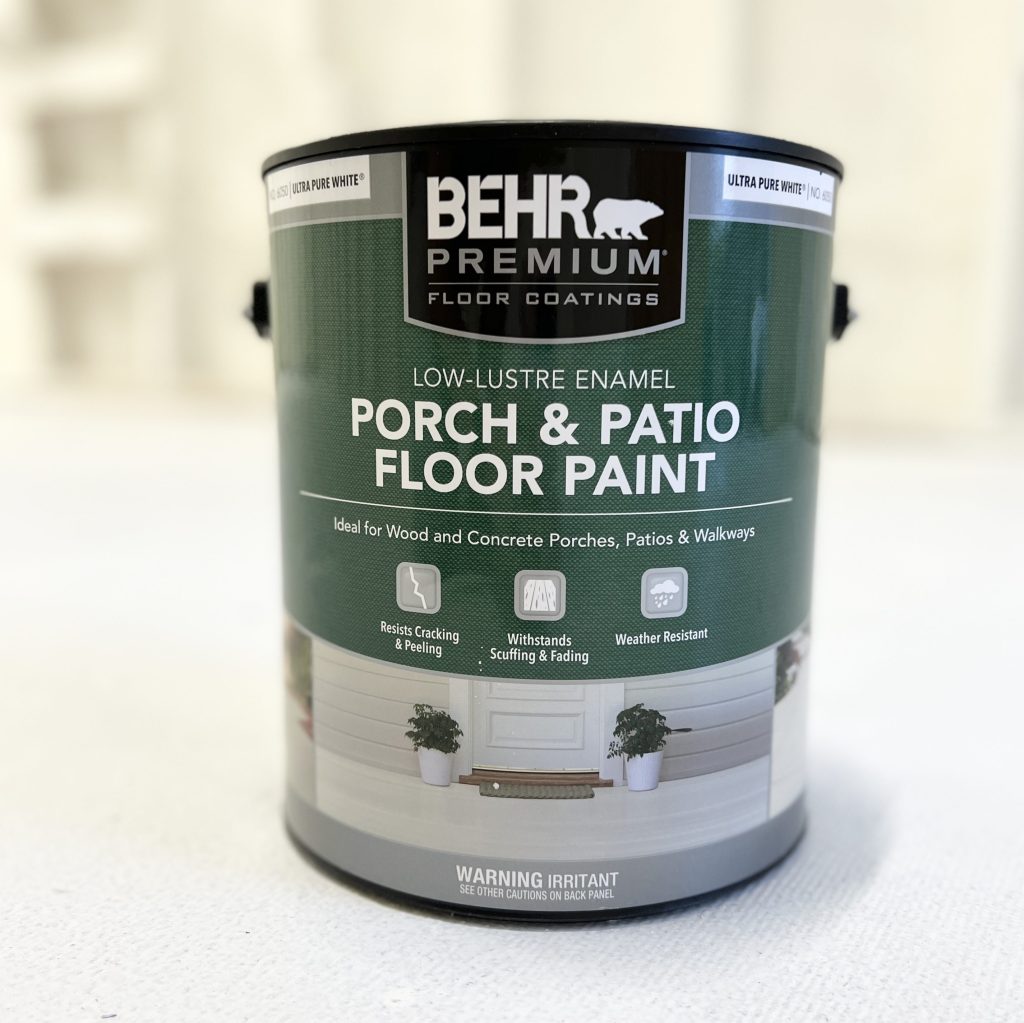
- Behr Porch and Patio Paint in contrasting colors
- 3/8” Microfiber roller covers
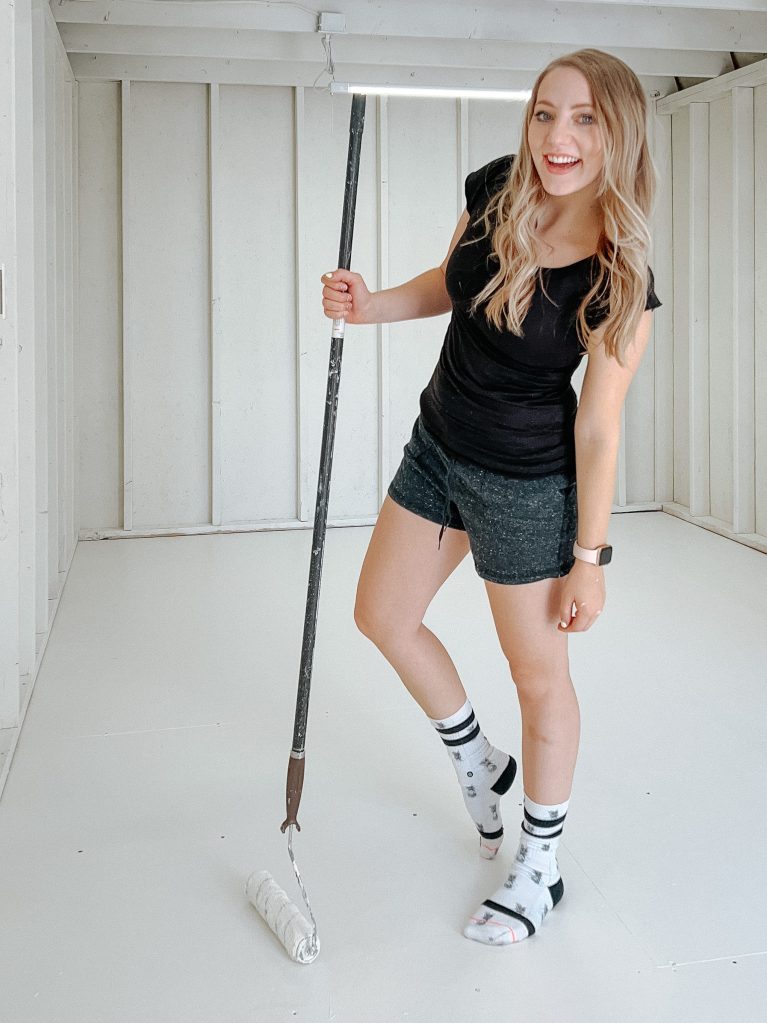
- Paint roller
- Paint roller extension pole (to save your back)
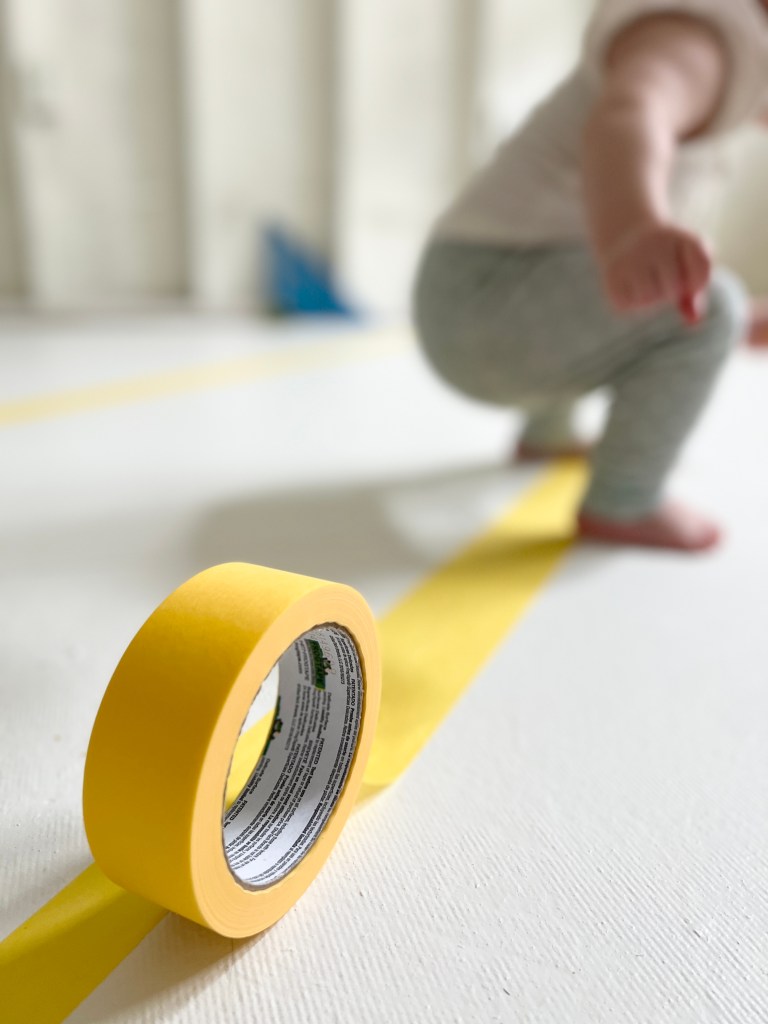
- Frog tape (I used 2 of the 1.4″ rolls)
- Paint brush for edges
- Tape measure
- Speed square
- Laser level (I wouldn’t do this project without it!)
- Pencil
TUTORIAL
Start by cleaning your floor. First I vacuumed, then I swept in between every step. It can get pretty windy where I live, so I still ended up with a few stray pieces of grass in my paint, but this is my workshop and it’s kind of outside, so I didn’t expect it to be flawless. That being said, if I had, you know, closed the door while the paint was drying that probably wouldn’t have happened!
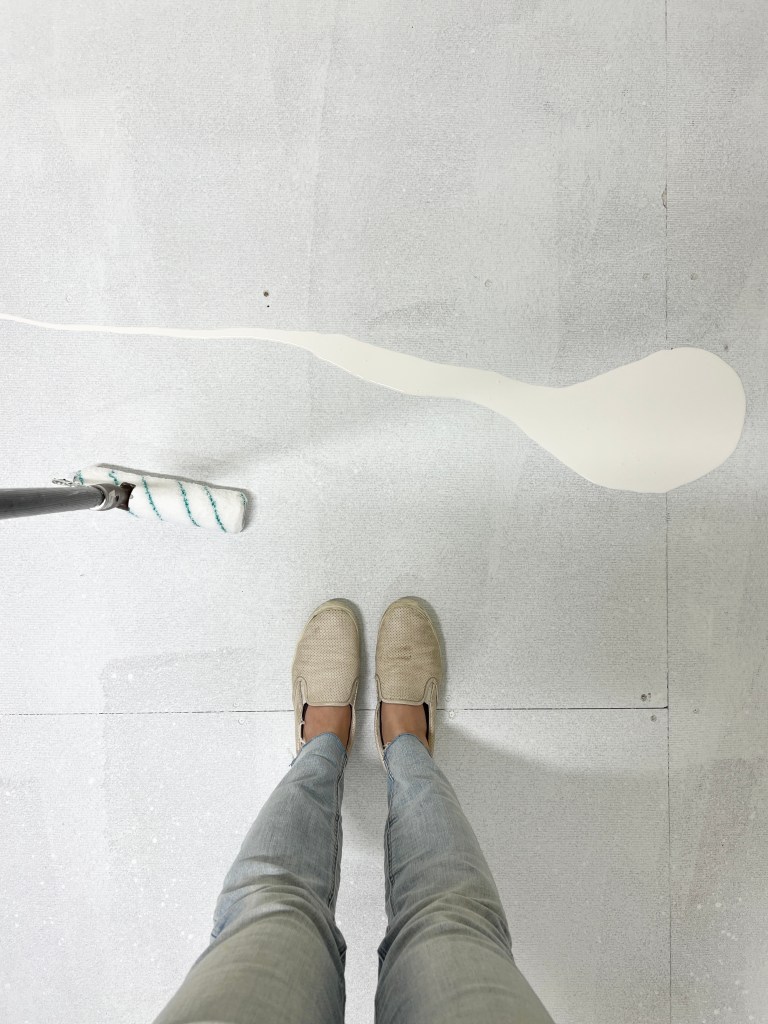
Next you’re going to prime. I used Zinsser’s 1-2-3 primer. No need for a paint tray, you can just dump it out and spread it around. See? Fun! Just be careful not to dump too much out (it’s kind of hard to get paint back in the can once it’s on the floor…) or you’ll end up with a thick layer on the floor that has a hard time drying.

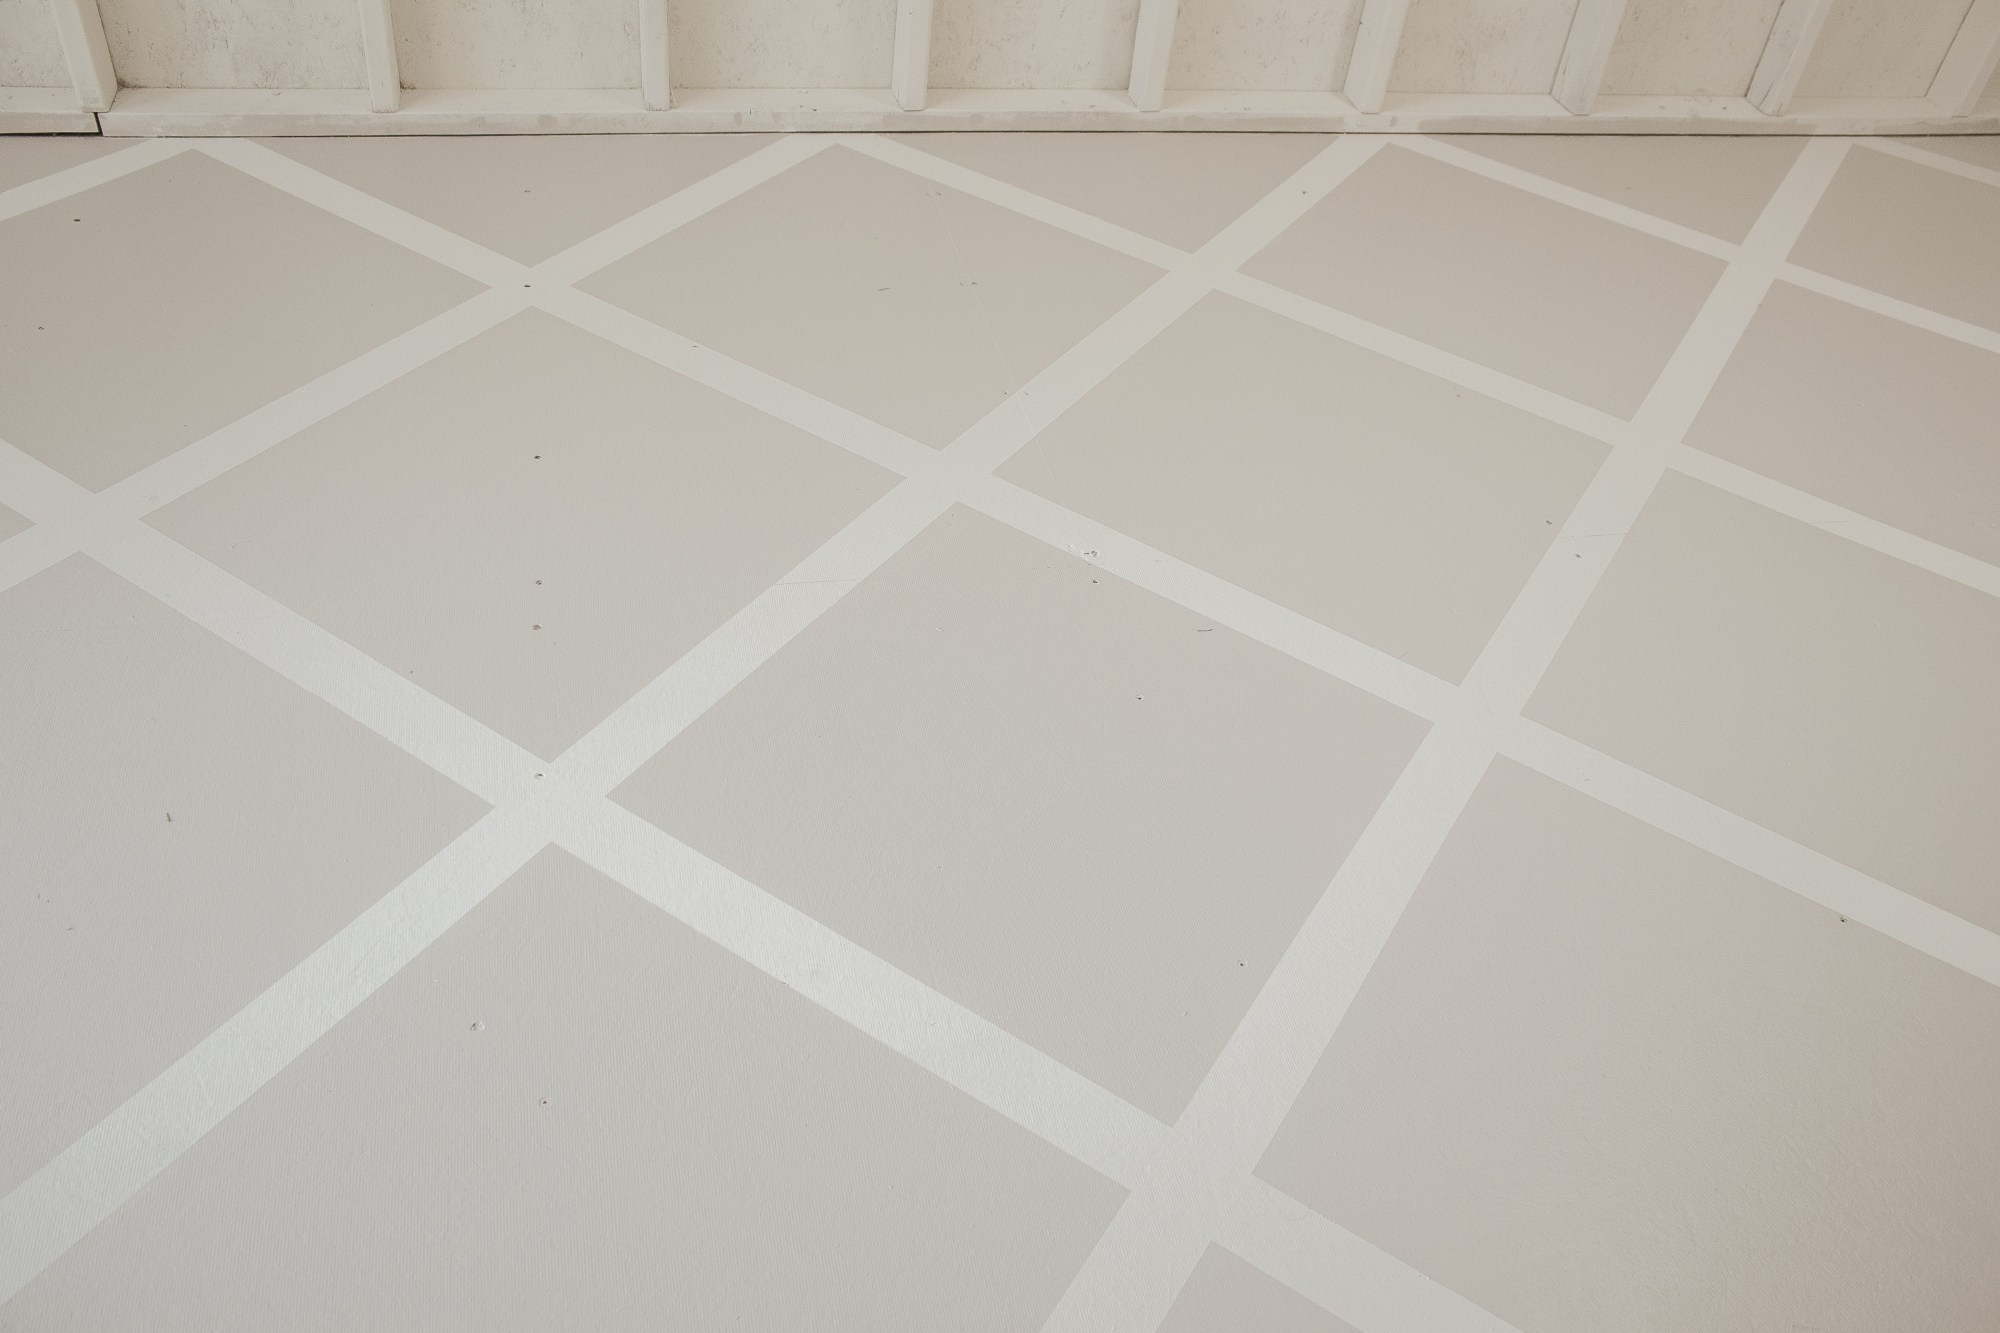
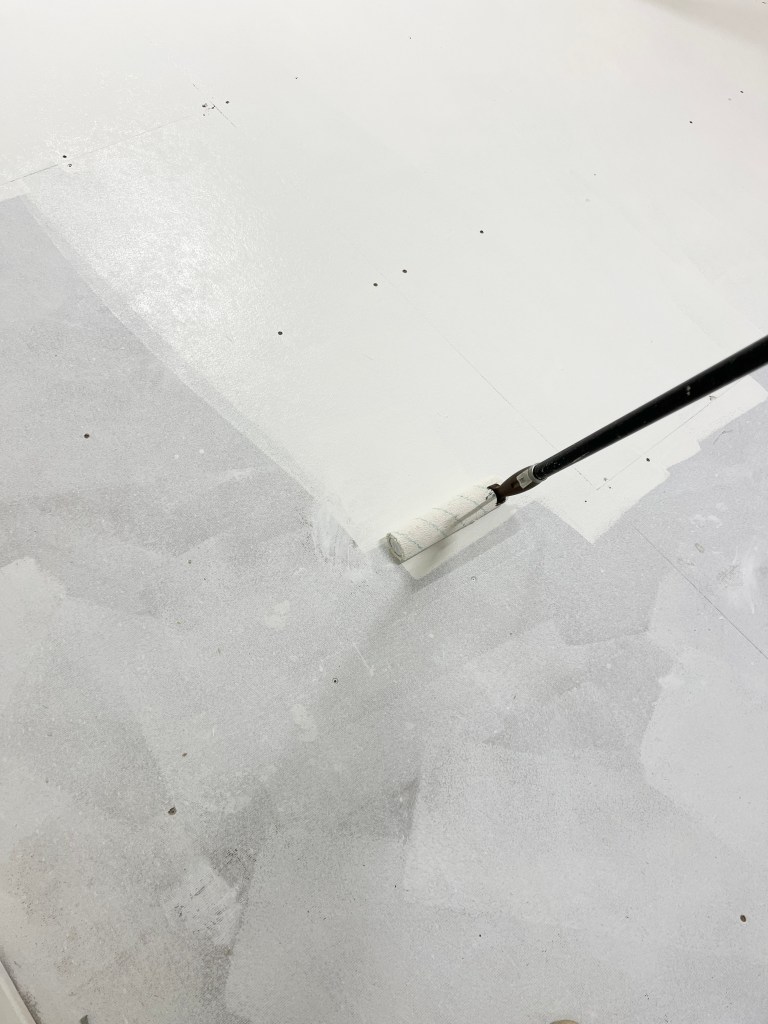
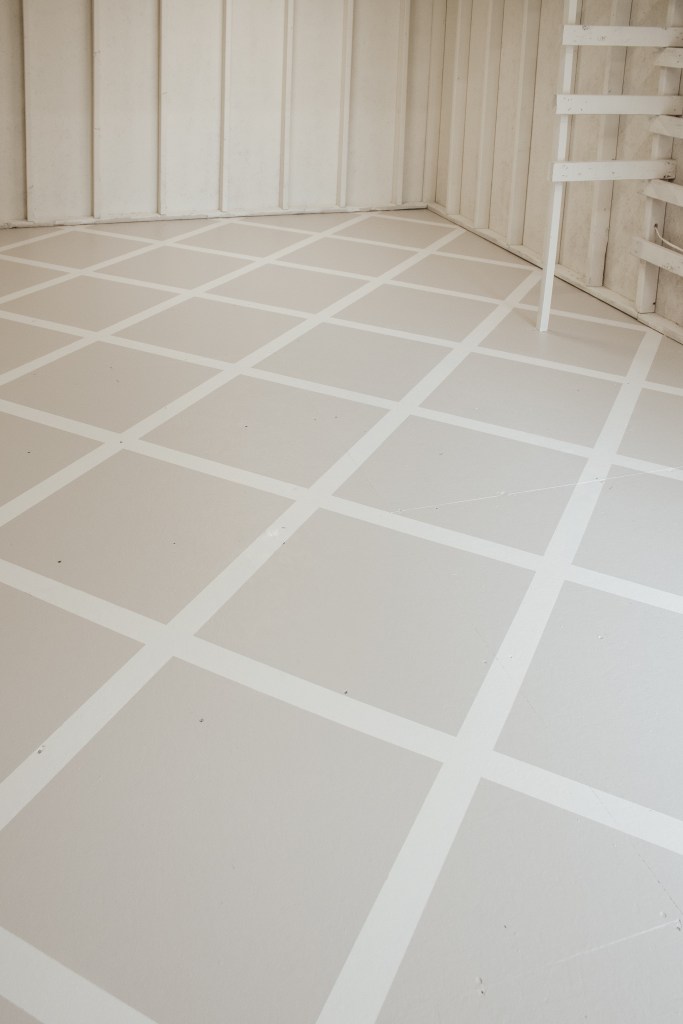
After your primer dries, start with whatever color you want your lines to be. I chose Benjamin Moore White Dove, which I had color matched at Home Depot. The Porch and Patio paint is meant to be a floor paint, so it should hopefully stand up to at least some wear and tear.
I put on two coats of the white and if I were leaving it here, I would’ve added a third coat. You probably don’t need a third coat if you’re doing any other color than white but oftentimes white paint needs an extra coat to be totally even.
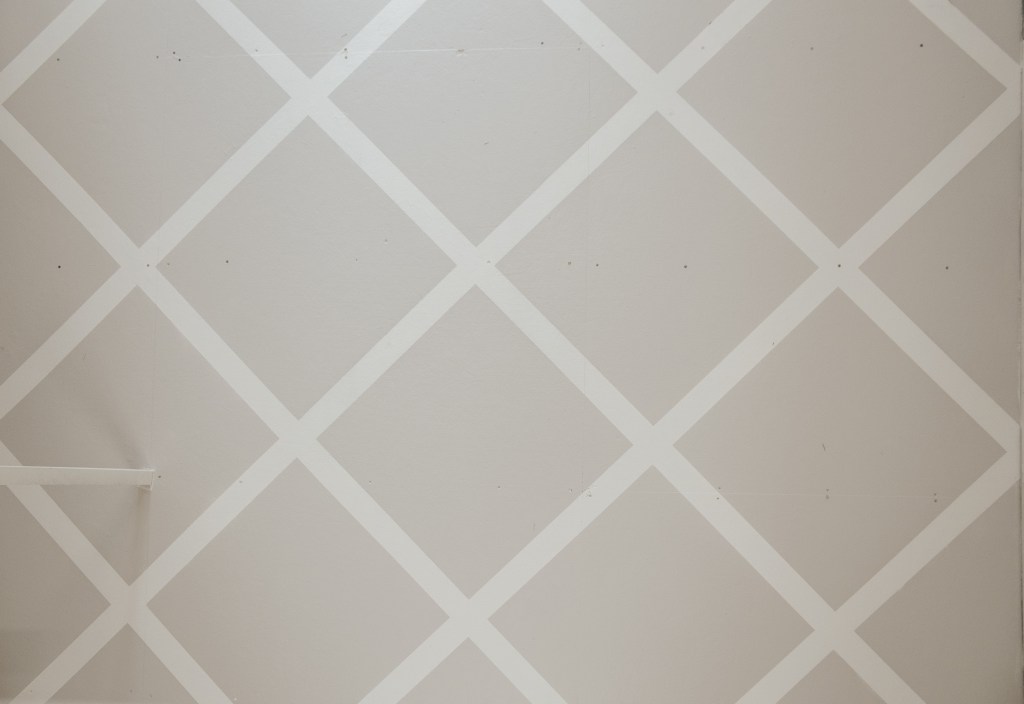
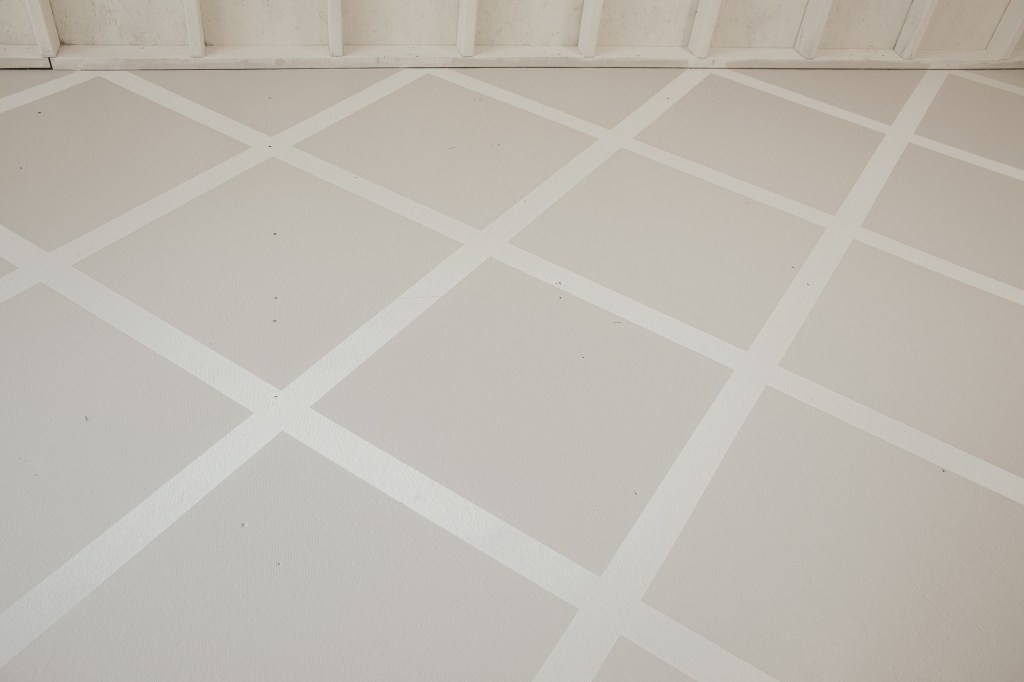
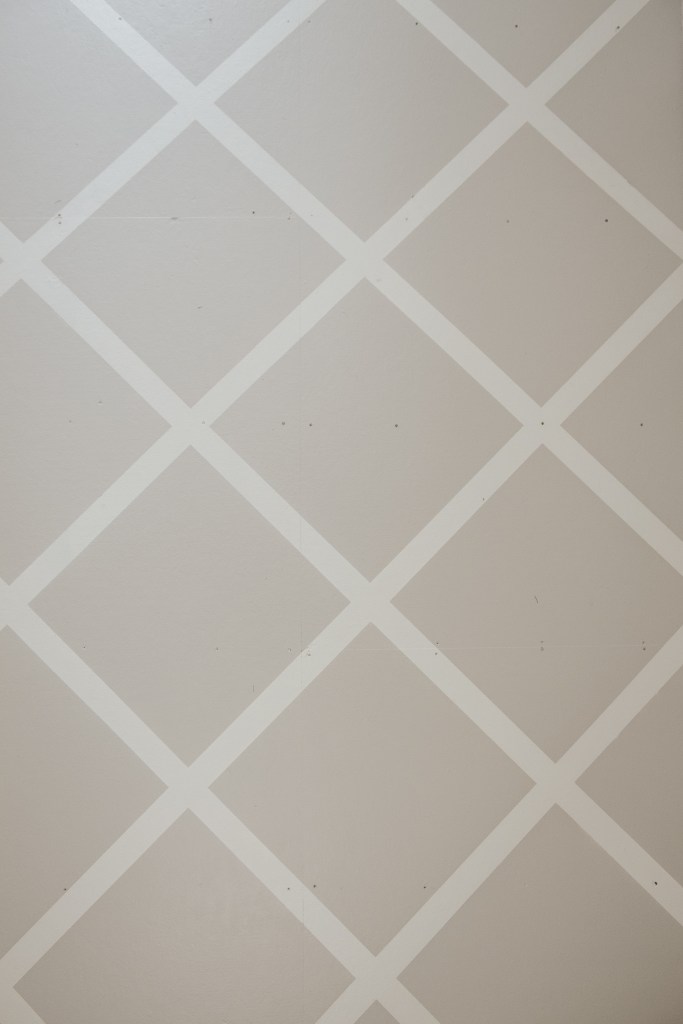
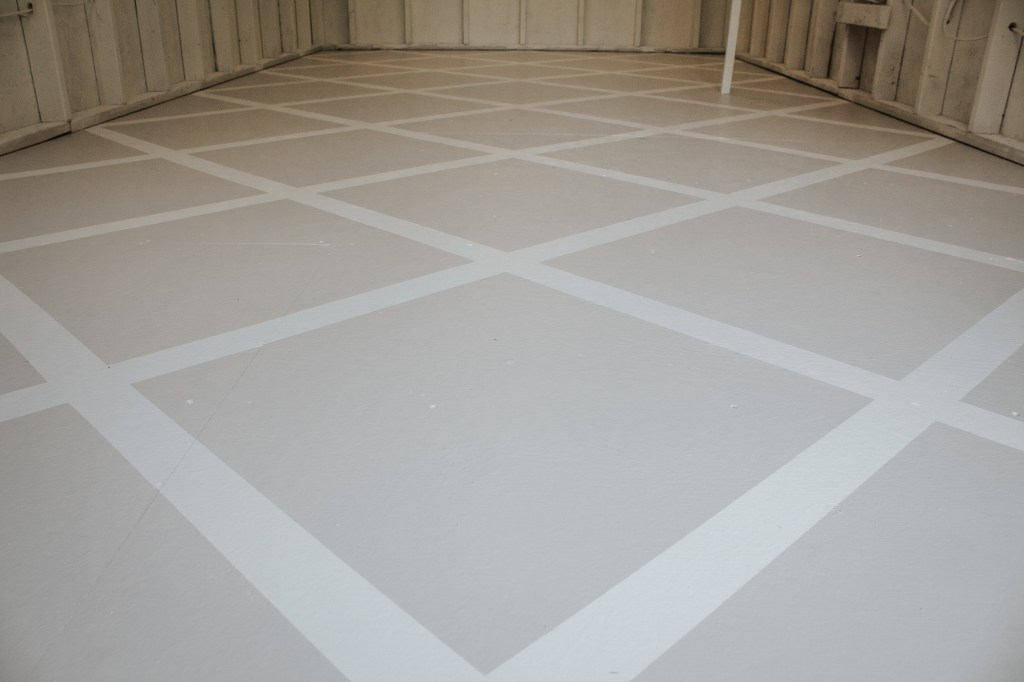
After that dries, you’re going to tape out your pattern. Like I mentioned before, I based this on Jenni’s pattern in her kitchen renovation, so be sure to check her out!
I marked the middle of my room and then used a speed square to find a 45* angle to start on. I quickly realize that it wasn’t practical to slide my square around to get the right angle every time. I also wanted to avoid as much math as possible, so I grabbed my laser level. Life saver! I lined it up with the 45* angle on the speed square and viola! I had my first line.
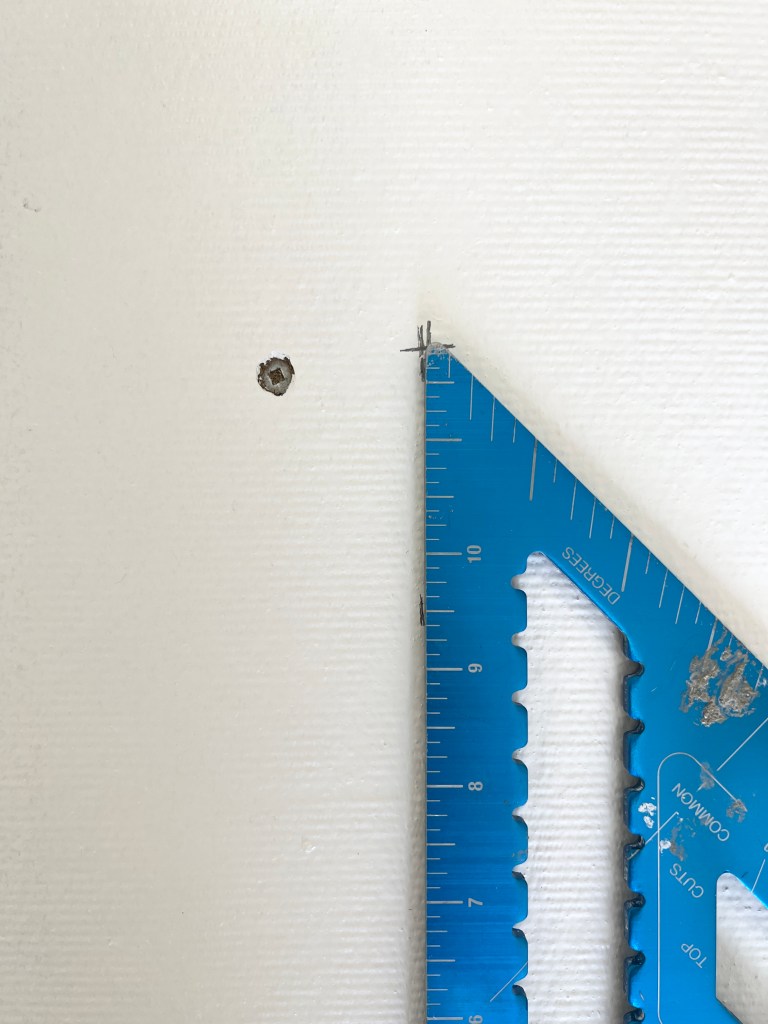
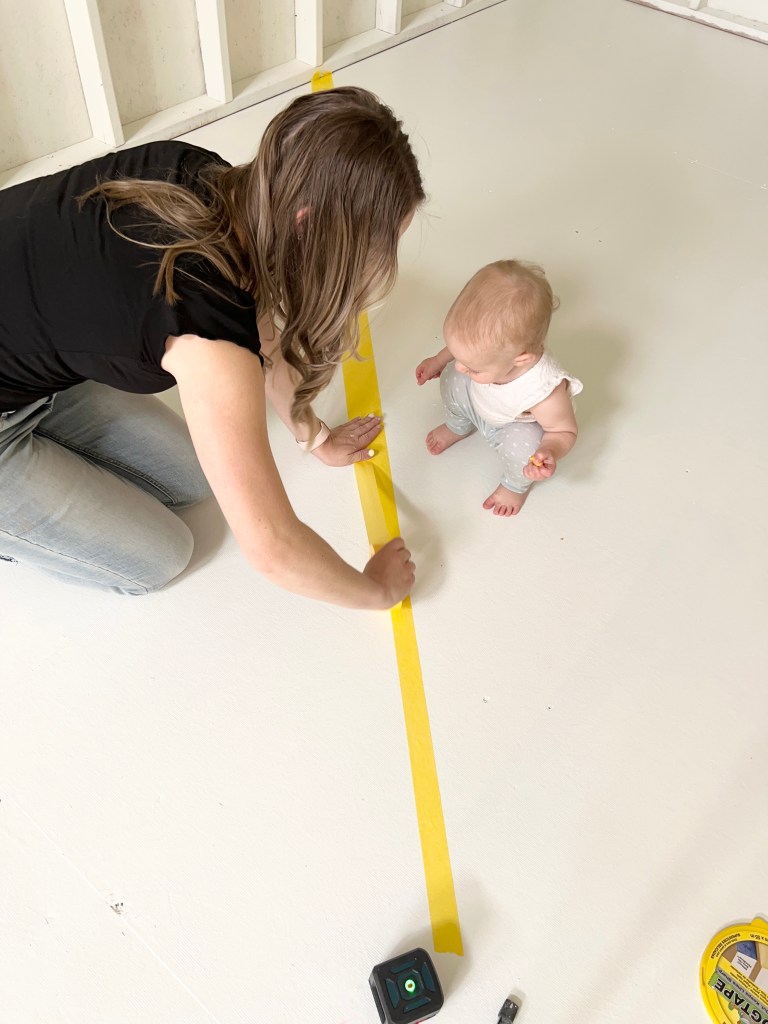
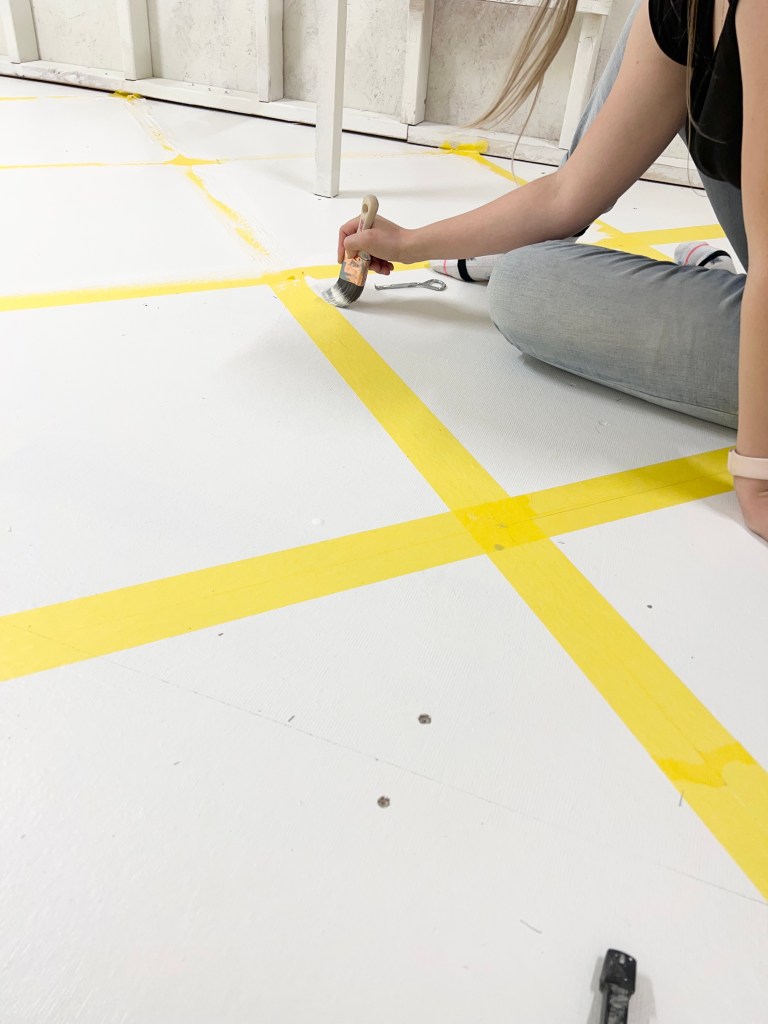
I taped along the line my level gave me, then right next to it I added another strip so that the lines are about 3” wide. Then, I measured 24” away from the tape in 3 spots and made a mark so that I had 3 points to my line. To make sure that I was measuring in a straight line, I lined my square up to the tape.
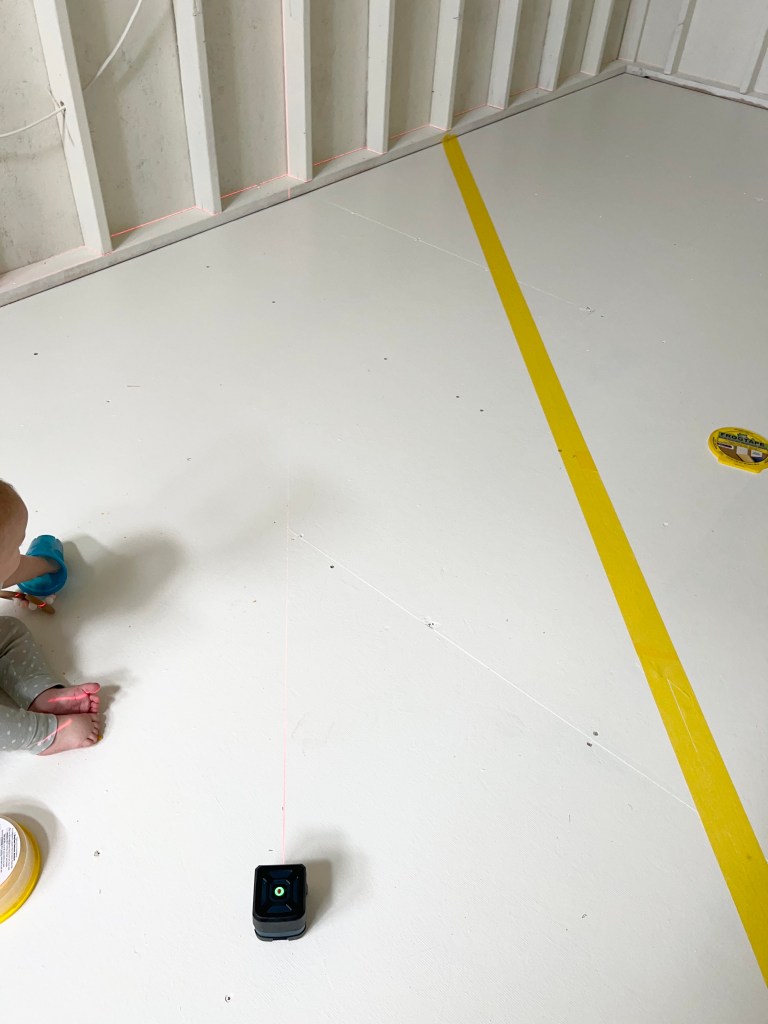
With those 3 marks, I easily lined my laser level up and had my next guide for my tape. Side note, I used Frog Tape delicate surfaces tape for my project because the floors were so freshly painted.
I taped all the lines in one direction first, then did it all over again for the other direction.
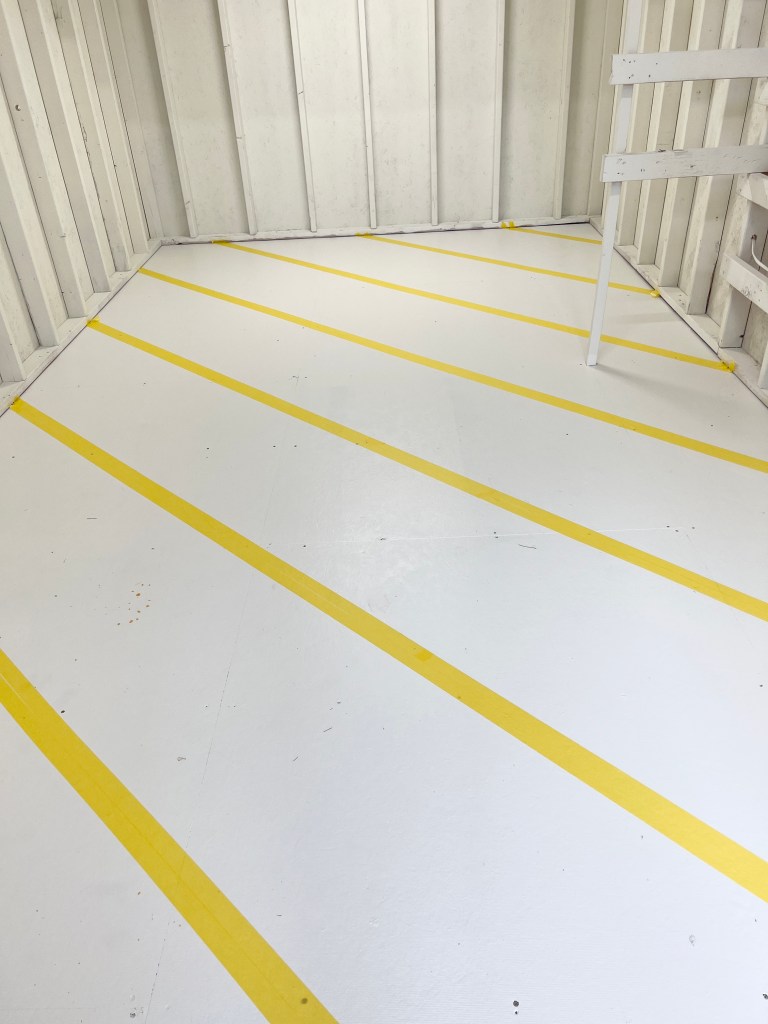
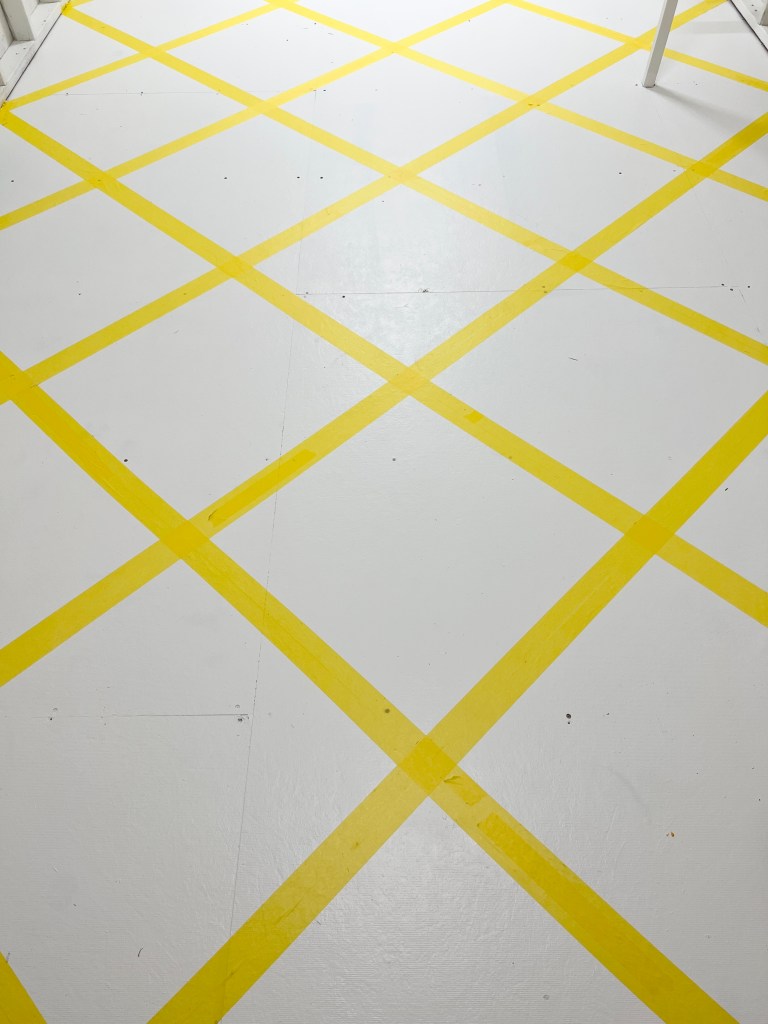
The pattern ended up centered perfectly in every direction because I started in the middle of the room and I think the size of these boxes is perfect! It would be really easy to adjust the size of the “boxes” to fit whatever space you are working in.
Whenever I need a super crisp line on my tape (which is the only reason I ever use tape), I like to seal the edges of my tape with paint. It’s an additional step, but it is so easy and the results definitely make it worth the extra time, in my opinion. Just take your base color – so whatever color is under the tape – and use a brush to paint along all the edges of the tape. The base color will seep under the tape along any spots that aren’t perfectly adhered and then seal the edge so that when you paint the contrasting color, nothing will seep under the tape. It’s like magic!
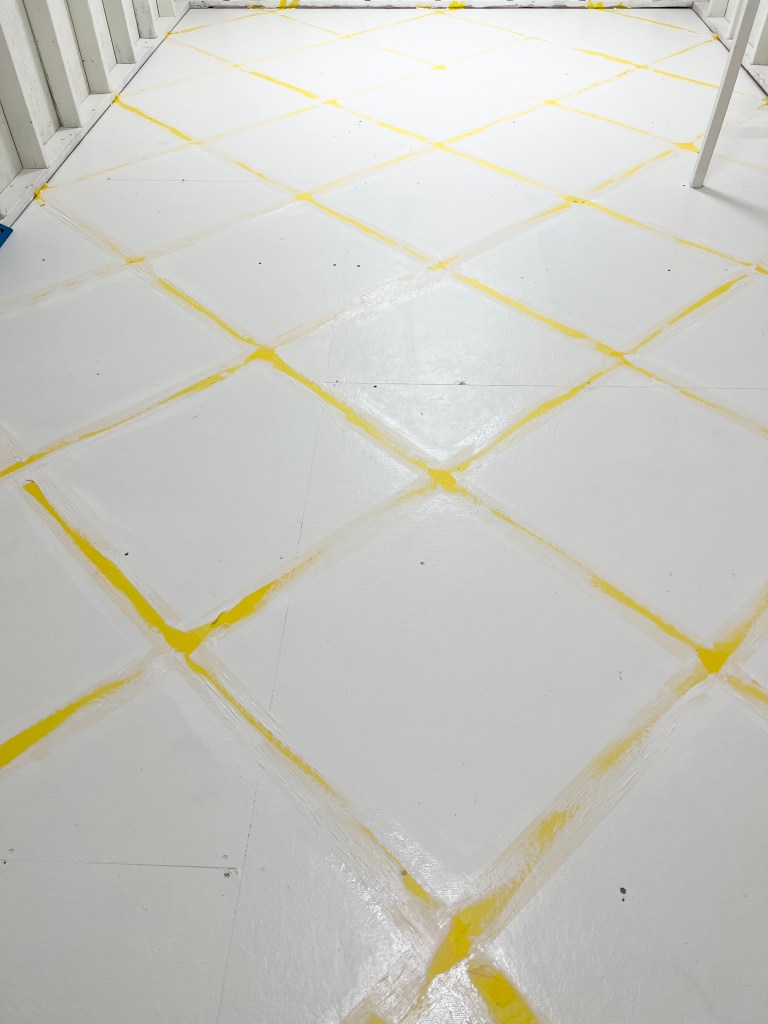
Once the paint you just added to the edges of the tape is dry, go ahead and paint your contrasting color. I chose Benjamin Moore Collingwood (I had this one color matched at Home Depot too) and did two coats.
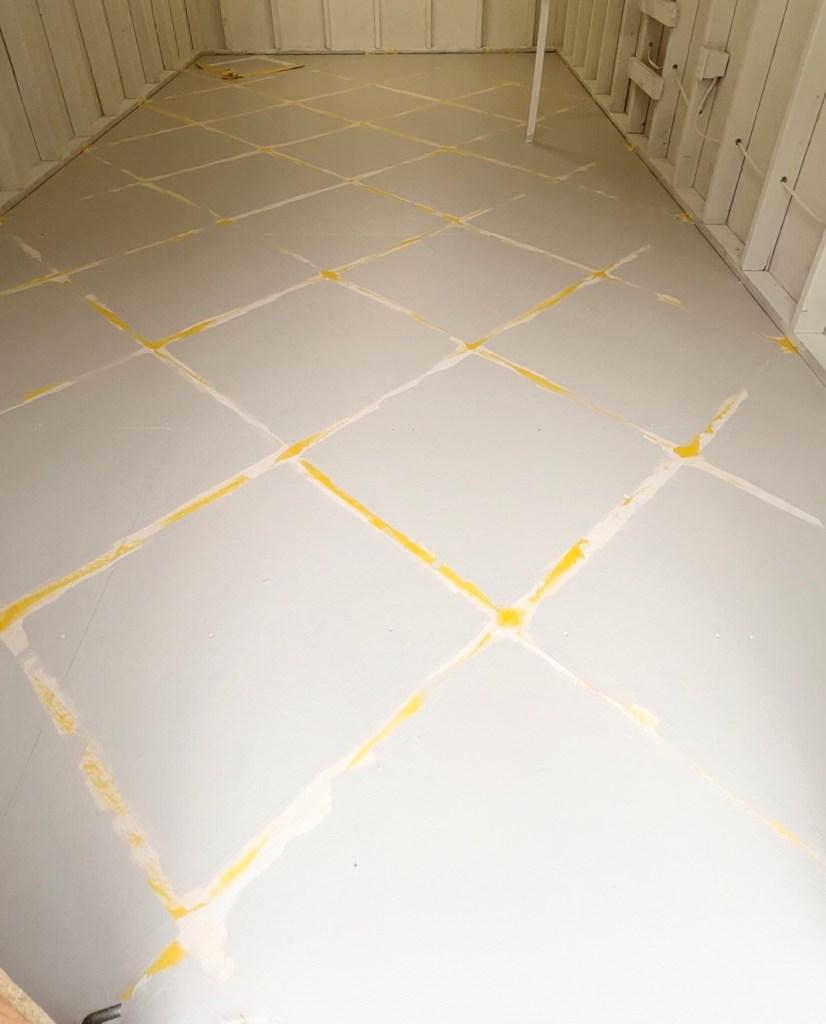
Pulling up the tape is so satisfying! Especially when you don’t have any bleed through because you’re a magician who now knows how to seal your tape! My 3 year old had a fantastic time helping me with this part.

I’ll throw on a couple coats of polycrylic, which technically this porch and patio paint doesn’t require… but I want this to be as durable as possible and the poly won’t hurt.
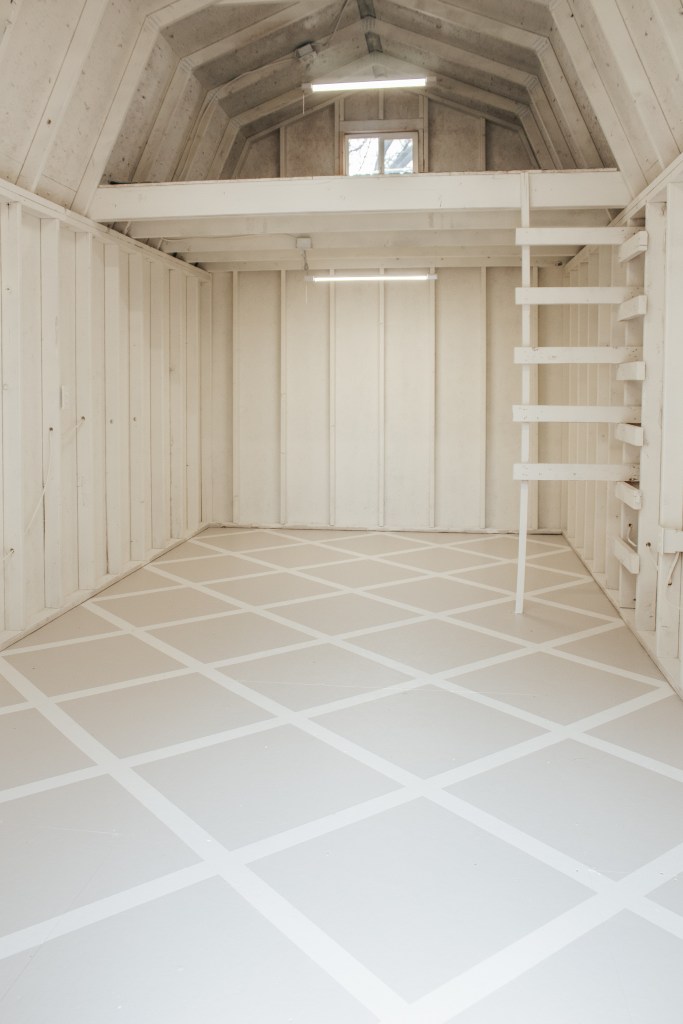
So there you go! Since I just barely finished this, I don’t have any info on how it wears but I’ll be sure to keep you updated as I live with it.
Don’t forget to head over to the One Room Challenge blog and catch up with all of the other incredibly talented makers and their projects.
With love,
Mercedes ♥


Mercedes!!!! This floor is perfection! And I was so delighted to watch you with your helpers! Oh, how it takes me back. I’m so thrilled too see you doing what you can (with patience) with them by your side.
LikeLike
Thank you Diane!
LikeLike
Hi Mercedes!
Love all your projects and you sure inspire me to do some myself . I like to do the German Smear on a small brick wall on my patio . I noticed the color of the drain pipe … it looks brown . Did you stain it brown ?
Happy DIY
Selma
LikeLike
Thank you! I spray painted them with rustoleum metallic rust spray paint 🙂 I have a highlight over on my Instagram if you’re interested
LikeLike