

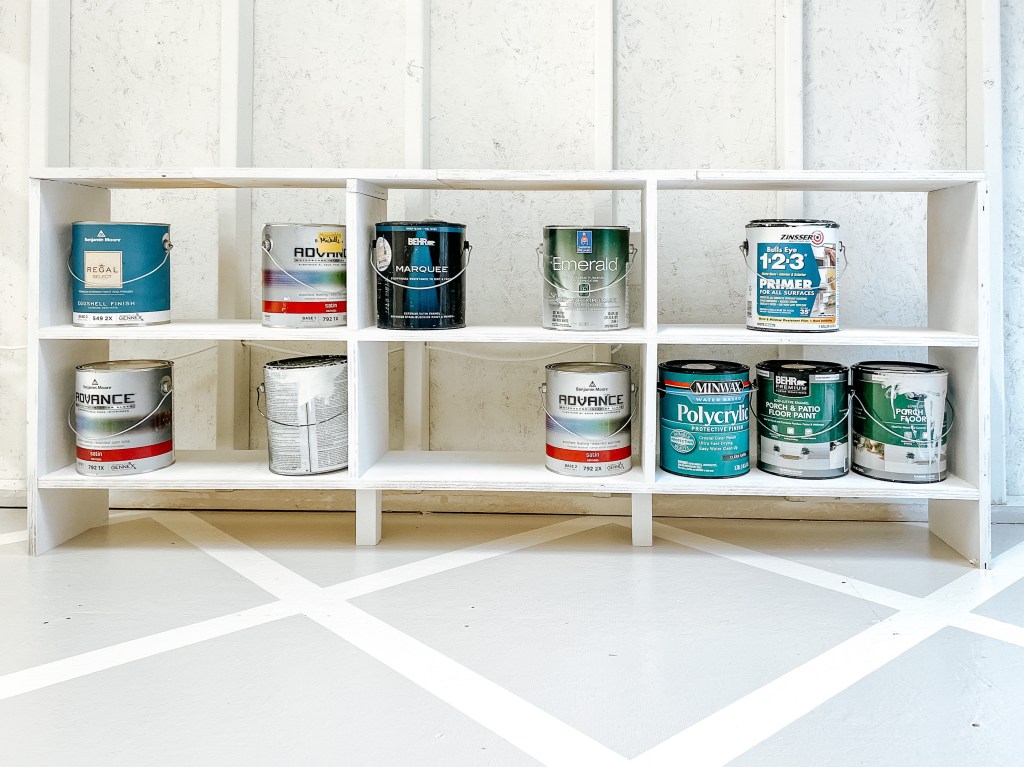
With all of the projects I’ve done, a have more than a couple half full paint cans lying around. I needed an easy storage solution that would allow me to see what I have and keep them organized.
Want to see what projects I’m working on now? Follow me on Instagram!

I didn’t really plan this out (other than having a rough idea of what I wanted to build in my head) but even without a plan it turned out great! Plus, I was able to build it entirely out of scrap wood I had in my garage. Score!
Disclosure: Some of the links provided are affiliate links, which simply means I may earn a small commission (at no additional cost to you) if you shop through one of my links.
Materials
- 3/4” plywood
- 2×2
- 2 quart sized paint cans (for spacing the legs)
- Speed square
- Pocket hole jig
- Pocket hole screws
- Wood glue
- Primer (optional)
- Paint (optional)
- Paint sprayer (or a brush and roller)
- Nail gun
- Miter saw
- Circular saw & guide (or just get your pieces ripped to the right width at your local home improvement store)
Tutorial
You can use my dimensions or make your shelf bigger or smaller. My dimensions will give you space for 18 gallon sized paint cans plus 9 more on the top, so really 27 cans.
First get all your wood cut. From your plywood, you’ll need (2) 9”x66”, (1) 9”x67.5”, (2) 9”x26.5”, (4) 9”x10”, and (2) 5” pieces of 2×2.

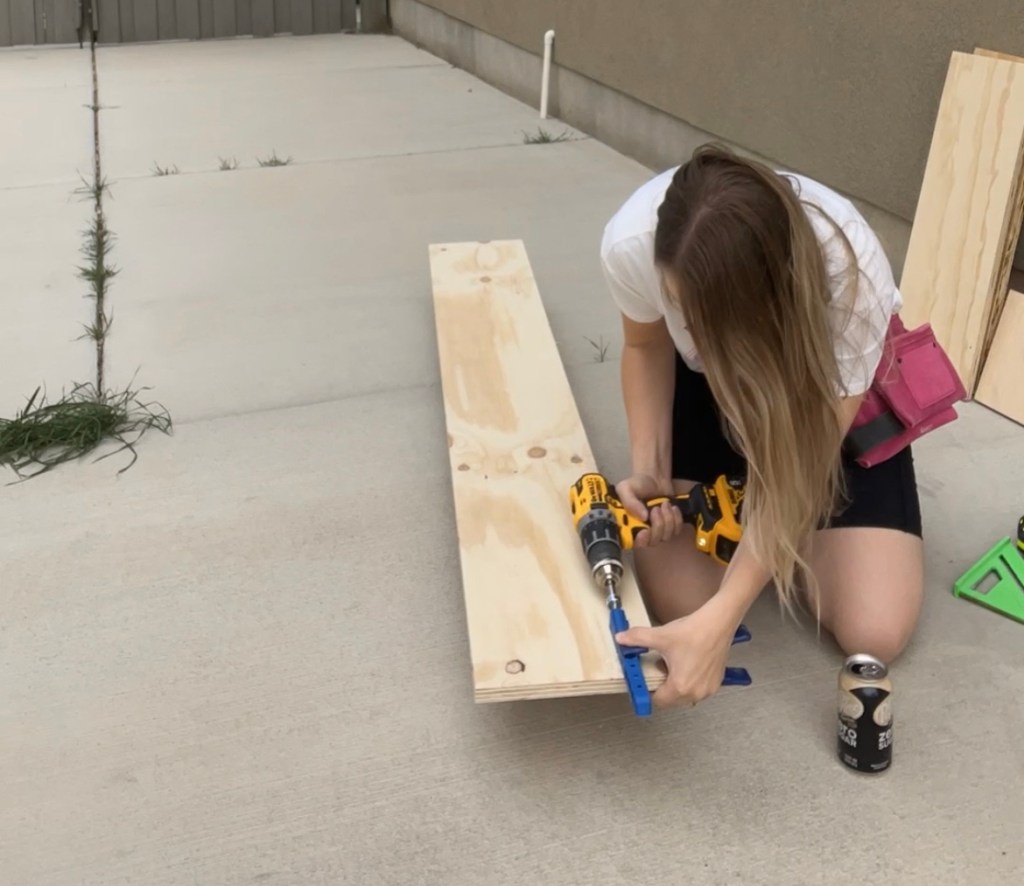
Drill pocket holes into the each end of the 66” board.
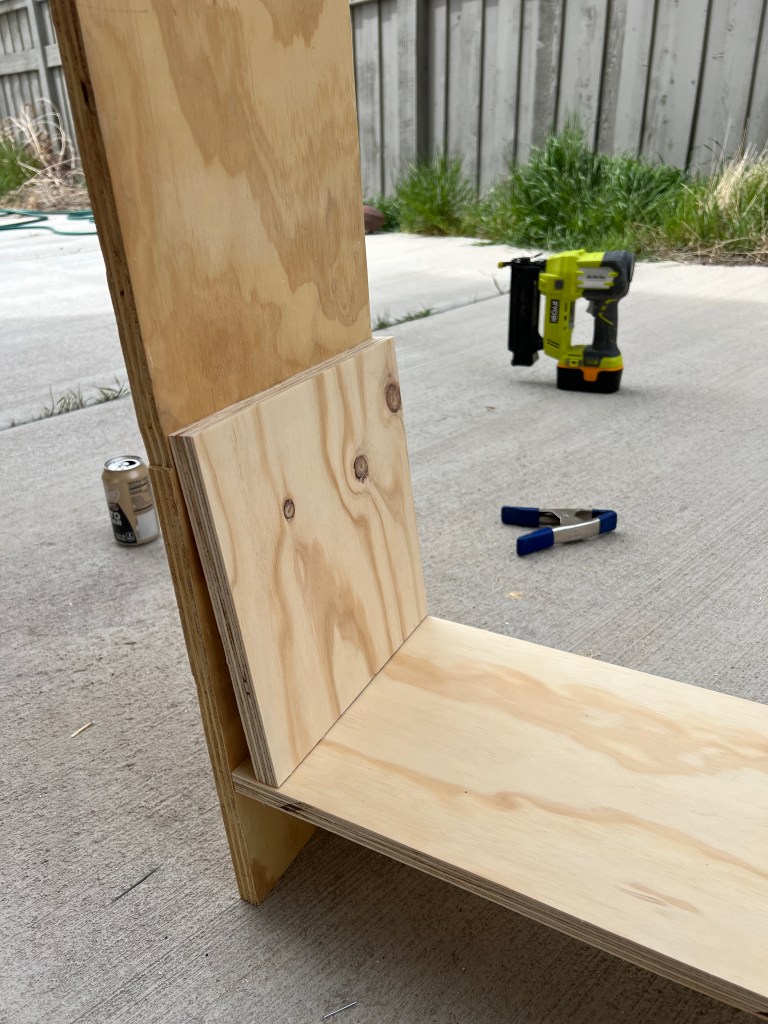
Next, take grab of the 66” pieces and both of the 26.5” pieces. Use 2 quart sized paint cans to prop the 66” piece up off the ground, pocket hole side down. Put a generous amount of wood glue on the ends and then line the 26.5” pieces up perpendicular to the 66” board. This will be make up your bottom shelf and the sides/legs.

Using the speed square, make sure the sides are perfectly perpendicular to the shelf and throw a couple Brad nails in using the nail gun to hold everything together. After it feels secure, lay it down and screw the pieces together. Double check squareness with your speed square as you go.
Now stand your shelf back up on its legs and grab two of the 10” pieces. You’ll use them to get the right spacing between the two shelves. Stand them up on the shelf you just attached and then get the second 66” piece. Add wood glue to the ends and lay it onto the dividers, pocket hole side down. Attach it just like you attached the first shelf.


Now you’ll attach the dividers. Each cubby will be 21.5” wide, so measure 21.5” from each side and make a mark. That’s where the edge of your divider will sit. Put wood glue on the 9” sides and slide them into place, securing with wood glue.

Do the same thing for the dividers on the upper shelf. With these ones, you’ll need to shoot the nail in from the sides at a steep angle to catch both the divider and the shelf.

Let the glue dry on those and then add the top. Add glue to the tops of the legs and the dividers. Take the 67.5” piece and lay it on top. Shoot a few nails into each leg and divider to attach the top piece.

Carefully flip the shelf upside down and glue on the two 2×2 pieces under where the dividers sit. Paint is heavy and this offers a little extra support to keep it from sagging.

Now you can prime and paint it if you want! You don’t have to, but why not? Everyone wants a bougie paint can storage shelf, right? If you do paint it, I highly recommend spraying it. This is my favorite paint sprayer! It’s inexpensive and saves so much time.

I’m obsessed with how this is looking in my she shed! The whole makeover is coming together so nicely. I have a lot of items on my to-do list next week, so be sure to follow along on Instagram because you’re not going to want to miss it! And check out all the other One Room Challenge Participants and their incredible spaces here.
With love,
Mercedes


3 thoughts on “Easy Paint Can Storage | One Room Challenge Week 5”