

Most DIY floating shelves use 2x4s for the bracket, so they are pretty chunky! I have nothing against chunky floating shelves, but I knew that was not going to work for this little space here. I found a great post by Sherry from Young House Love that I pulled a lot of tips from!
Want to see what projects I’m working on now? Follow me on Instagram!

MATERIALS
- 1×2 pine
- 1×3 pine
- Select pine 1×2
- Kreg pocket hole jig
- Pocket hole screws
- Wood glue
- 3″ screws
- 1/2″ plywood
- 5mm plywood
- Level
- Clamps
- Circular saw
- Miter saw
- Electric sander
- Drill
- Brad nailer
- Wood stain
- General Finishes polyurethane
TUTORIAL
Step one is build the bones of the shelf, or the bracket. Start by figuring out how long you want your shelf to be and cut a 1×2 to that length.
Next, determine how deep you want your shelves to be (mine are 10.25″). Take that depth measurement and subtract 0.75″ to account for the front piece that will go on and subtract another 1.5″ to account for the back 1×2 (10.25 – 0.75 – 1.5 = . 8″)
*I didn’t actually use 1x2s and 1x3s, I used some scrap plywood in my garage that was a little wider than a 1×2, a little skinnier than a 1×3, but still 0.75″ thick. So my measurements weren’t exactly this, but hopefully you still get the picture!

Drill pocket holes into one side of each of your 1x3s and then using wood glue, a clamp, and pocket screws, screw them into the skinny side of the 1×2. Now you have a bracket that is 0.75″ thick all the way around.

Mark where the studs on your wall and use 3″ screws to attach the bracket to the wall, making sure it is level. Keep stud placement in mind when assembling your bracket so that you don’t accidentally cover up all your stud spots with 1x3s! I also screwed the side pieces into my cabinets since I had them available. These shelves are very sturdy!

Now you’re ready to attach the 1/2″ plywood to the top. Measure the length of your bracket and the depth and cut a piece of plywood to that size using a circular saw. Lightly sand. Put wood glue on the top of your bracket and set the 1/2″ plywood on top of that, then clamp it to hold the plywood tight while the glue sets.
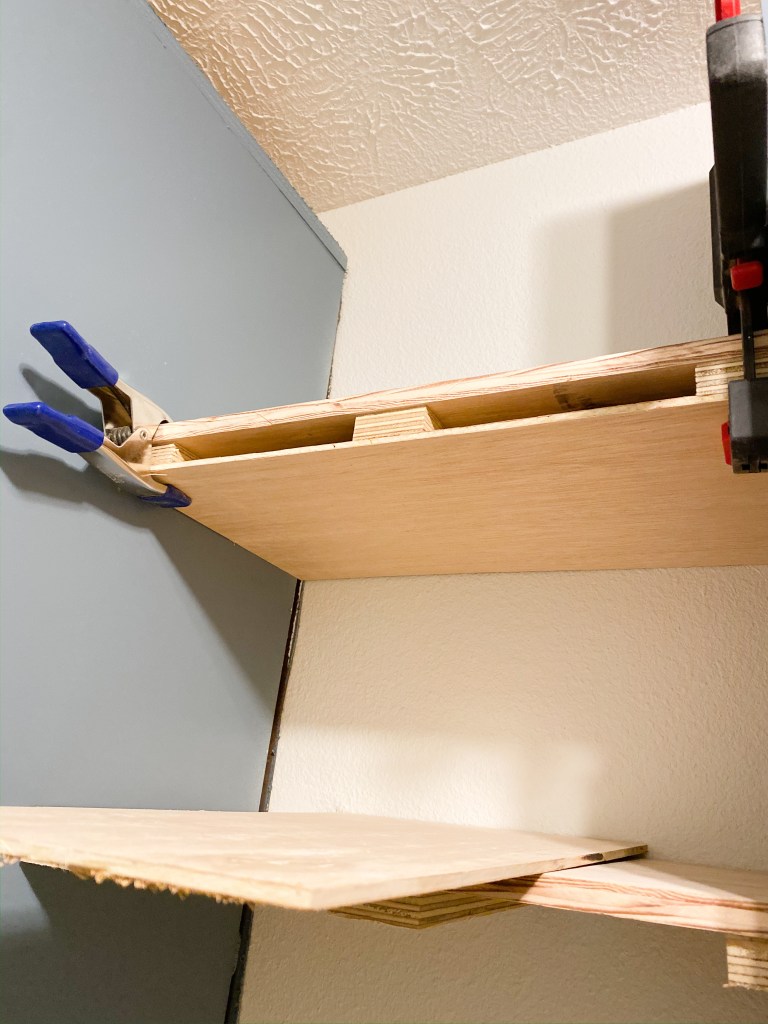
While that is drying, cut 5mm plywood to the same size as your 1/2″ plywood. Once the top plywood is set, repeat the glueing/clamping process with the bottom piece, but don’t forget to sand it first! You can also throw a few finish nails in here if you’re worried about your glue holding, but I didn’t end up doing that.

Now it’s time to finish off the front! Cut the select pine to the right length and sand it. Carefully line it up with the top of the shelf. It’ll be just a hair wider than your shelf, but that’s okay. If your shelf has open sides, miter the corners and add select pine along the edges too. Attach these with your nail gun to the bracket. Fill any nail holes with wood filler or a sawdust/wood glue mixture and sand smooth.

Ta-da! You have a shelf! Use wood conditioner and stain to get it to a color you’re happy with. I used Weathered Oak, then a really light coat of Early American, then Weathered Oak again. I’ll… eventually… finish it off with my favorite protective coat, General Finishes polyurethane.


If you try this yourself, be sure to tag me on Instagram (@with.love.mercedes) so that I can see your work!

With love,
Mercedes ♥

Great plan. Can’t wait to make one. you say to cut a 5mm piece of plywood same size as top, but somehow I cannot find where you explain what to do with it.
LikeLike
Hi Donna! The 5mm plywood is the bottom piece. So you end up with 1/2” plywood on top of the bracket, 5mm plywood below the bracket, and the finishing piece on the front. Hopefully that makes sense!
LikeLike
Thank you for sharing this tutorial; can’t wait to try it! One question, why not stain the plywood before attaching it to the bracket rather than after?
LikeLike
No reason, you could certainly do it before if you’d prefer.
LikeLike