
When I decided to tackle my master bedroom, I knew that our bed would have to go. I listed it on Facebook Marketplace and we were shocked when less than 24 hours later, it was on its way to another home. I did not expect it to sell that quickly! But I probably should have, it was a fantastic bed. There was nothing wrong with it and J and I both really liked it (the buyer actually messaged me a couple days ago to thank me again for selling it to them), but we knew it wasn’t going to fit into the vision that we had for the room as a whole.
I recently made a base to match the headboard – check it out here!

During some Wayfair screen shopping (can we make that a thing? It’s like window shopping, but online!), I found this lovely bed. Look at it. Take it in in all its glory. Isn’t it wonderful? I love everything about this bed, except for the price tag. With an already perfectly acceptable bed, there was no way I was about to drop $700 on a new one. I combed through the internet for anything similar anytime I found something, it was always about the same price. Grrr.

While it may take me ages to make a decision, once I’ve made one I’m pretty set on making it happen. Enter Pinterest! I wanted to know how difficult it would be to build a headboard – after all, I built a shower (more on that later) – and I found a tutorial to build a headboard that mimicked the style of this bed perfectly! And it was only going to cost about $100 instead of $700. Score! If you’re looking for a great tutorial, her blog post is awesome. Funny enough, she also has board and batten in her bedroom, which is what I’m currently working on. It sounds like we need to be friends.
*Edit – I want to make it clear that all of the information I got for this headboard is from the tutorial linked above. I made a few minor modifications but for the most part, it is the same!


I’m so pleased with the finished product! It is exactly what I was looking for, plus I was able to build it for less than what I sold my original bed for. Score! If you’re interested in a tutorial, keep on reading.
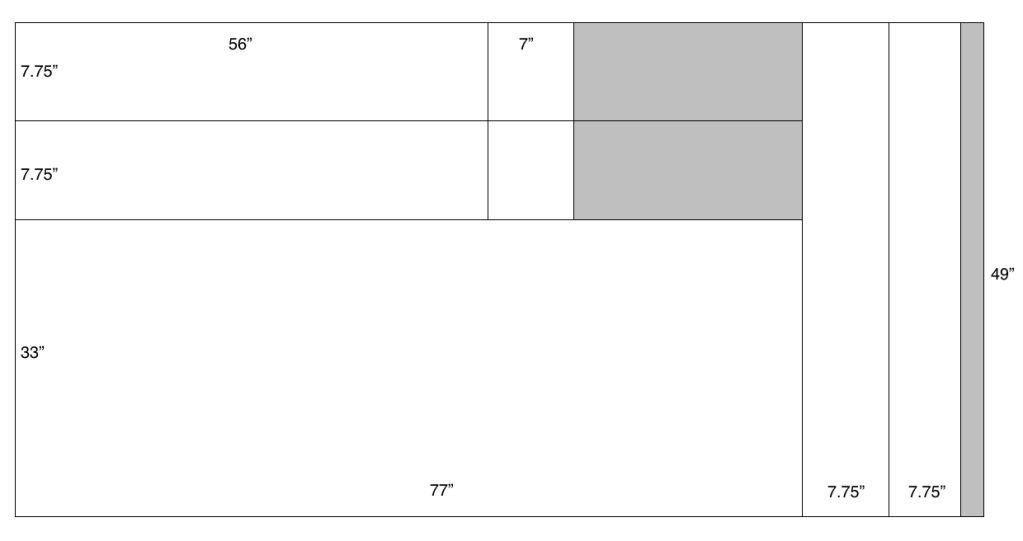
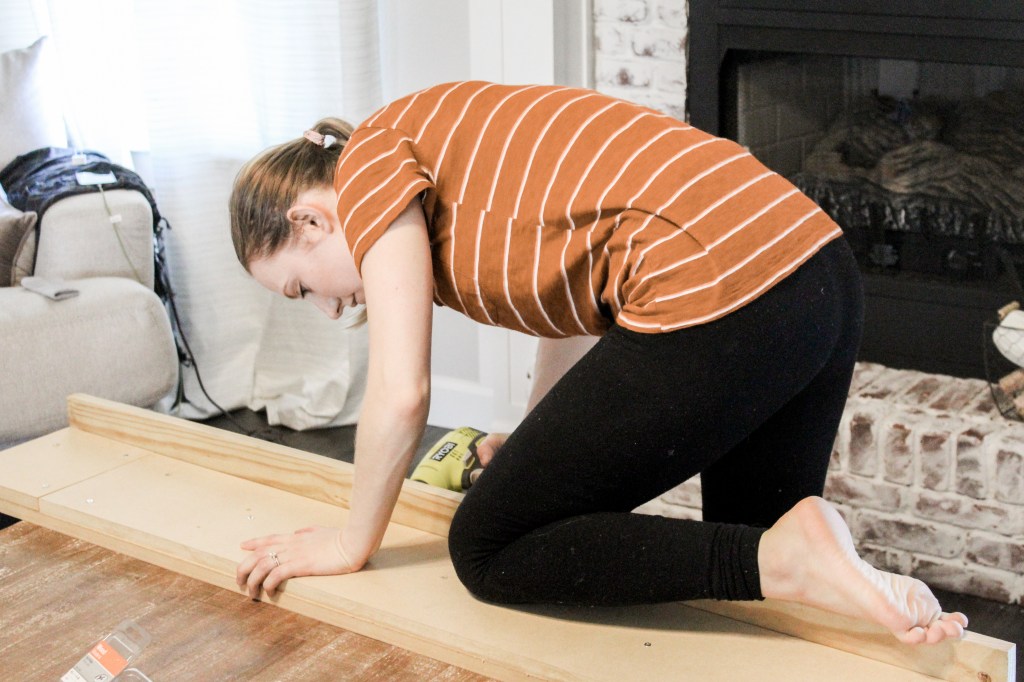
The first step was getting the structural elements. I grabbed a sheet of 3/4 inch MDF from Lowe’s and had it cut to the following specifications. You can get it cut at the store, just be prepared to feel super awkward (if you’re anything like me and it’s weird to watch other people slave over your project while you’re unable to help). Here are all the cuts you’ll need made.
- 77″ x 33″ (back)
- 7.75″ x 56″ (wing)
- 7.75″ x 56″ (wing)
- 7.75″ x 49″ (partial wing 1)
- 7.75″ x 49″ (partial wing 2)
- 7.75″ x 7″ (partial wing 1)
- 7.75″ x 7″ (partial wing 2)
If you head over to my instagram (@with.love.mercedes), you can watch the highlight titled Headboard to see how I barely fit in my car after squeezing a bunch of MDF in, so I would recommend a truck if you want to be able to see out of the right side of your vehicle! You are also going to need to grab these items:

- (2) 1x4s cut to 56″
- (1) 1×4 that is 72″
- (1) XL twin mattress topper
- Spray adhesive
- Staple gun and a LOT of staples
- 1 1/4 inch screws
- 2 inch screws
- Fabric – I used curtains I found at Home Goods (you need two really thick panels at least 40″x84″)
- At least 6 yards of batting
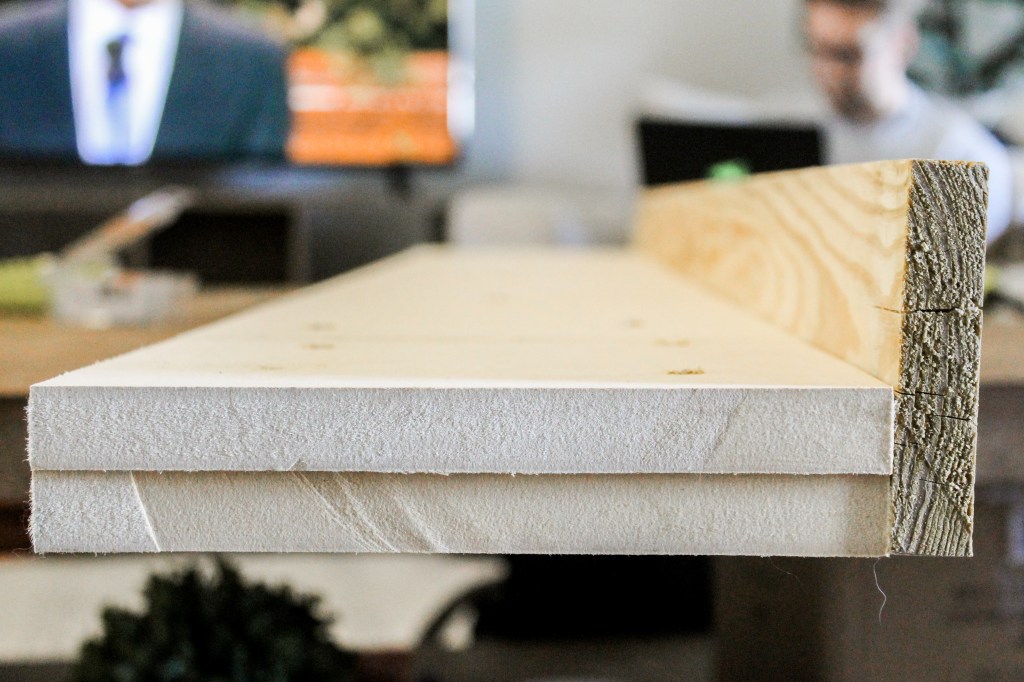
Once I had all of my goodies, I built the wings. Since you can’t get two perfect 7.75″ x 56″ pieces out of one sheet of MDF, you have to sort of piece them together. I used one of the full wing pieces and laid one of the 49″ pieces on top, then I screwed them together with 1 1/4 inch screws. Using the 7″ piece, I filled in the gap and screwed it on. The edge doesn’t need to be absolutely perfect because the batting will give you some room for error. I then repeated this with the second wing. I tried to make it so that the puzzle piece ends would be on the bottom, but after it was wrapped in batting I couldn’t tell which end it was so who knows where they ended up!

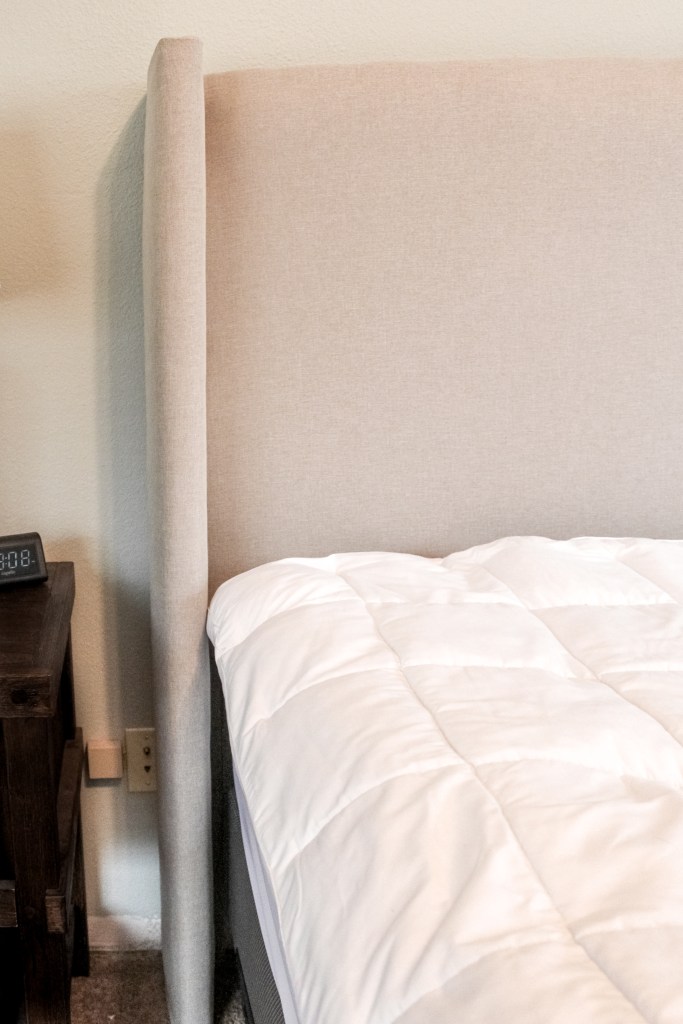
To add support since the wings are also the legs, I screwed the 56″ 1x4s on at a 90* angle to the wings. This also provided a spot where I could screw the wings onto the back of the headboard. I used 1 1/4″ screws here, but I probably should have used 2″ screws.
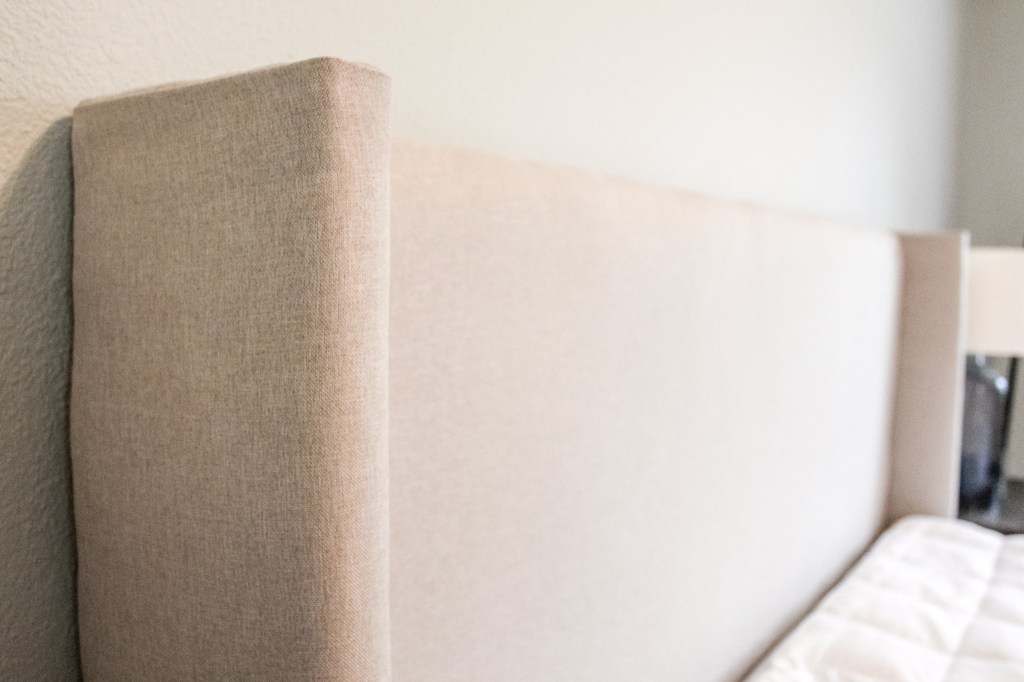
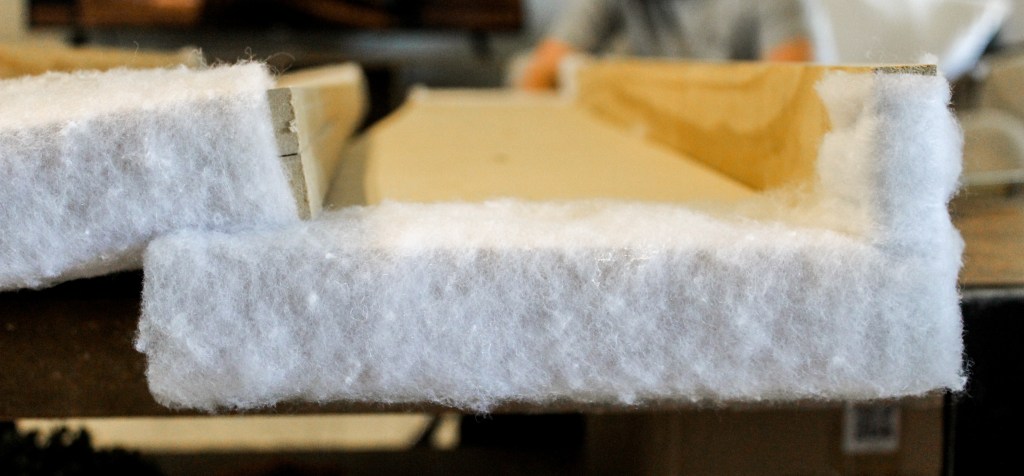
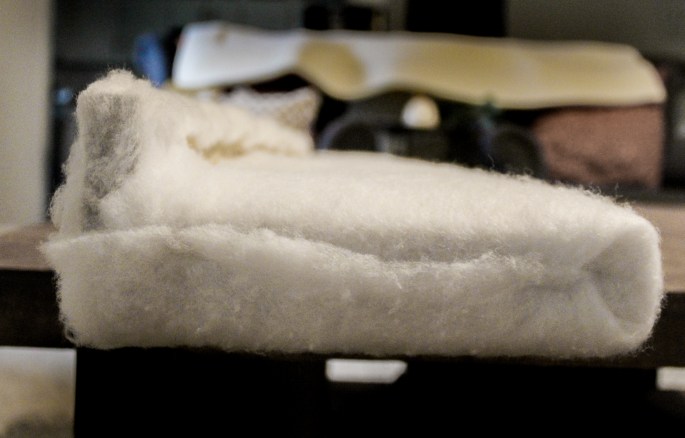
The next step is to make it comfy! I cut a small piece of batting to go over the edges (both top and bottom) and then wrapped the main part of the wing with it. I left an inch or so on the inside of the 1×4 free so that screwing it into the back would be easier. I wrapped the edges of my wing twice and on the second run, I wrapped the ends like a present to give them a lot of cushion. If I were to do it again, I would probably just wrap it like I did the first time again.
Now onto the main (and easiest) part – the back! I took the 72″ 1×4 and screwed it running along the top of the MDF. This just makes the headboard a little thicker on the top – it’s mostly for aesthetics, not structure. I forgot to take a picture of this step, sorry!
Then I took my spray adhesive and sprayed a bunch onto the MDF and then laid the mattress pad on. Be warned – this stuff is a little stinky. My mattress pad was not long enough for my board (urgh, it should have been. I still don’t know why it didn’t fit…) but luckily I had some random scraps of a different mattress pad that I used for a project a while back in the garage, so I cut a strip of that and filled in the gap, attaching it with spray adhesive.
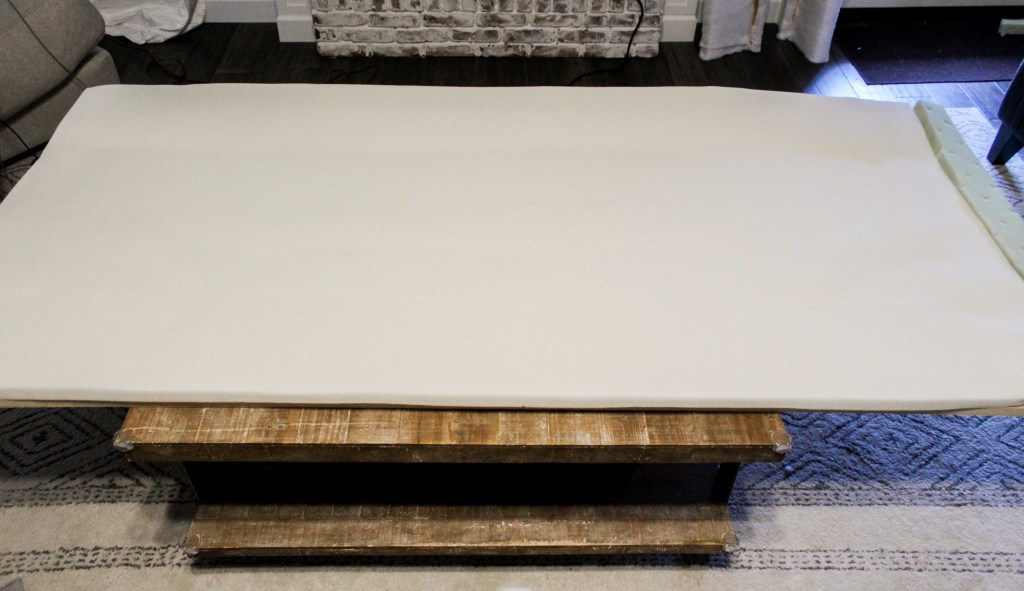
I decided to throw a couple of staples in my pad to help keep it in place. To help even out the tucks that were made by the staples, I cut some chunks of batting and used spray adhesive to tack them into place. You want the surface to be even so that it doesn’t look bumpy once the fabric is on.
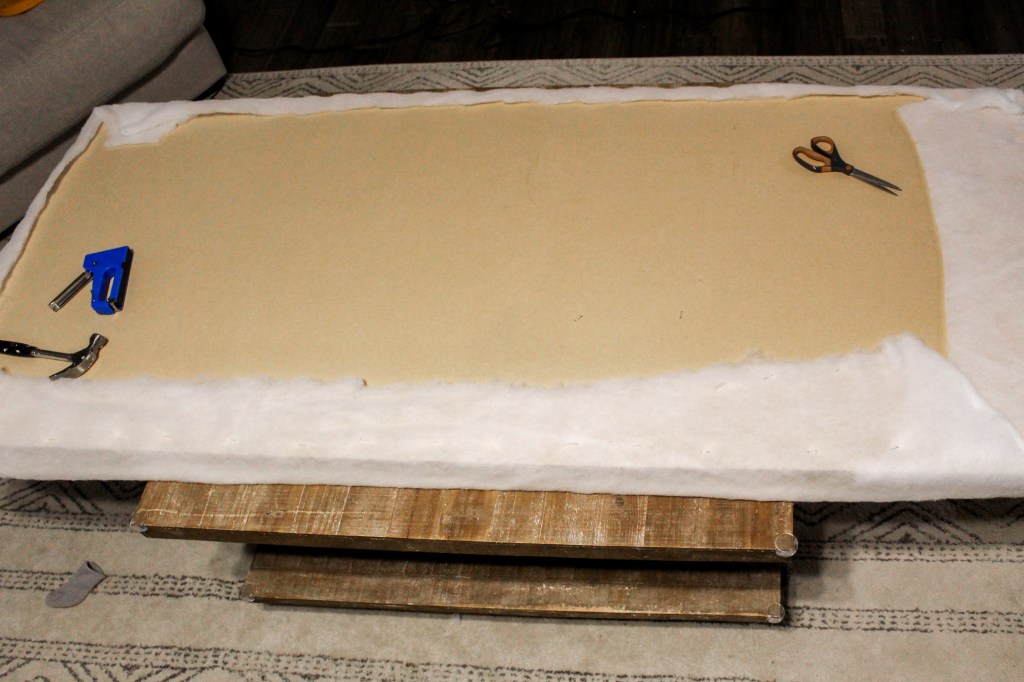
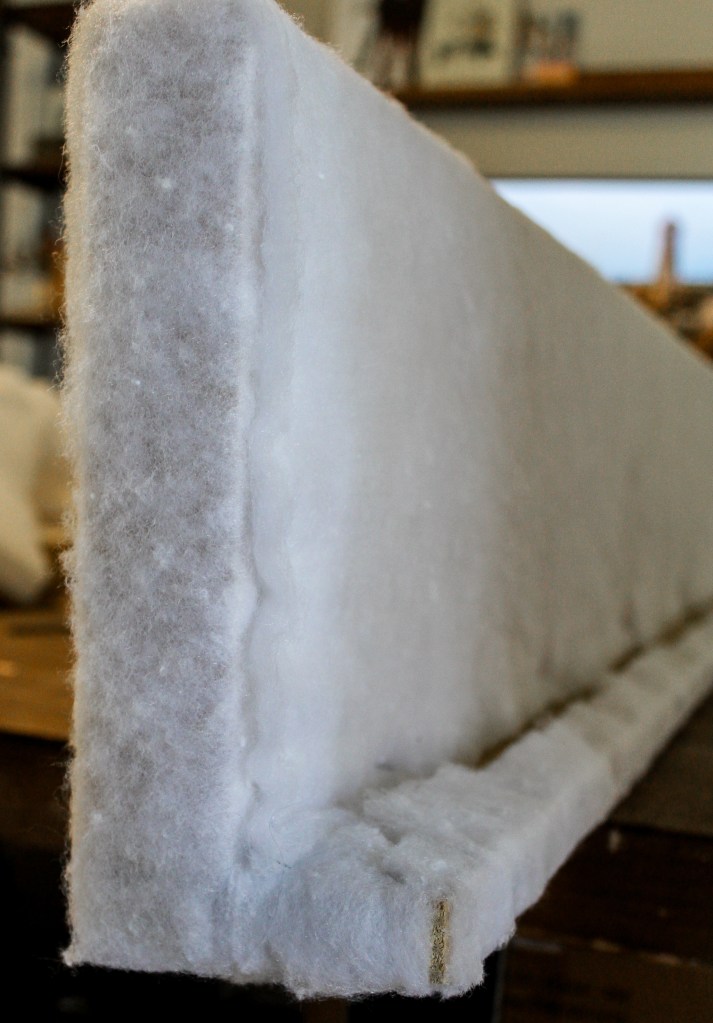
I cut a large piece of batting and laid it over the top and then J helped me flip the headboard over (because dang, that stuff is heavy) so that the MDF was laying on the pad, which was laying on the batting. I pulled the batting nice and tight and stapled it into place and then went to iron out my fabric. Holy cow. These curtains did not want to straighten out! After what felt like ages, I abandoned my iron and threw them in the dryer, which (a) worked a lot better and (b) gave me some down time to play with this little nugget who wanted in on all the action. I still had to iron out a few stubborn spots, but it was much easier than it had been.
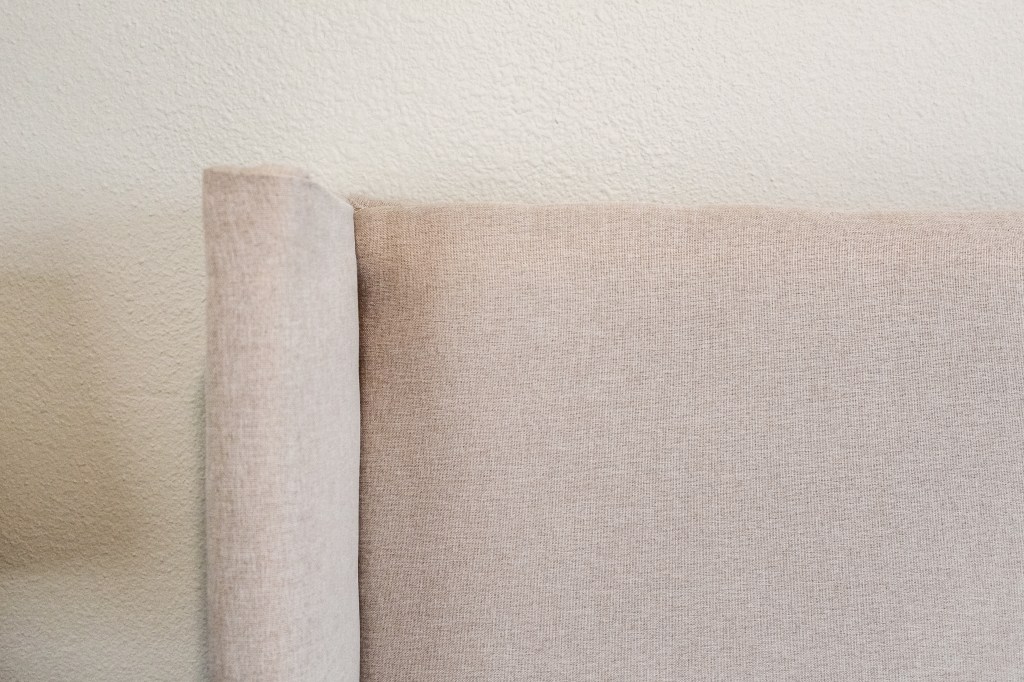
I cut the gussets off the curtains and laid one panel on top of the batting, making sure it was flat. I pulled the fabric tight and stapled it down, but I left the top loose. You want to finish stapling the top at the very end so that you don’t end up with any weird pulls or folds after attaching the wings; however, I would recommend stapling down the 2 inches or so on the top edges where the wings are going to overlap in the back. Trust me.
Now I went back to the wings. Much like how I wrapped the batting, I started with a small piece that went on the ends and then wrapped the fabric around the main part, leaving a bit of empty space for screws. When I stapled down the end fabric, I needed to add a little bit of batting where the staples were to keep the tuck from showing through (just like when I stapled down the pad).
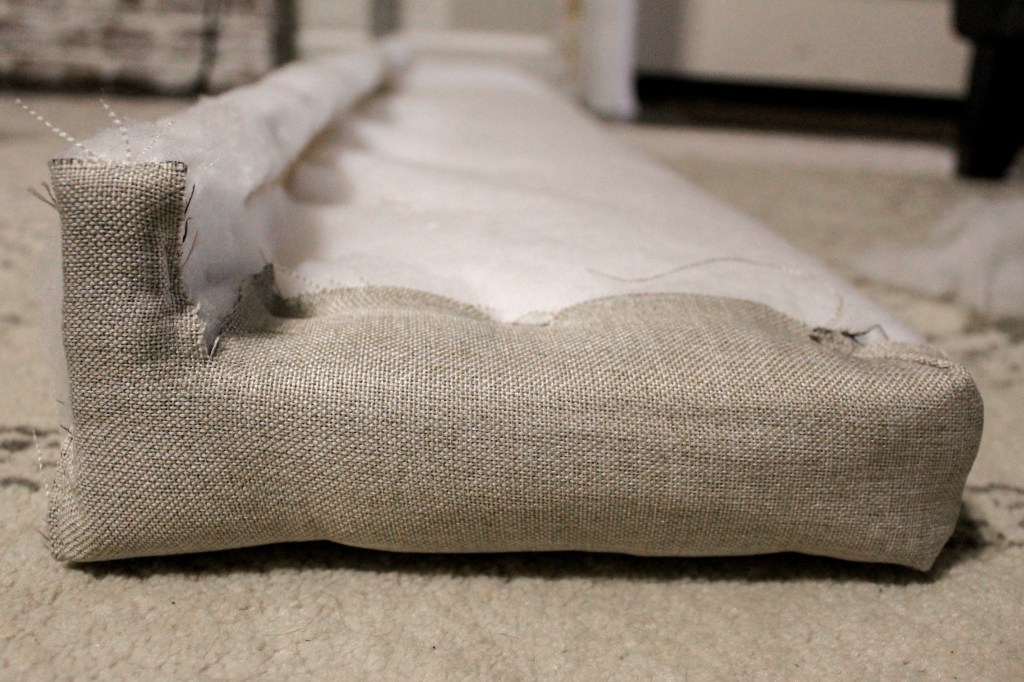
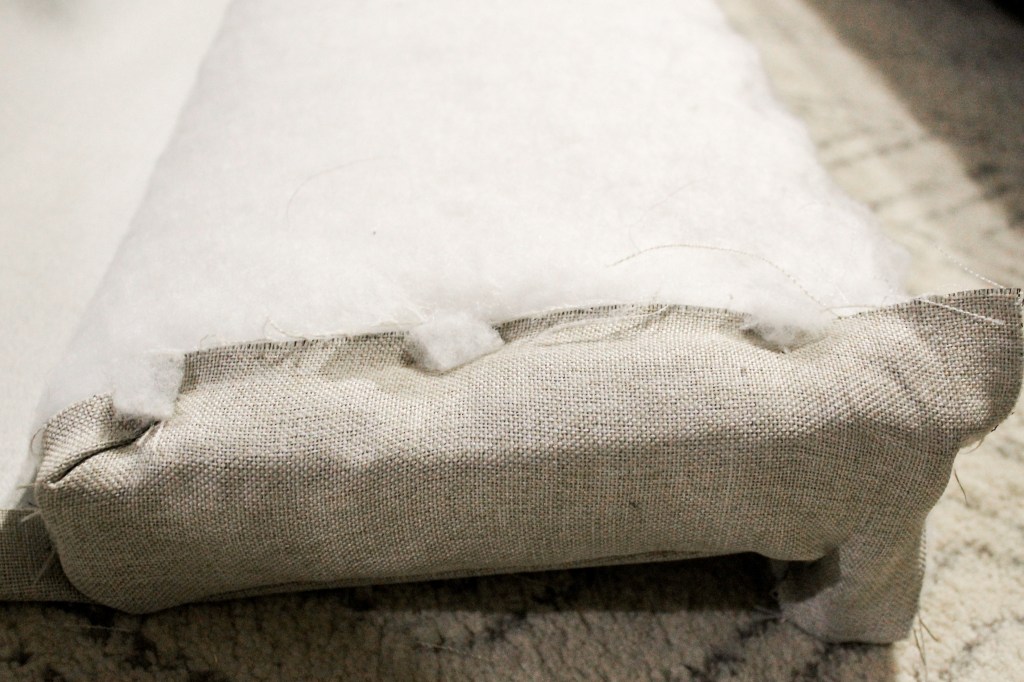
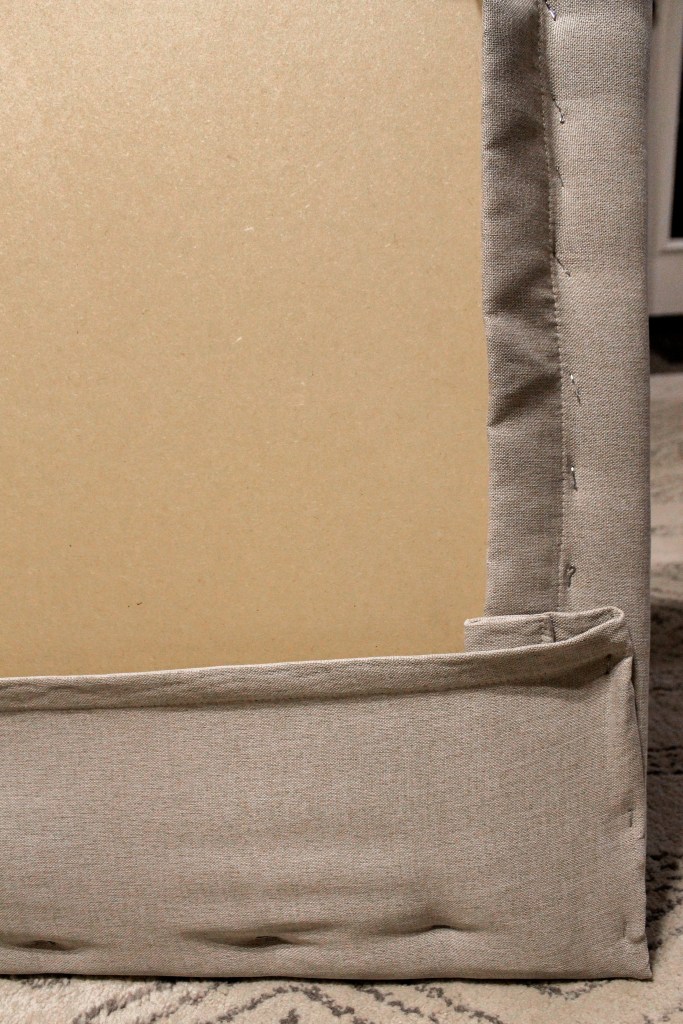
When I wrapped the main part of the wings, I folded the raw edge under and ironed it so that it would hold. You don’t want to add any staples where you’re going to be able to see them, so they all need to go into the inside of the 1×4 where it will attach with the headboard back.
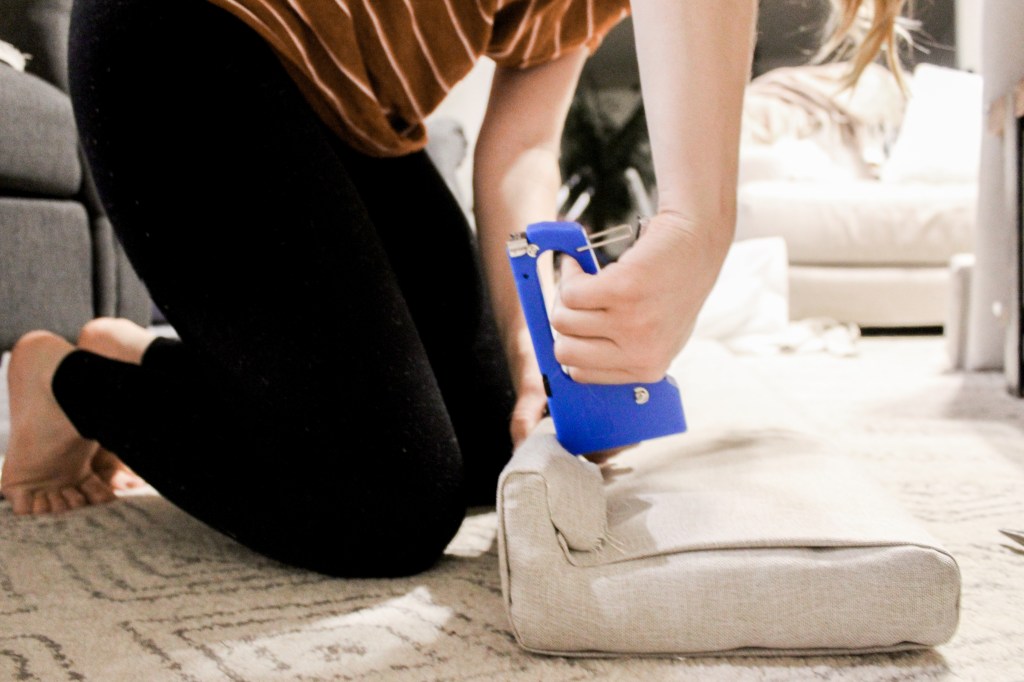
Once the wings were wrapped, it was almost done! J and I leaned the back up upside down against the coffee table and then lined the wings up, also upside down. I wanted to make sure that the top was level and had some elaborate plan for doing that. J suggested assembling it upside down and that made a lot more sense. I can do a lot of things without any help, but I would definitely recommend grabbing an extra set of hands for this part. It is really helpful to have someone hold the wings in place while you screw them in. Use 2″ screws for this!
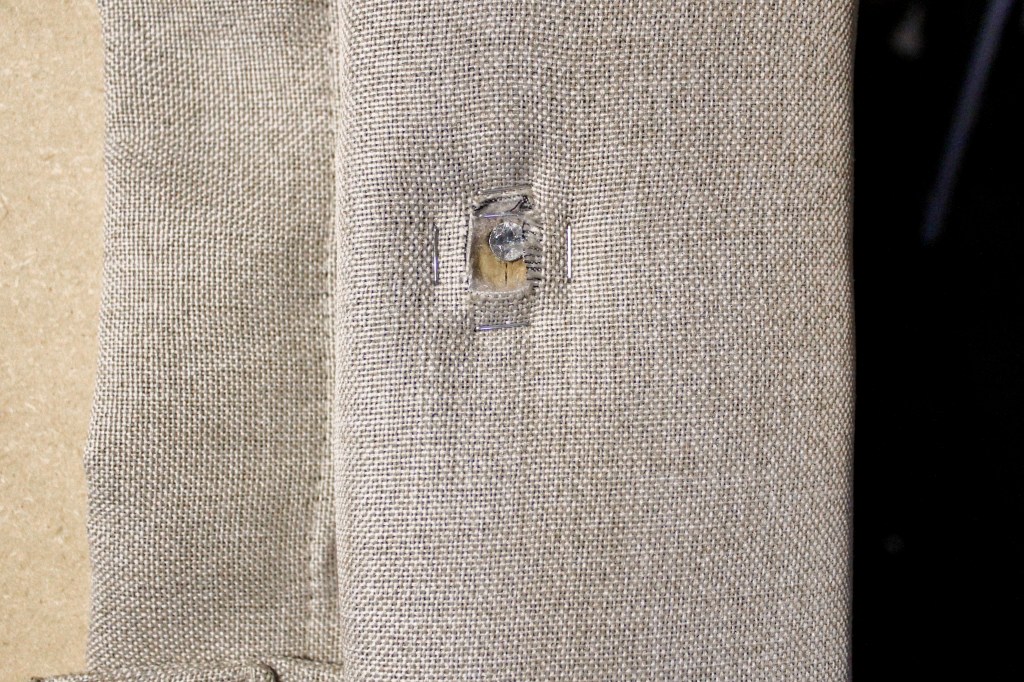
Quick tip – cut these little holes. It is scary to cut holes in your perfect fabric, but if you don’t, your screw will catch and pull on your fabric and that is definitely worse. After I cut the hole, I shoved my finger in and cleared all the batting away because your screw will wind up the batting like cotton candy if you don’t. You could patch these holes, but I was tired and decided not to because they go up against the wall so no one will ever see them, so I just stapled around them and called it a day.
Now all I needed to do was pull the fabric on top tight and staple it down! I wish I would’ve done the edges before attaching the wings because I had to take out a couple screws in order to shove the fabric where it needed to go. Anyway, pull it tight, staple, and viola : a headboard!
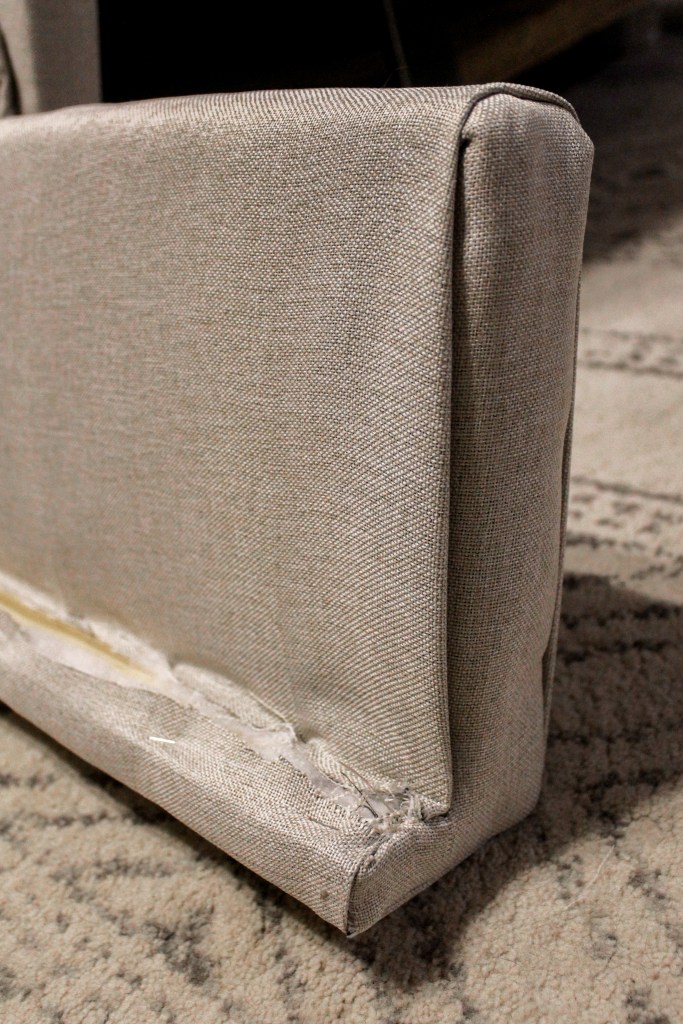
I could’ve stopped here, but I wanted to finish it off just a little bit more. On the back, there was a bunch of exposed MDF. I grabbed an old sheet, cut it to size, and stapled it to the back to cover the ugliness. There was also some exposed wood on the legs (remember that space I left for the screws? Well it’s all covered by the back of the headboard, except for the distance between the floor and where the back starts, haha) so I cut strips of extra curtain fabric and folded/ironed in the raw edges to cover that up. This is really hidden, so I just went ahead and stapled my strips on, but you could try spray adhesive if you wanted.
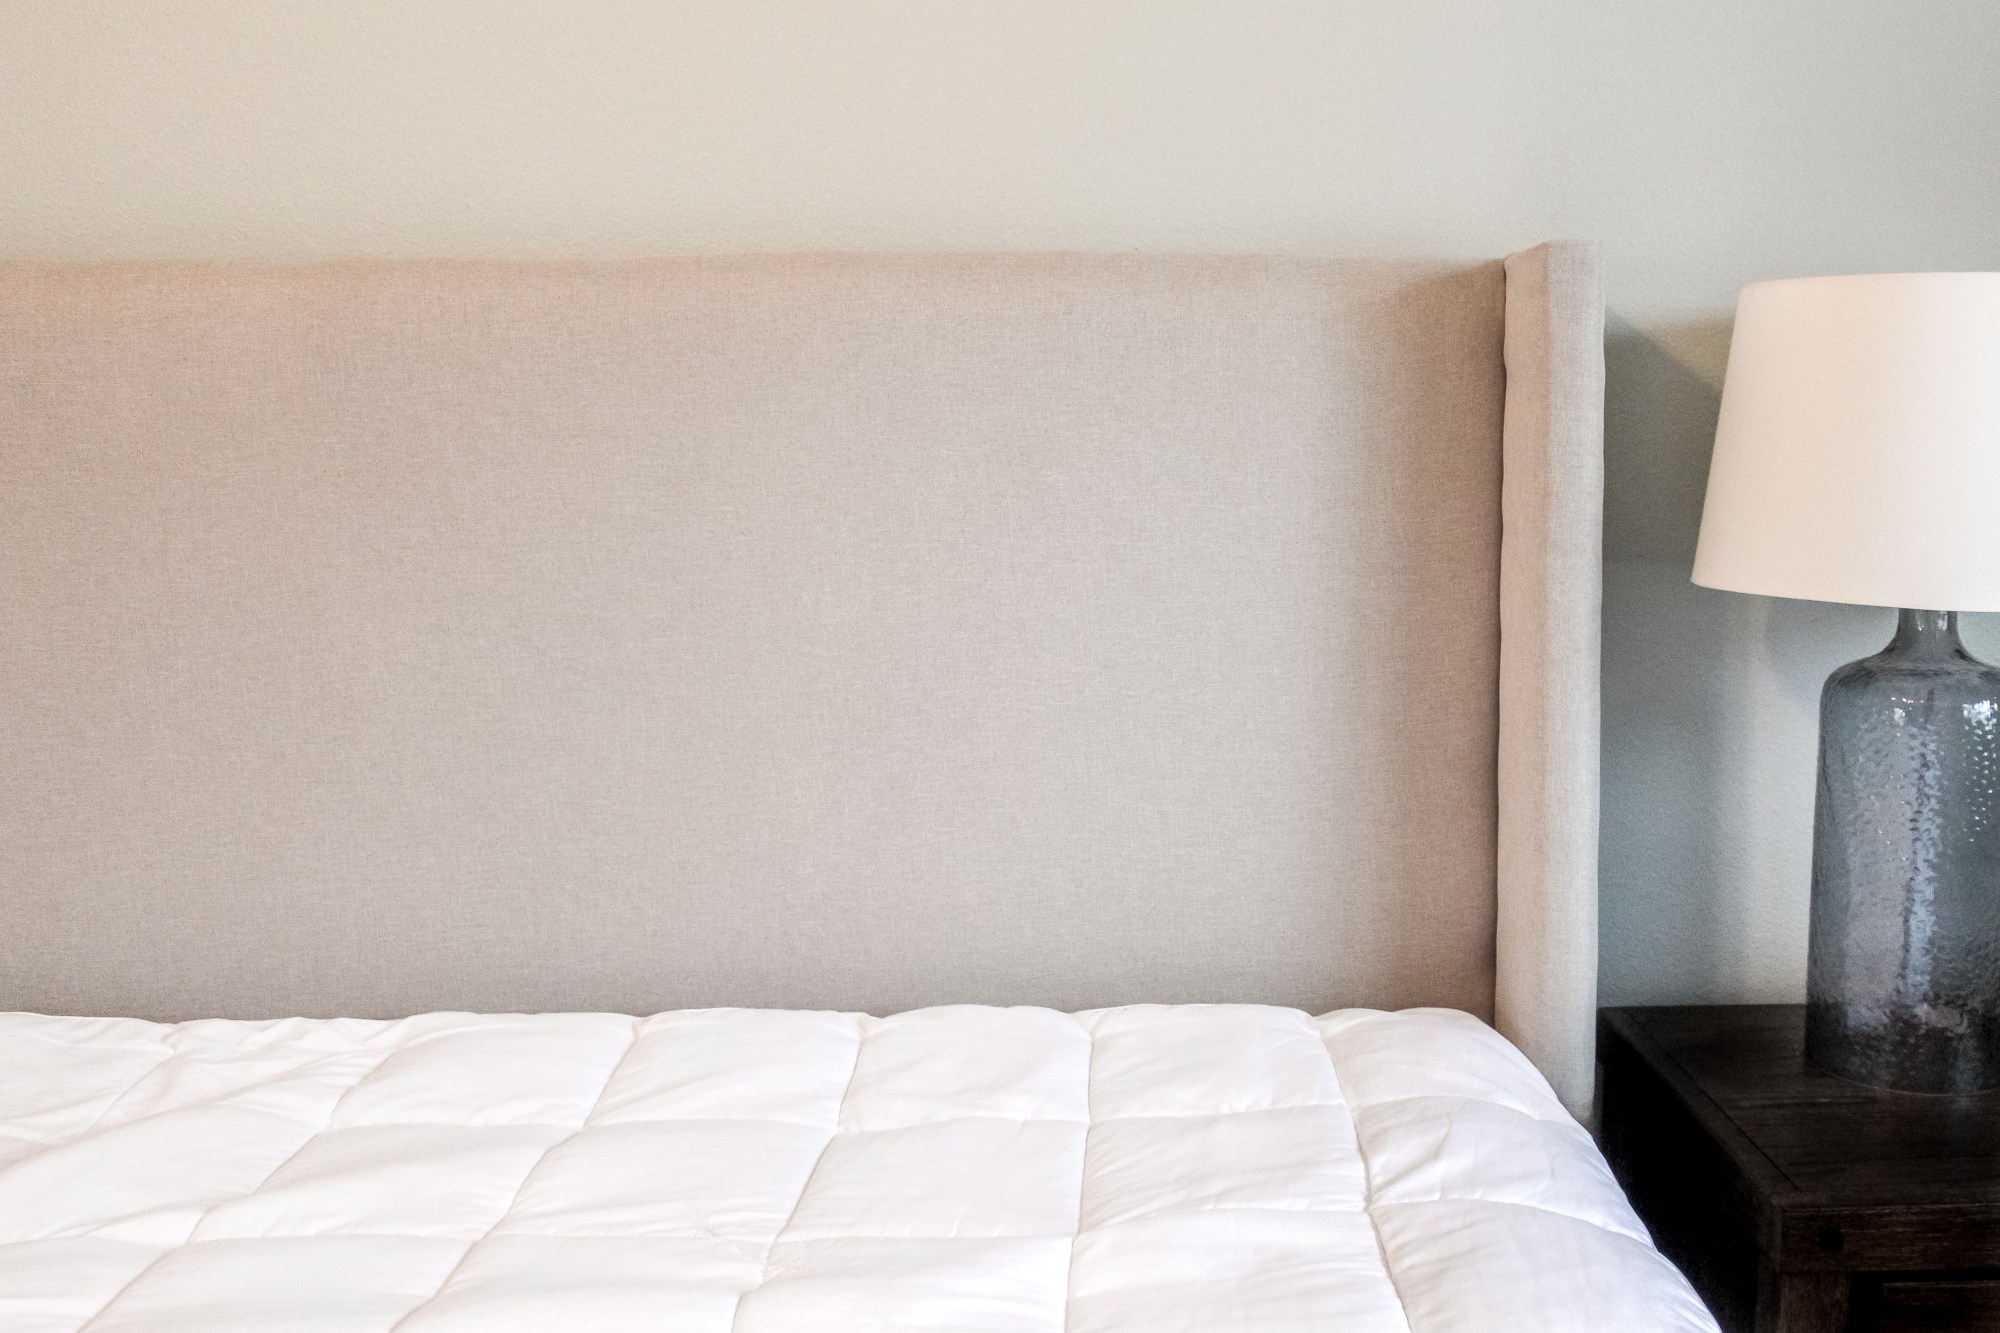
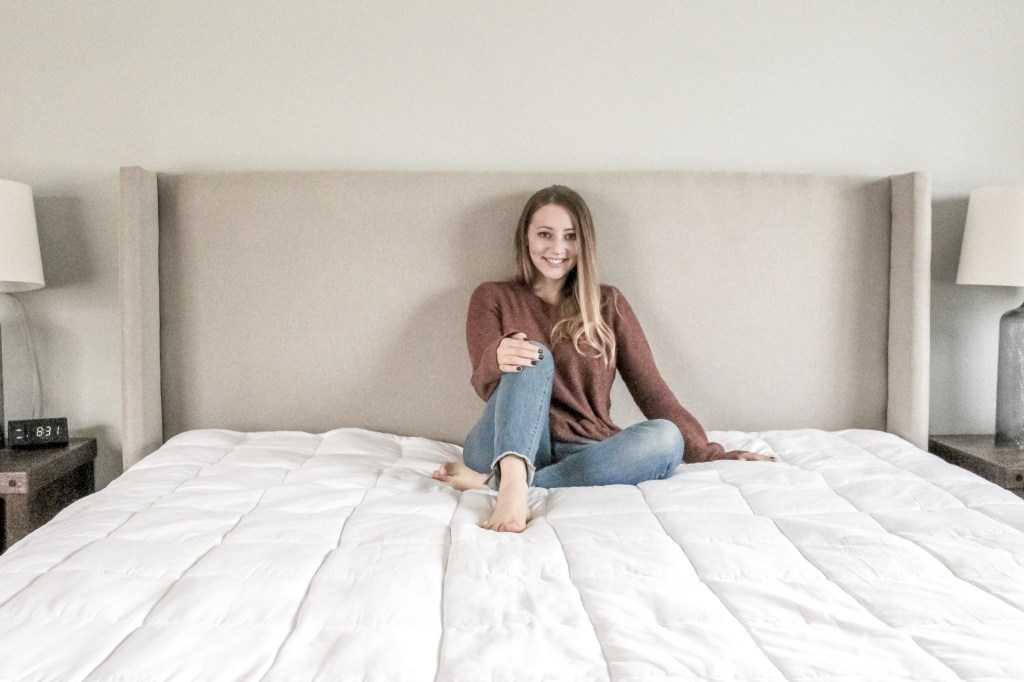
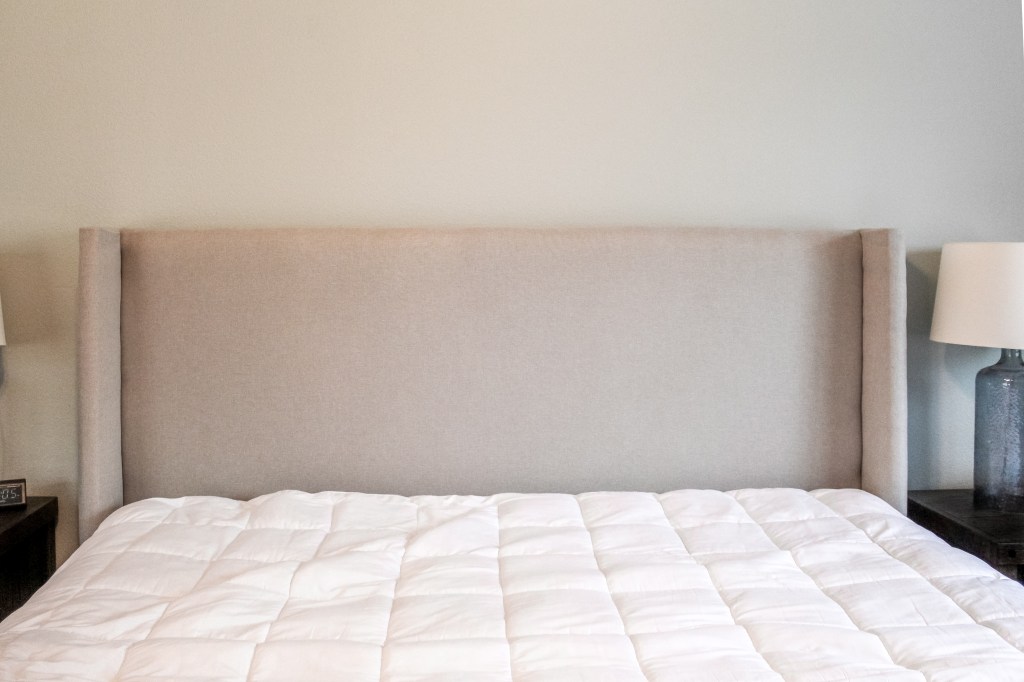
Okay guys, this headboard is super heavy, like I definitely can’t move it by myself. But we got it into the room and it looks awesome! Now I just need to finish up my board and batten so that I can see the two together. This room is already taking shape and I couldn’t be happier about it.
Check out all the other ORC participants here and see what fun projects they’re up to and don’t forget to follow me on Instagram to get sneak peaks of all the other projects I’m tackling during this challenge!
With love,
Mercedes ♥


Was this a king size bed headboard? Love the final product!
LikeLike
Yes! If you wanted to make a different size you, just would need to adjust the width of the back piece accordingly!
LikeLike
love this! I am thinking about making my own headboard today as well! ❤
LikeLike