

Disclosure: Some of the links provided are affiliate links, which simply means I may earn a small commission (at no additional cost to you) if you shop through one of my links.
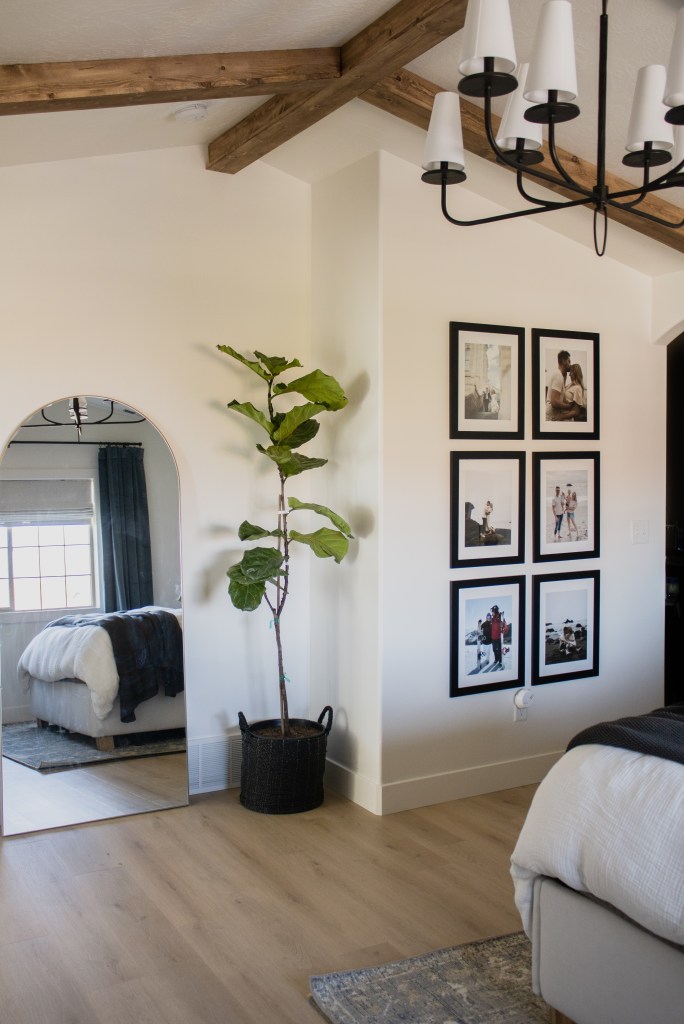
I’ve said it before and I’ll say it again – there’s nothing quite as relaxing as having a primary bedroom that you love. Having that cozy retreat to look forward to at the end of the day is a game changer and, in my opinion, is one of the biggest things you can do to change the way that you feel about your home.

Want to see what projects I’m working on now? Follow me on Instagram!
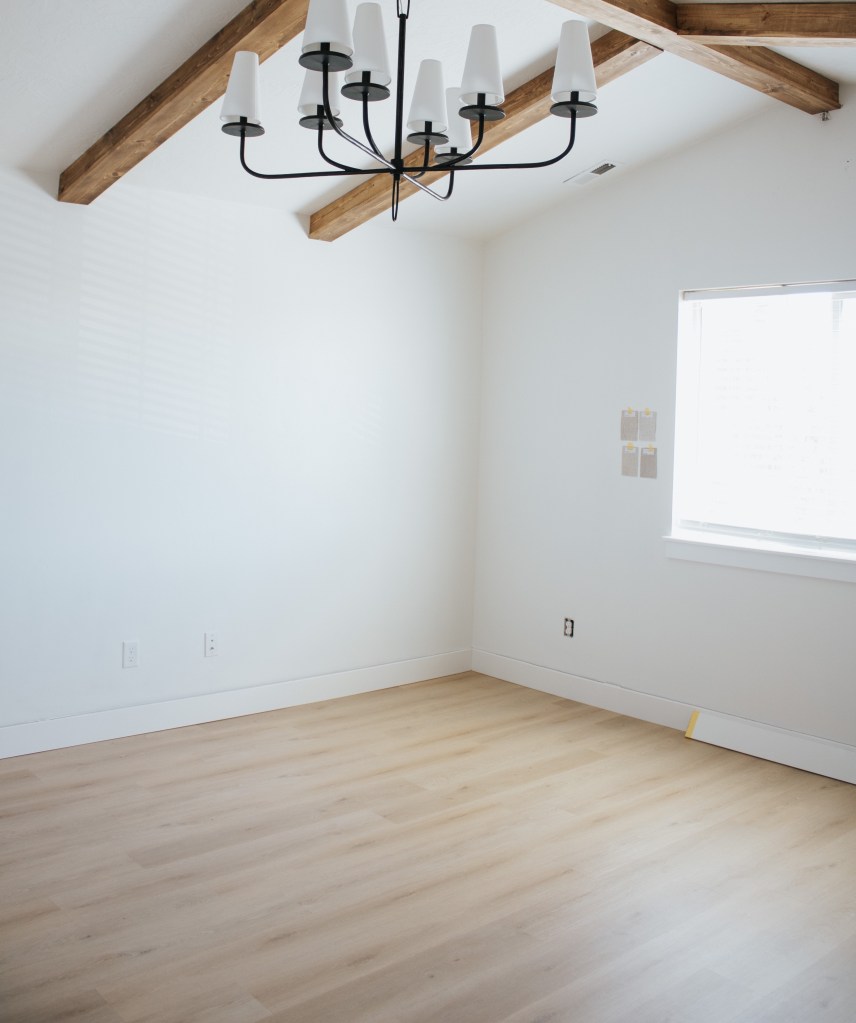
During our bedroom renovation I ripped out the carpet and installed LVP floors. I’m not against carpet in a bedroom – especially in kids bedrooms – but this carpet was just not the vibe for this room. Jordan has really bad allergies, so replacing the carpet with something that doesn’t hold onto allergens was an easy decision. The new floors are so happy and bright and the rug grounds the bed and keeps the room from feeling too sterile.
Here are some of the pros and cons of a few popular flooring options :
Carpet
PROS
- Warm on feet
- Inexpensive
- Excellent noise dampening
- Wide variety of styles
CONS
- Shows wear and tear
- Will need to be replaced periodically
- Holds dirt and allergens
Hardwood
PROS
- Easy (ish) to clean
- Adds value to your home
- Long-lasting
- Each plank is unique
- Can be installed in a wide variety of patterns
CONS
- Expensive
- Scratches easily with pets
- Can be noisy
- May need to be resealed over time
- Susceptible to water damage
Laminate
PROS
- Durable
- Easy to install
- Inexpensive
- Easy to clean
CONS
- Printed top layer means pattern is not unique
- Does not repair easily
- Not moisture proof
- Shorter lifespan than LVP
LVP (Luxury vinyl plank)
PROS
- Inexpensive
- Easy to install
- Extremely durable
- Easy to clean
- Water proof
CONS
- Quality can vary – you can find high quality LVP but also really crappy stuff
- Does not repair easily
- Printed top layer means pattern is not unique
Tutorial
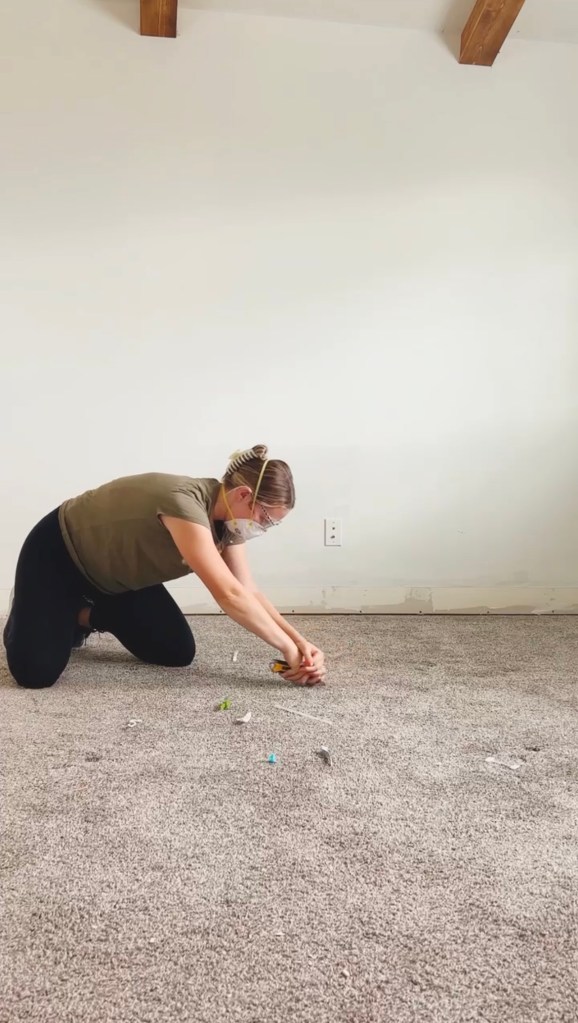
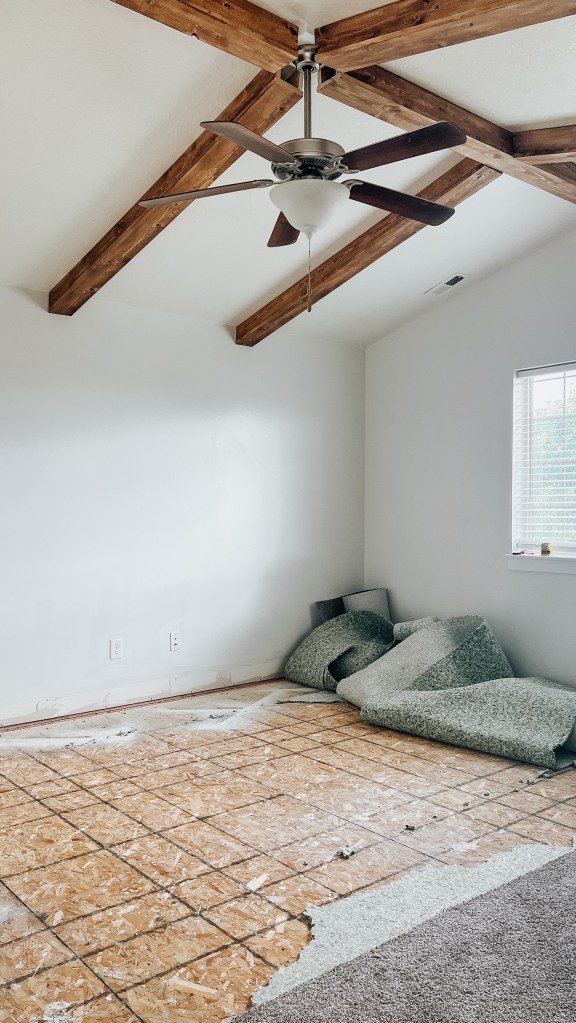
After we had settled on a beautiful LVP (this is DuraLux Somerville Wheat), I got to work. I ripped out the carpet which is one of the most satisfying jobs! Be sure to wear a dust mask while you do this. I carefully removed the baseboards by scoring along the caulk line with a utility knife, then using a 5-in-1 tool and a crowbar to pry them off the wall. Then I used the utility knife to cut the carpet into manageable sections and rolled them up for disposal. Under the carpet will be a carpet pad that is either glued or stapled down. Be sure to scrape off all the glue or staples before laying the new floors!

I used my compact shop vac to clean up any debris left behind and then rolled out the underlayment. Underlayment acts as a moisture barrier, insulator, and sound dampener for your floors. Don’t skip this step! The moisture barrier will help prolong the life of your floors, the insulation will help them to not feel too cold on your feet, and the sound dampener helps the room to not feel so echo-y and prevents some of the sound from carrying through the the room below.
I cut the underlayment to size with scissors and used the tape strip attached to the product to join them together. You can buy special tape to join odd pieces together, or just use some packing tape. I like to work strip by strip instead of laying all the underlayment out at once because it does rip fairly easily and I have two toddlers running around with me during projects.

When you’re ready to lay your floors, figure out which direction you want to lay them. Generally speaking you want them running parallel to your longest wall, but there is no reason why you can’t switch that up if you want. Start in the upper left hand corner and lay your first row. The first few rows will be the hardest ones because the floor gains strength and stability as you lay it.

The planks will have a lip on one corner. Always lay that corner facing the bottom right. Move along the first row clicking the pieces into place along the short edge. Use a mallet to lightly pound on the seam and lock the plank into place. Be careful to not hit it too hard because you can break the locking mechanism! A few years ago, I helped my parents relay some flooring in their basement because they had accidentally broken a bunch of the click lock mechanisms during install, so they’re floors were separating.

Most flooring materials require some spacing between the edge of the floor and the edge of the wall to allow for expansion. Remember, cold things contract and hot things expand? This happens with your house too. Give your floors space to expand so they don’t end up buckling. Vinyl doesn’t need nearly as much of a gap as hardwood does, but it’s still a good idea to leave 1/4″ gap (the baseboards will cover it).

One of the best things about LVP is how easy it is to cut! You may still need a jigsaw for the tricky cuts, but straight cuts are easy as pie. Grab a speed square and a utility knife. Score the board on the finished side and along the straight edge, then turn it over and snap it! Cut through the foam backing with the utility knife and there you go – perfectly straight cut in about 20 seconds.


When you’re ready to start the next row, choose a random length board. Make sure that the joints of the board are at least as far apart as the width of the board – so if you are using 5″ wide boards, make sure that the ends of the board from one row to the next are at least 5″ apart. This is important for the strength of the floor. So choose a random length board and start the next row, clicking the board into place along the long edge of the first row. Then lay the next board, clicking it into place along both the long edge above it and the short edge next to it.

As you lay the floors, pay attention to the boards that you are selecting so that none of the printed patterns are right next to each other. The further apart you can get those repeated patterns, the more natural and realistic your floors will look. Also, try not to follow any pattern for choosing starting boards. You don’t want to be able to see stair steps, so always start with a different length board and vary it so that it looks random. I set aside the cut pieces from the end to start with and try to use those as starting boards, but I will also cut boards down to start with to make sure that I have a good, varied lay.
You can use transitions to easily move from LVP to another flooring material (like in a doorway), or you can leave it as a straight transition and put a few brad nails in where it will be covered with baseboards.

I was able to lay this whole bedroom floor in two days, but I could’ve easily done it in one day had I planned my time that way! This is a great project to do if you’re not loving your carpet anymore and it’s relatively straightforward, which is always good. Let me know if you tackle this project yourself – I always love getting your projects in my DMs on Instagram. And as always, feel free to comment below with any questions!
With love,
Mercedes ♥
