
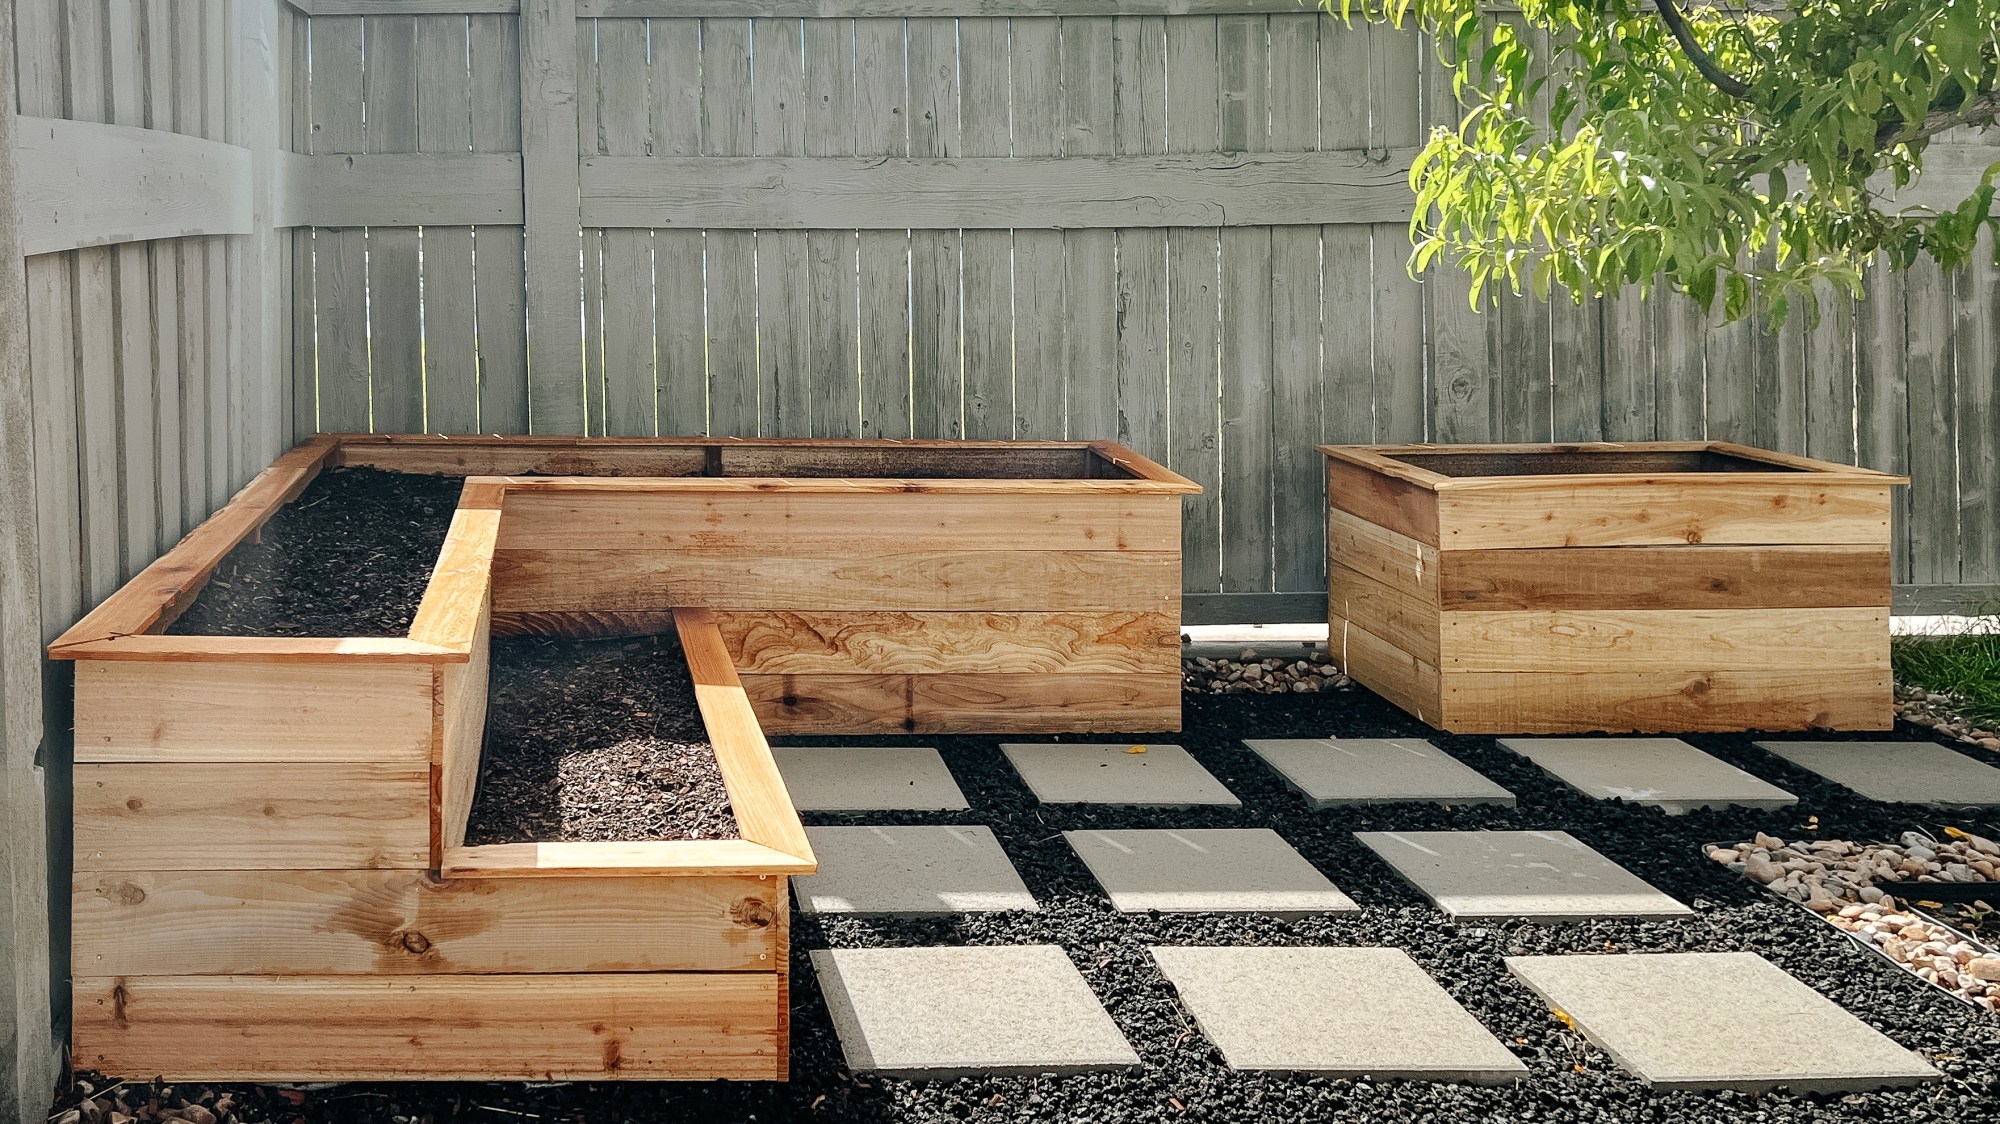
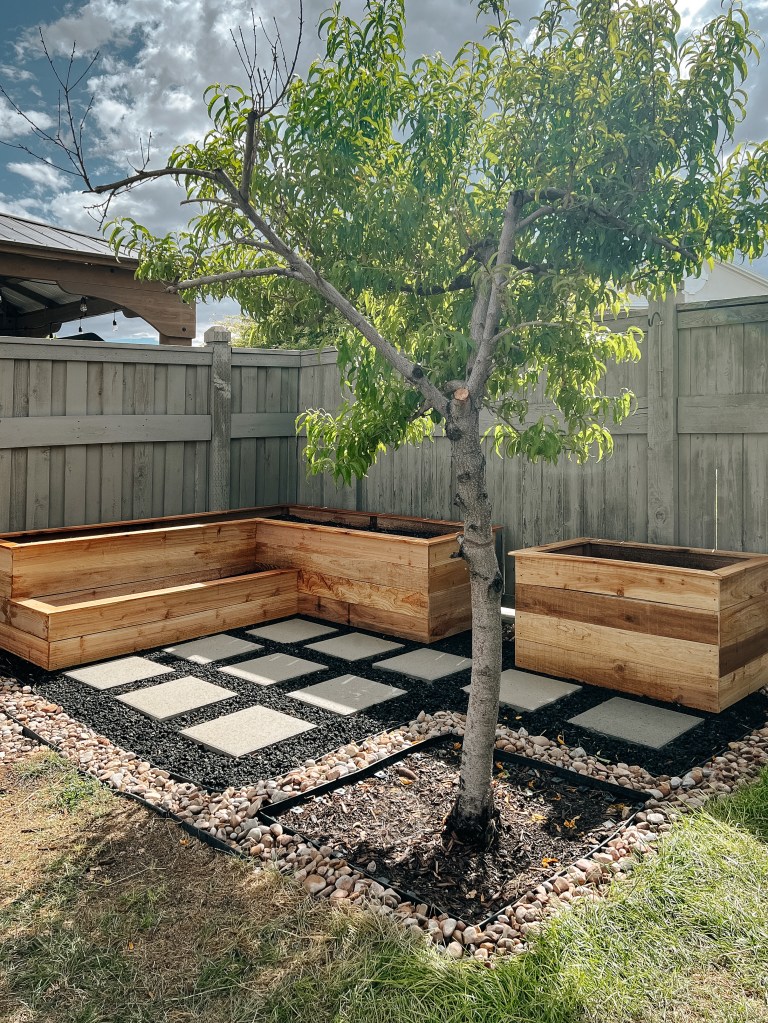
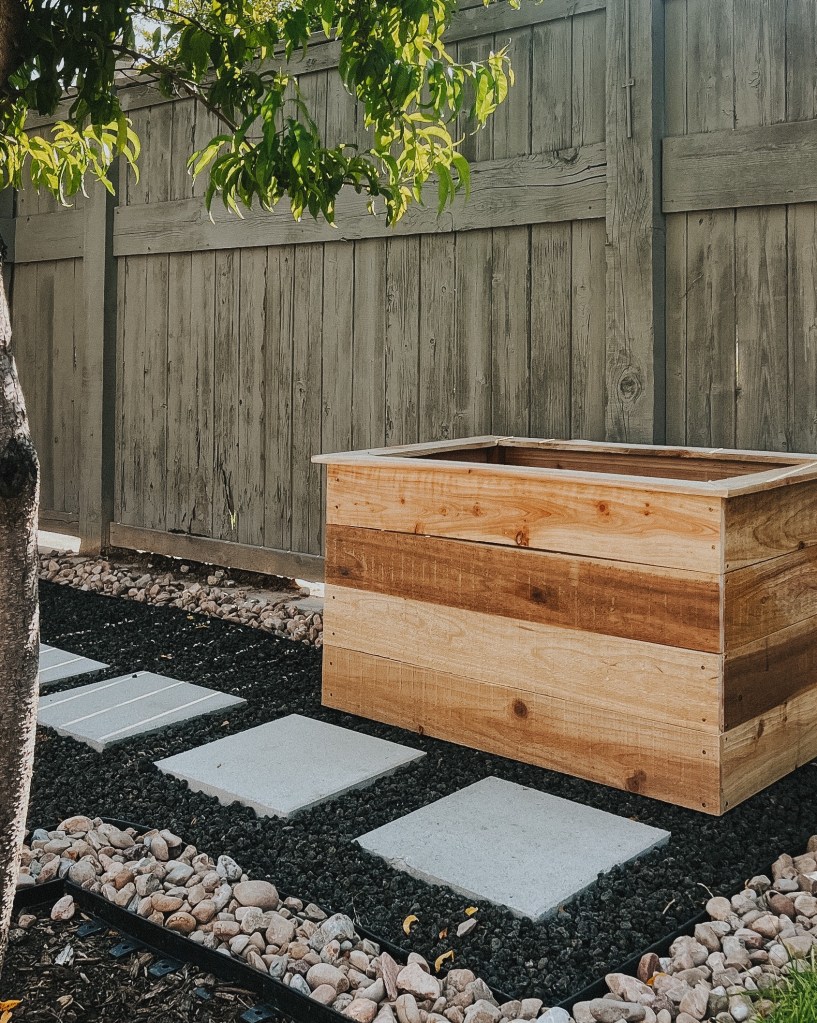
Our backyard is currently still in an it has to get worse before it can get better phase, but this corner has made HUGE progress in the last few weeks. It wasn’t really that bad when we bought our house, but stylistically it just didn’t do anything for me and I’ve been slowly working on getting it to look how I want. I planted a few trees, redid a flower bed, and then earlier this summer I removed three giant planter boxes that went along the side of our yard with the intention to turn the back corner into the garden.
I finally got around to building them (which, thank goodness because we’ve had piles of dirt in our yard waiting for a home) and the build was so much easier than I expected! The small one cost me less than $50 and the big one was about $150, which is super inexpensive considering the cost of wood these days!

You can easily customize the size and shape of these to fit your garden. That’s one of the best things about DIY! Everything is custom.
Disclosure: Some of the links provided are affiliate links, which simply means I may earn a small commission (at no additional cost to you) if you shop through one of my links.
Materials
- 5.5” x 6’ cedar fence pickets (8 for the small box, 26 for the big one)
- 3.5” x 6’ cedar fence pickets (2 for the small box, 7 for the big one)
- Pressure treated 2×2 (1 for the small box, 4 for the big one)
- 1.5” exterior screws
- Plastic sheeting
- Landscape fabric
- Exterior glue
Tools Required :
Tutorial
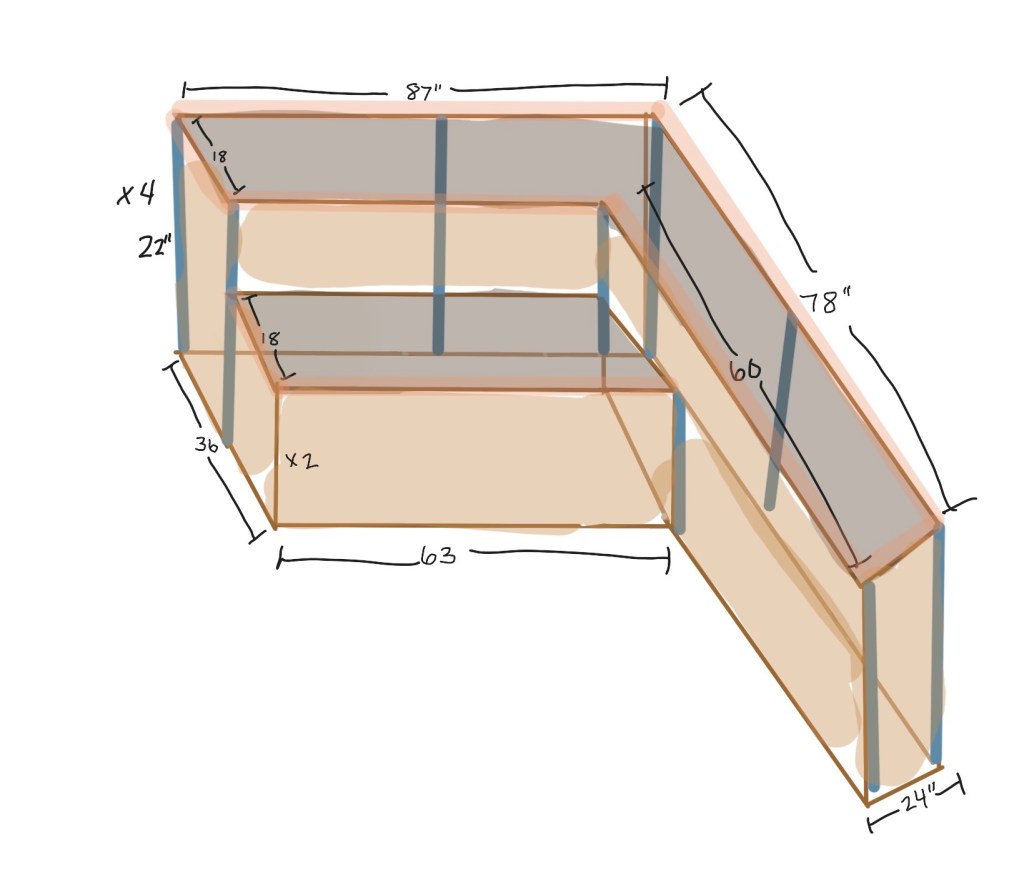
I’m going to walk you through the steps of building the small box, but know that I used the same method for the big one! The only difference is that on the inside corner of the L, I screwed the boards directly together instead of using a 2×2 post.
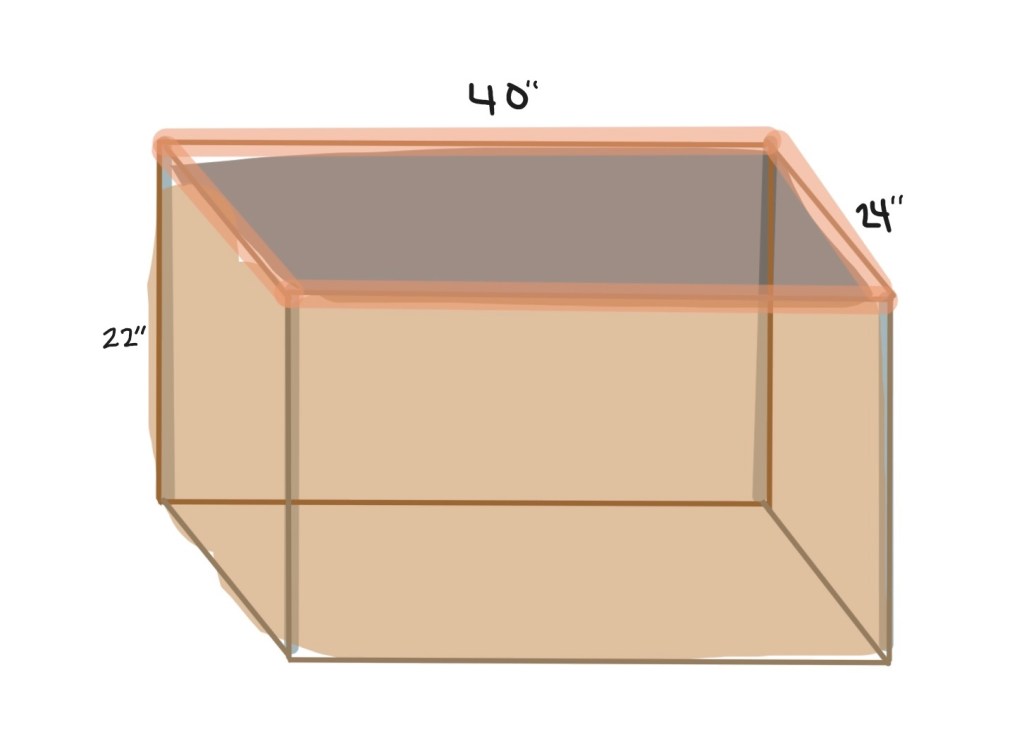
Cut all your pieces to size for the main box. You’ll need (8) 40” pieces of the 5.5” board, (8) 24” pieces of the 5.5” board, and (4) 22” pieces of 2×2.

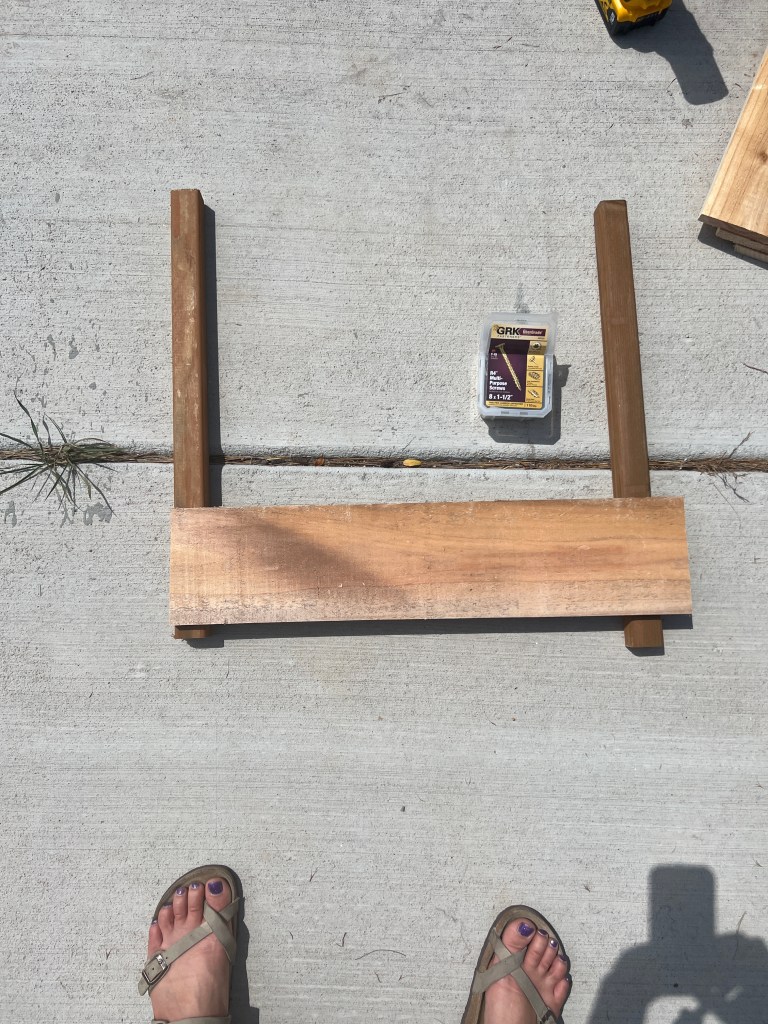
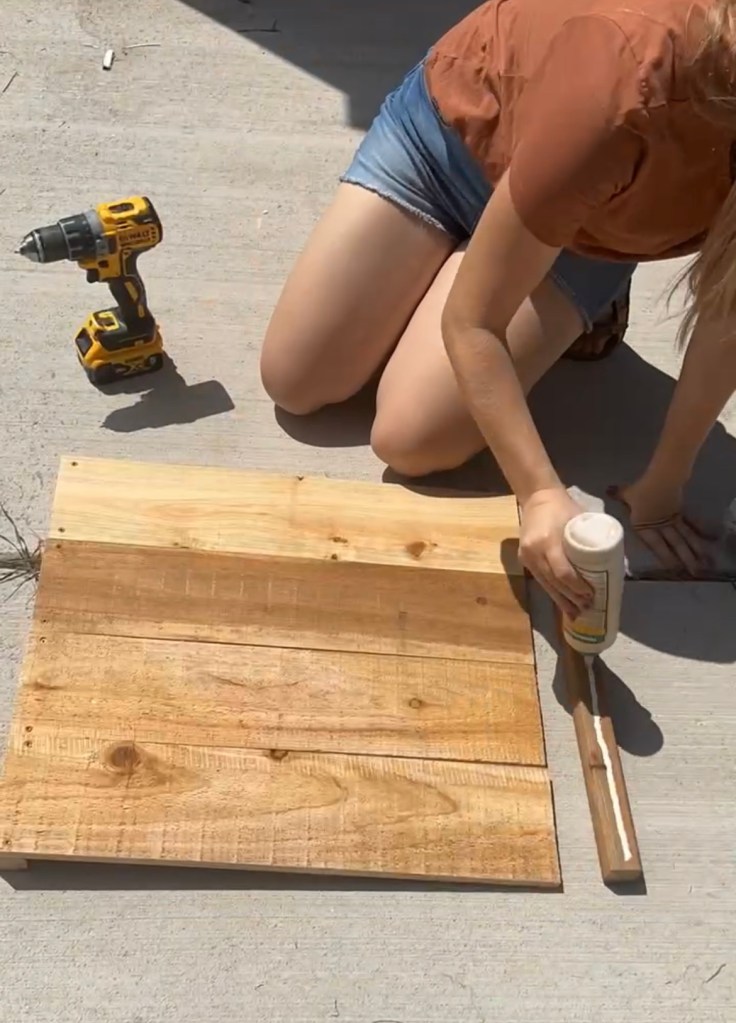
Lay out two of your 2x2s and apply a bead of glue down one of them. Then line up four of the 24” boards and screw them on, propping them up with the second 2×2 to make sure they’re laying flat.
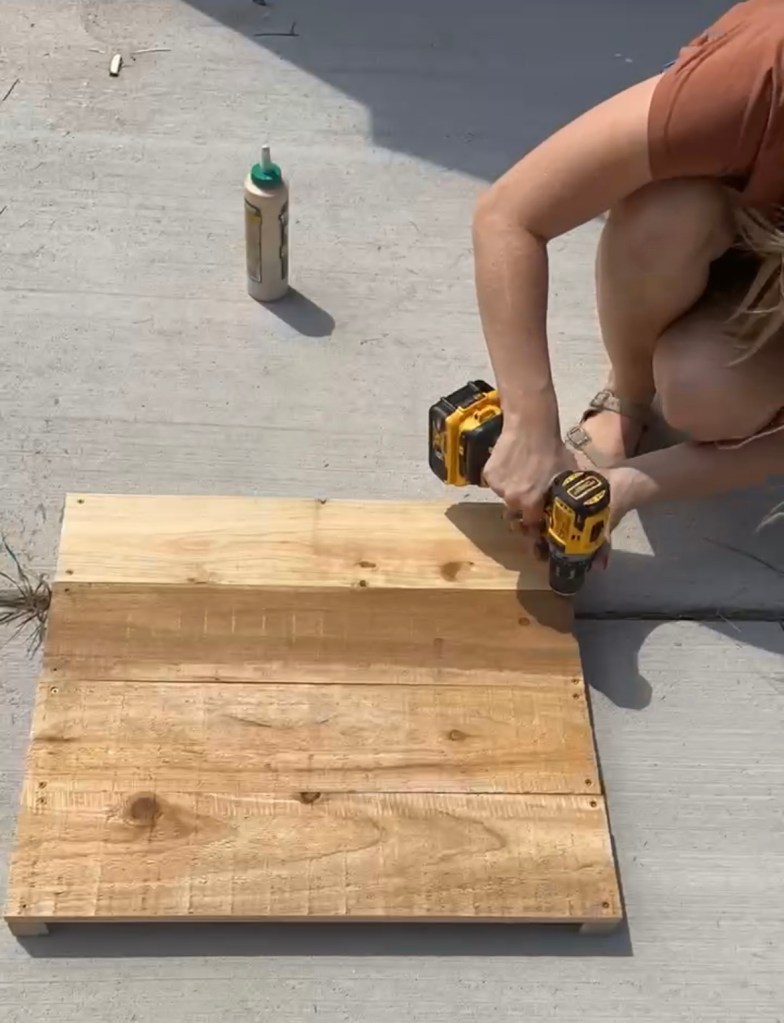
Apply a bead of glue on the other 2×2 and screw the other side in as well. I used two screws on each board on each side.
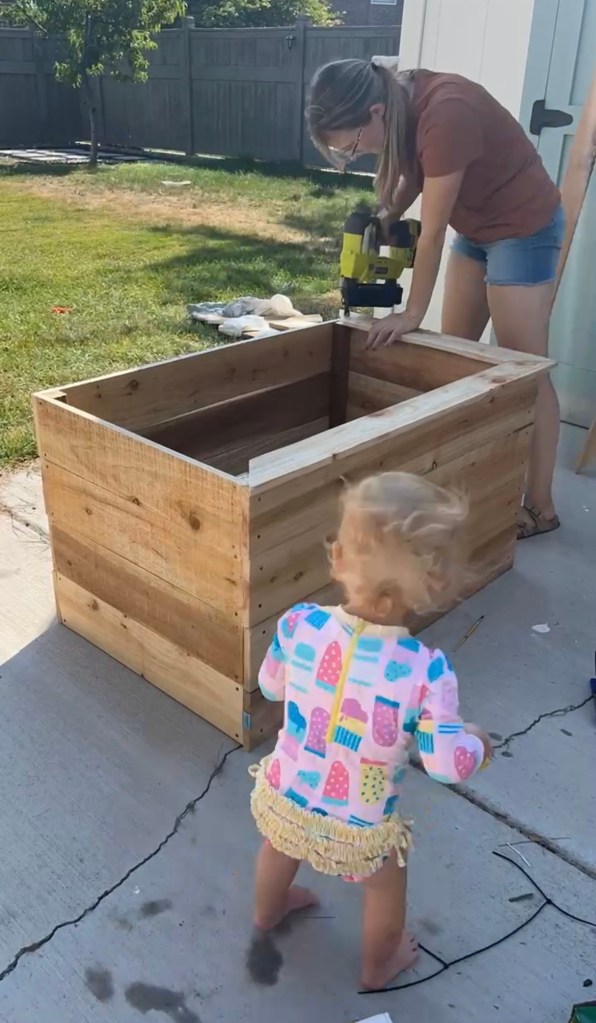
Now you have your side pieces! This next part is the trickiest part of the whole build, but don’t worry it’s not that hard. You need to stand up one of your side pieces and start screwing on the front panels. Once you have the first one on it’ll stand up on its own, but before then it’s a bit of a balancing act. Before you screw it on, be sure to add glue!

Note : If you have any variation in the size of your fence pickets, you may end up with one end of your side pieces that is perfectly flush and one that is not. If that is the case, make the flush side your top side. You can deal with some unevenness on the bottom by wiggling it into your dirt/rocks, but you want the top to be flush. So when you’re attaching the front pieces, flip the side pieces upside down so that the top is sitting on your flat surface. That will help keep everything on the top flush.
Screw four front boards onto the first side panel, then attach the second one. Grab your remaining four 40” boards and attach them to the back.

Time for the top trim piece! Using the skinnier 3.5” pickets, you’re going to create a flat ledge that will finish off the top of the box. I did a 1” overhang on the small box, but then I switched it to 1 3/8” on the bigger box (I know, I know… that’s a weird number – it’s as big of an overhang as I could do while still hiding the internal posts). I think I like the bigger overhang better because it means there is less obstructing the inside of the box.
So I’ll use that 1 3/8” number, but you can adjust if it you want. For the side pieces, you’ll need to miter them so that the long edge to long edge is 24+1.375+1.375 = 26.75. So cut one end at a 45* angle, then measure 26.75” from the long edge and cut another 45” angle there, making sure that when you’re lining it up to your mark it’ll be the long edge again. You also need to make sure that you’re cutting your board like a frame, so the angles should be pointing in at each other (creating a trapezoid not a parallelogram).
To get a super tight fit, I lined up my side pieces on the box and then measured the distance between the two of them that I needed to fill for the front and back. I recommend doing this (as opposed to me giving you a measurement to cut) just because cedar fence pickets aren’t the most precisely cut wood and the slight variations in thickness can affect getting a tight corner.
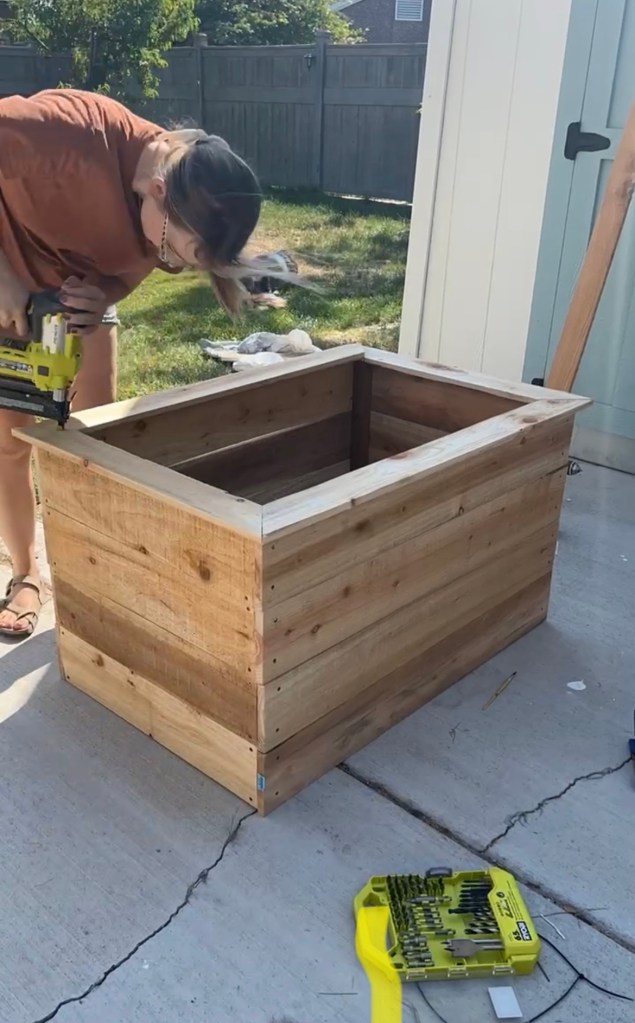
Once you have your top pieces, put some glue along the top of the box and then nail them on with a nail gun. You’re almost done! Time to fill.
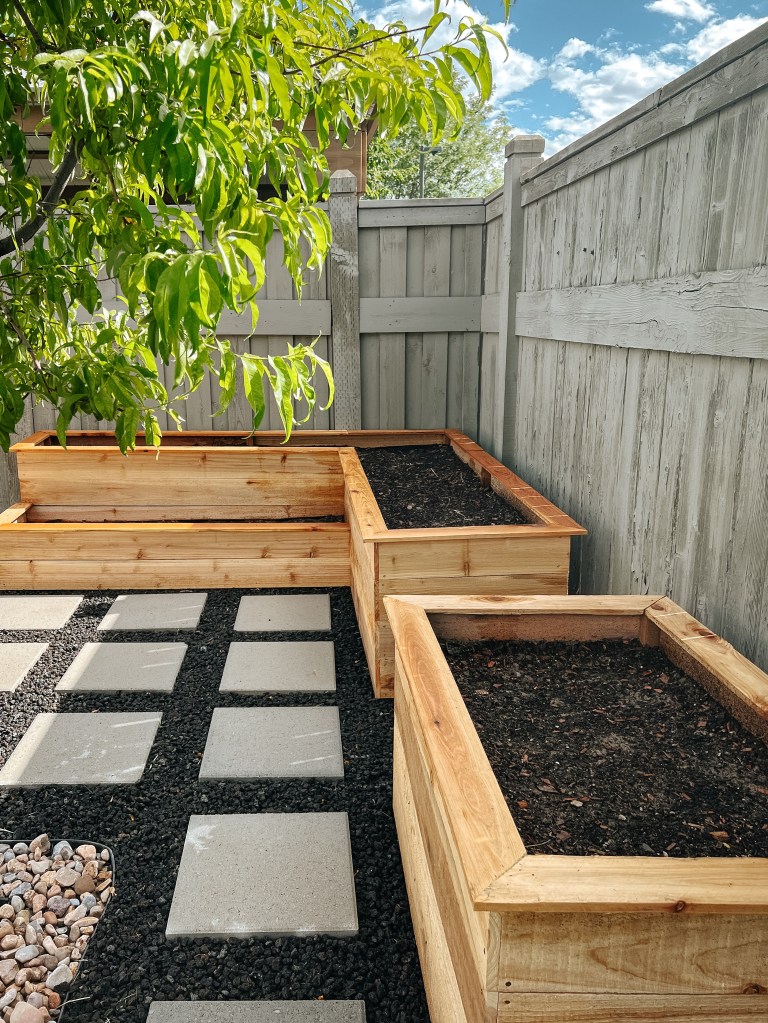
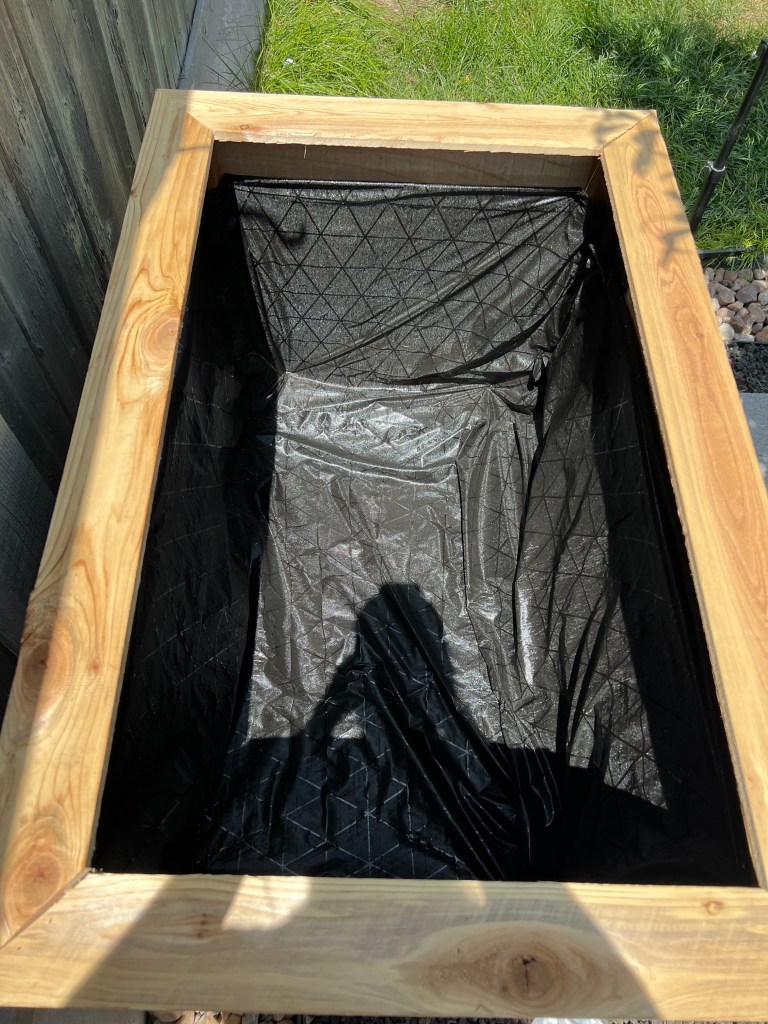
I lined my box first with plastic sheeting to try and help keep the soil moisture off of the wood. It is exterior rated wood (duh, it’s for a fence) but I still want to prolong my boxes’ lives for as long as I can. I stapled the sheeting on just above the first slat line and made sure that it wasn’t lining the bottom because that would mess with drainage. Then I stapled on landscape fabric, which I made sure to line the bottom with! Its job is to hold in the dirt, so I tried to make sure I didn’t have any cracks for the dirt to seep out of. I took this about 1” above where I stapled the sheeting.
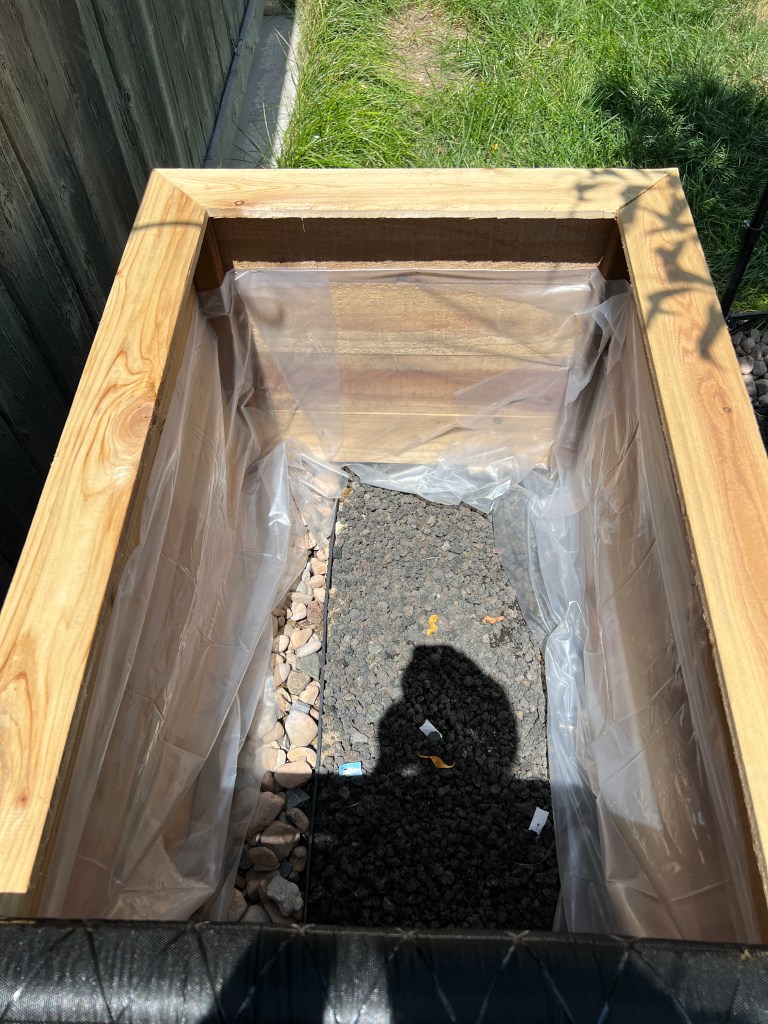
Then time to fill them. I’ll be honest – I understand why most garden boxes are not this tall. It took so much dirt to fill these up! Luckily, I had a ton of soil waiting just for this purpose (remember the giant boxes I said I removed earlier this year?) but I used about twice what I was expecting to. So just beware, it’s a lot to fill these! I started with dead branches and other yard waste that I’ve been saving just for this purpose. The extra organic material is good for your soil, and it also means you’ll need a little less dirt. Yay!

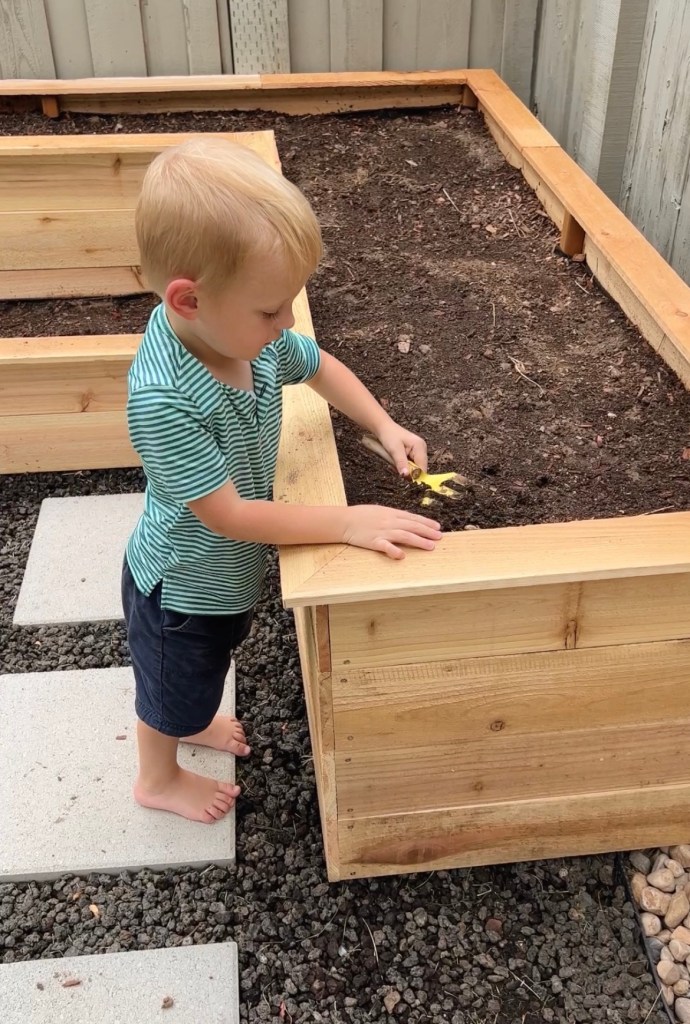
Before Elliott (my 3 year old) and I planted our seeds, we made sure to wet the dirt well to help it settle and just to give the seeds a good amount of moisture.
Since it’s already the beginning of August, I did a ton of research and asked my friends on Instagram what to plant and here’s what we came up with! These boxes are big enough to plant all of this without it being overwhelming for me – yay!
Spinach
Peas
Green beans
Kale
Broccoli
Eggplant
Parsnips
Cabbage
Kohlrabi (I’ve never heard of this before but someone suggested it so we’re trying it!)
Basil
Carrots
Brussel sprouts
Follow me on Instagram to warch the garden progress – hopefully we can keep at least some of them alive!
With love,
Mercedes

Do you have a DIY for the gravel/stone base you used for your garden boxes. I need to build something similar. Thanks. Gail Harrigan
LikeLike
Hi Gail! I have a video walkthrough saved in the “Garden” highlight on our Instagram – @with.love.mercedes 💕
LikeLike