

I wanted this closet to be more than just functional for Theia, I wanted it to be fun too. While storage was a huge motivator for this space – the drawers were a must have and we added more inches of rod space too – it needed to be fun. That meant custom built shelving, painted drawers, and of course a vanity area.

While she is only almost four years old, she has already staked out where exactly her nail polish, lip glosses, and necklaces are going. Theia is such a girly girl and it’s been fun to lean into that with her and create things that I can see her using for years to come.

Materials
- Laminated boards
- 1×3 MDF
- 1/2” plywood
- 1/4” MDF
- Soft close drawer slides
- 2.5” screws
- Laminate screws
- Pocket hole screws
- Wood glue
- Wood filler
- Caulk
- Primer
- Paint
- Gold spray paint
- Pocket hole jig or cheaper option
- Square
- Miter saw
- Circular saw with rip guide
- Drill
- Level
- Knobs – similar
Tutorial
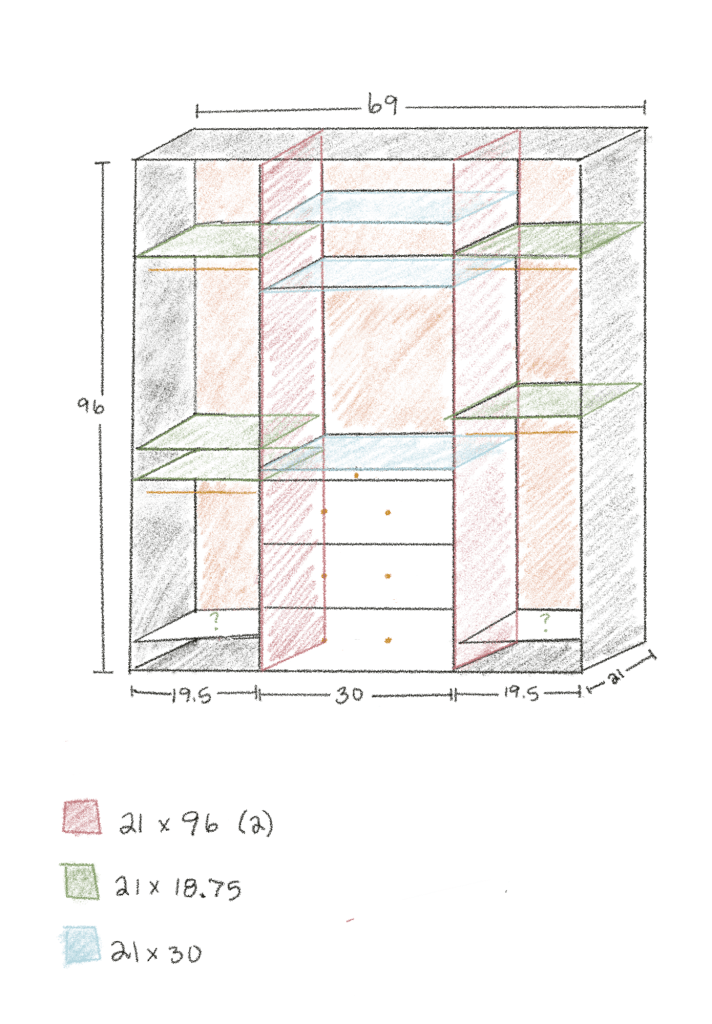
I started by planning everything out. I use procreate on my iPad to draw my plans. I ended up abandoning that very top shelf in the middle because I totally forgot that the closet isn’t entirely open, it has a door casing – whoops! It still worked out well.
Shelves
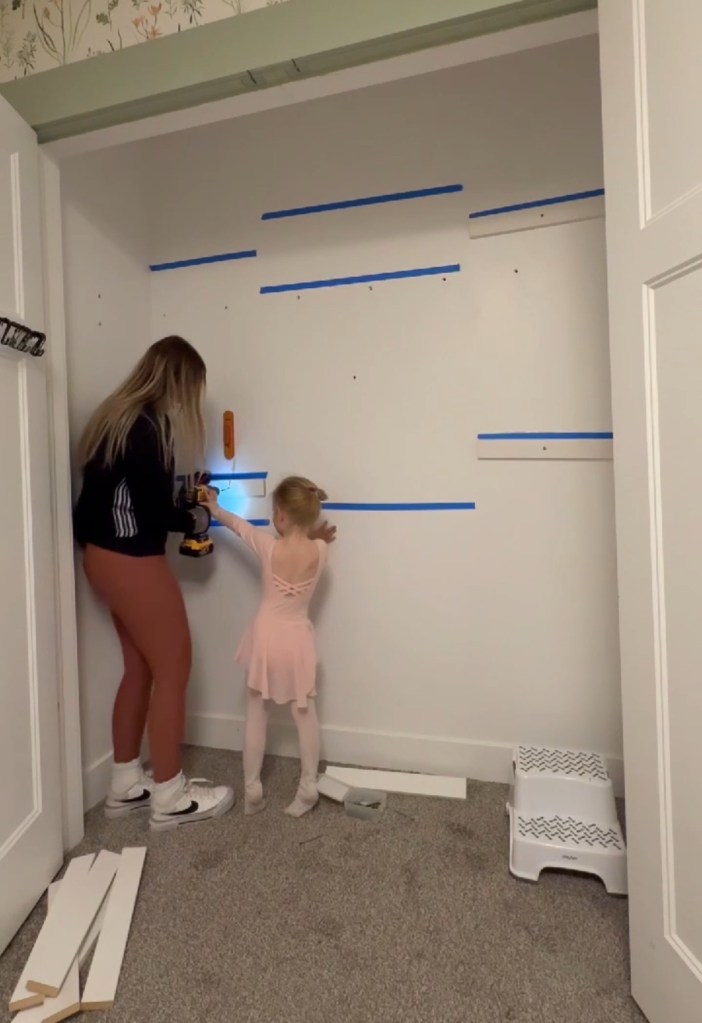
First, I installed the 1×3 MDF boards as supports. I screwed into studs where I could and where I couldn’t, I used heavy duty drywall anchors. To line these up, I drilled the board into the stud, leveled it off, then added a screw just barely into the drywall. Then I took the board down and added the drywall anchor where the screw left a mark.
I added the vertical dividers and nailed them into the supports on the side. They get more support later when we add the shelves, but this helps to hold them up while you work. Make sure to cut slots out of the baseboards to make room to slide them in flush against the wall.

I cut down all the shelves and set them in, screwing them into the dividers with the laminate screws (they have a little cap you can use to hide the screw head) and nailing them into the supports from the top. This process is super quick made me feel really good about my progress for that day!

I also added a little toe kick using some scraps and a bottom piece to divide the floor from my shelves. Then I caulked everything before moving onto the drawers.
Drawers
Onto the drawers! While essentially just a box, drawers always take me so much longer than I wish they did.

I always start by installing my drawer slides and measuring the width from slide to slide. This helps prevent any accidental math errors. I learned a new trick for getting the slides level – I cut a piece of wood to the distance I wanted between each slide (9”, in this case). Using that piece of wood, I set the wood on top of the previous slide and then the slide on top of that. It kept them perfectly spaced and perfectly level!
I used 1/2” plywood and constructed the sides first. I drilled pocket holes and glued and screwed them together. I also added two pocket holes on each board and used those to attach the bottom (also 1/2 plywood) to the box.

The most important thing with constructing drawers is to make sure everything is square. That includes the drawers and also whatever your attaching the slides to (in this case, the vertical dividers). This is a great time to let your perfectionist out and get everything just right before moving on. I built three regular drawers and one tray that we’re using for her jewelry, but it’s all essentially the same process.

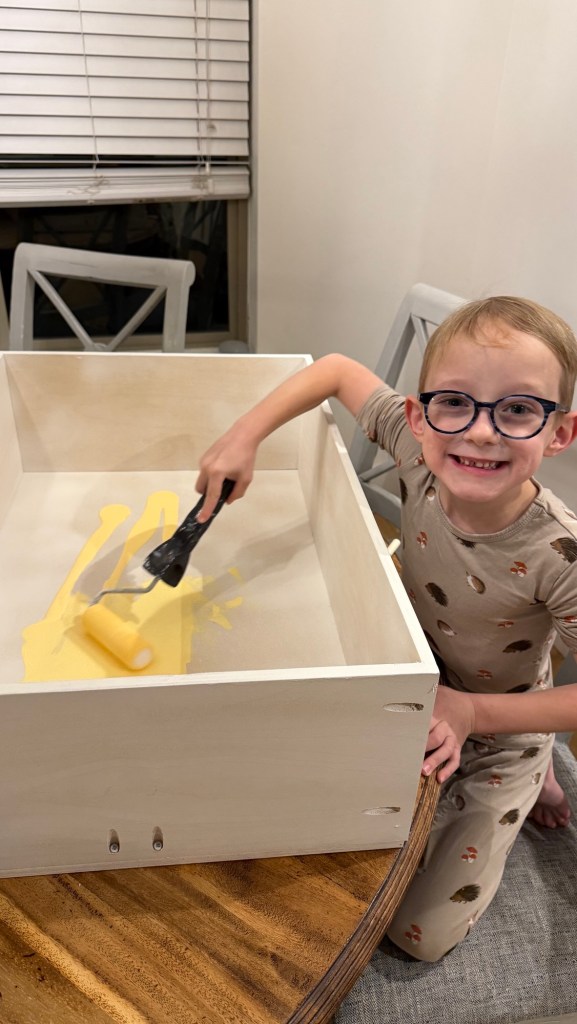
I filled the raw edge of the plywood with wood filler and sanded it to make it smooth. I also like to knock down the edge with a little sandpaper to make it less sharp. Then we primed the raw wood and I let the kids help me paint each box a fun color. Little girls are rainbows and sunshine and we definitely needed fun colors in here.

When I attached the slides to the boxes, 2/3 weren’t sliding in well. Luckily I realized it was an easy fix and I reinstalled the slides on the dividers using my trick above!


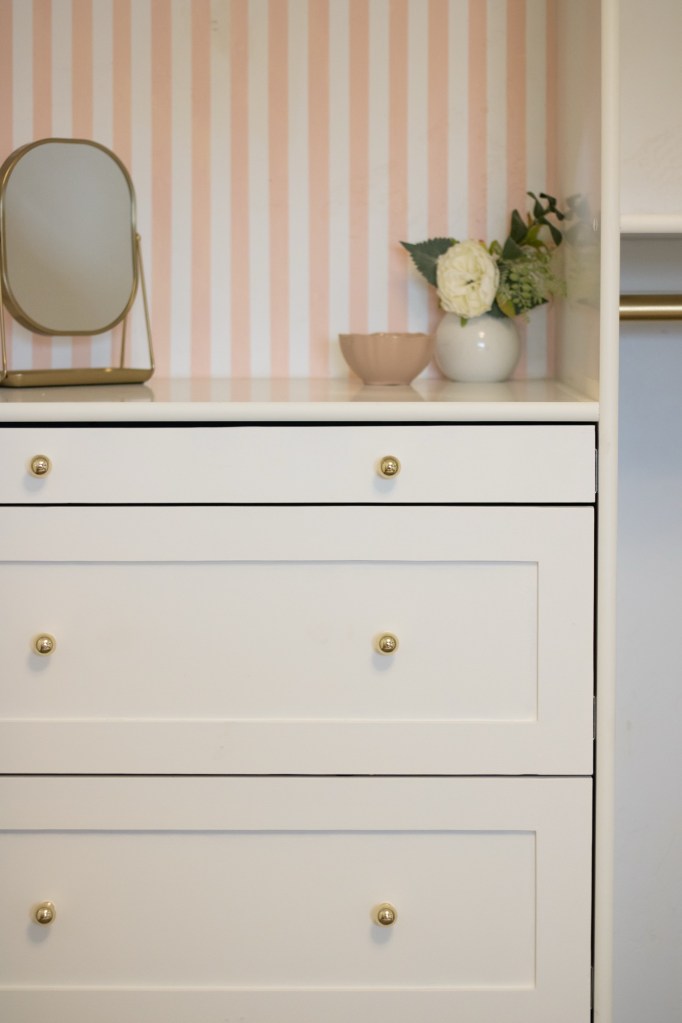
I made drawer fronts using 1/4” MDF that I glued together. I cut one piece to the size I wanted for the drawer front, then 4 pieces of 2” strips cut to size. I arranged the strips on top of the slab to create a shaker style front. I just glued and clamped these together, then filled the raw edges, sanded them smooth, and caulked and filled gaps and seams.

I primed and painted them, then installed them using glue and nails (though I think I could’ve skipped the nails) on the boxes. I used 1/8” boards as spacers to get everything spaced evenly.

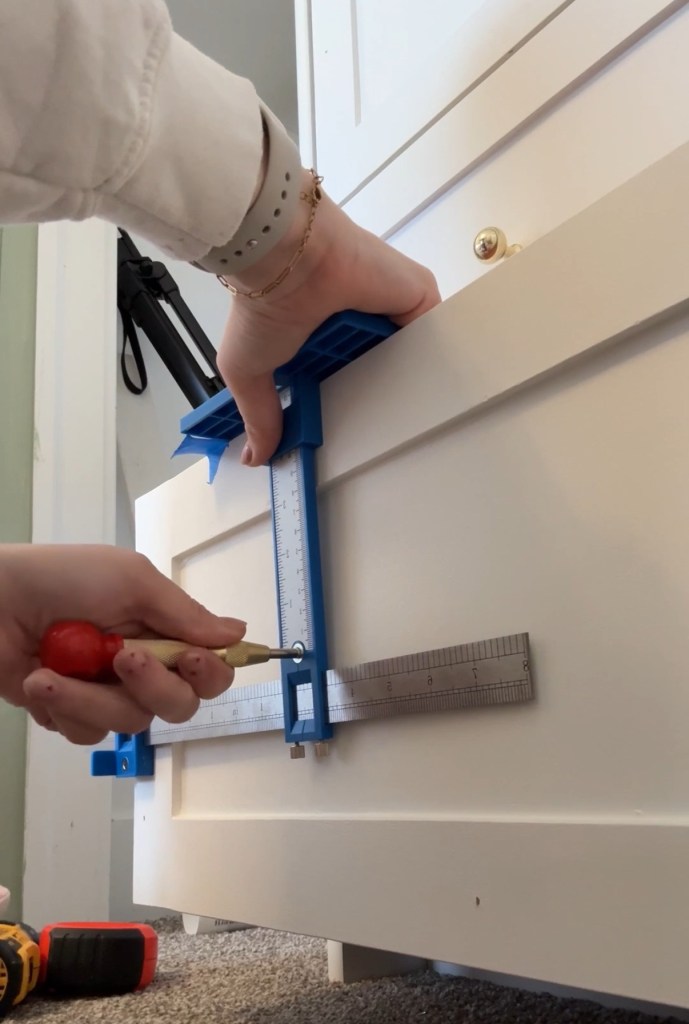
I installed the prettiest knobs – they were on her dresser before and unfortunately I can’t find them anywhere anymore, but these are similar. I really like this jig for placing hardware!


Rods
I really wanted brass rods in here, but have you seen the price of brass rods? It is absolutely insane. Instead, I spray painted a wooden rod. I found good evidence that it will hold up well, but if it chips, I can replace it like five times and still not spend as much as I would with real brass rods. I made sure to prime them first, too.

I added an additional spacer block behind the rod bracket so I could maximize vertical space, but you could also just install the brackets below the shelf supports.
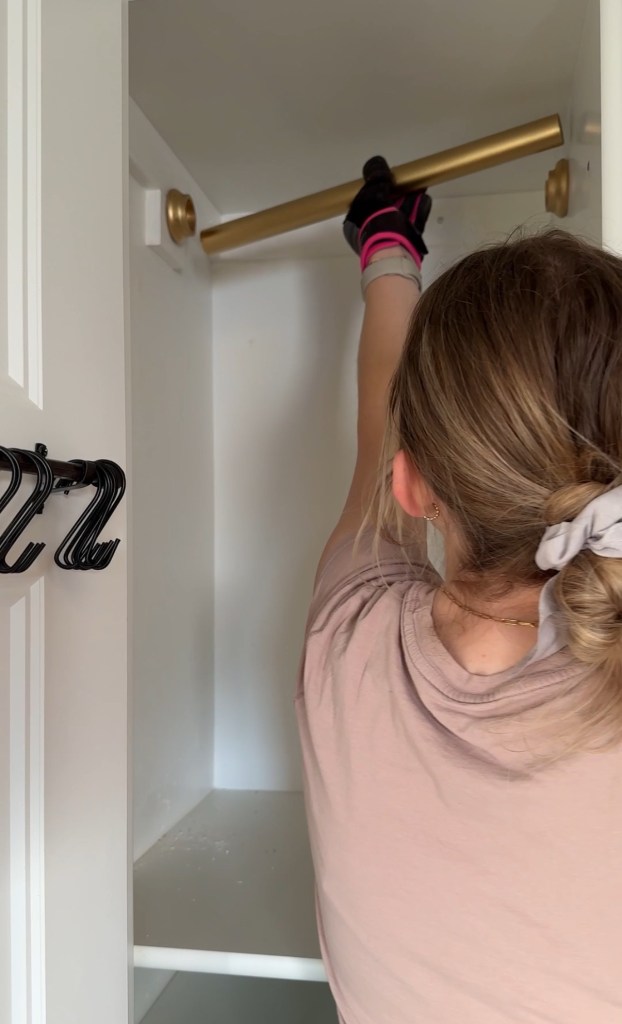
The biggest tip I have for cutting closet rods is cut them 1/8” shorter than your measurement so that you have room to slide them in.


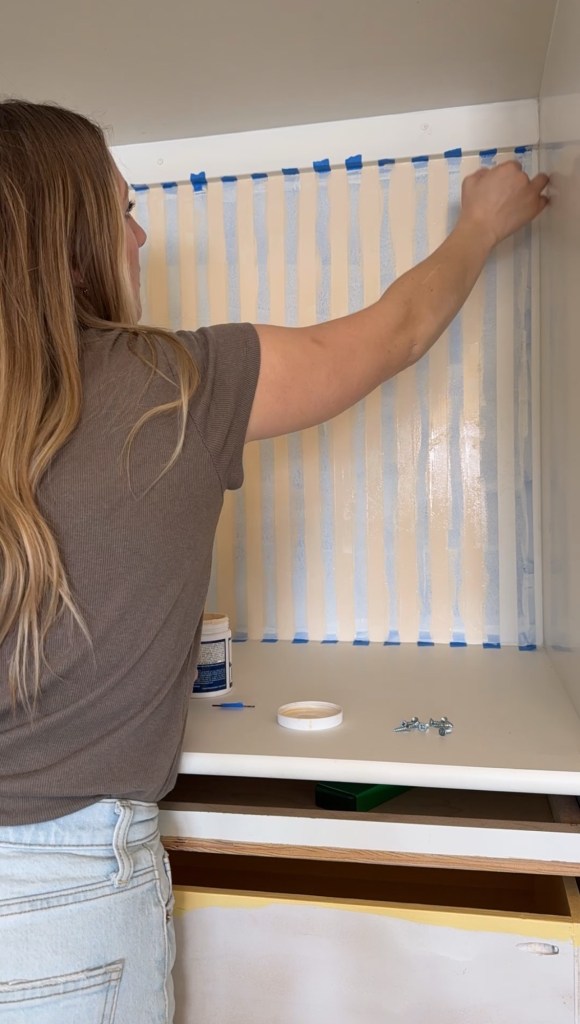
Vanity Area
The area above the drawers was looking a little plain, so I decided to paint some stripes! I did this in the kids bathroom and it was significantly easier to do in this small space. Super easy and such a cute payoff! I ended up mixing two colors together to get the perfect pink for the stripes. I love them so much!


Now that the closet is done, I can start working on the rest of her room.


She and I are both so pumped for her bunk beds – we’d better get to work on them!
With love,
Mercedes 🖤

Hello Mercedes!Love reading about your projects. You have a beautiful family! And, to think, l knew you when. . . Congrats
LikeLike
Aw thank you Mrs. DeYoung!!
LikeLike