

As I was searching for inspiration for my workbench design, I couldn’t find anything that I really loved. Everything was either too simple – like a frame built out of 2x4s that offered a good amount of storage, but not much for organizing smaller items – or was a dresser that had been up cycled – no shade on dressers miter stations! They’re great! Just too small for what the potential of this space.
Want to see what projects I’m working on now? Follow me on Instagram!

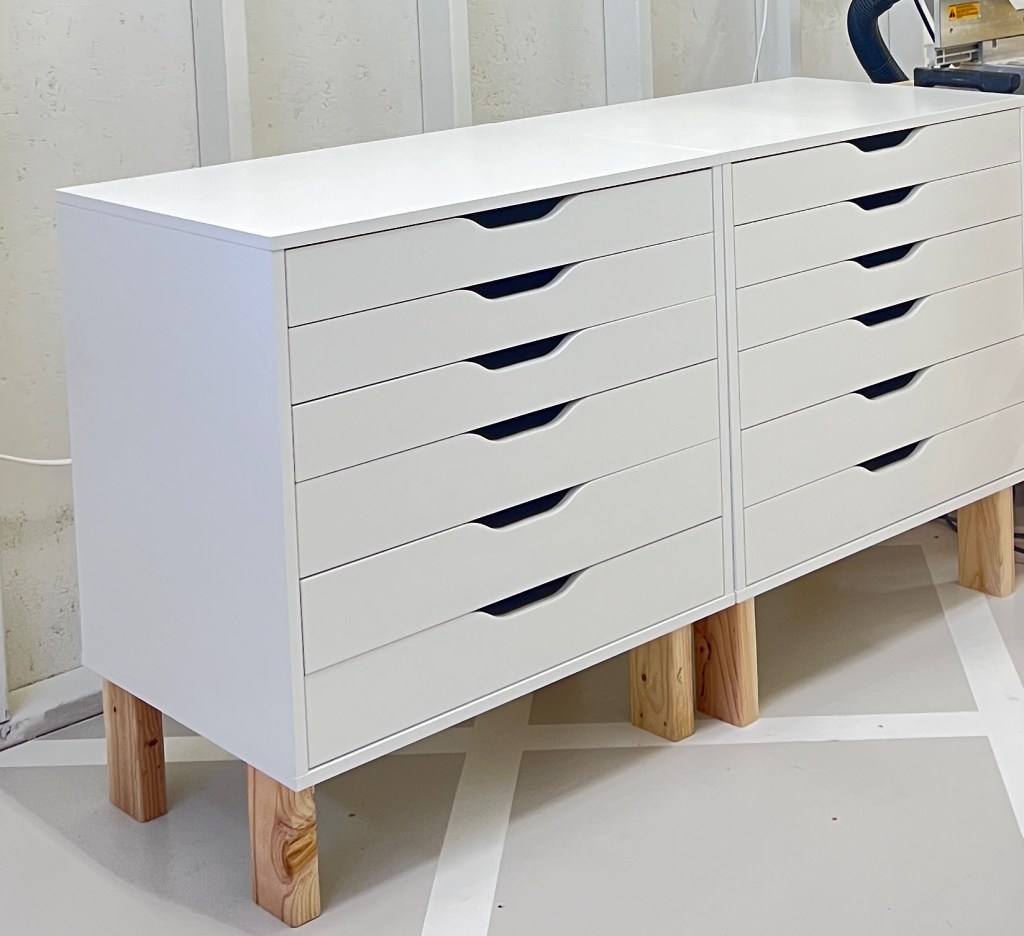
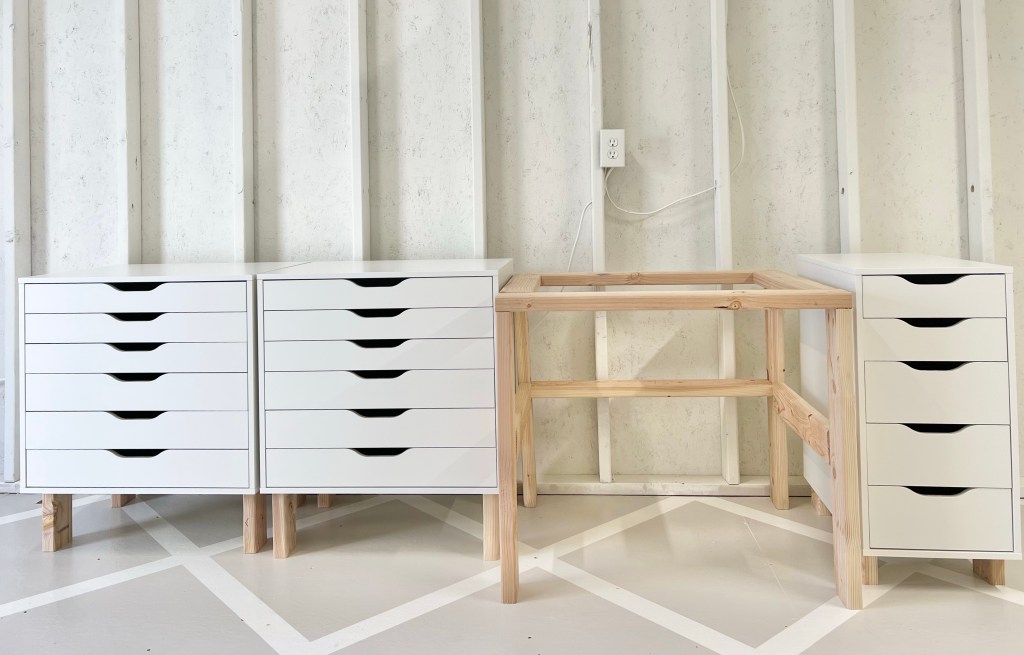
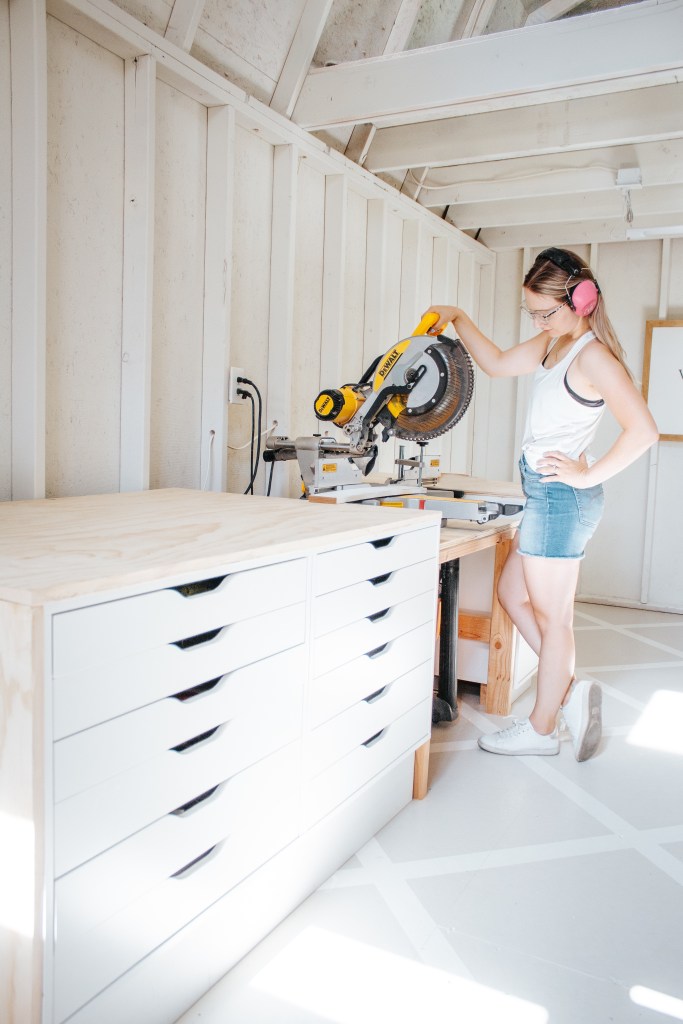
After hours of searching for the perfect drawer units, I came across these Alex units at IKEA! When I was first looking at them I thought I had won the jackpot because they were so inexpensive, but when I went to show Jordan the next day they had doubled in price! They had been on sale for 50% off and I was so bummed I hadn’t realized it. But even at full price, they were still worth it.
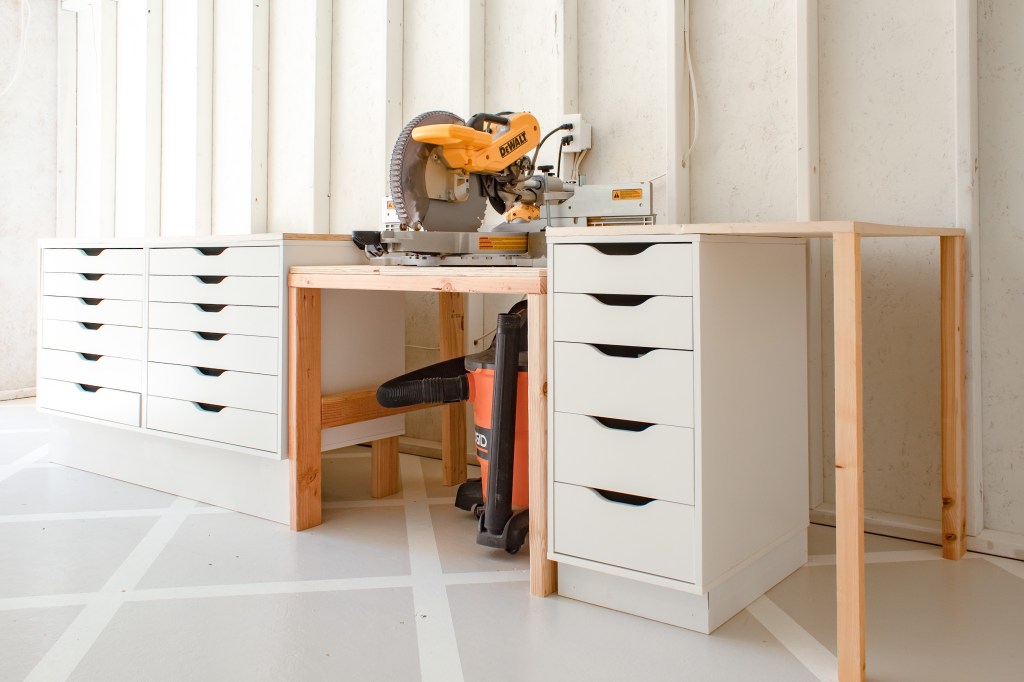
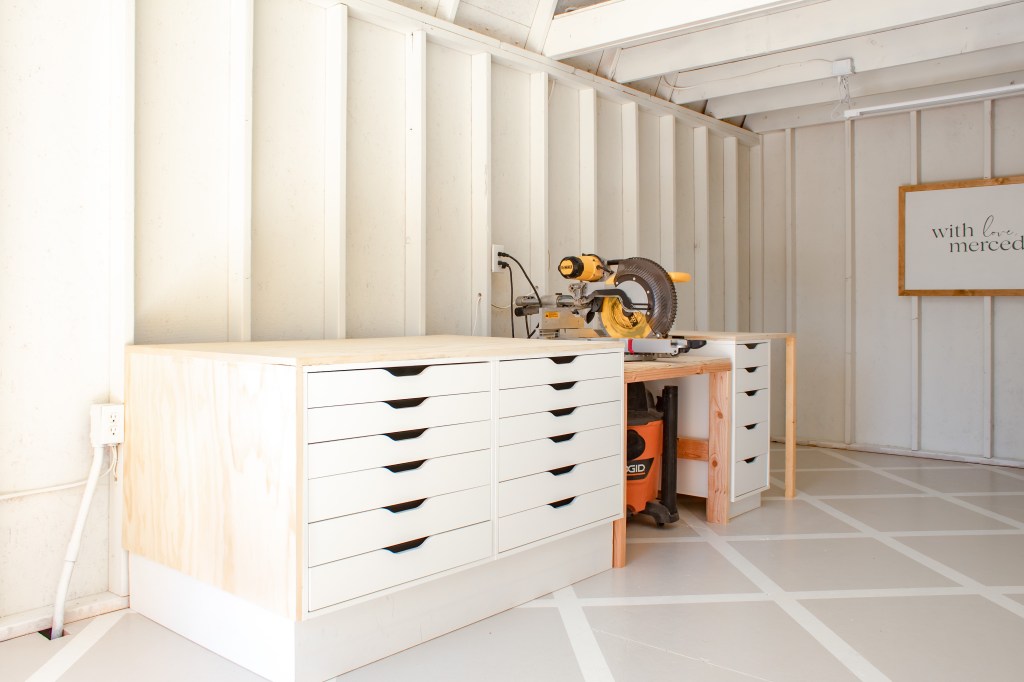
I am obsessed with how much storage I have now! And I love that I have so many shallow drawers instead of just a few deep ones – it’s perfect for organizing all of my project materials! Plus the fact that I can hook up my shop vac to my saw – that’s a game changer.

Disclosure: Some of the links provided are affiliate links, which simply means I may earn a small commission (at no additional cost to you) if you shop through one of my links.
Materials
- Ikea Alex drawer units (*you can really mix and match these to customize your bench – see note – I used 2 of these and 1 of these)
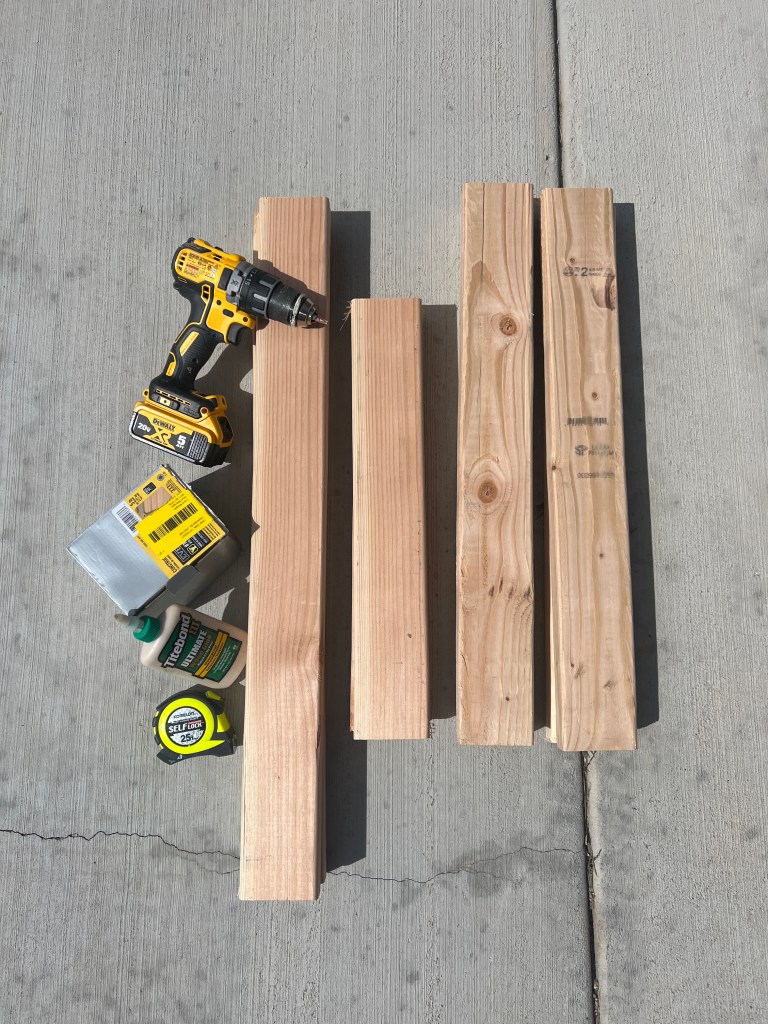
- 5-6 2x4s
- Wood glue
- 3” screws
- 3/4” plywood
- Edge banding
- 1.5” screws
- Miter saw
- Circular saw and guide or table saw
- 1×8 and 1×4 MDF for toe kick (may change based on how tall you want it)
- Drill
Tutorial
The first thing you need to do is figure out the height you want to build your bench to. The Alex drawers need to be raised in order to make it a comfortable height. I’m pretty short, so I’m built mine too be 31.5” tall but you may want yours a little taller.
After you’ve figured out the height you want it to be, you need to do a little math. I’m going to use the height I used as an example, but be sure to adjust that number if you need to!
First, take your height and subtracts 0.75” to account for the countertop. 31.5” – 0.75” = 30.75”. Next, measure the height of your unit (23.5” is the height of my bigger one). The different sizes of Alex drawers all have different heights, so if you’re using multiple sizes you’ll need to run this calculation multiple times. 30.75” – 23.5” = 7.25”. Now you’ve calculated the height you need the legs to be.
Cut 4 pieces of 2×4 to that length to create 4 legs and attach them to the bottom of the drawers with wood glue. You can add pocket holes to the legs and screw them in as well if you’re worried about it, but I didn’t (shhhhh, don’t tell).

There are predrilled holes on the bottom of the Alex drawers for the casters (which we’re leaving off) and I used those holes to line my 2×4 up in the same spot on each unit. The back legs I lined up to the edge and the front ones to the “inside” holes. It doesn’t really matter where you put them as long as they’re in the same spot on each! Repeat for each drawer unit. S
I grabbed my husband to help me flip them over. Because I didn’t screw the legs on, I didn’t want to apply to much horizontal pressure to them. I’m confident they’ll be fine with the unit sitting on top, but less confident that I can apply that much pressure to the side and have it be fine.
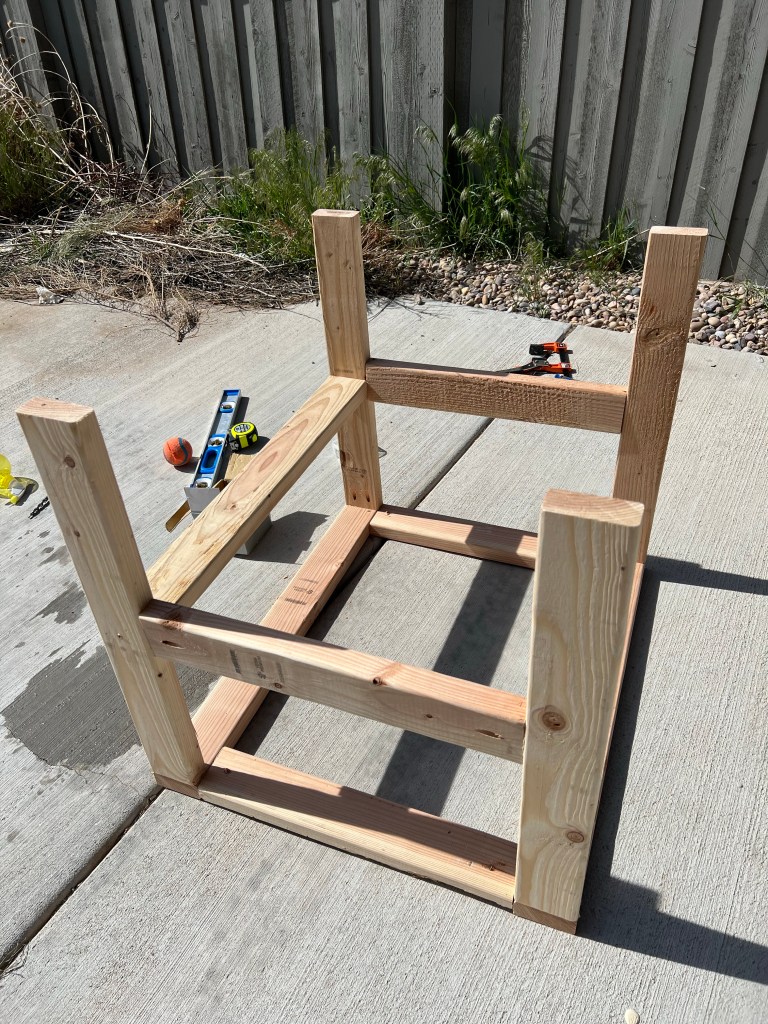
Ok, let’s pause on the drawers and build the stand! for the saw! Time for a little more math.
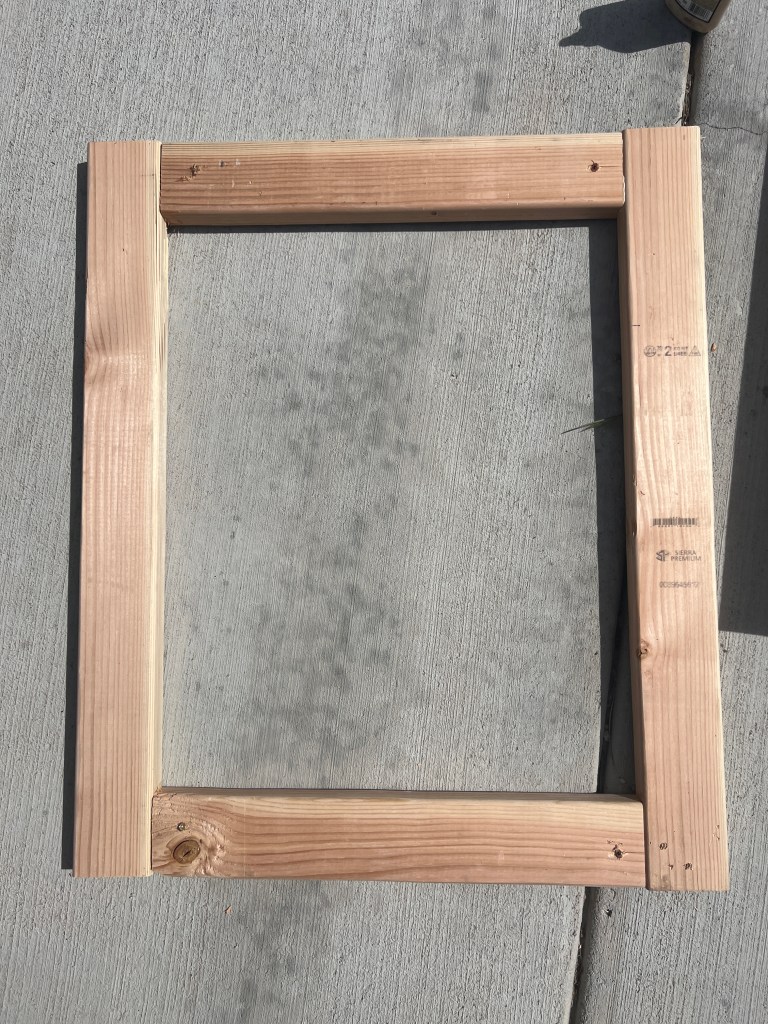
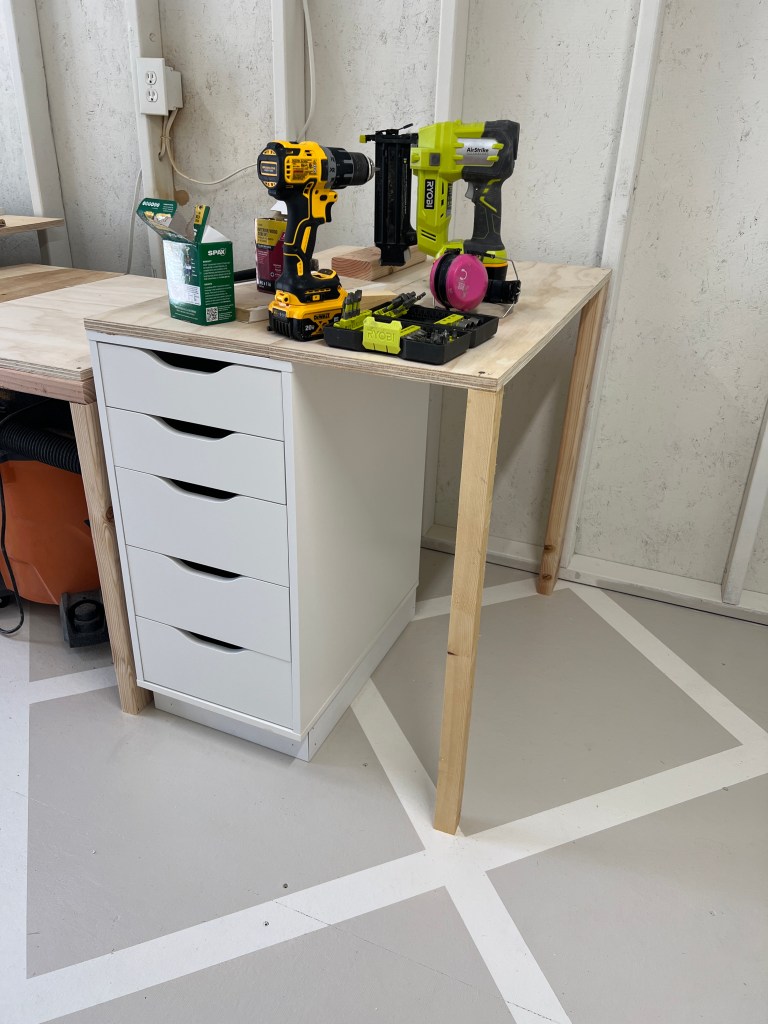
Take the height of your bench 31.5” for me) and subtract the distance from the bottom of your saw to the top of the plate. 31.5” – 3.5” 28”. Then subtract another 2.25” (28” – 2.25”=25.75”). Cut 4 pieces to this length out of 2x4s.
Measure the width of your saw (mine is about 32.75”) and add a 0.25” for a little wiggle room 32.75” + 0.25” = 33”. Cut 3 2x4s to that length.
My saw is a sliding daw so it needed the depth to be make sure that my stand accounted for one, the fact that it needs to be able to slide back and two, room for the shop vac hose to fit through. I chose 28” for the finished depth of my stand. Take that measurement and subtract 7” (28” – 7” = 21”) and cut 4 2x4s to that length.
Time to construct it! Build a box out of 2 of the width size pieces and 2 of the depth size pieces. I screwed this together by driving the screw in at an angle, but I would recommend doing pocket holes to make things easier. Make sure to use a square to make sure everything is, well, square.
Then drill pocket holes into the leg pieces and attach them to the box you just made.
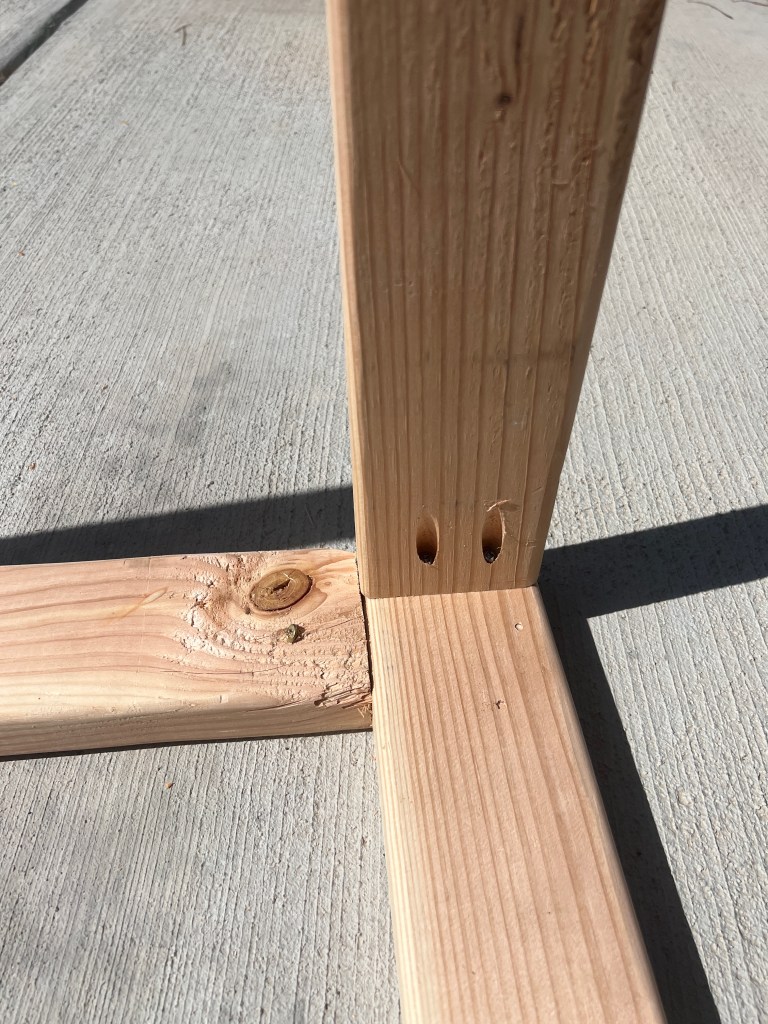
Drill another few pocket holes on the remaining pieces and attach them to the legs to provide stability. The front should be left open so that you can move the shop vac in and out easily.
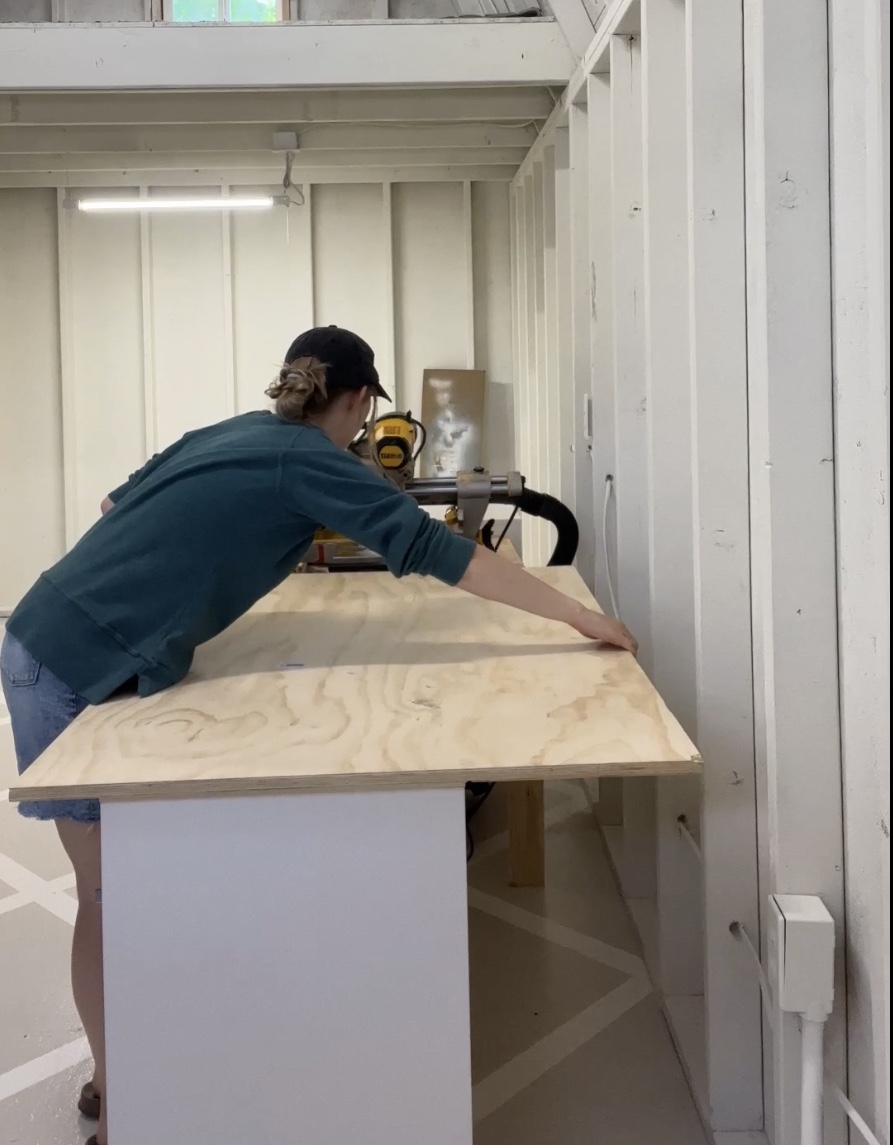
Measure the top of your table and cut 3/4” plywood to create a top. I was using scraps so I joined two pieces together since I didn’t have one that was big enough. screw it into the frame you made out of 2x4s.
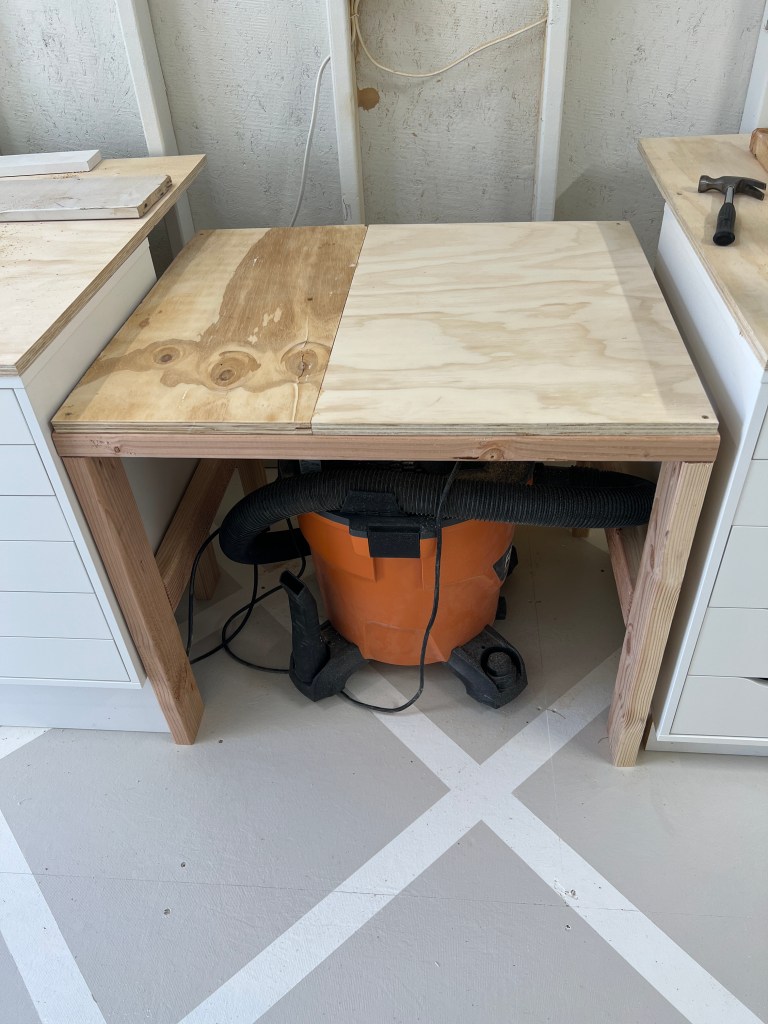
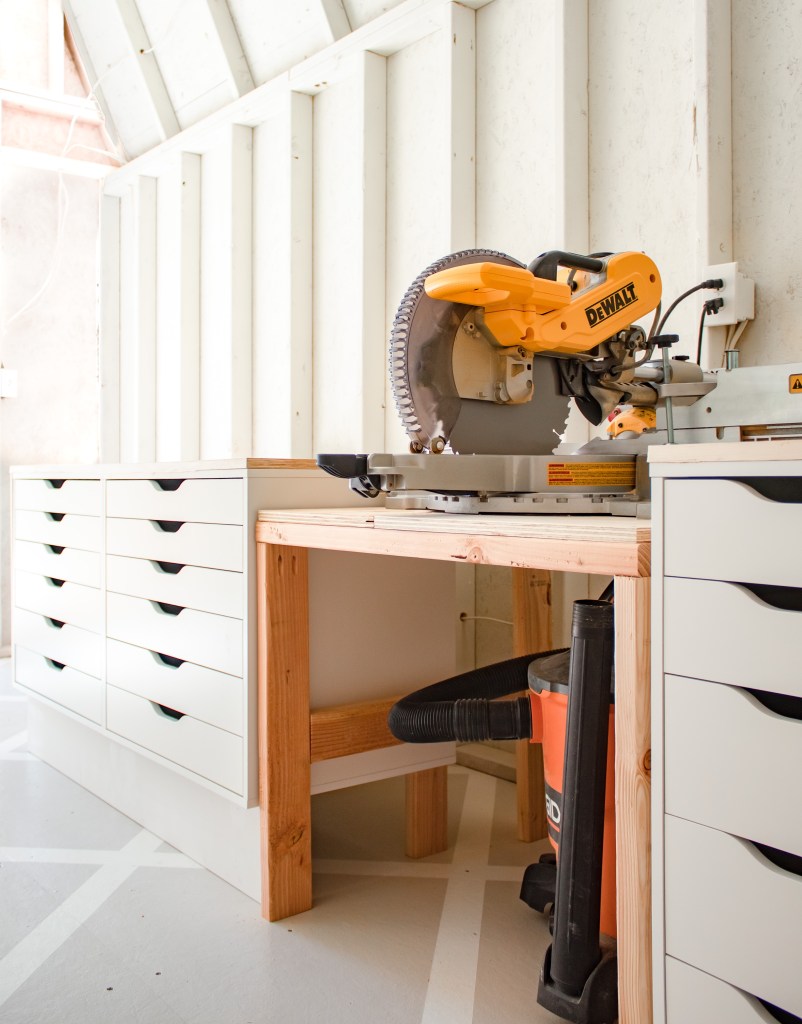
Now back to the bench! Double check the height of your miter stand in relation to the drawer units. With your saw on, the top of the saw should be 3/4” above the bench (since we haven’t added the counter to the bench yet).
Screw any drawer units that are next to each other together with 1.5” screws.
Now we’re going to add the countertop. I made mine 35” deep, which means that when the front of the miter stand is lined up to the front of the side pieces, I have 7” to fit cords and hoses behind the miter stand. After cutting a piece of 3/4” plywood to size, I put a ton of wood glue down and then screwed it in from underneath (take a drawer or two out so that your drill fits).
Note: I didn’t get a photo, but I added in two 2x4s as legs in the back corners to support the overhang of the counter. They’re just glued on with wood glue. If I were doing it again, this would be a good time to add them instead of slipping them in later.

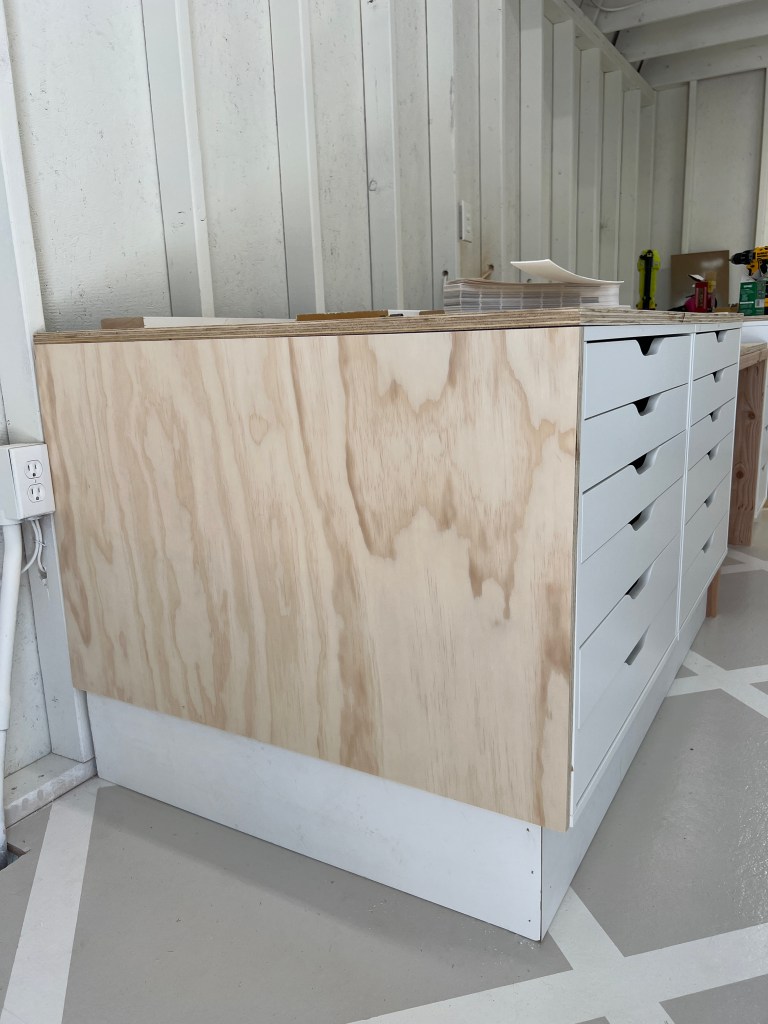
I wanted to close off the edge so I added this waterfall style piece. Just like with the countertop, I cut a 3/4” piece of plywood to size and glued and screwed it on.
On the right side, I doubled the size of the countertop width so that it would overhang enough to fit a trash can underneath. It will also be a good spot for clamping materials to cut with the jigsaw. I was planning to use 2 2x4s as legs but ran out, so one is a 2×2 instead because that’s what I had laying around (we’re going with slightly janky but still totally fine here…).
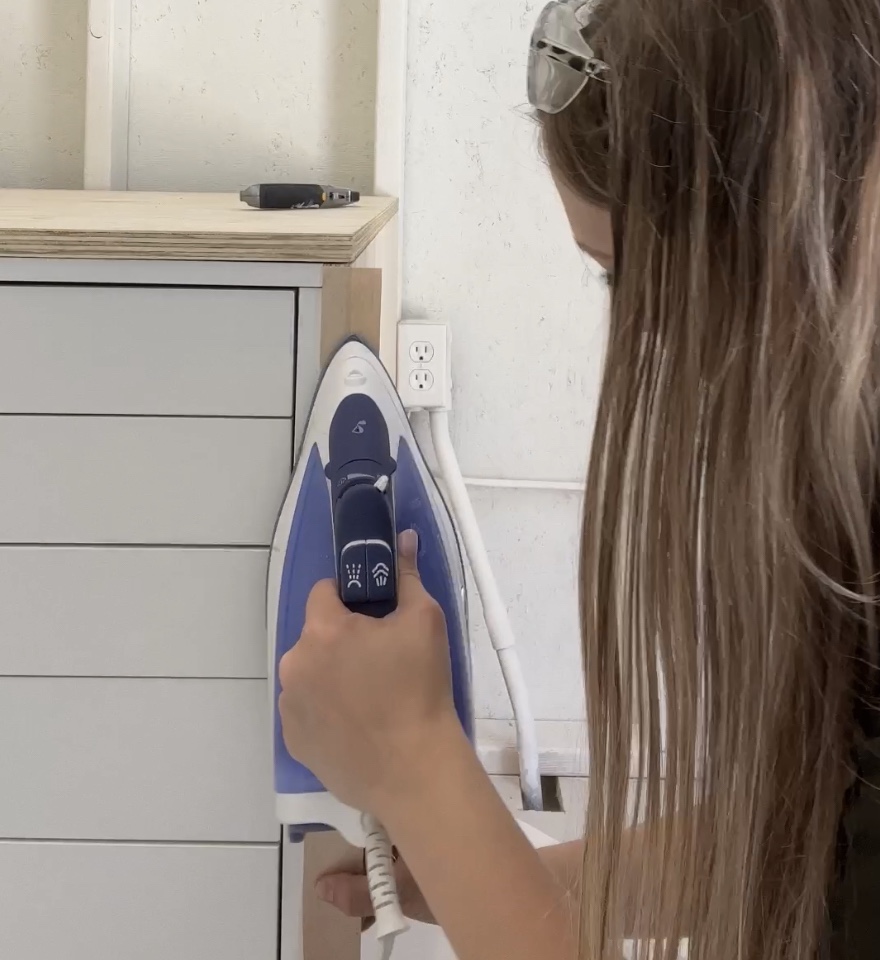
To finish off the raw edges of the plywood, I added edge banding. It’s just a thin layer of veneer with heat activated glue, so you iron it on and trim it to size with scissors and/or a utility knife.
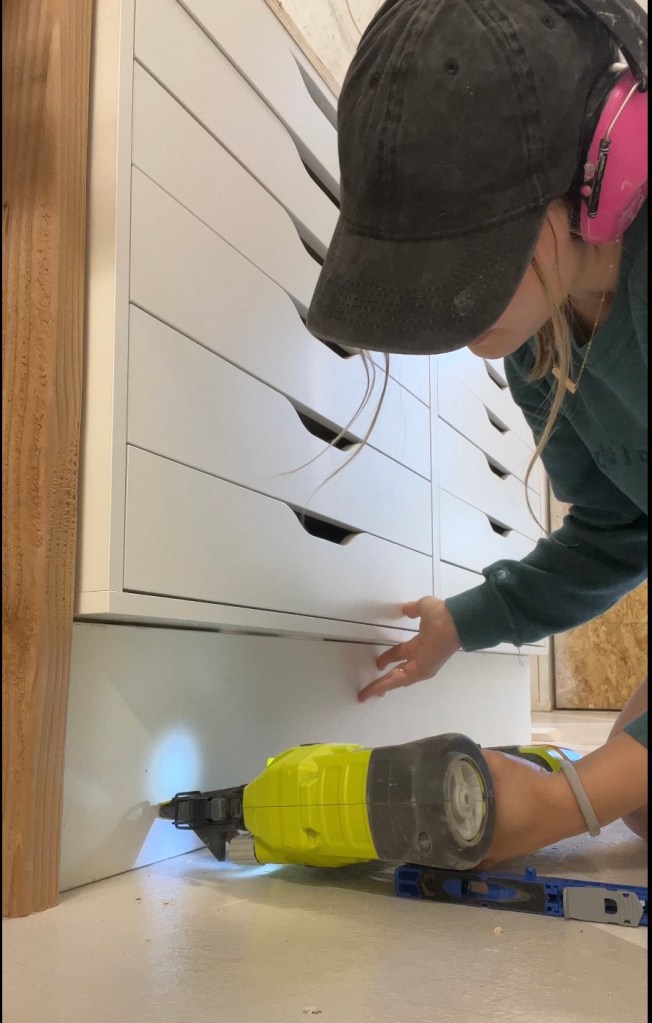
Lastly I added the toe kick! I needed a 1×8 for my wider but originally shorter drawers (left) and a 1×4 for my more narrow but originally taller drawers (right).
I slipped my shop vac under the miter saw so that I can attach the hose to the miter saw – yay for dust control!
Now all my project supplies can be organized and I have such a great tabletop for all of my project needs. As always, feel free to ask me questions you might have in the comments below!
Subscribe above and follow me on Instagram to stay up to date with all my projects.
With love,
Mercedes 🖤
Check out the shed shed reveal here!

❤️❤️
LikeLike