

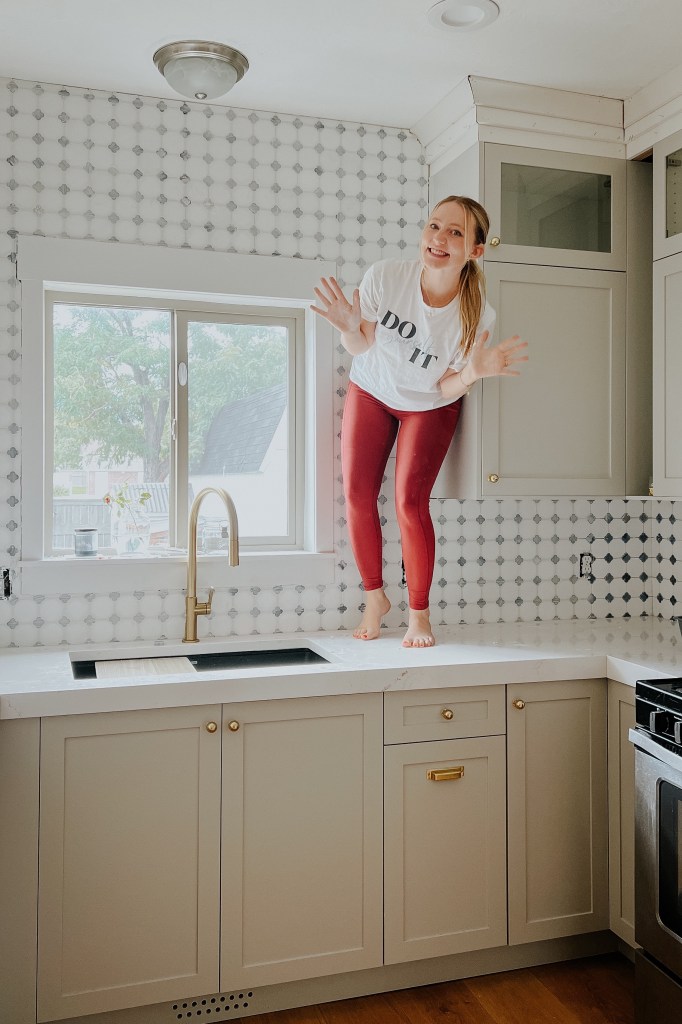
Every day I have a different favorite part of the kitchen, but the backsplash is often one of the winners. It was the hardest thing for me to pick out during the entire renovation because I knew that whatever I decided would have a massive impact on the look of the kitchen. The sink wall has so much visible backsplash on it and is such a focal point… I wanted to get it just right.

I saved this exact tile to a Pinterest board early on in the kitchen planning, but kept shying away from it because I worried it would be too busy, too bold, too much. But after looking at a gazillion different tile samples, I realized that what I really wanted in here was a little color, a little fun, and a little quirky yet traditional. This tile delivered on all fronts!
Want to see what projects I’m working on now? Follow me on Instagram.
Materials
Disclosure: Some of the links provided are affiliate links, which simply means I may earn a small commission (at no additional cost to you) if you shop through one of my links.
- Tile
- Trowel
- Mortar (or musselbound)
- (3) Bucket (one for mortar, one for grout, one for grout cleaning)
- Grout (I used warm gray)
- Grout float
- Tile sponge
- Tile saw
- Mixing paddle
- Drill
- Safety glasses
- Safety earphones
Tutorial
I have done quite a few backsplashes and different tile projects, and they’re always some of my favorites. Honestly, they are hard on my body, but the end result and the saved money is sooooo worth it.

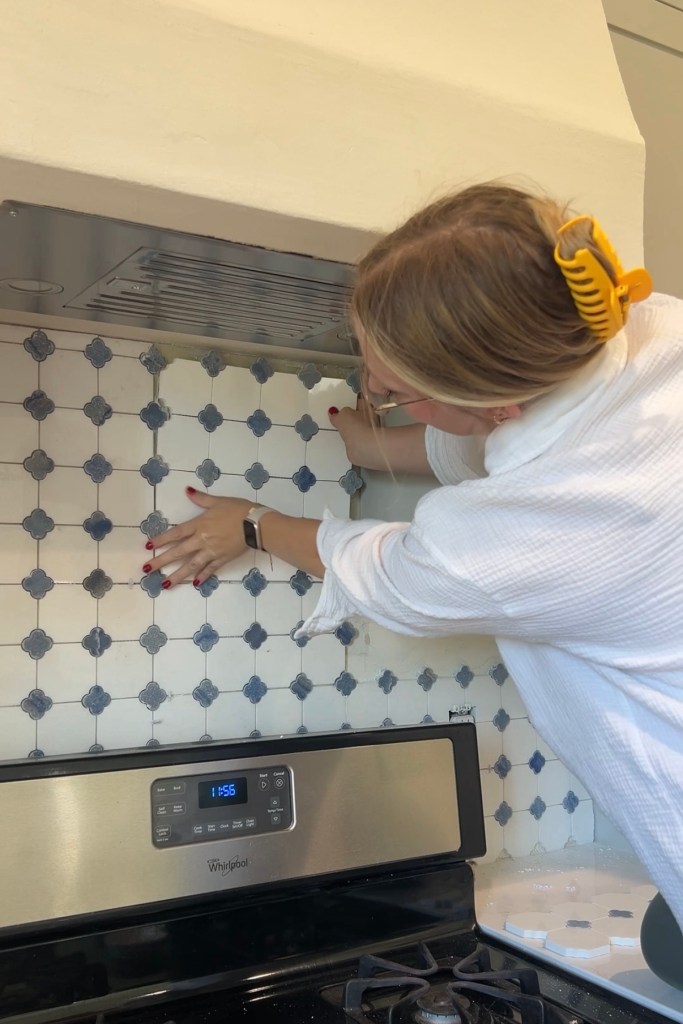
I installed this backsplash straight to the drywall. If I were building this kitchen, I would install cement board to tile on, but drywall works just fine. I’ve used both traditional mortar and musselbound for tile work and I think there are pros and cons to both. I decided to go with traditional mortar for this job. The main point in favor of traditional mortar is that you can install wet tile on it and I knew there would be quite a few cuts with this mosaic tile – I didn’t want to deal with drying each piece before installing!
Every tile is going to have a specific size trowel to use for the job. This ensures that the right amount of material is going on the surface for the best adhesion. I used this trowel and this mortar.

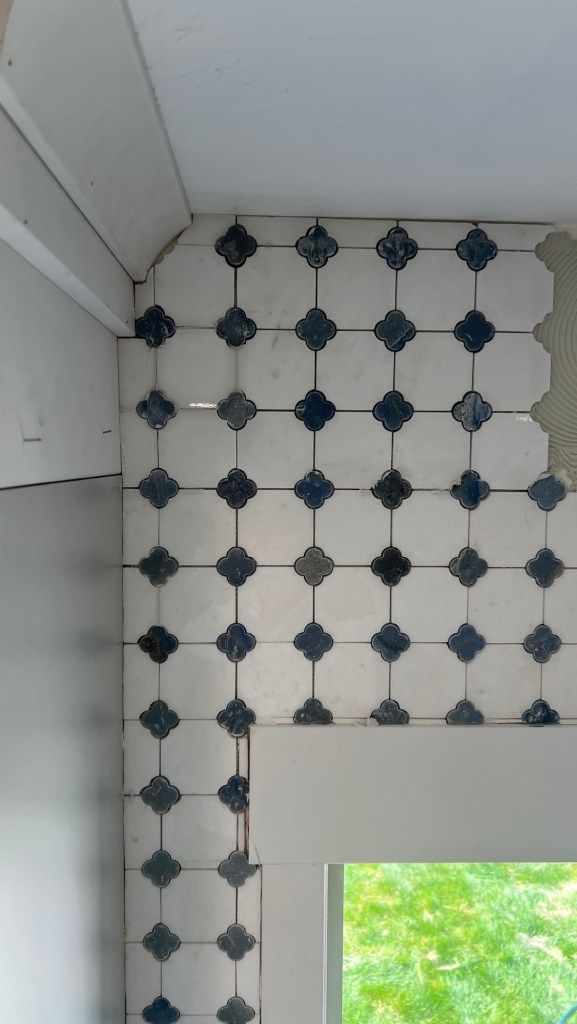
Before beginning, I figured out how I wanted to center the tile. I centered it on the window on the sink wall and on the stove on the stove wall.

I mixed the mortar up in a bucket with a mixing paddle and my drill. You’re looking for the consistency of peanut butter. It needs to be stiff enough to hold the grooves your trowel will make but thin enough to work with. I definitely recommend wearing gloves while doing this. Mortar dries out my hands so much and they hurt for days if I decide not to wear gloves.


I used this tile saw, which is the same tile saw I’ve had for years. It is budget friendly and has worked for every single project I’ve needed it for. Tile saws are such a good beginner saw because they grind instead of slice, which makes them less scary to work with – at least for me!

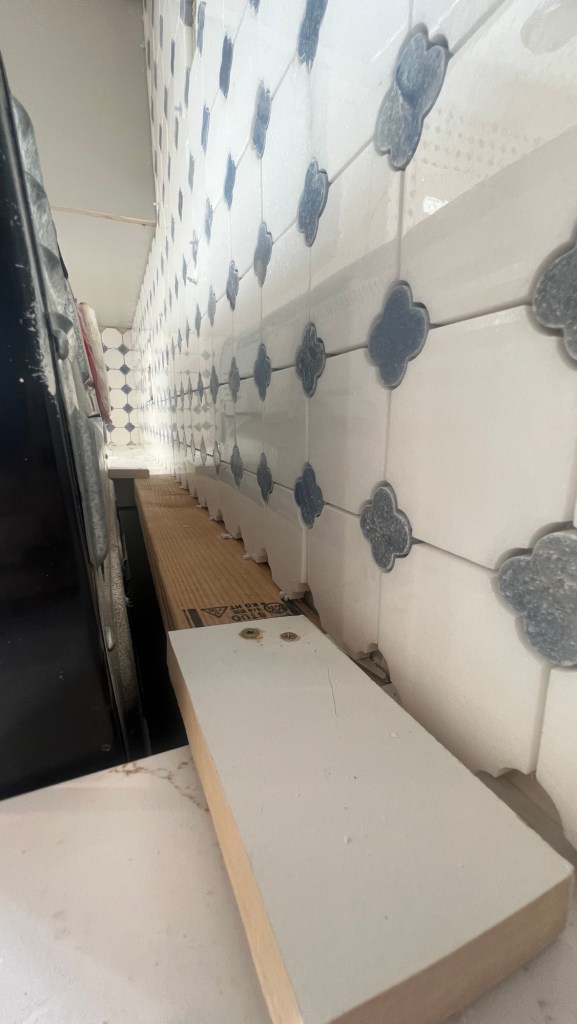
Behind the stove, I installed a piece of wood to support the tile while it dried, but besides that there isn’t really anything complicated about laying it. You can totally do this!
After the tiles had set for a day, grouted. The correct way – and the way I prefer to do it – is to use a grout float. It’s like a big spatula that spreads the grout for you. Unfortunately, I couldn’t find mine anywhere so I resorted to my hands. I’ve since learned that some people prefer this method, but it seemed to waste a lot more grout (harder to scrape it off the tiles as you go) and my hands hurt by the end! So do what works for you, but I’ll definitely be going back to a grout float next time.
Also, I forgot that I found my absolute favorite grout to work with and I didn’t use it on this project. As soon as I started, I realized it. I don’t even know how to describe why this grout is so superior…it just is. It’s smooth and silky, easy to spread and easy to clean off!
When you spread the grout on, you want to be sure to fill in all the gaps between the tiles, then take a damp tiling sponge and work in circular motions to clean the excess grout off. I like to have a bucket of water nearby to rinse and wring the sponge out regularly, and I always change the water a few times as I go.

You will be left with some grout haze – it’s basically the grout dissolved in the cleaning water. Don’t worry! It’s impossible to not have any. The next day, once your grout is cured, just go in with a rag and wipe it off. Super easy. If you have any stubborn bits, you can use a little vinegar and it’ll come right off.

So that’s how I installed this gorgeous backsplash. I’m more than a little obsessed, and I’m so glad that I decided to pick a tile that makes me so happy.
With love,
Mercedes 🖤
