
Old Mill Brick supplied the material for this project. As always, all opinions are my own.
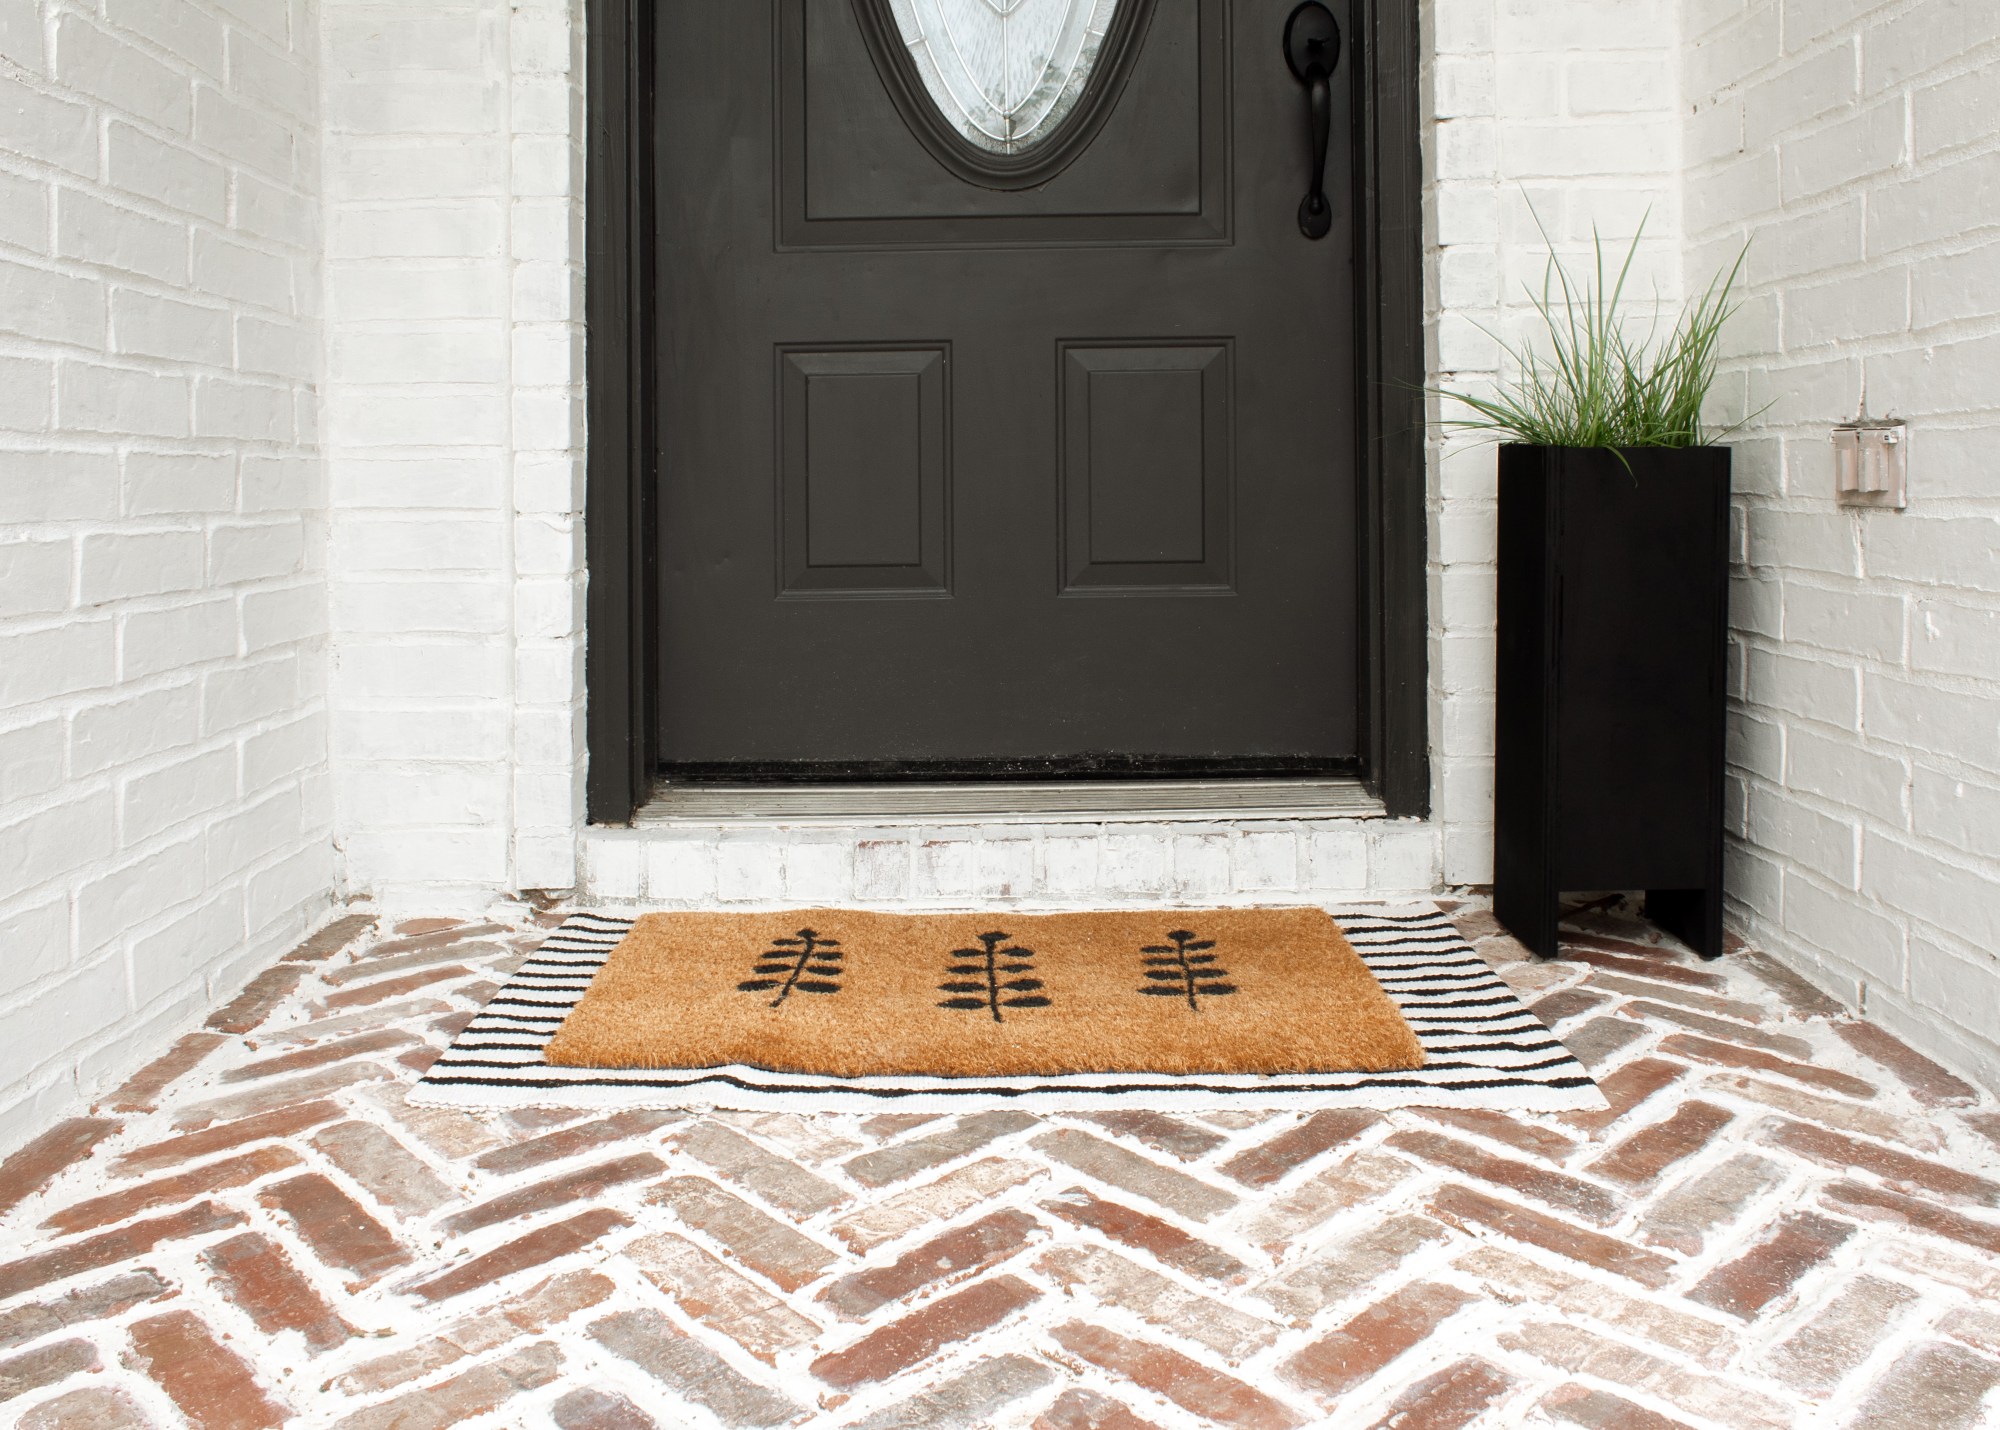
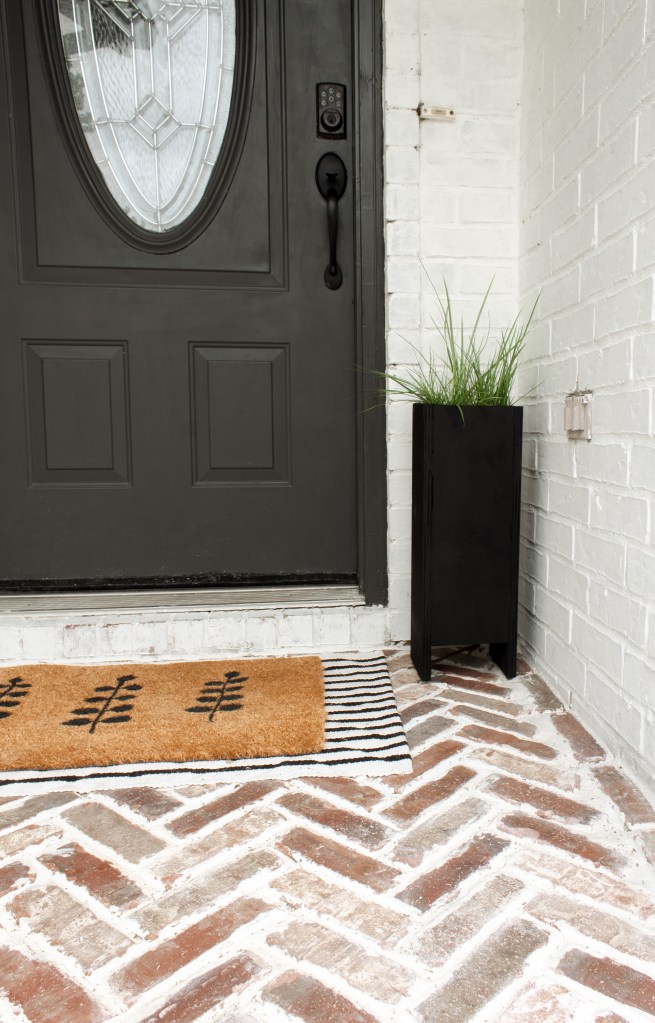
Okay, so this brick porch might be the best thing that has ever happened to the exterior of our house. It’s at least tied with the limewashing. I love it so much!
Want to see what projects I’m working on now? Follow me on Instagram!
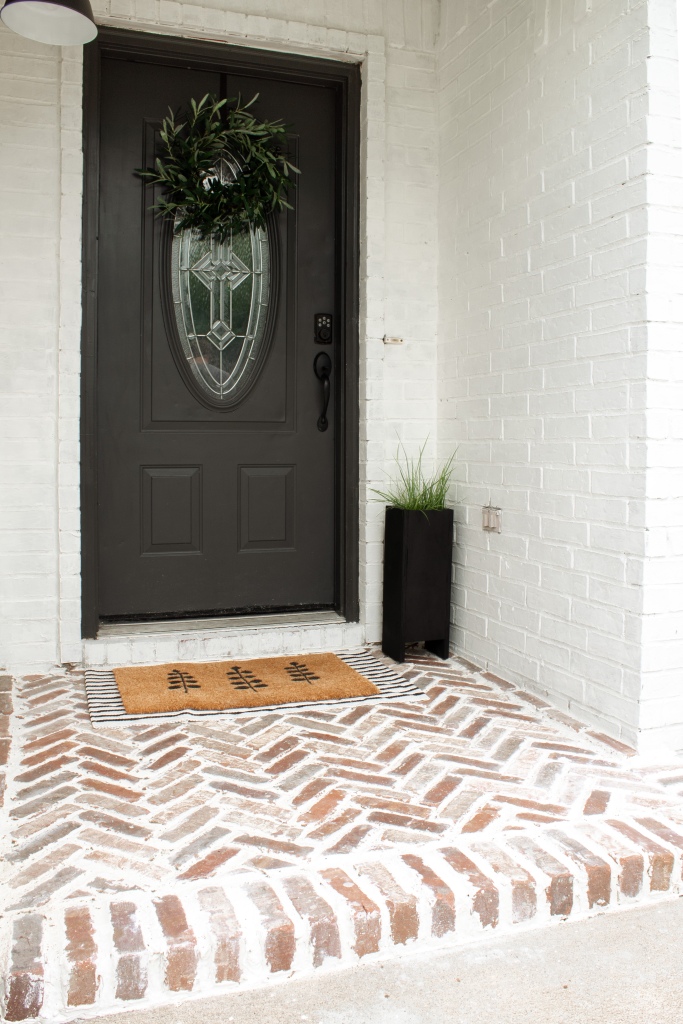
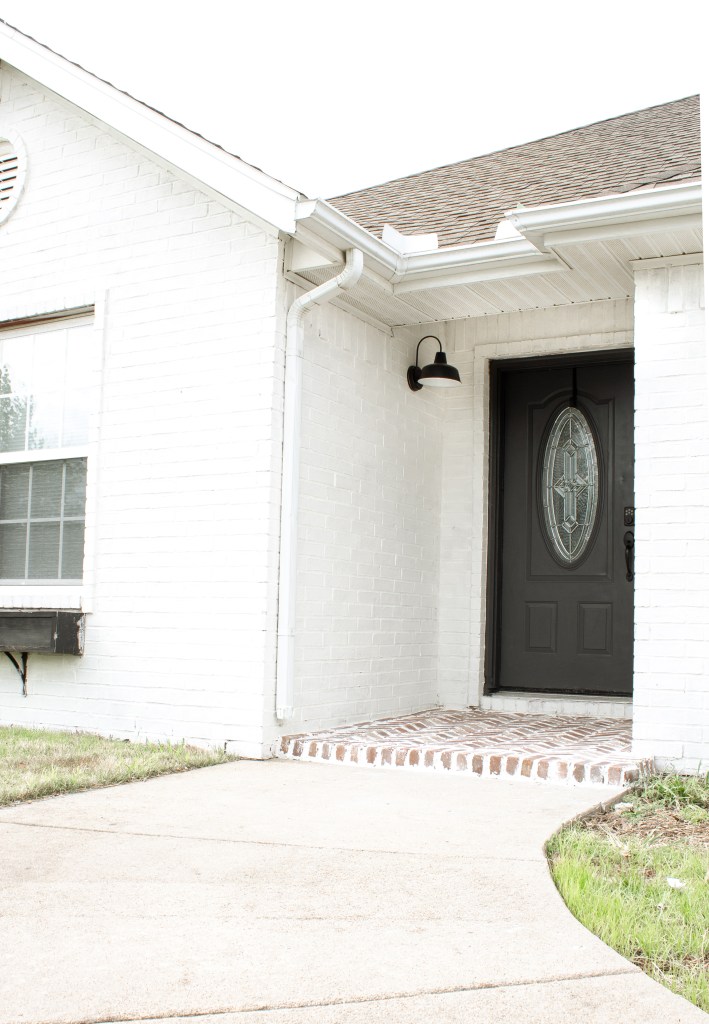
I knew that after the brick was limewashed, the house was going to feel a little one-tone and that I was going to need to add some more depth and texture in, so I came up with the idea of adding this little porch.


It does exactly what I wanted it to do, which is bring in some warmth and character, and it also makes our front entry feel a lot more intentional.

Disclosure: Some of the links provided are affiliate links, which simply means I may earn a small commission (at no additional cost to you) if you shop through one of my links.
TUTORIAL
Here’s what you’ll need to add this awesome feature to your house :
- 2×4
- Garden stakes
- Quickcrete (I used 9 bags)
- Mixing tub
- Something to mix with, either a trowel or a shovel
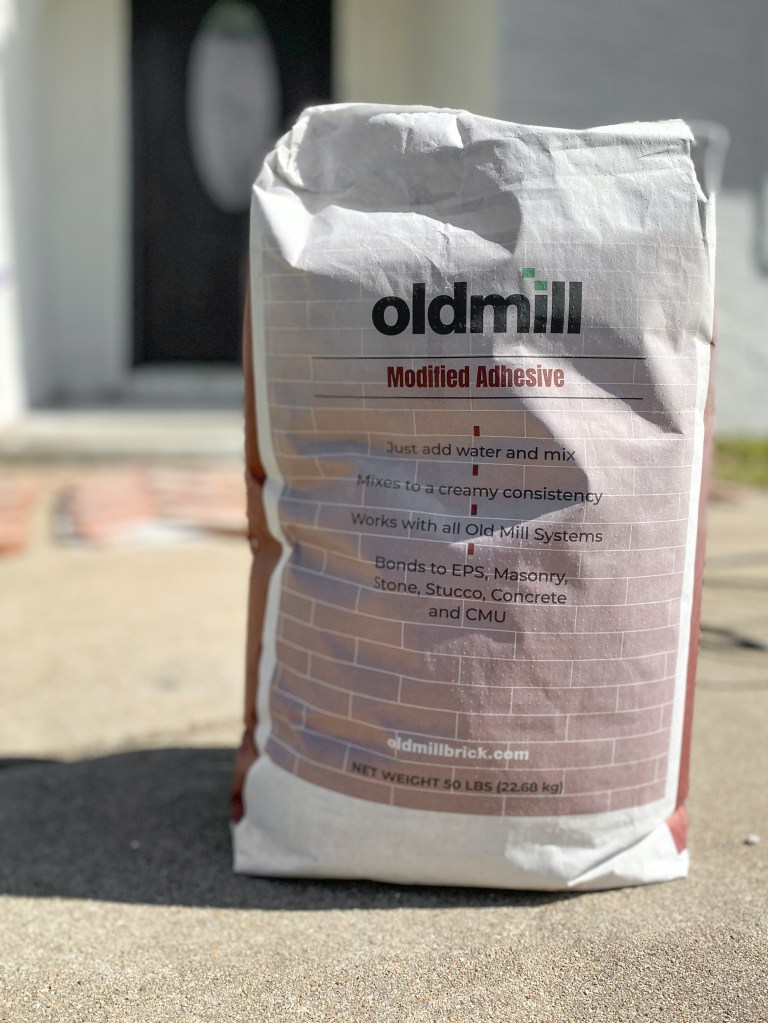
- Old Mill Brick adhesive
- Thin brick from Old Mill Brick (I used herringbone brickwebb, corners, and singles)
- Mixing bucket
- Mixing paddle
- Flooring Trowel
- Sponge
- Piping bag
- White mortar
- Angle grinder
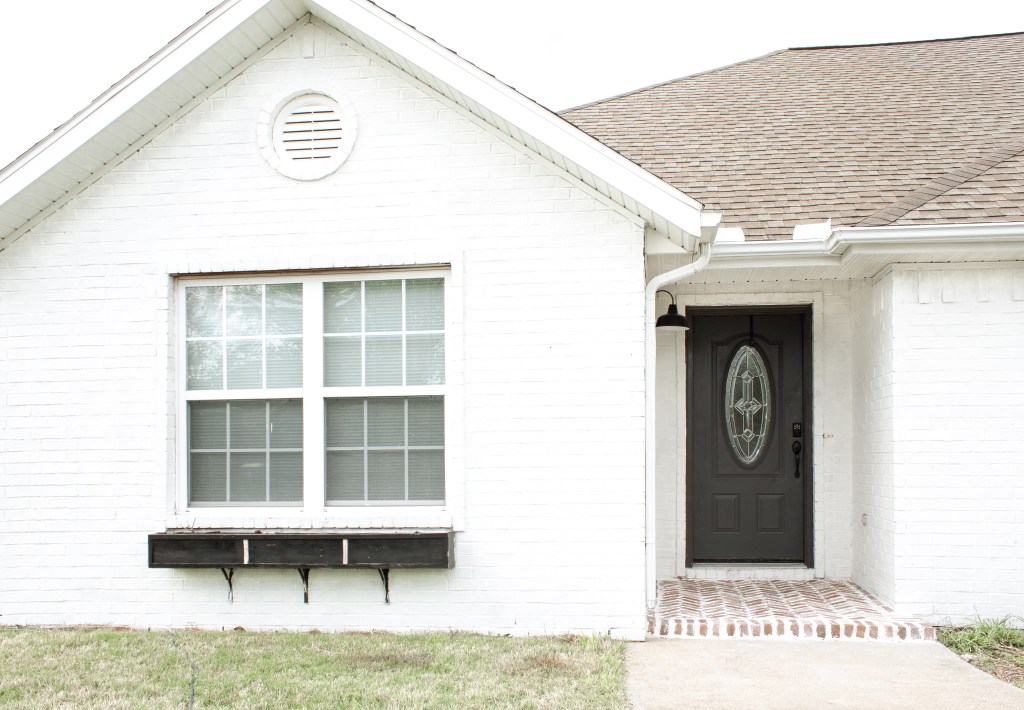
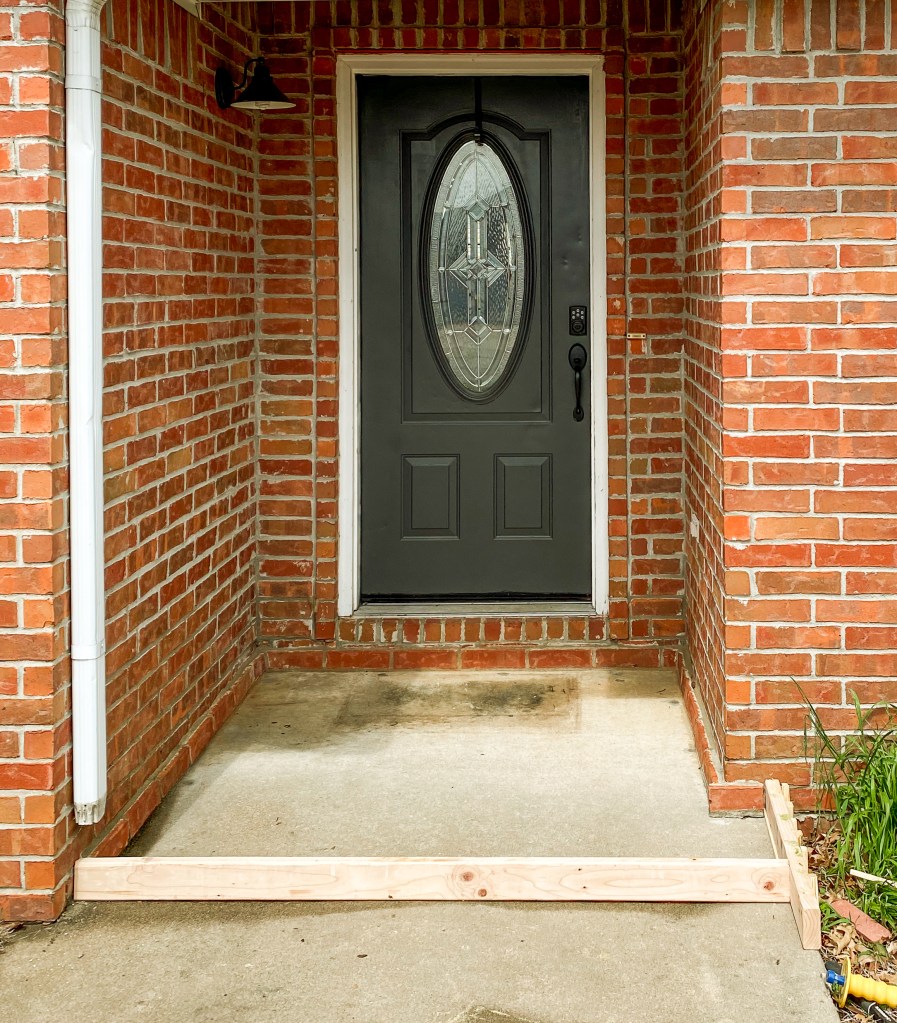
The first thing I needed to do was to create a concrete porch, since previously we only had a walkway here. I used a 2×4 and screwed it into garden stakes to create a mold for the concrete to sit in.
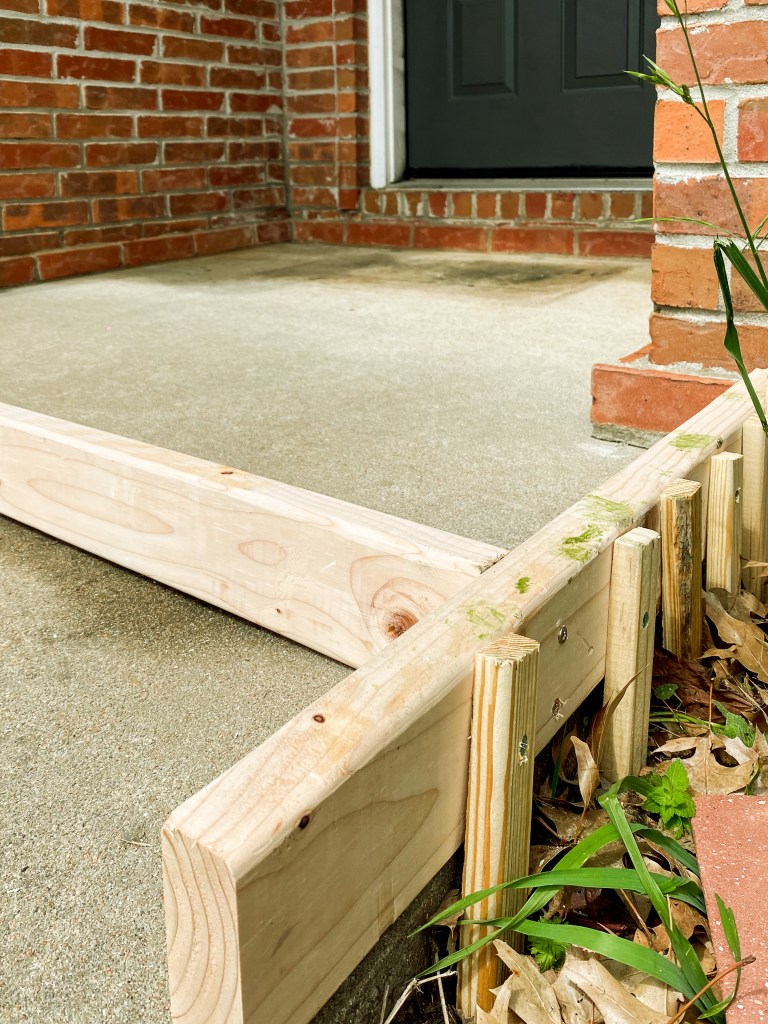
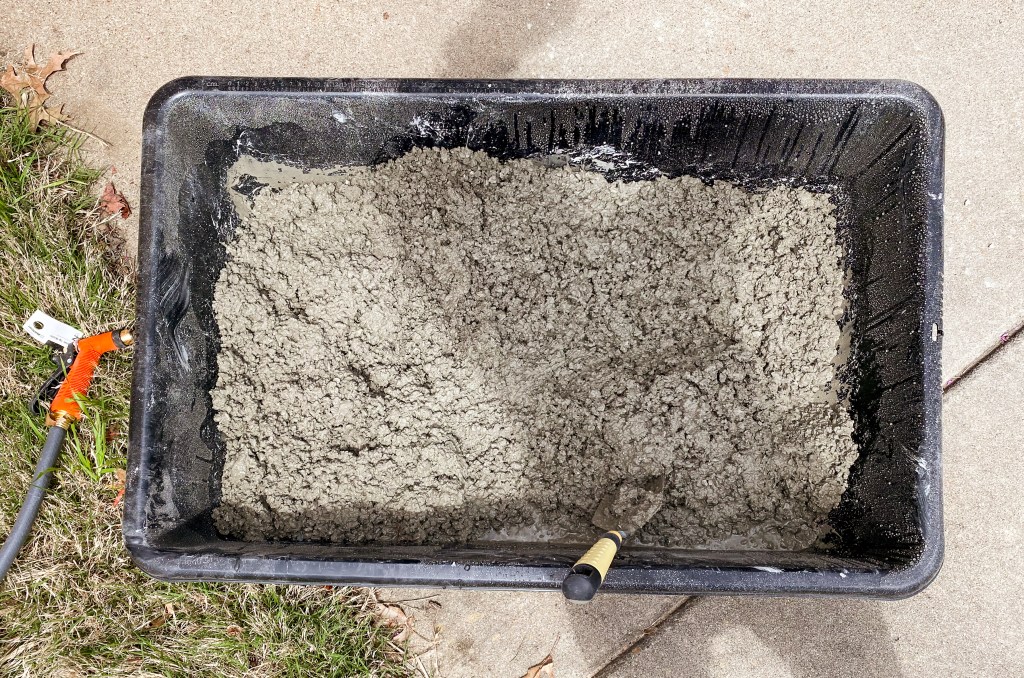
I mixed my Quickcrete with water in a mixing tub with a shovel, then dumped it into the mold. It’s important to overfill the mold a little and run a 2×4 over the top as you go (this is called screeding) to get a smooth surface. I wasn’t too worried about making it perfect since it would be covered with brick, but it still needed to be pretty smooth for the brick to lay flat.
After I poured the concrete, it needed a week to cure. Curing the concrete helps it dry slowly, preventing any cracks. I sprayed it with my hose everyday and then covered it with plastic.
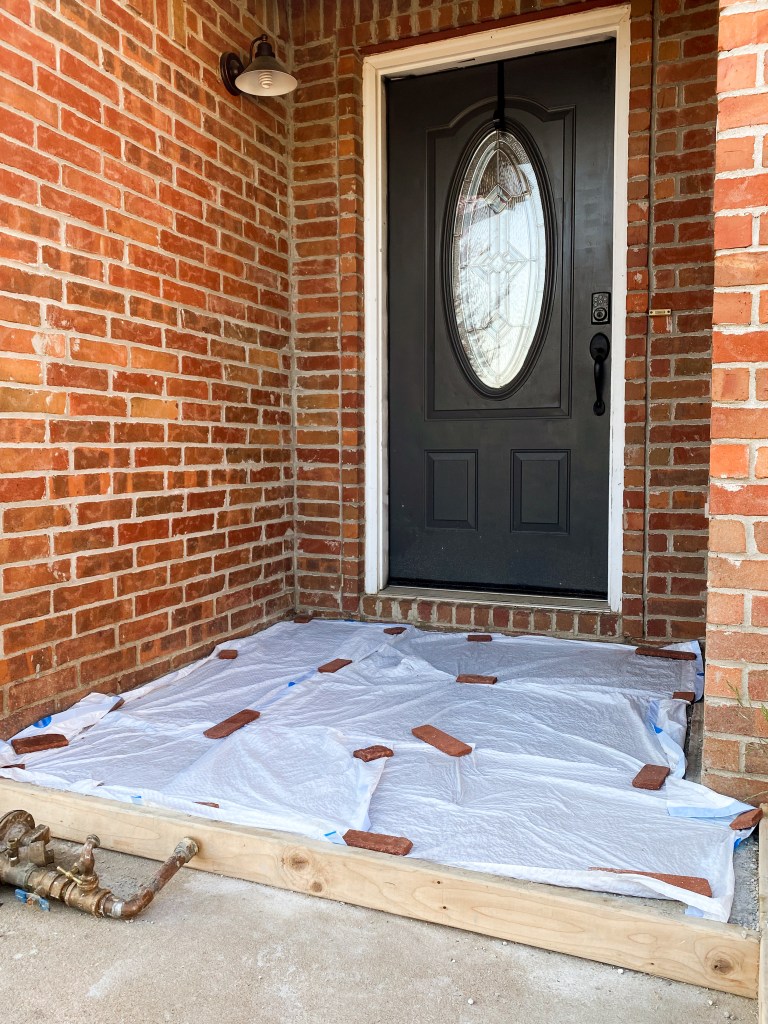
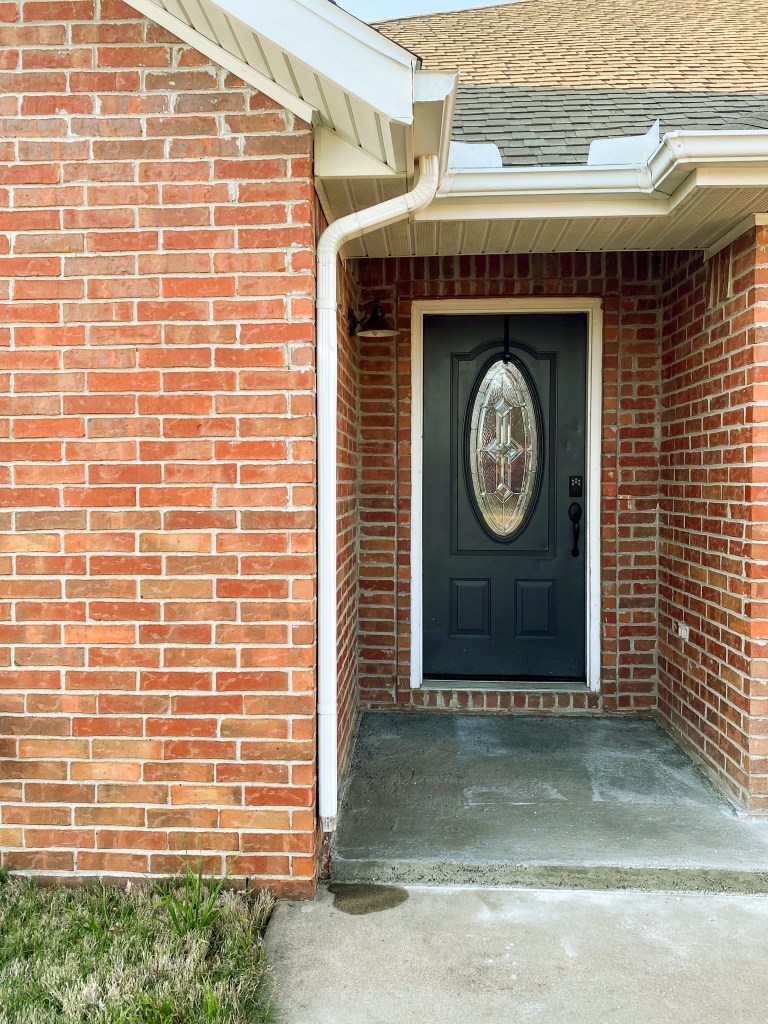
(I limewashed the house in between these steps so I didn’t have to worry about covering up the porch)
Then it was time for the brick – yay! I used Old Mill Brick when I redid my fireplace and they very generously provided me with the brick that I needed for this project. One thing that I always recommend in tiling (or bricking!) projects is to dry fit everything first. This means cutting and laying out where everything goes before adding any adhesive. This gives you the ability to plan and problem solve before you’re having to deal with your adhesive drying out on you.
Cutting the bricks is really easy because you don’t need a tile saw – thank goodness! You can use one if you’d like or you can use an angle grinder, which is a lot easier in my opinion. Make sure that you wear eye and ear protection and a dust mask. I clamped the brick to a scrap board to prevent it from moving, then slowly cut through with the grinder. I used a diamond tipped blade that I have for cutting through tile and it was like butter.
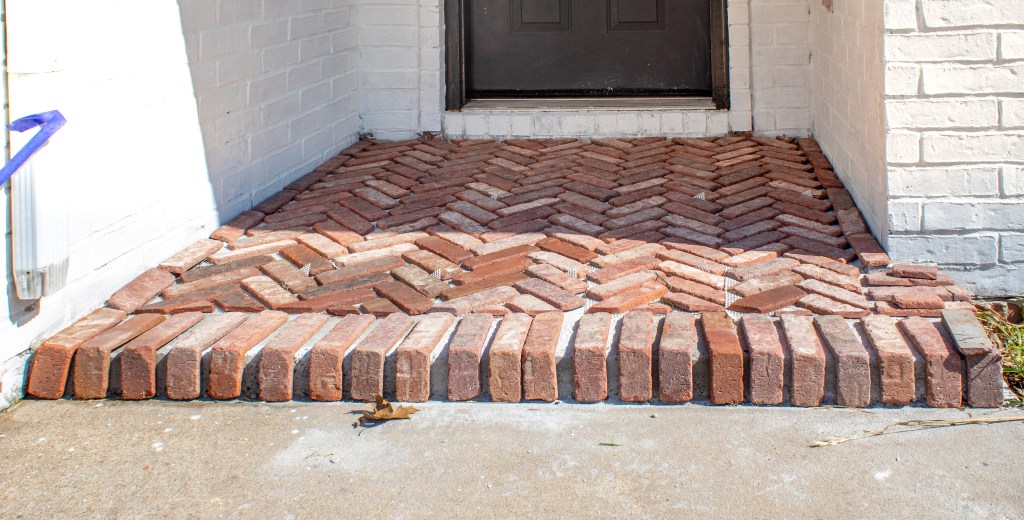
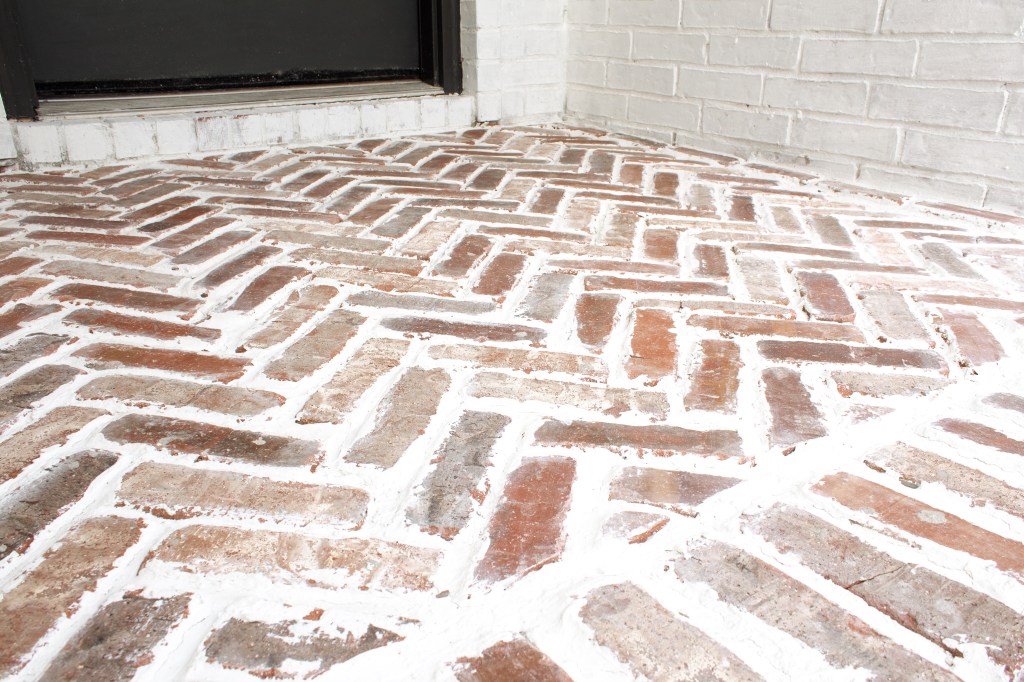
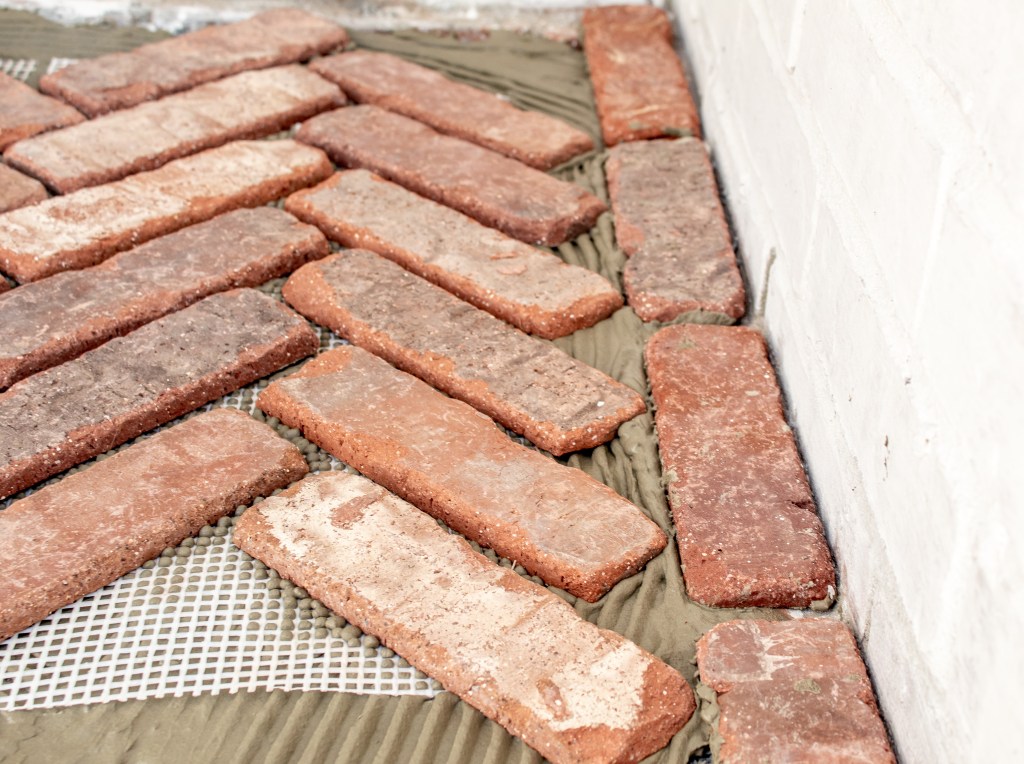
To make laying the herringbone pattern incredibly easy, I used Old Mill Brick’s new Herringbone Brickwebb. The bricks come adhered to a webbed backing, so the pattern is already laid out for you. Herringbone is normally rather tedious to lay, but the brickwebb makes it a breeze. I used a couple single bricks to make a border and then special corner pieces to run along the curb. Since the bricks are thin like tiles, you need the corner pieces because they are bent and give the appearance of a full thickness brick. I recommend trimming the top corners off of the webbing at this point! They kind of get in the way, but are easy to trim with scissors.
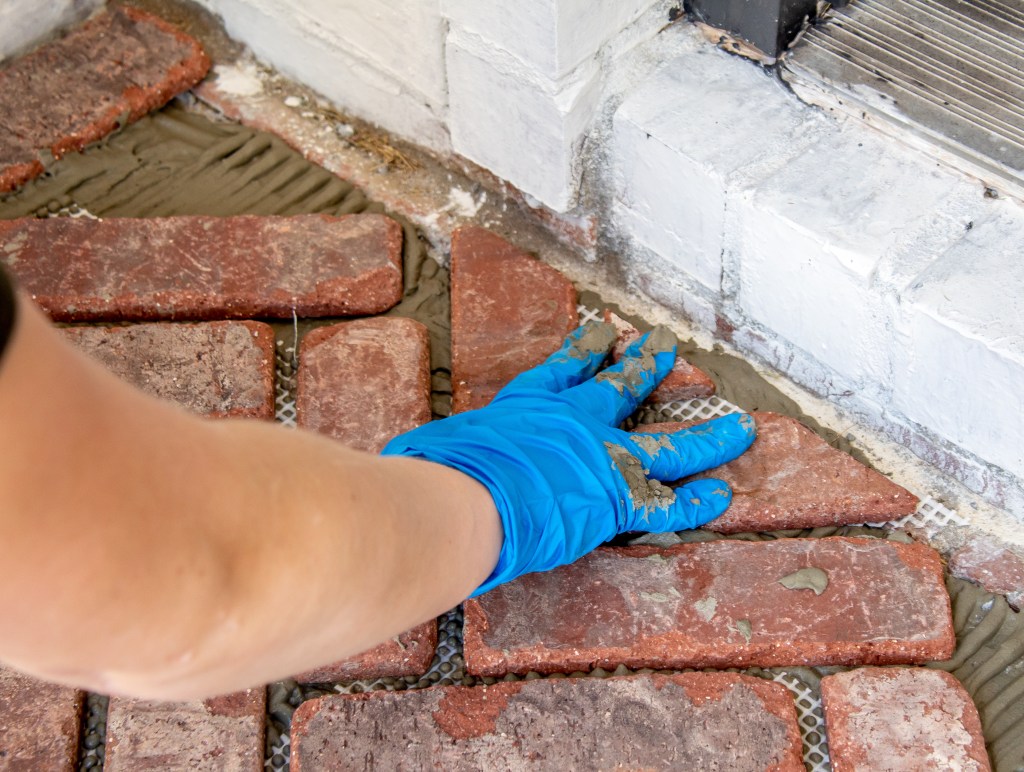
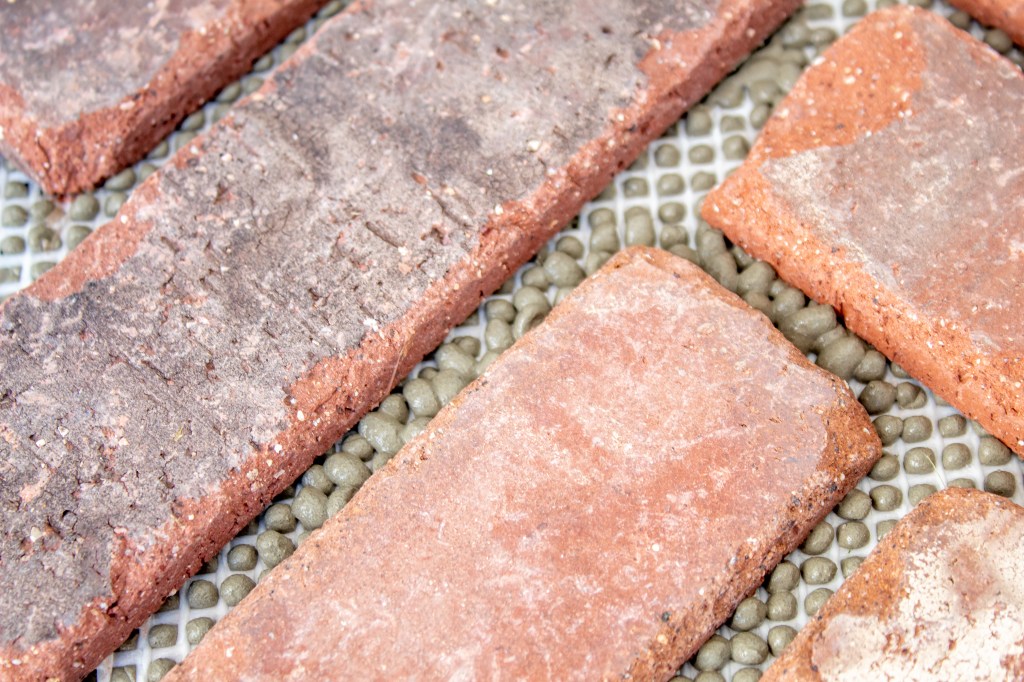
After I had everything cut and aligned where I wanted it to be, I took all the brick off so that I could spread the adhesive. I mixed the adhesive in a bucket until it was the consistency of smooth peanut butter and then started spreading it with a 3/8″ notched trowel.
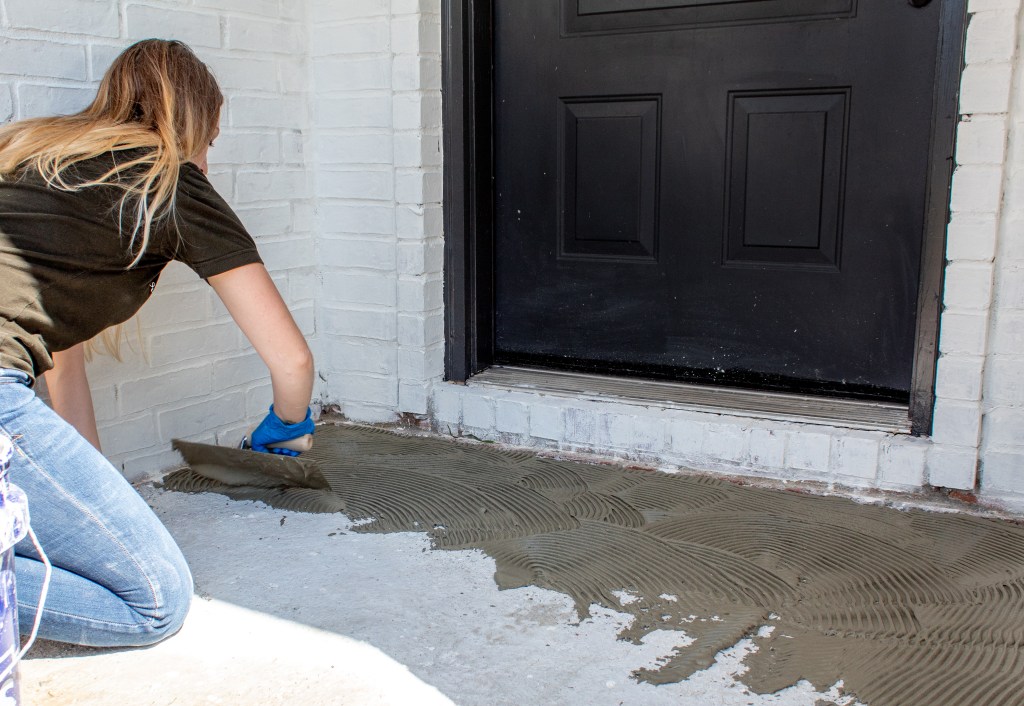
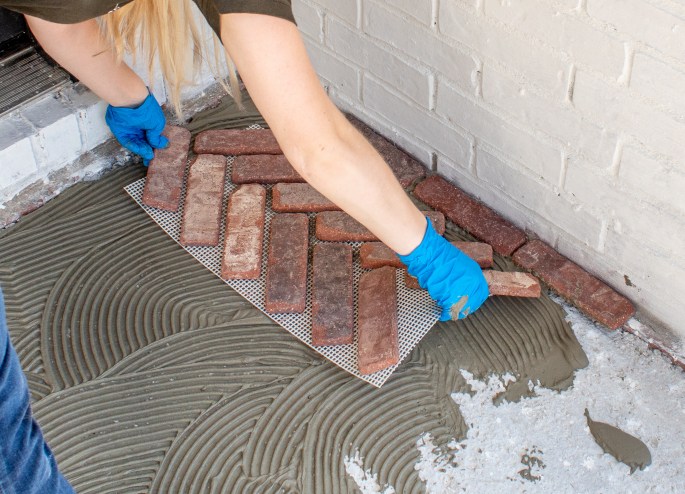
Then the process is simple – spread, add brick, repeat. This step was pretty fast since I already had all my cuts made and I was using the awesome brickwebb.
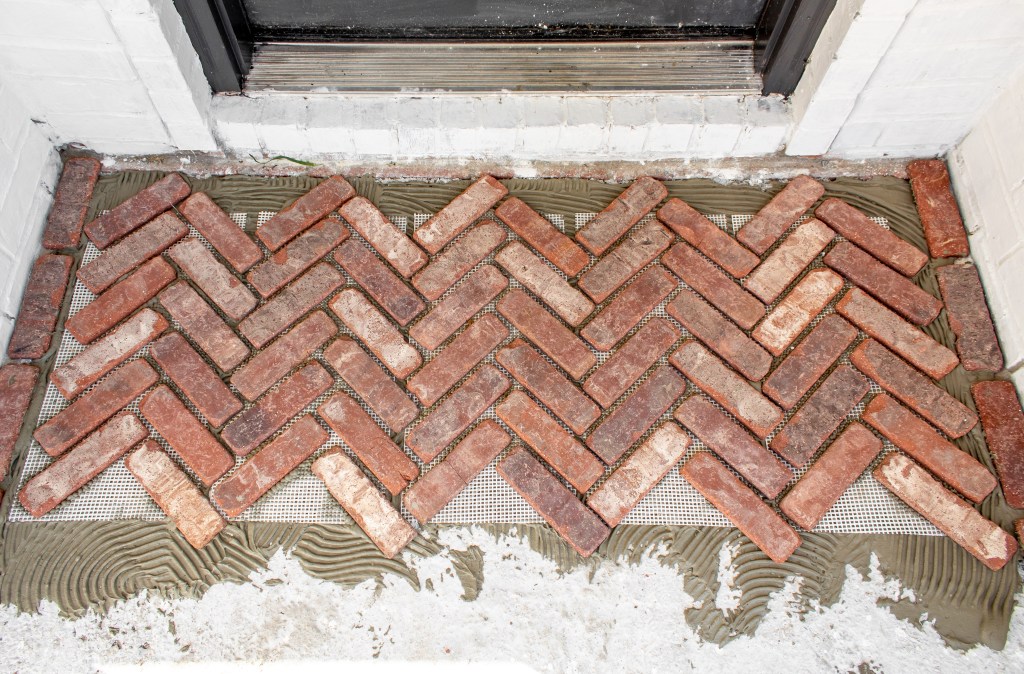

It needs to sit for 24 hours in order to set, so don’t walk on it for at least a day. I taped the porch off to keep away any accidental foot traffic.

Once it’s had time to dry, you can grout. There are a couple different options for how to do this and it depends on what style you want. I decided to do a light German Schmear. I mixed up some white mortar and used a piping back to run it through the grout lines. Then I smoothed it out and used a sponge to spread just a little onto the bricks. Use some painters tape along any surfaces you don’t want grout to get on because this is a messy process. I have a more in depth tutorial on how to German Schmear here.

The grout will need another 24 hours to dry and then you can step back and stare at your gorgeous new porch all day long!

With love,
Mercedes ♥

Love it! Could you tell me the name of the color you got for brick? Thanks
LikeLike
If you click on the link in the materials list it will take you to the exact product!
LikeLike
Thanks so much for the reply, I was looking for the color of the brick. Old mill has several different colors. And the material list only that you used brick but not the color you chose. Anyway much appreciated and you did a great job!
LikeLike
If you click the link, it will take you to the exact product, color and everything!
LikeLike
How far apart did you lay the singles?
LikeLike
I just eyeballed it to match the spacing of the brickwebb
LikeLike
do you need to seal the mortar to prevent staining? how does it clean up?
LikeLike
I didn’t seal at all! I wanted it to wear and soften from a super bright white, but you could power wash it to clean it just like you would brick or concrete 🙂
LikeLike
Incredible job! Seriously such a transformation!
LikeLike
Thank you!
LikeLike
Hey! This is such a great project and it looks so great. Do you have an estimated cost you’re willing to share? Thank you!!!
LikeLike
Hi! A lot of my material was gifted, so I don’t have a very accurate cost estimate for you. But you could pretty easily add up what you would need for your size space!
LikeLike
Será q consigo fazer esse piso na minha cozinha rustica já q o cimento queimado foi mal feito? Mesmo q fique com um degrau da sala.
Maravilhoso seu trabalho!
LikeLike
Hi! Yes you could do this in a kitchen, I would just do some research on how to seal them so that they don’t stain with any food spills.
LikeLike
I was wondering how this has held up to foot traffic?
LikeLike
It’s held up perfectly! No issues at all 🙂 it is real brick, so it’ll hold up like any brick walkway would – a long time!
LikeLike
How durable r these & howr thes as far as everyday wear when u walk on these
LikeLike
Hi! They’re only slightly less durable than regular bricks. They’re real bricks just a little thinner, so the change in thickness affects their durability slightly, but they are rated as durable enough for flooring and walkways and things like that. You shouldn’t have any problems with walking on them daily!
LikeLike
Looks amazing! How does this hold up in winter? Is it easy to shovel snow on it, and can pet-friendly salt be used without damaging?
LikeLike
Hi! This was in Arkansas, so not much winter there! Sorry I don’t have experience shoveling it. But it’s real brick so anything you can use on brick you can use here!
LikeLike
Hi, your project turned out Beautifully!
But can you share the color of the front door?
LikeLike
I hear its best to use bonding agent when pouring concrete over concrete? Did you happen to do so? Or have you had any issues with not doing so?
LikeLike