Disclosure: Some of the links provided are affiliate links, which simply means I may earn a small commission (at no additional cost to you) if you shop through one of my links.
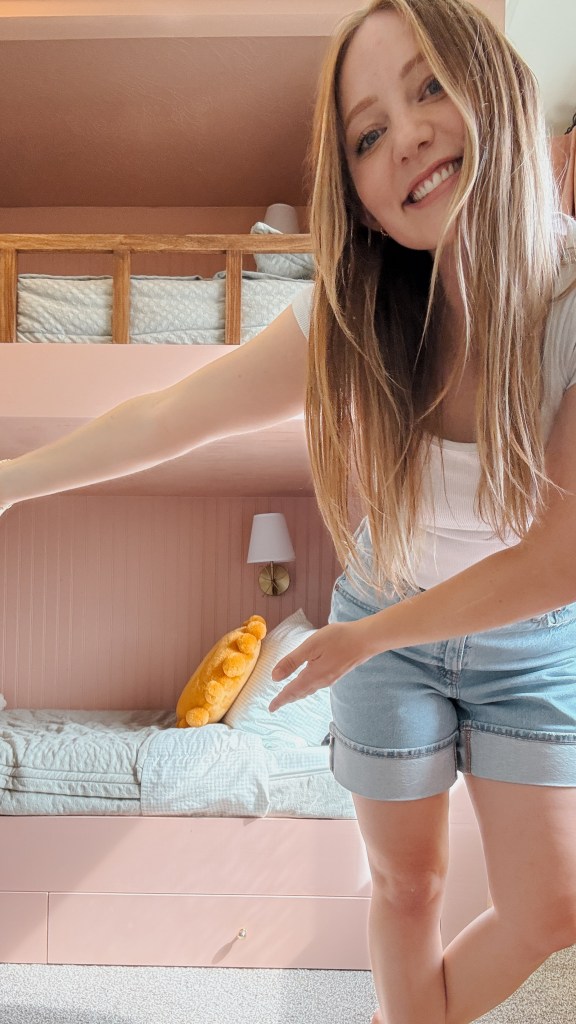
It’s finally time for the reveal! Ok truthfully, it was time months ago and after a long hiatus I’m so excited to finally share our built-in twin over twin bunk beds.. This has easily been one of my favorite DIY projects to date. Not only was it less complicated than I expected, but the payoff has huge – Theia still talks about her bunk beds almost every day, which makes all the wood we hauled up the stairs and every late night spent painting totally worth it.
When I brought up the idea of bunk beds to my four year old, her face lit up. My kids love having sleep overs in each others rooms and I thought bunk beds would lead to many happy memories – I was right!
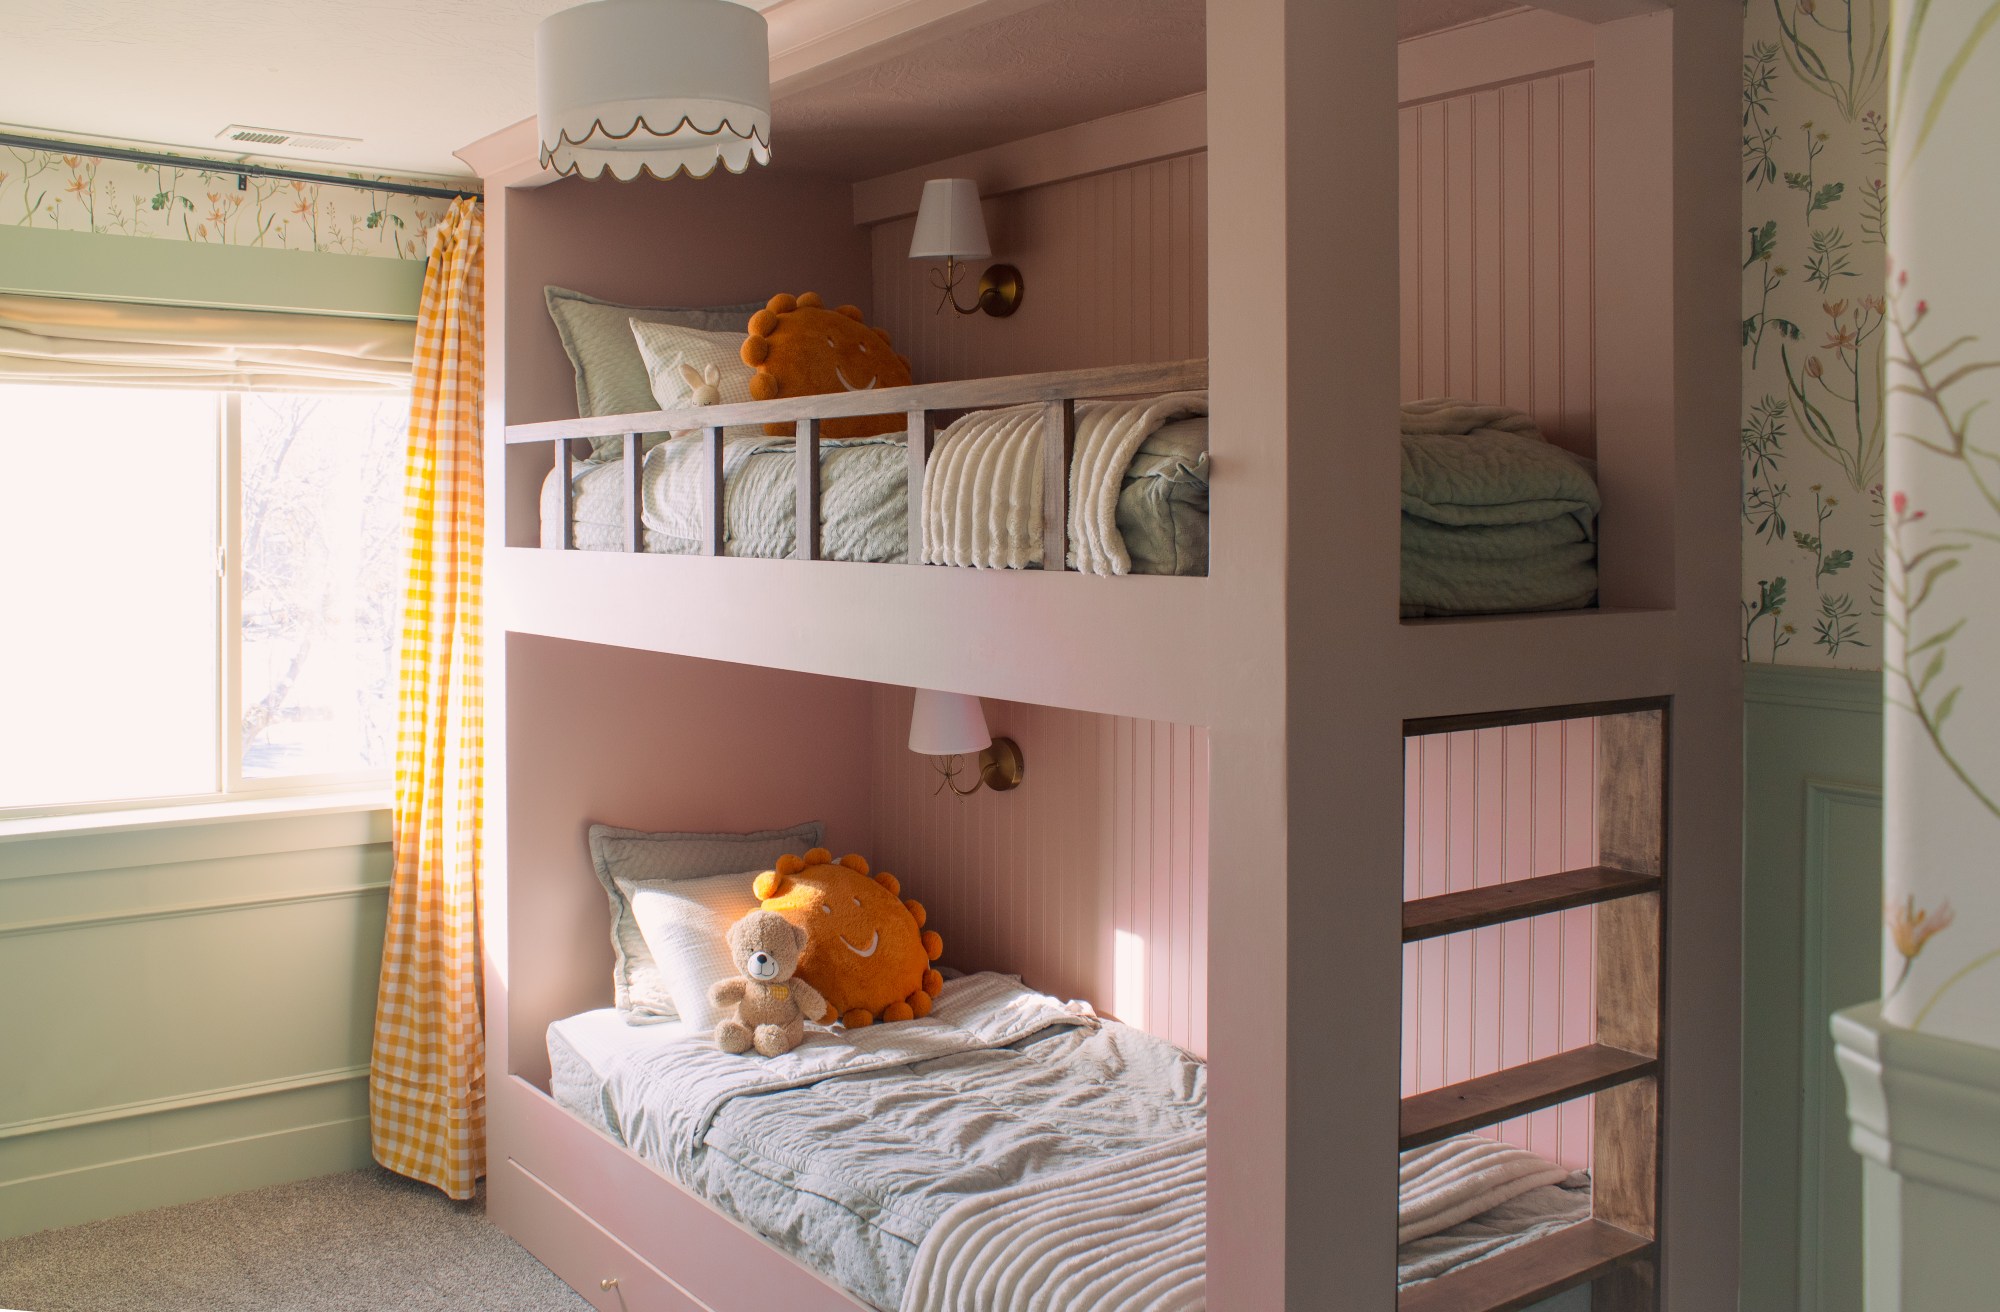
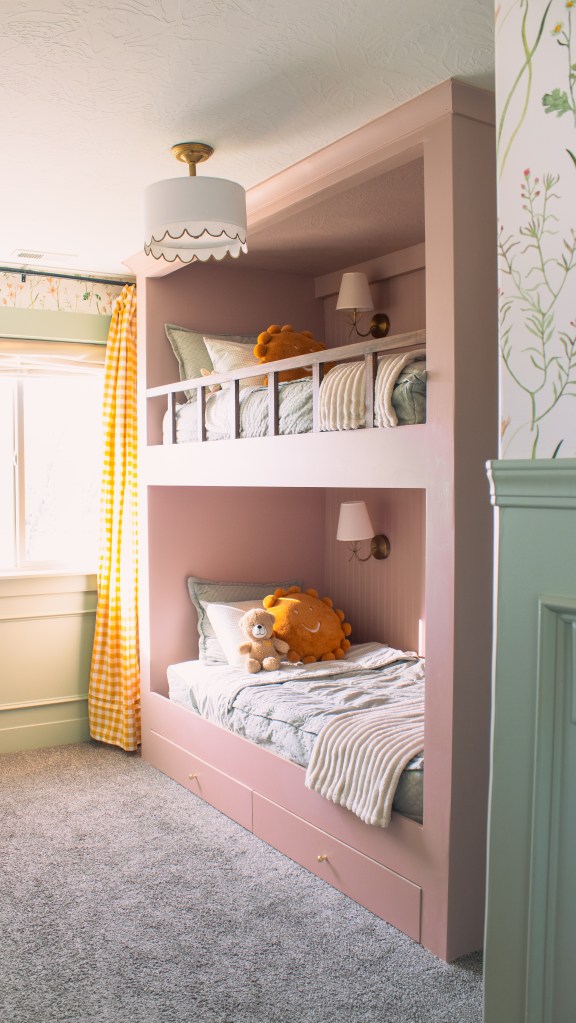
Since you last saw these custom bunk beds, I painted them the coziest shade of pink, added in the final touches like the ladder, safety rail and beadboard, and built storage drawers. The final product is everything I hoped it would be.
How I Built our twin over twin built-in bunk beds
If you’re just tuning in and want a detailed look at how we got to this point, I have two previous posts for you to look through:
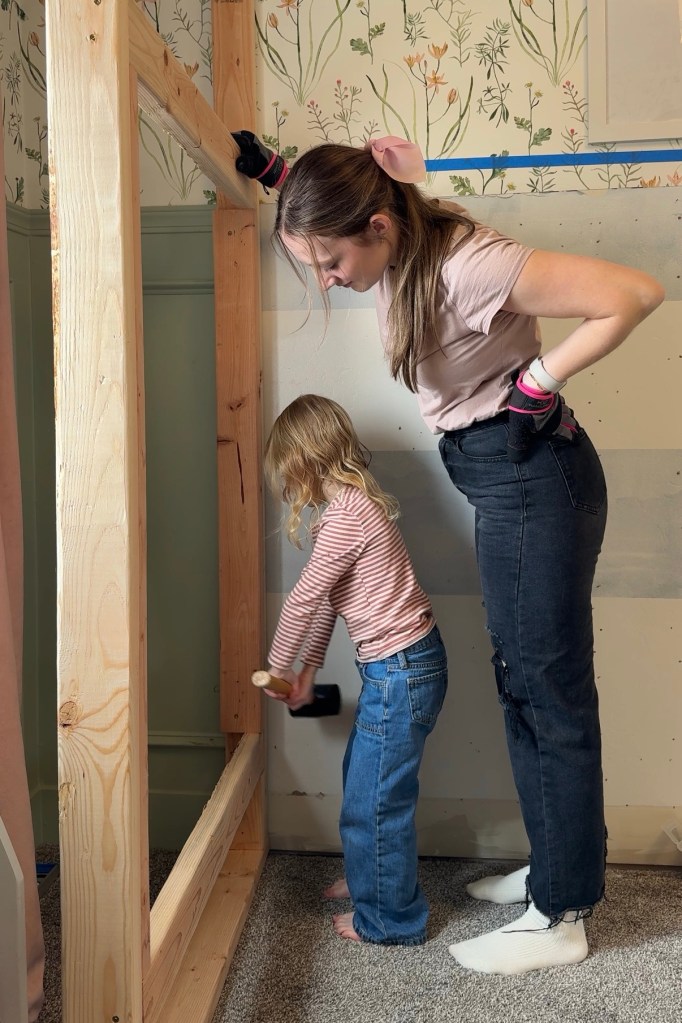
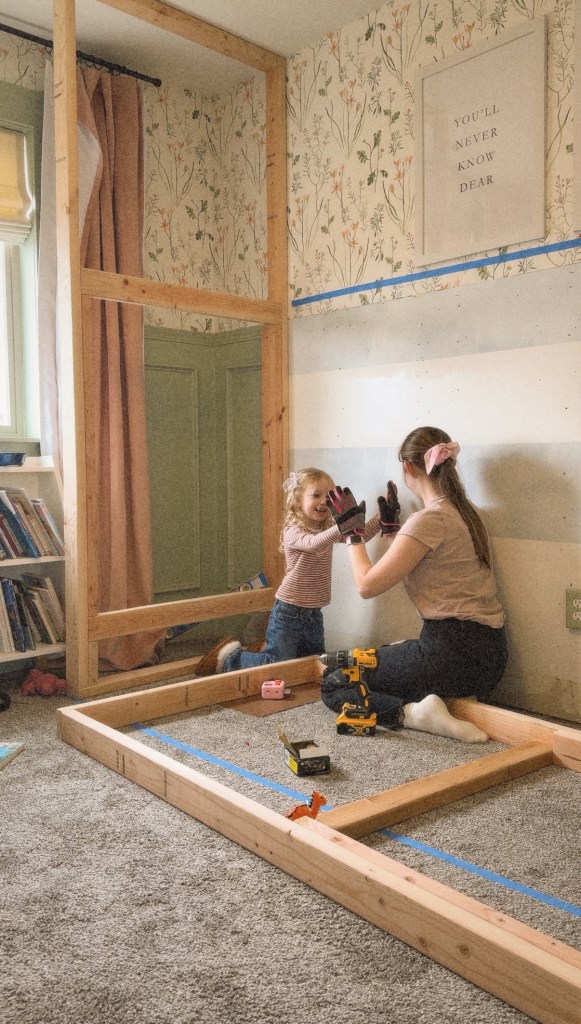
First, I built the framing – you can find all of those details in this post. Theia helped a lot with this step and it was so fun to share that experience with her.
The next step was where the bulk of the work was. I wrapped that frame with MDF and trimmed everything out to get it ready for paint – you can find those details in this post.
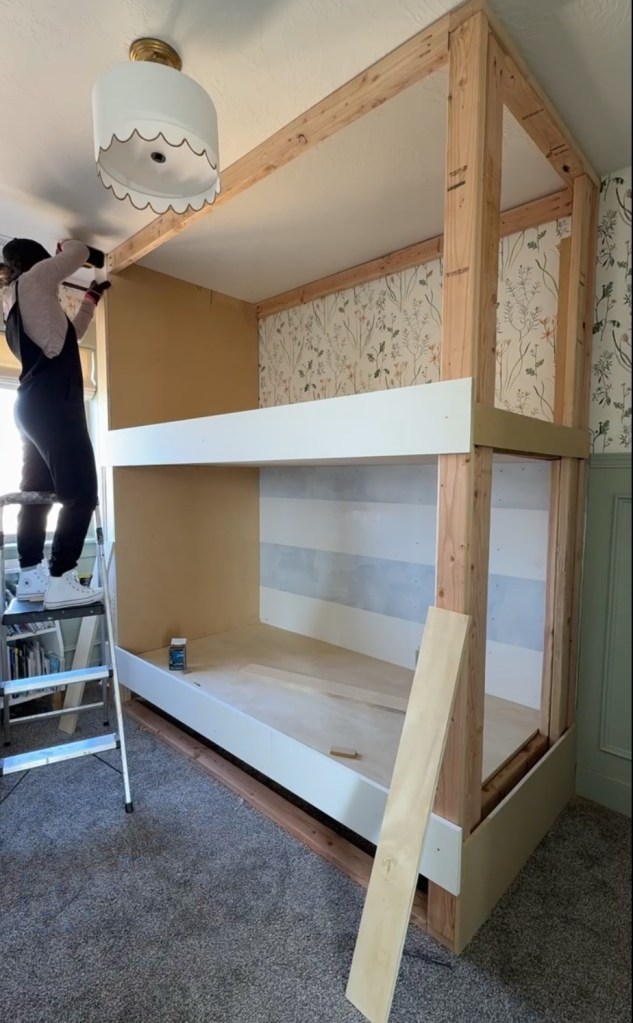
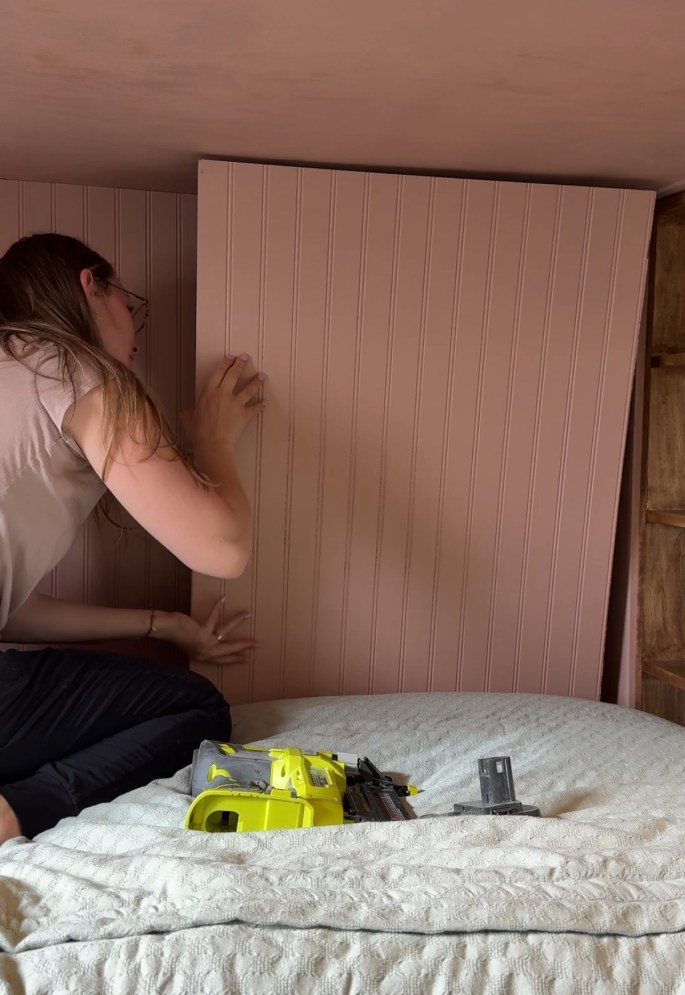
I was really excited to get the paint on, but in retrospect I probably should have totally finished trimming everything out before getting the paint on. I sprayed the paint on using my favorite paint sprayer. I added the beadboard accent and the crown moulding after this step, so I ended up painting those separately (I sprayed the beadboard before install so the finish would match and hand painted the crown). It worked totally fine, but if you’re building these yourself there is no reason to paint before finishing trimming everything – haha!

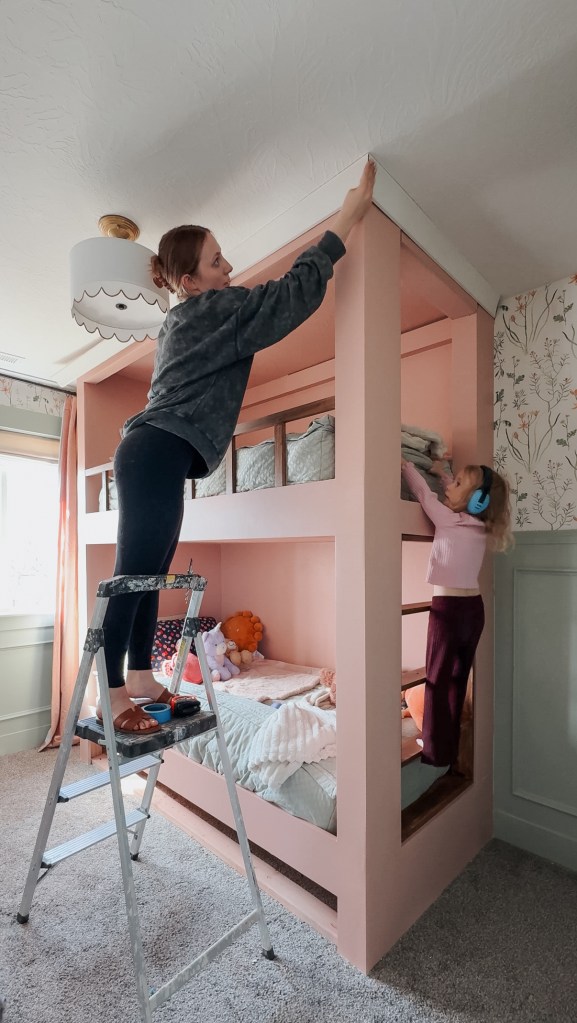
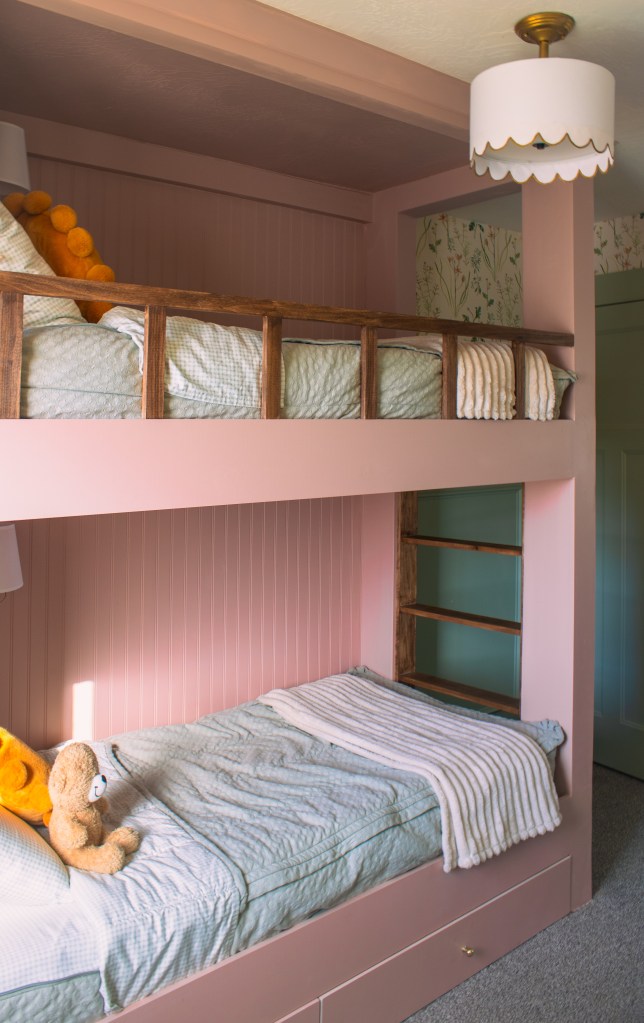
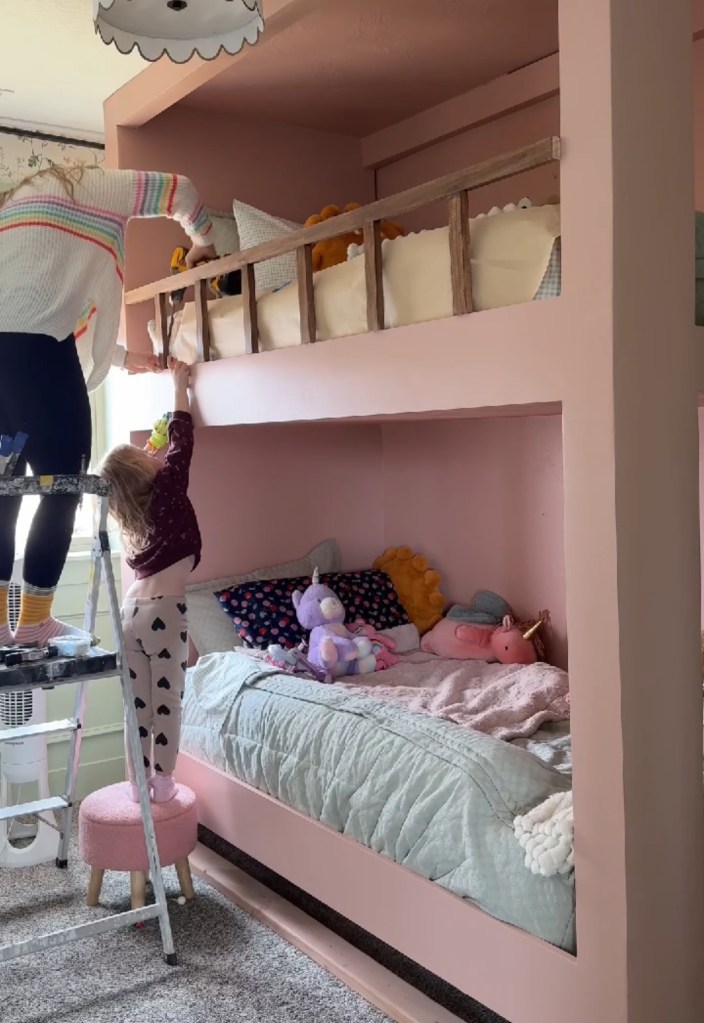
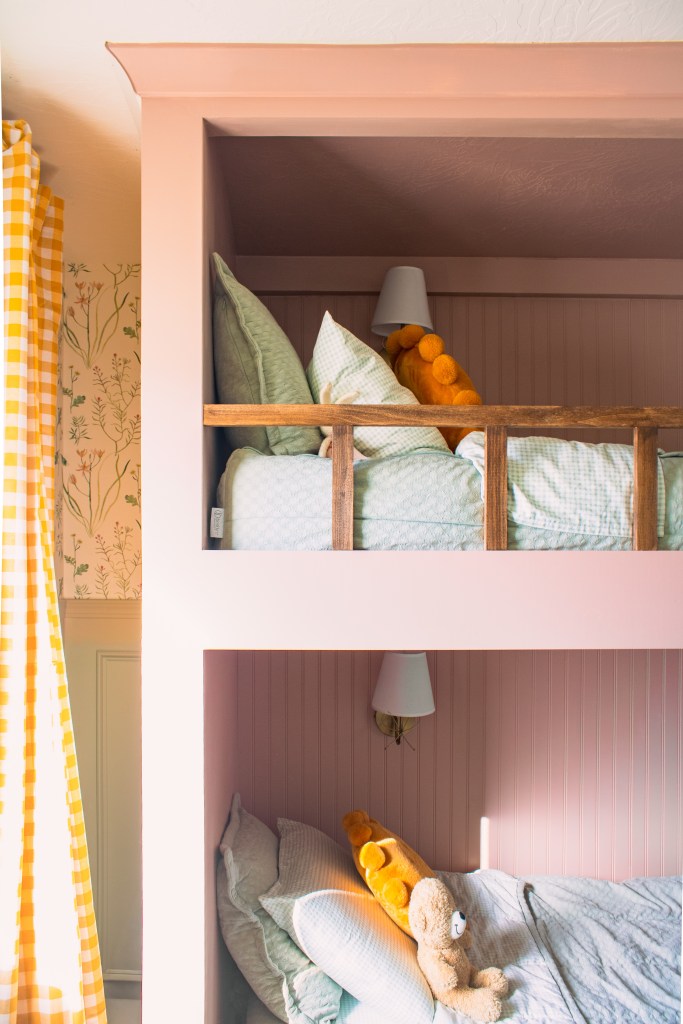
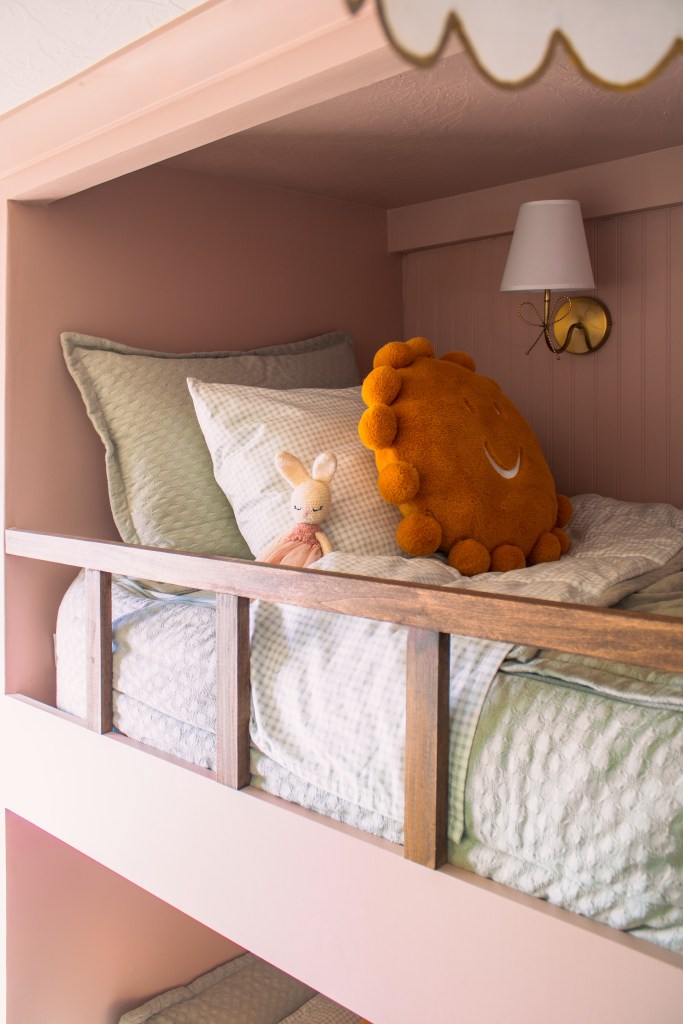
And here are some close ups of the ladder and safety rail install. I built the rail out of 1x2s (but I want to double it up so it’s a little thicker!) and the ladder out of 1x4s, both poplar to give it a little more sturdiness than standard pine. The rail is attached with glue and pocket screws (I love this pocket hole jig, but this one works great too) and the ladder is glued and nailed in with brad nails. I was planning to screw it in but it is such a tight fit that after seven months of me climbing up and down to make the top bunk, it still hasn’t budged. I’m calling it good!
The Final Product
And without further ado, here she is in all her glory.
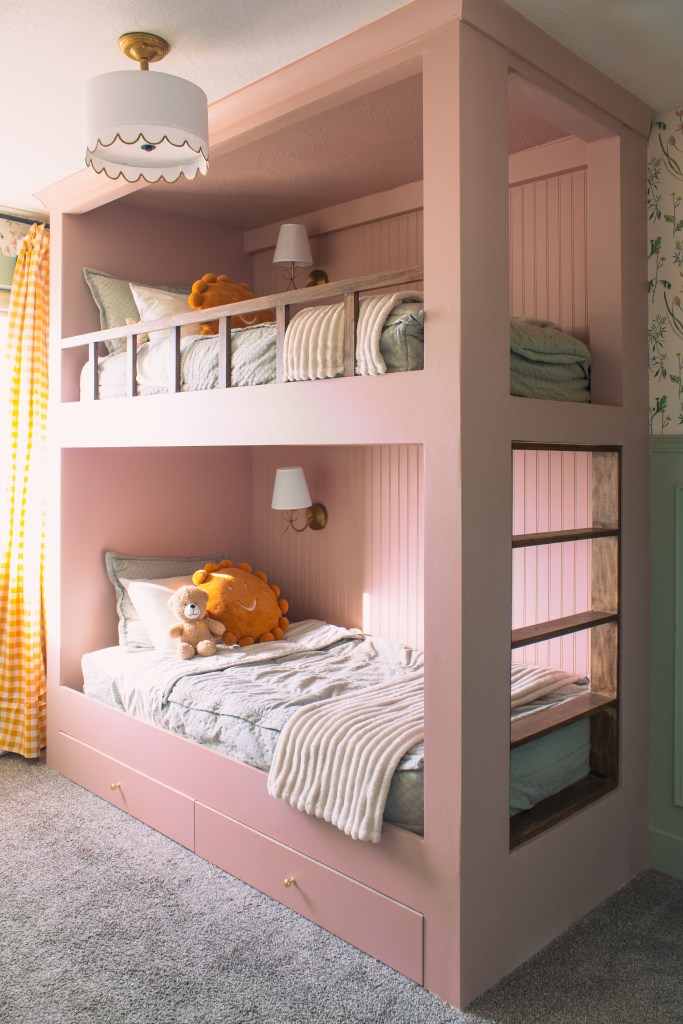
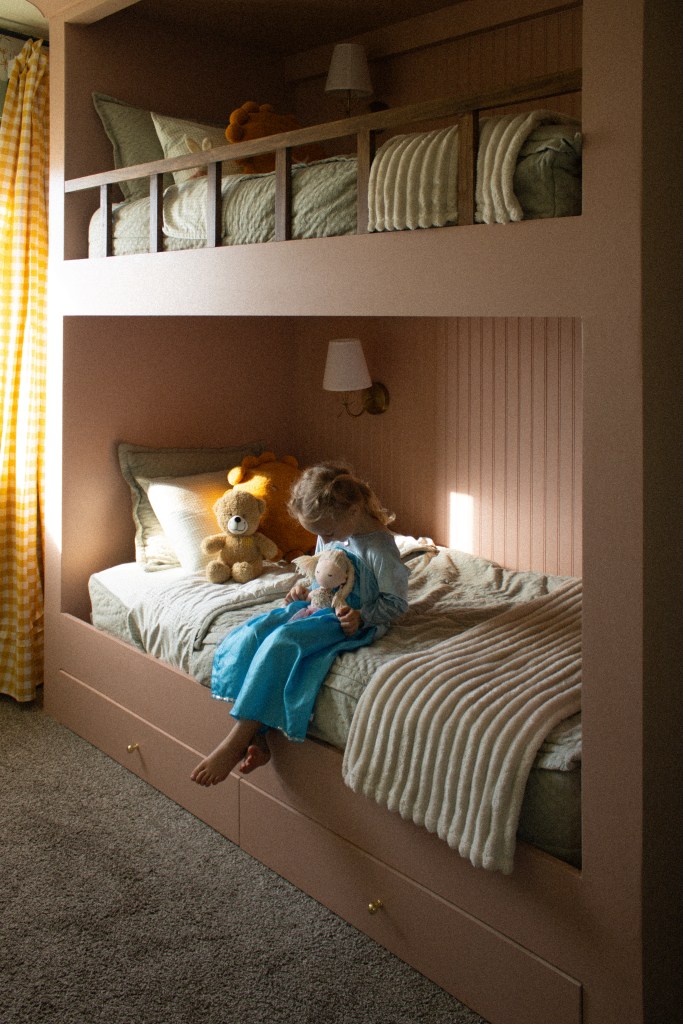
The pink paint color we landed on is Benjamin Moore Ciao Bella. It is the perfect mid-toned pink, in my opinion. Not too bright, but not too subtle. Not too light, but not too dark. I’m still trying to decide if I want to paint all the green to match, but I love that green so much too (Benjamin Moore Salisbury Green at 75%) it’s hard to say goodbye to her nursery colors! So for now, it’s staying.
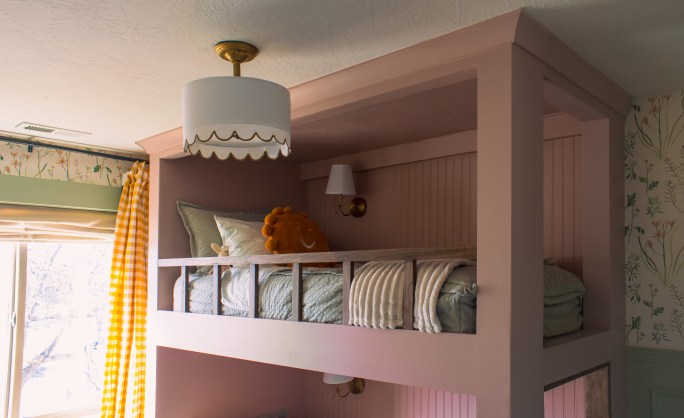
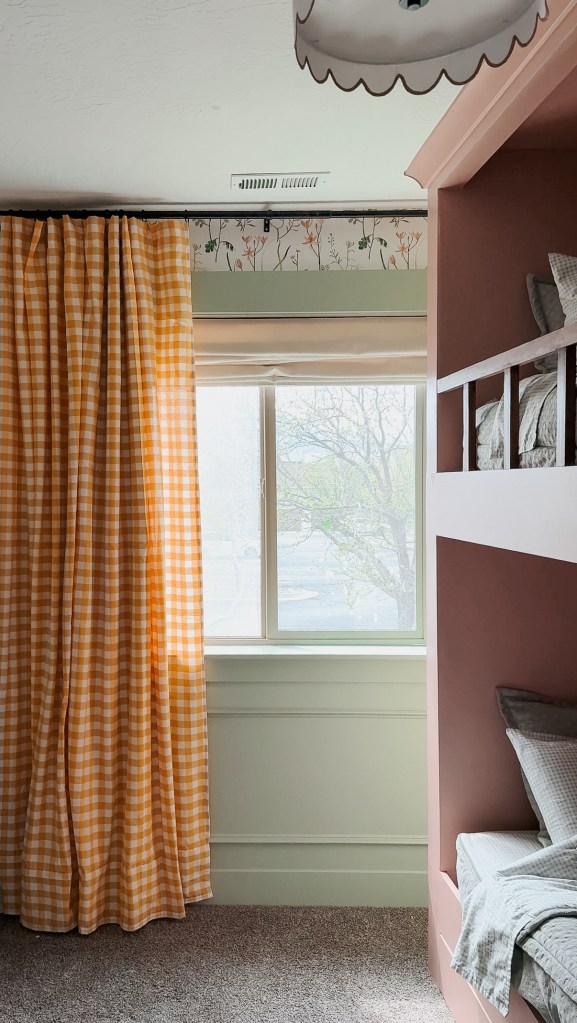
Our ceilings are a standard 8’ tall and her room is very average sized, so I was a little worried about the bunks feeling overbearing. Luckily, they do not! If anything, they make the room feel bigger. They don’t take up a bigger footprint than any other twin bed would take.
I did choose a very short mattress so that I could maximize vertical space on both the bottom and the top. After hours of researching, this is the one I chose and we love it. We can easily sit on the bottom for nighttime stories and the kids are more than comfortable with the vertical space on the top bunk. Plus the mattress itself is nice and comfortable, obviously a must.
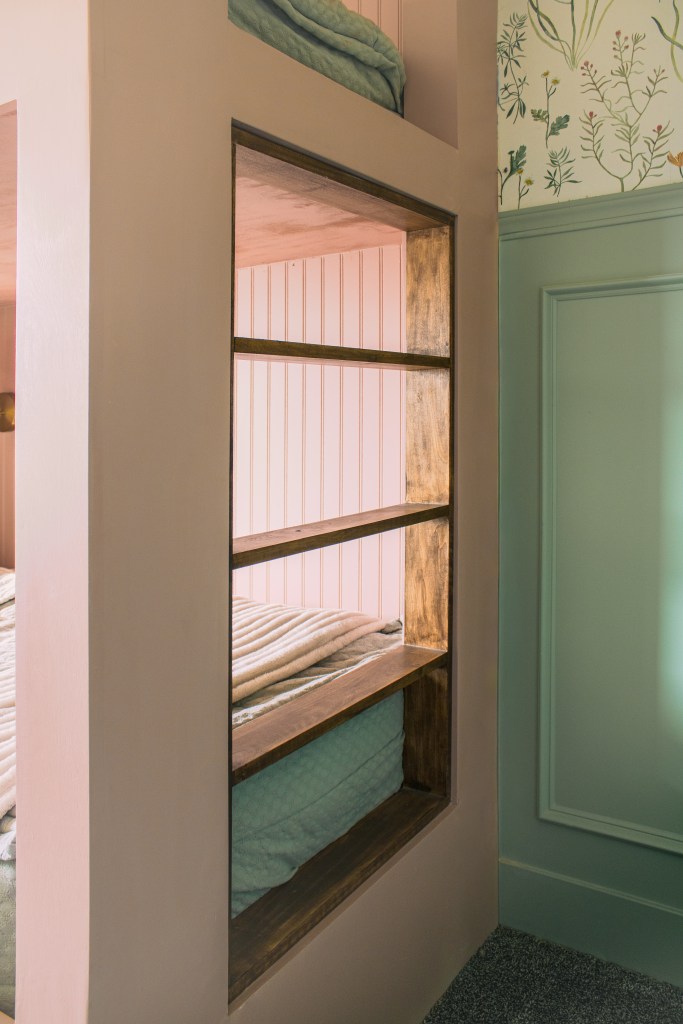
I stained the wood pieces with Minwax Dark Walnut, a favorite of mine, and sealed it with polycrylic.
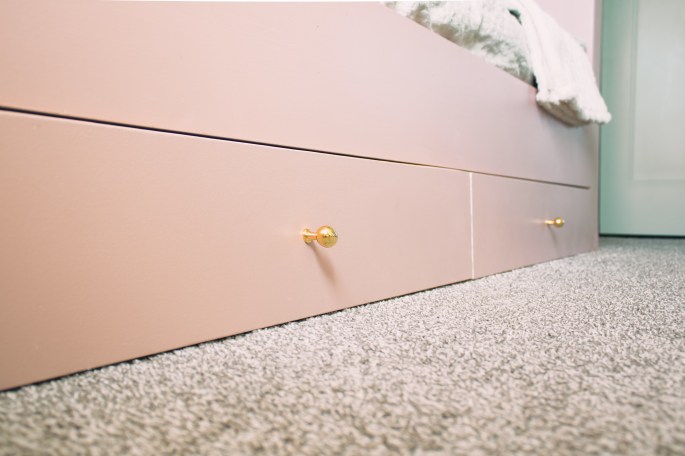
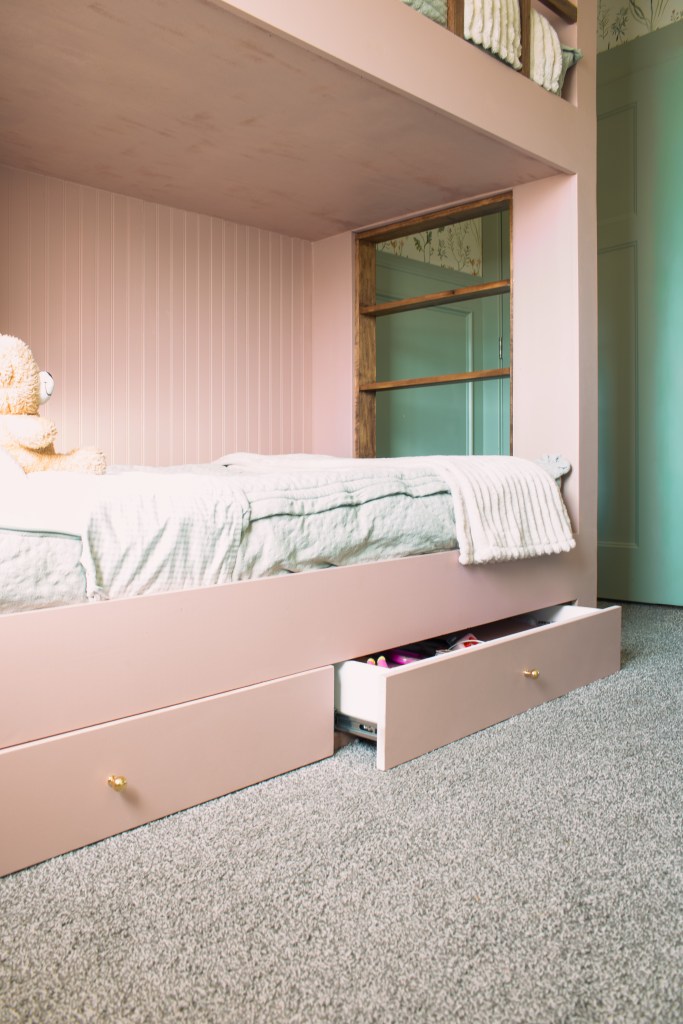
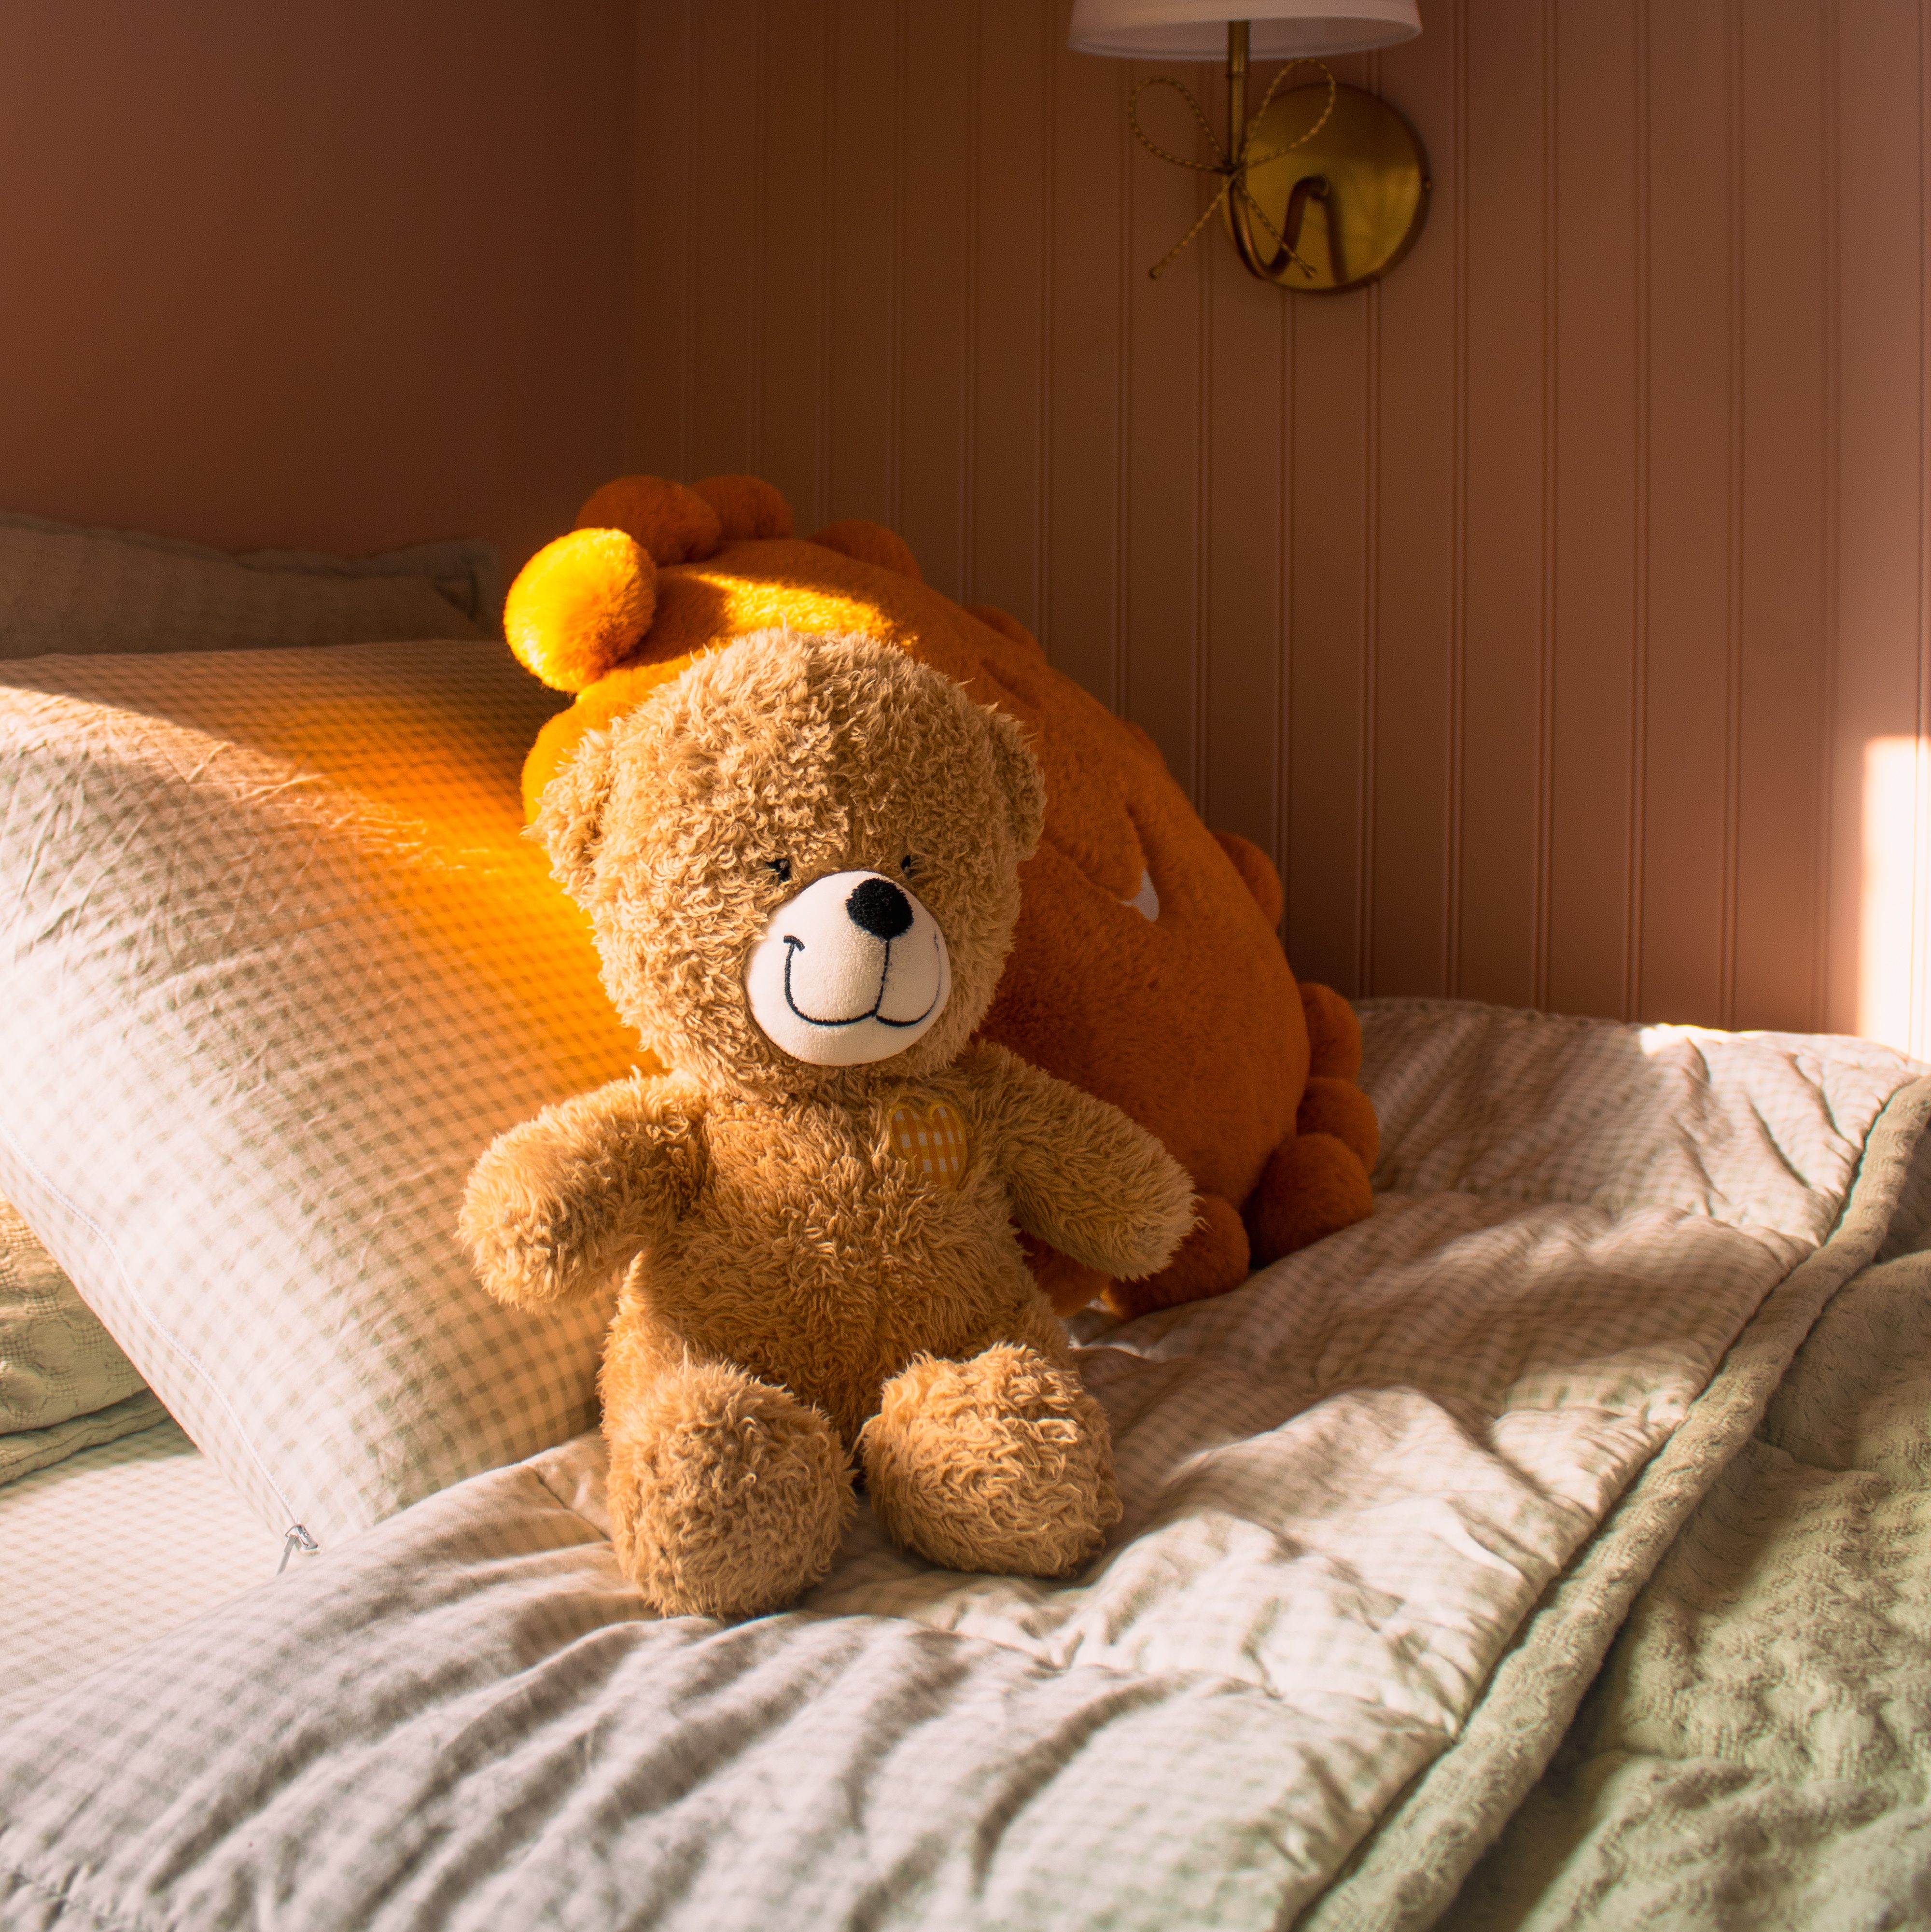
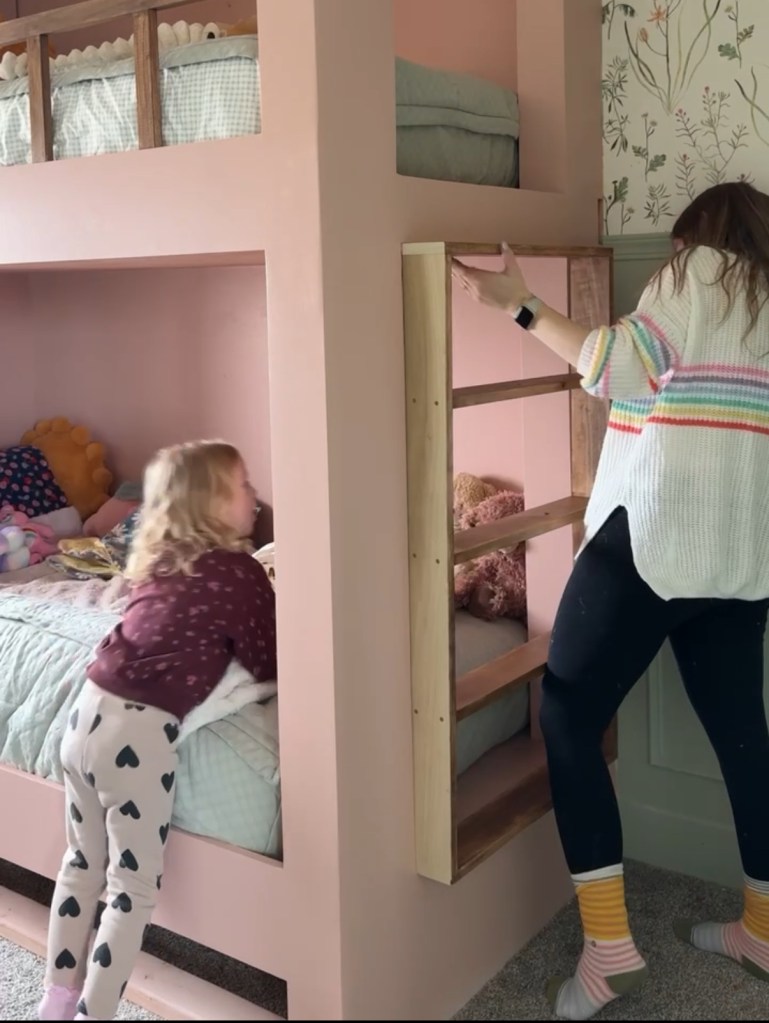
My favorite functional feature of the bunks are the drawers I added. They are big enough to store all of her various toys and stuffed animals in, which has been so helpful with keeping her room clean.
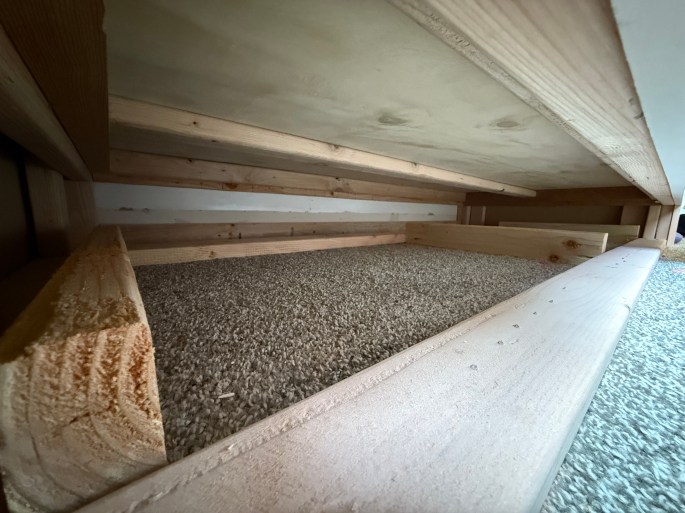
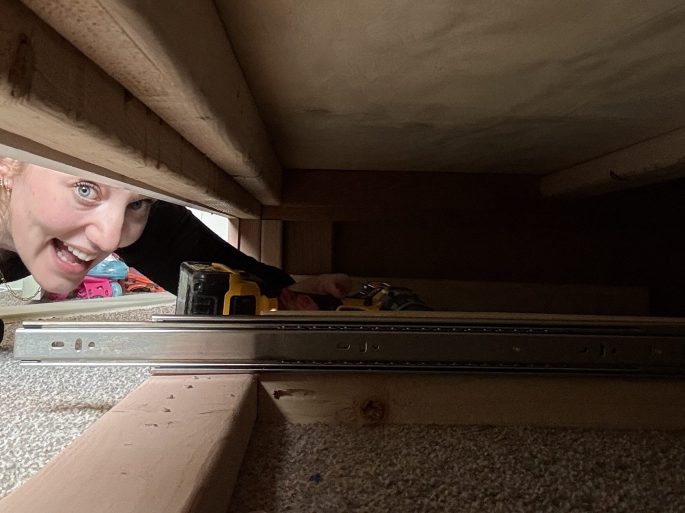
I built a simple frame out of 2x4s to hold the drawer slides, then installed these slides. Then I build the drawer boxes, installed them, and used a flat piece of 3/4” MDF as the drawer front. It’s a little extra work to build the drawers, but definitely worth it.
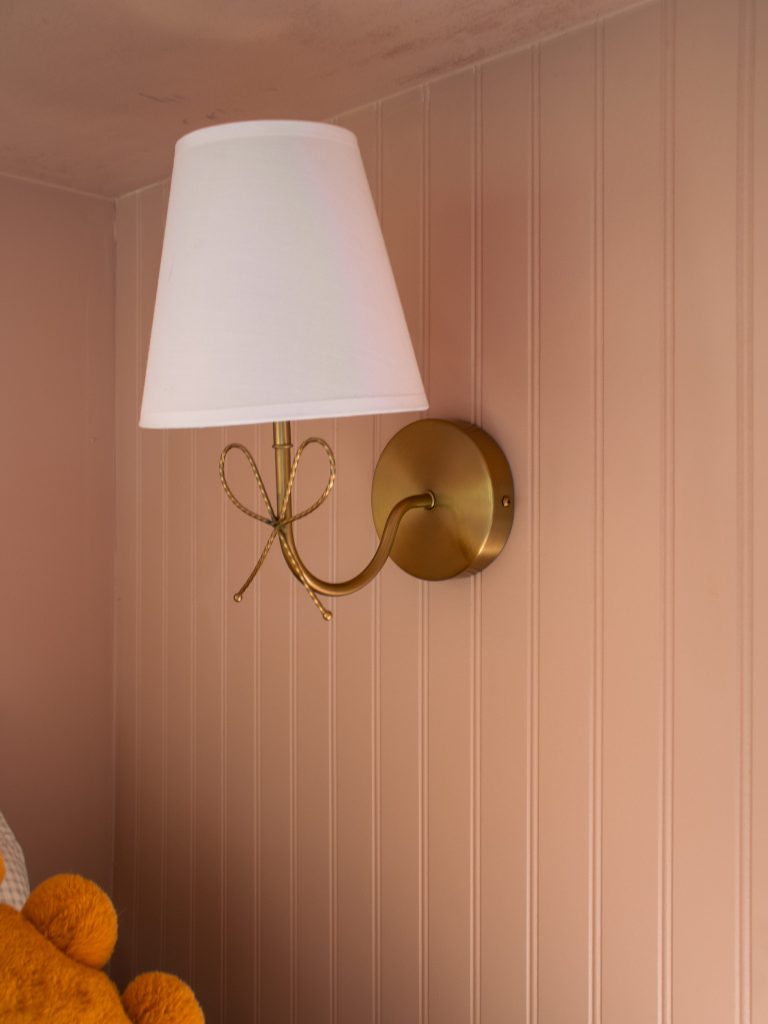
The beadboard adds just the right amount of texture and depth – I’m so glad I added it. I also installed this inexpensive battery powered sconce lighting. They change colors, so you can imagine they have been a huge hit.
I’m using Beddy’s bedding on her bunks because it makes it so much easier to make that top one! Theia also loves being zipped in at night. If you’re in the market for Beddy’s, you can use my code WITHLOVE for 15% off.
Here’s the room when we moved in, her nursery, and now her big girl room.
Well, that’s a wrap on this project! Be sure to check out the first two parts (part one | part two) if you’re interested in building these yourself and as always, comment below or over on Instagram with any questions you might have.
With love,
Mercedes 🖤