
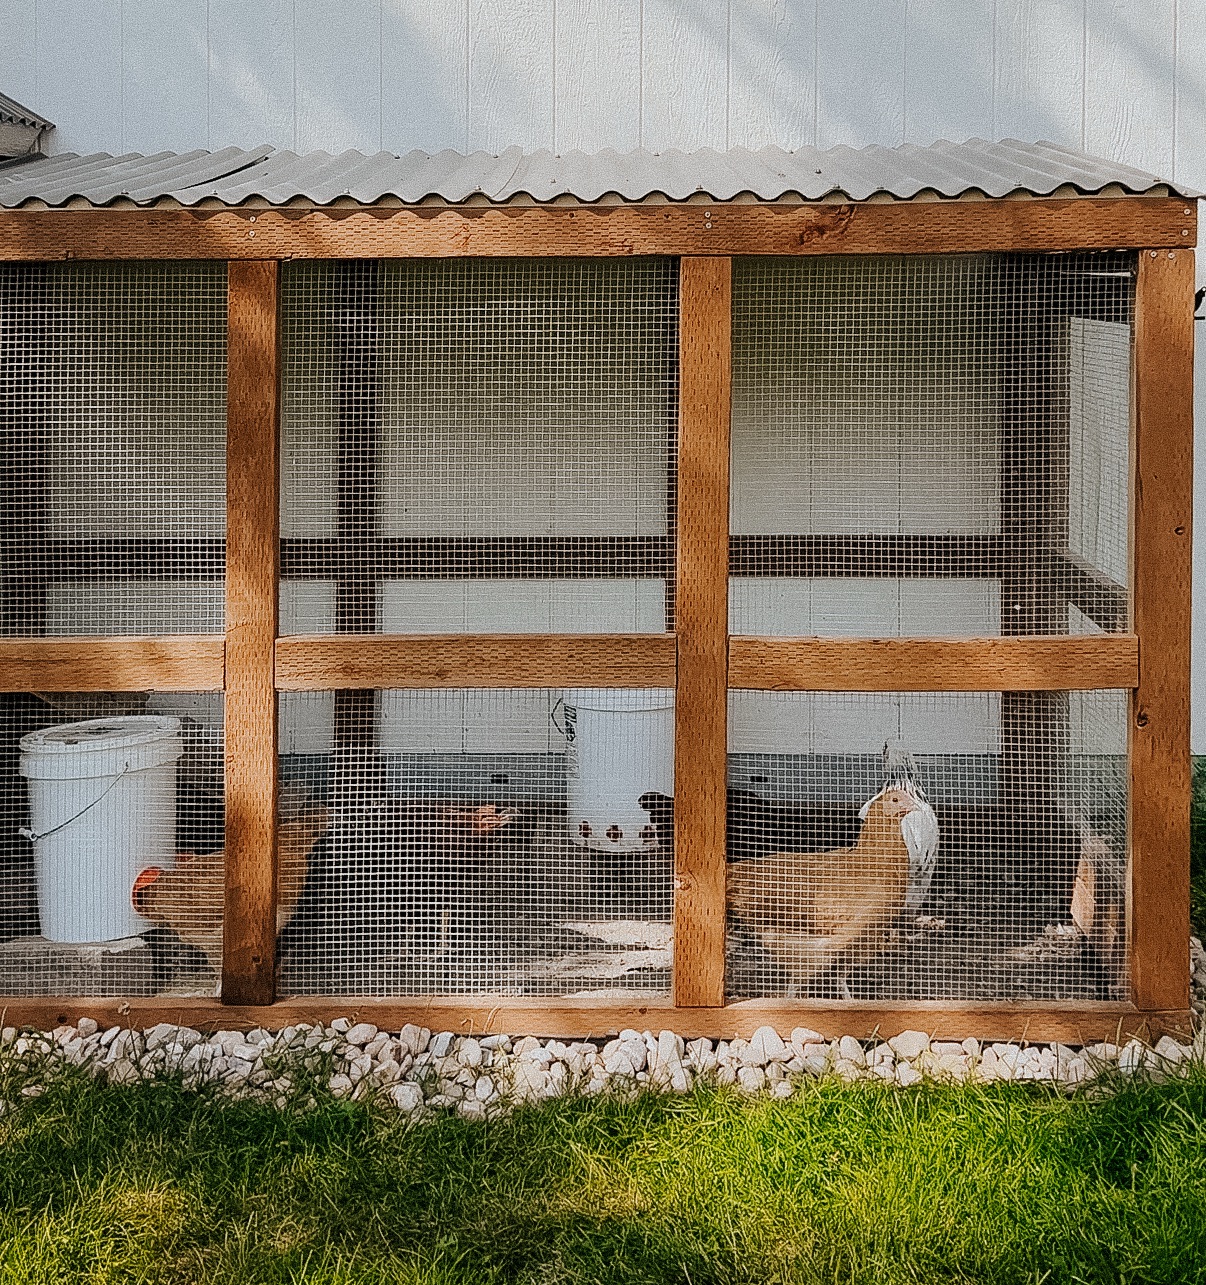
Almost a year ago, I posted about the chicken coop that I built. It’s about time I got around to writing about building the attached run. Our chickens spend most of their time in their coop and their run, so having a sturdy, predator proof run was essential to getting our backyard set up for chickens.
I was pregnant with my third baby when we got chickens. After I built the coop but before I built the run, I was put on modified bed rest. The chickens needed a run, so thankfully Jordan and my father in law stepped in to help. I sat on a chair and directed them in the build, and it turned out great!

This run can be easily modified to fit whatever dimensions you’re needing. Just change the length and width dimensions. You may have to also adjust the slope of the roof so that snow doesn’t build up and get too heavy.
Materials
Disclosure: Some of the links provided are affiliate links, which simply means I may earn a small commission (at no additional cost to you) if you shop through one of my links.
- Pressure treated 2x4s
- 2x3s
- Hardware cloth (this is exactly what I bought, but I had quite a bit extra since I didn’t have to do the shed side)
- Door latch
- Hinges
- 1.25” Screws
- Pocket hole screws
- Washers
- Gloves (use when working with hardware cloth!)
- Tin snips
- Square
- Pocket hole clamp

Tutorial
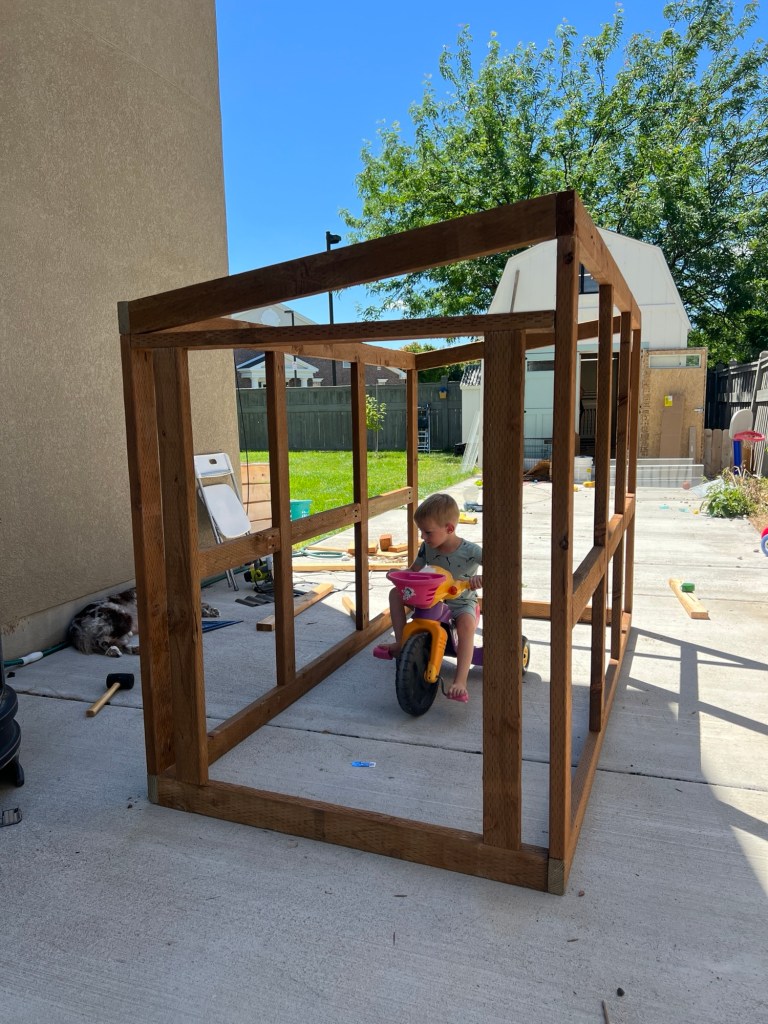
There are basically three walls in this run : the tall back wall, the shorter front wall, and the door wall. The fourth wall (opposite the door) attaches to the coop, so it doesn’t need much additional construction.
Note : double check these measurements (especially the angle) as you go! I changed a few to better fit my space, and pregnancy brain means I didn’t record it.

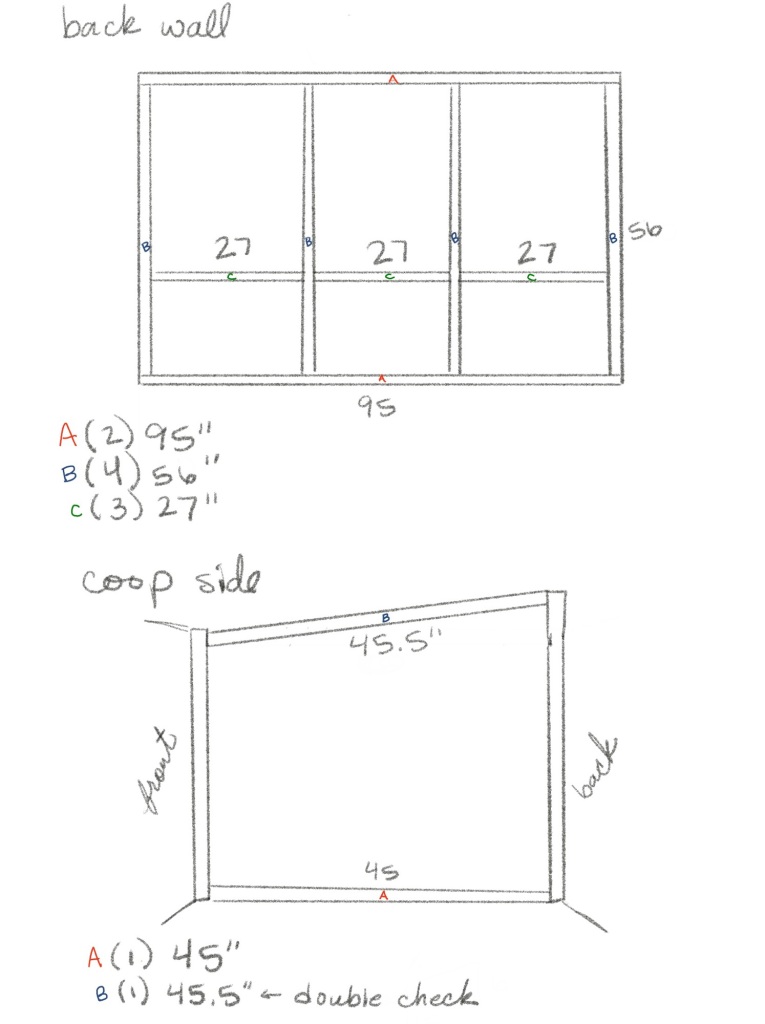

We started by building the tallest wall, then the shorter wall. We used a combination of pocket holes and regular butt joints to attach everything. We built it laying flat to keep it square.
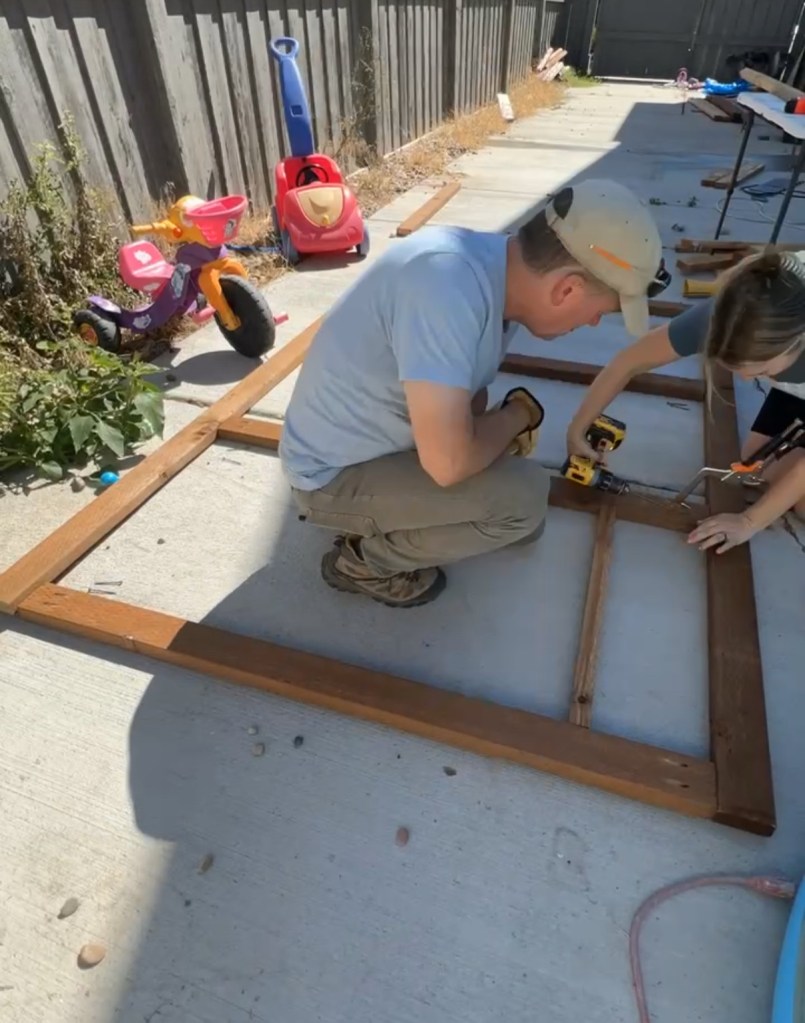
With the two main walls built, we built the door frame and cut the angled roof support.
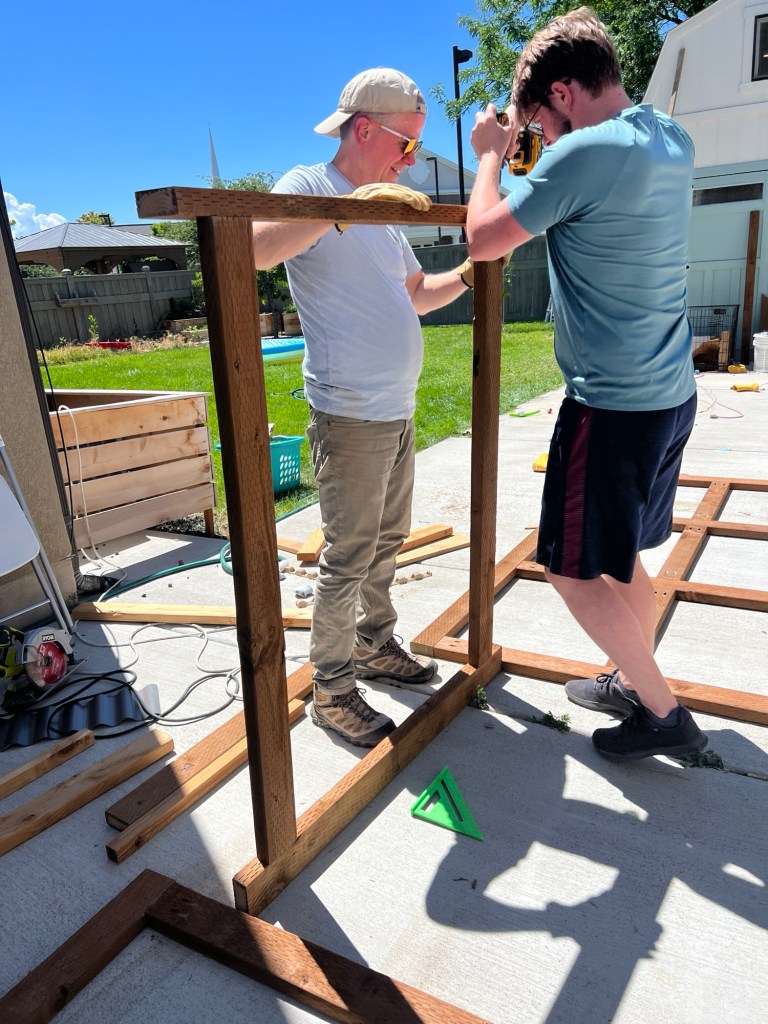
We stood it up and attached the door frame, then the angled roof support on both the door side and the coop side. The coop side also got a horizontal base support.

We added a few roof rafters and moved it into place. The rafters are made from regular 2x3s.


I ended up making the door wider than my original plans. It is a simple box with a horizontal board (which is mostly for aesthetics).

I added a door jam on the inside of the framing so the door cannot swing inwards. I attached the latch up high so raccoons can’t reach it, but I wish I had made it a little lower for my kids. Then again, maybe it’s a good thing it’s high up!

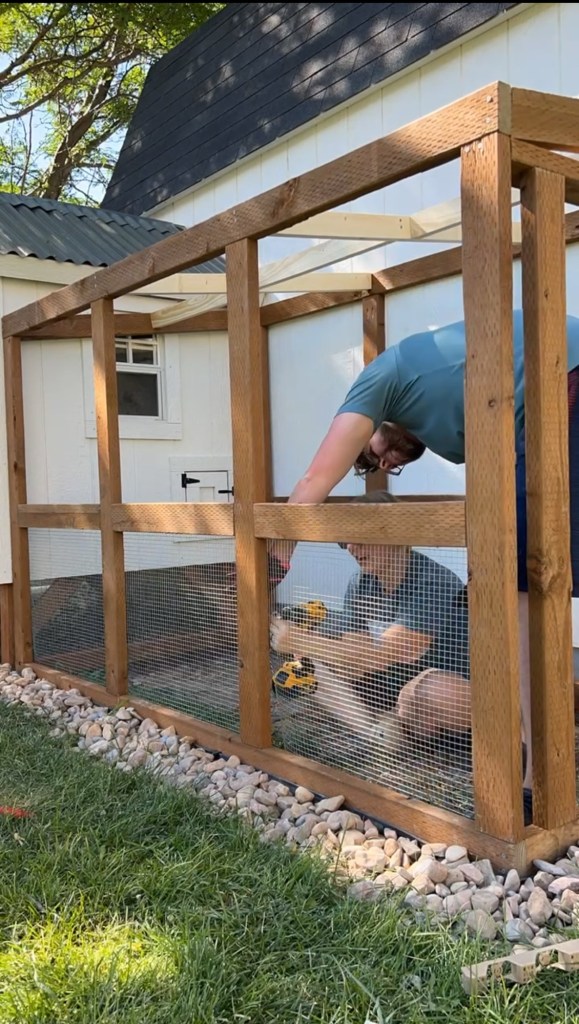
I had heard that attaching the hardware cloth (much better than chicken wire!) was a bit of a nightmare, but we actually found it to be pretty straightforward. Jordan and I worked together to stretch it and screw it in. We used a screwdriver to pull it tight and then screws with washers to hold it into place. I measured each opening and cut it with tin snips as we went.
Have you seen people paint the hardware cloth black? It totally disappears and is on my list of things to do.

A lot of people will dig a trench around their coop and bury the hardware cloth to keep predators from digging and getting in. I decided not to do this for a few reasons – first, we have a fenced in backyard in a neighborhood with few predators, so our risk is low. Second, we have really hard soil here and digging out a trench sounded like the last thing I wanted to do. Third, I did do a border of rocks around the outside and while it’s probably not that much protection, at least it’s something. We’ve had our chickens for two years now and haven’t had a single problem, but if you’re worried, burying some hardware cloth I a great solution.
I used the same roofing that I have on the coop and screwed it into the rafters. This was actually the hardest part of it all because it was difficult to reach the very back! But still, not too tricky.

I secured the run to the shed and to the coop. If yours is entirely freestanding, you might consider pouring some footings to secure it that way, but it might be fine secured only to the coop – depending on how much wind you get.
Originally, I had planned to paint the run white. I still think it would be cute that way! Sort of a cottage-y feel. But due to said pregnancy, I left it raw. It’s still that way today and honestly I’m still undecided on if it should be white or not. Without the white shed background I think it’s a definite white, but with it is it too much white? I still haven’t gotten around to painting the hardware cloth, so it really feels like tomorrow’s question.

Let me know if you have any questions on how I built the run! We’ve been super happy with it.

With love,
Mercedes 🖤
Now you’re ready to build your own chicken run! Be sure to check out my post on building the chicken coop, as well as my experience with our backyard flock!

2 thoughts on “How To Build A Chicken Run”