
If you’ve read my plans for Theia’s bedroom, you know that I’ve been planning on these bunk beds for a while now. My kids (6yo and almost 4yo) love having sleep overs together so while we are lucky enough for them to be able to have their own rooms, giving them an easy way to make those memories together is a dream.
Want to see what projects I’m working on now? Follow me on Instagram.
These are twin over twin bunks. While her bedroom is the biggest kids room in the house, there is still not enough room for a full bed or even a twin XL, really, so I’m keeping it simple and doing twin over twin.
I actually really wanted to use pre-made plans for this build. I used plans for the coop build and it was so nice not having to do the work of drawing up the plans, but I couldn’t find any that gave me exactly what I was looking for. So I ended up drawing them myself in the end. Hopefully you find them useful!
Materials
Disclosure: Some of the links provided are affiliate links, which simply means I may earn a small commission (at no additional cost to you) if you shop through one of my links.
- (21) 2x4s
- (8) 2x3s
- (2) 3/4” plywood
- 3” screws
- 2.5” screws
- 2.5” pocket hole screws
- Pocket hole jig (budget option)
- *optional : pocket hole clamp
- Drill
- Miter saw (budget option)
- Level
- Stud finder
- Square
- Wood glue
Tutorial
This tutorial will hopefully guide you on how to build the bunk beds using the plans I’ve created. If you have any questions, I’d be happy to answer them! Just leave a comment below or message me on Instagram.
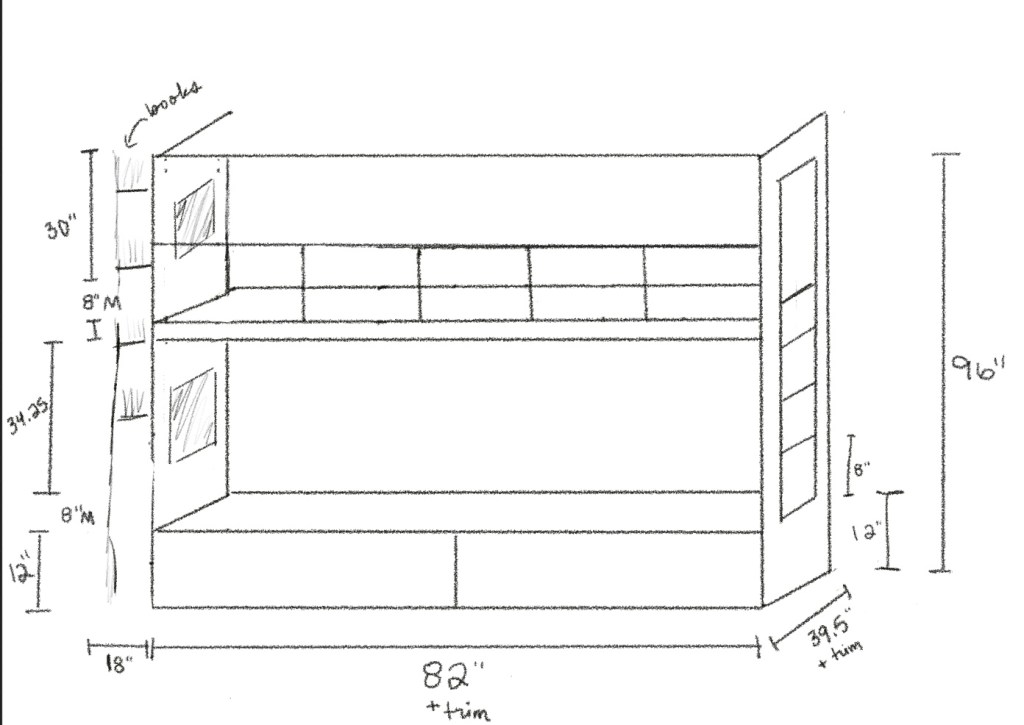
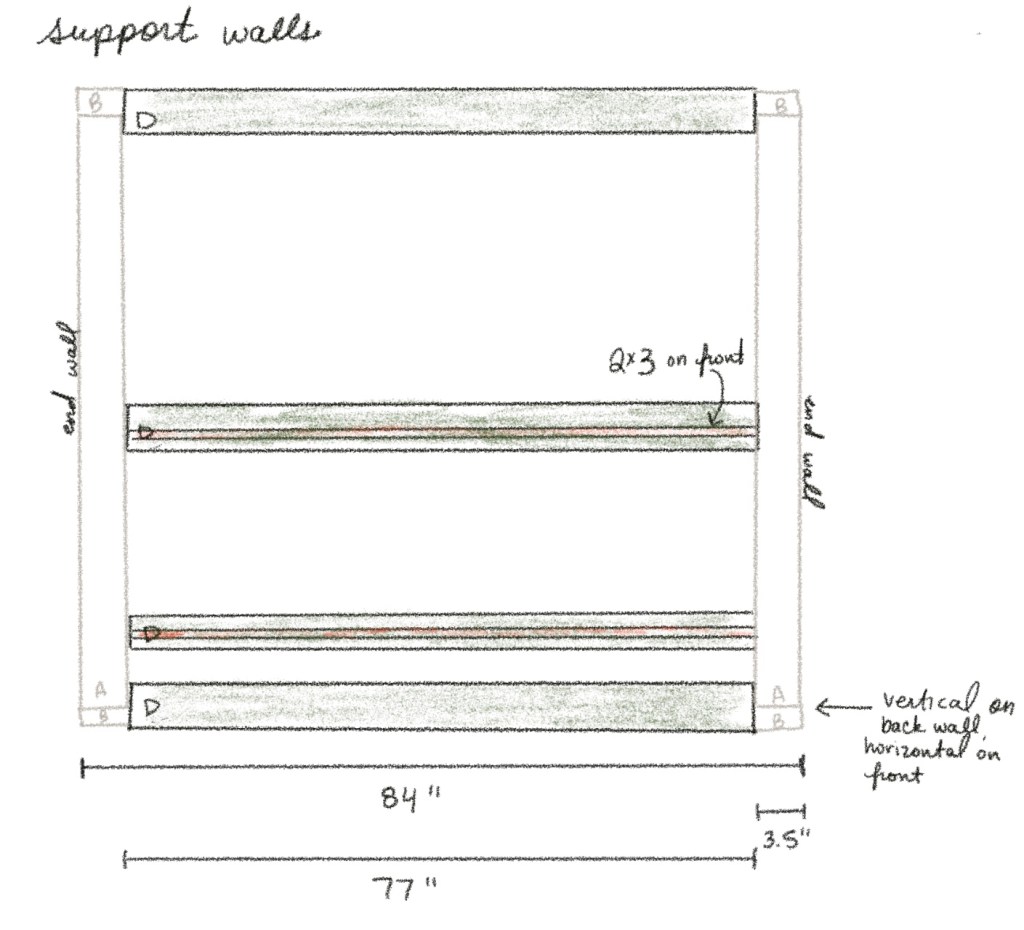
Here are the plans that I drew up. They obviously do not include the studs in the walls or the plywood/plywood support :

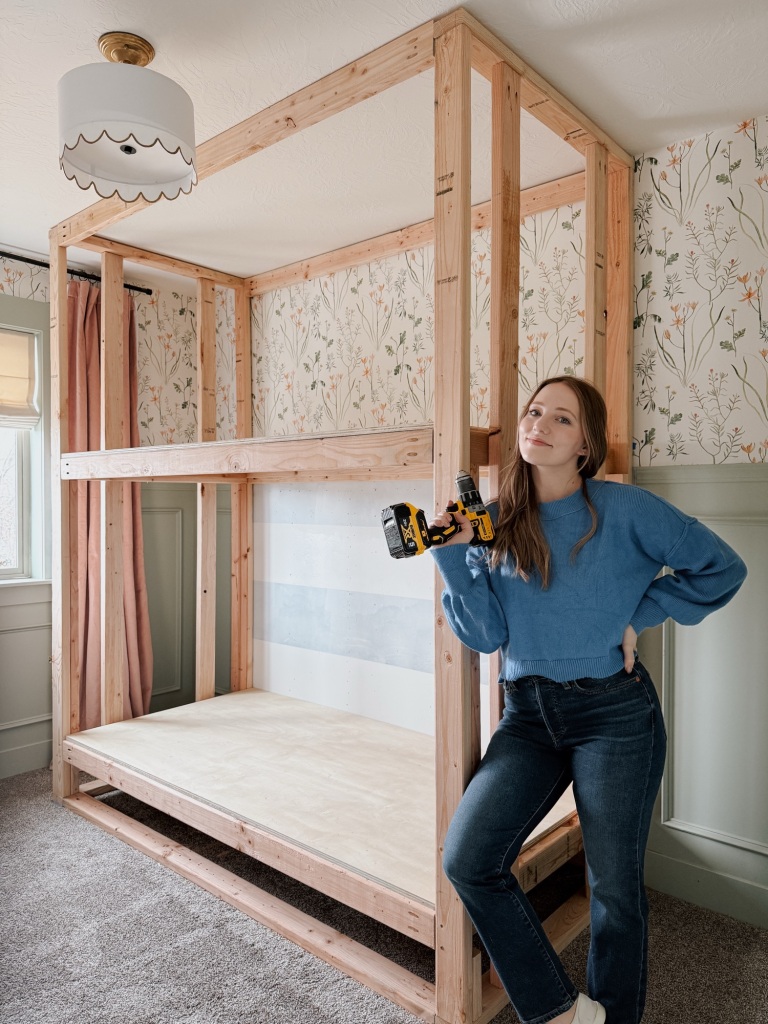
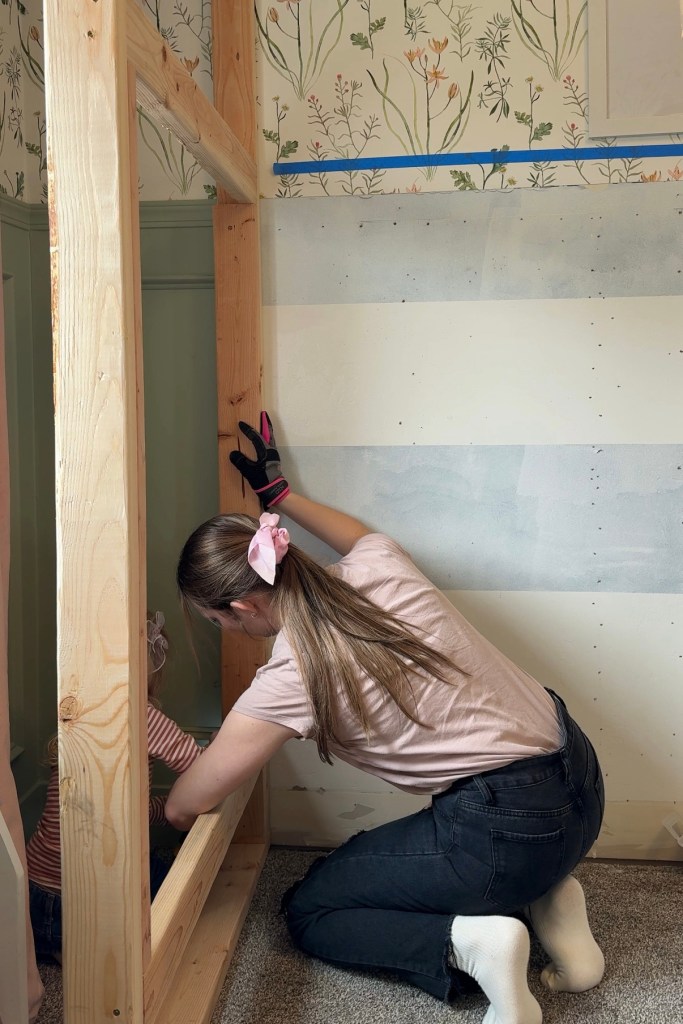
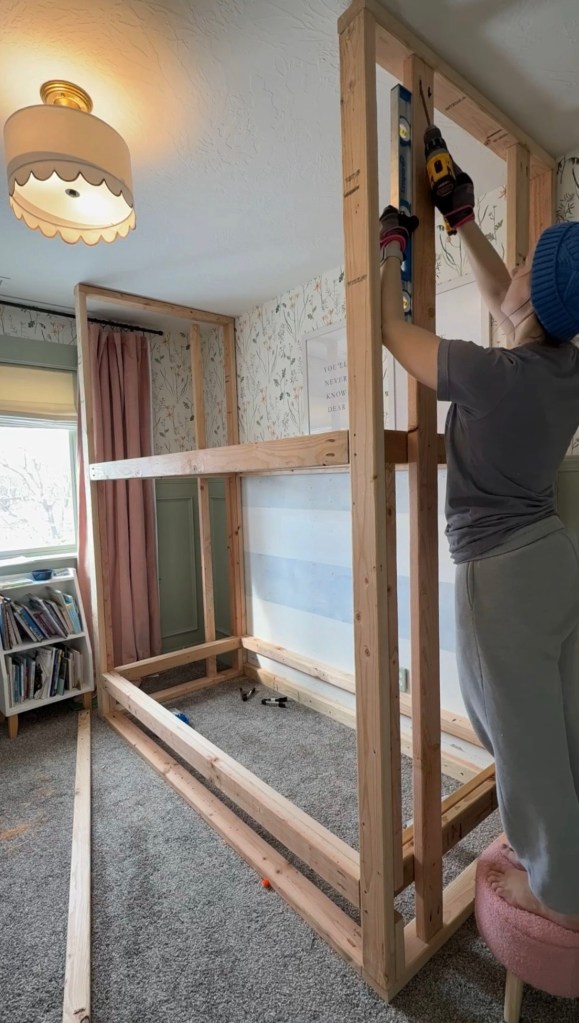
I started by building the headboard and footboard walls. I built the basic frame and didn’t attach the studs here yet. Why? Mostly because my brain was working through the build as I was going. I wasn’t exactly sure what spacing I wanted for the ladder or the cubbies (which I’ve actually nixed now). It is likely a little easier to attach the studs for these walls when you’re building the wall so while that isn’t what I did, it is what I would recommend.
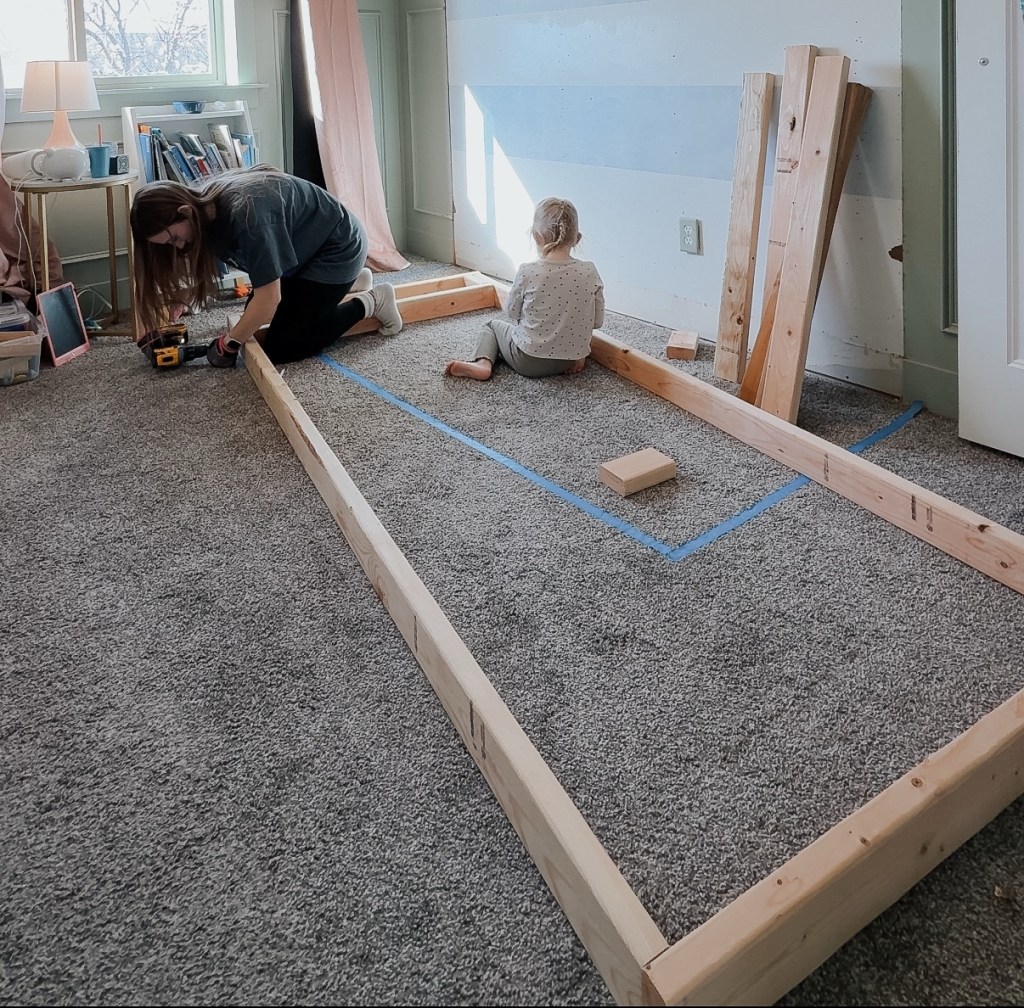
Anyway, I built the basic wall structure with the help of Miss Theia herself and we stood it up and attached it to the wall. The wall doesn’t hit any studs here, so I just threw some screws into the drywall for a bit of stability.
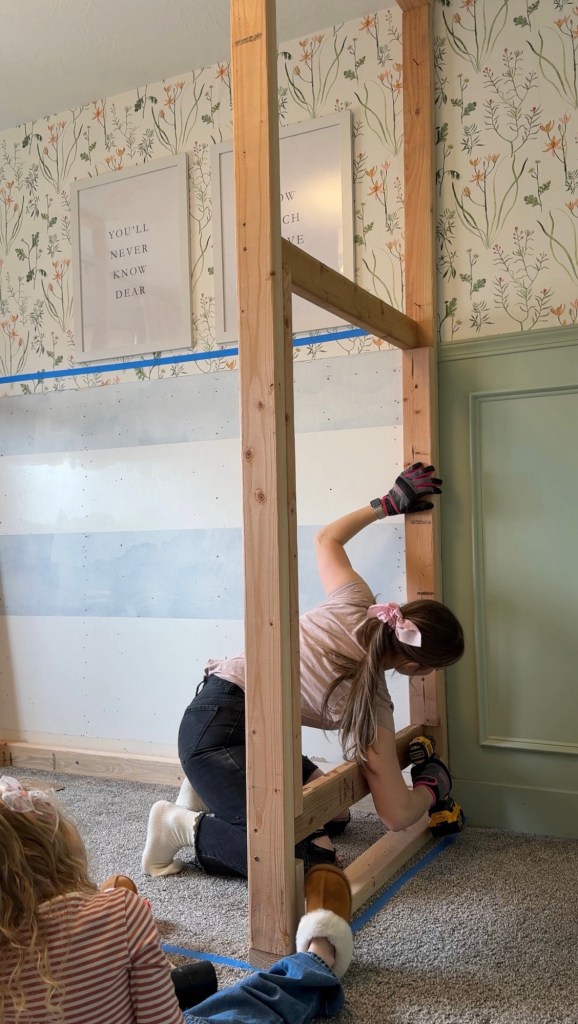
After standing the headboard wall up, we added the bottom horizontal 2×4. This gave us the perfect spacing to line the footboard wall up. We screwed the back support board into the studs and the headboard and later the footboard wall into it.
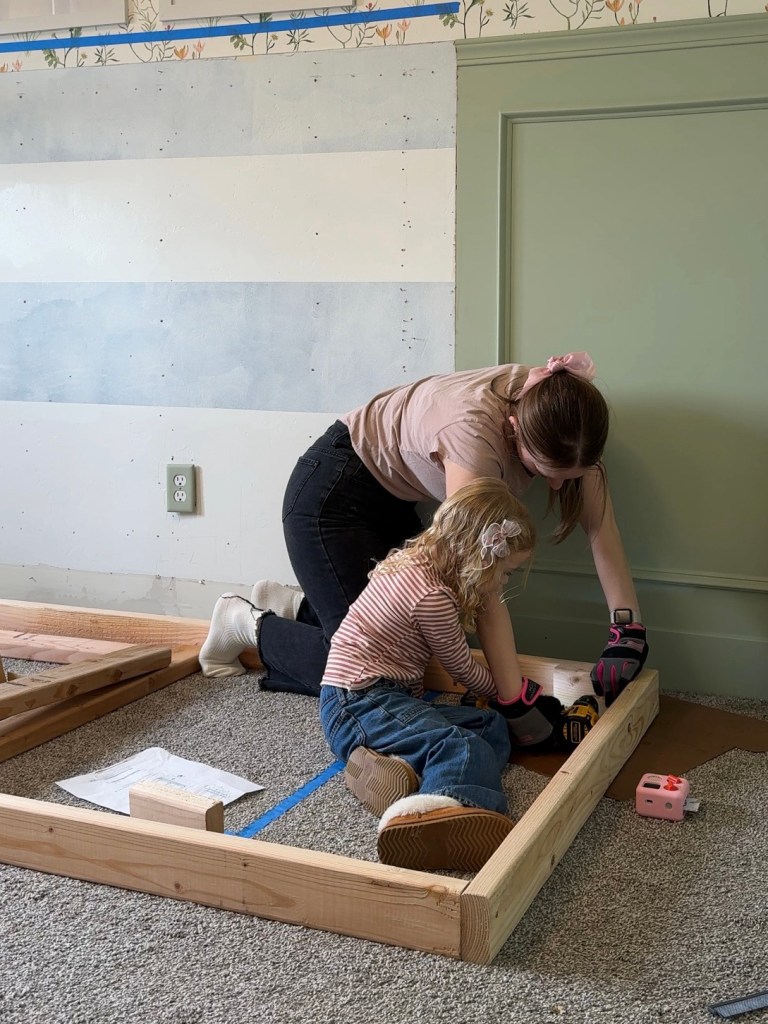
We stood the footboard wall up and attached it to the wall and the bottom horizontal board.
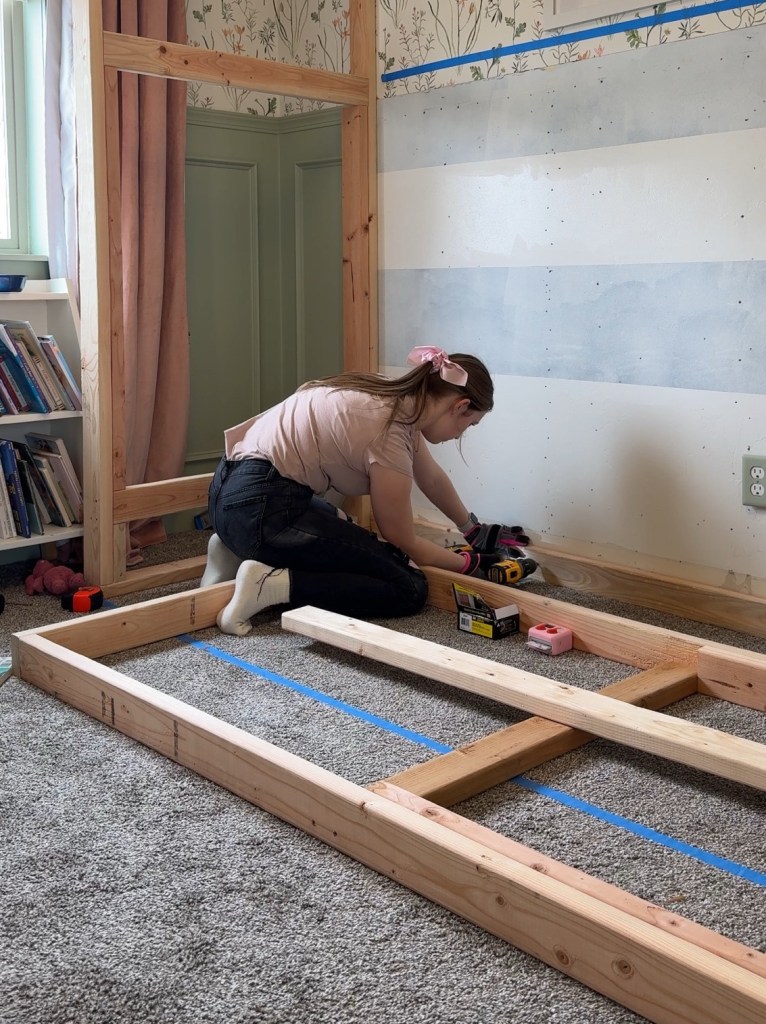
Then I added more horizontal supports along the back wall. All of them are screwed into studs and the walls are secured to them with pocket screws.
Then I added the horizontal support boards across the front and attached them with pocket holes as well.


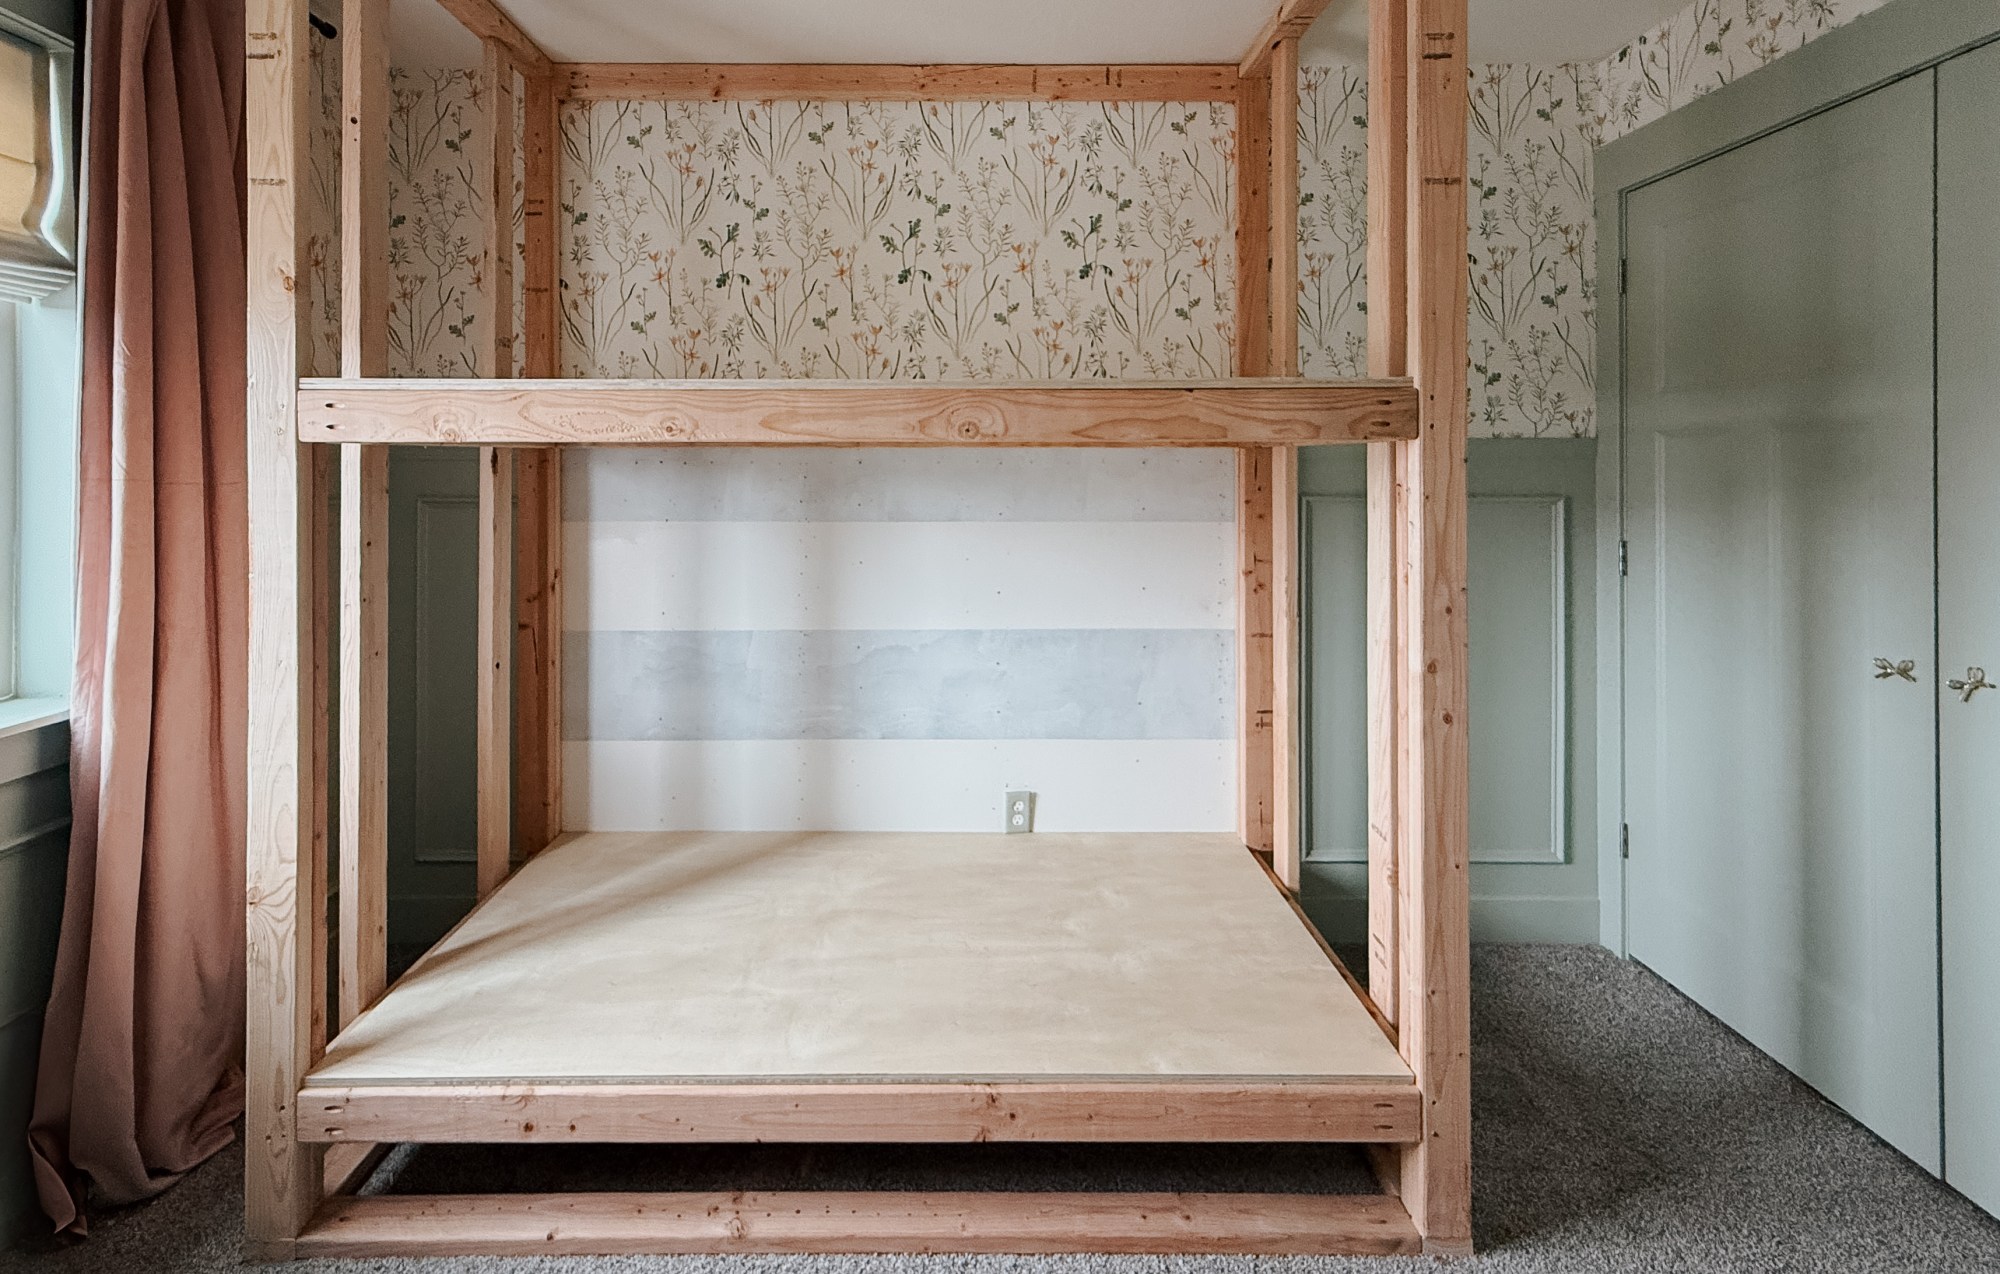
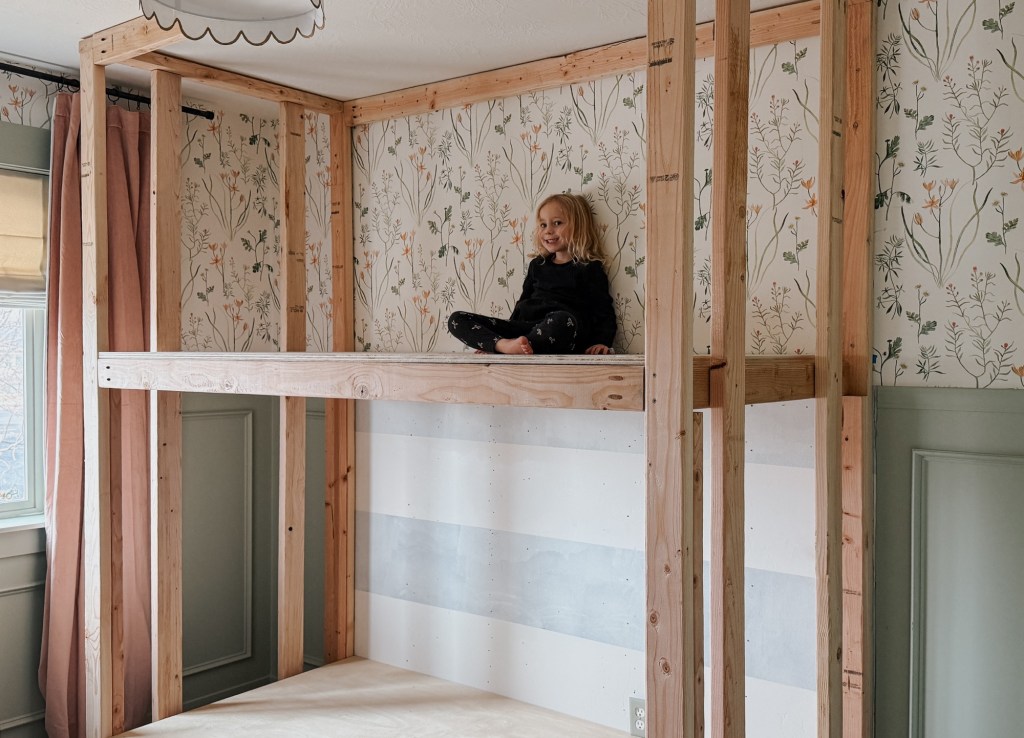
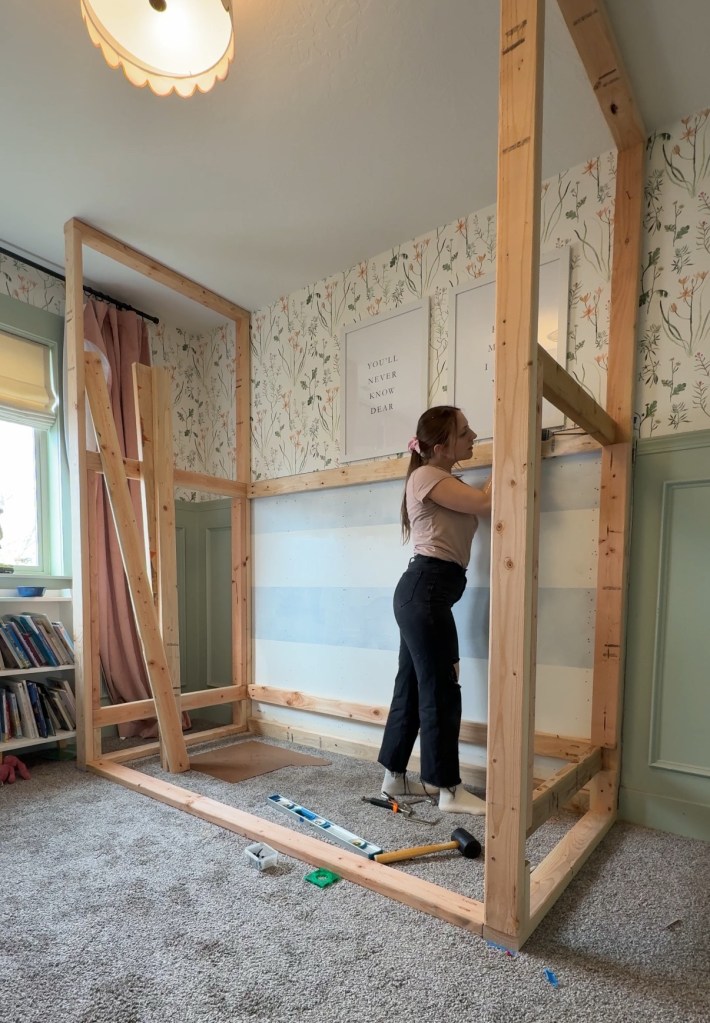
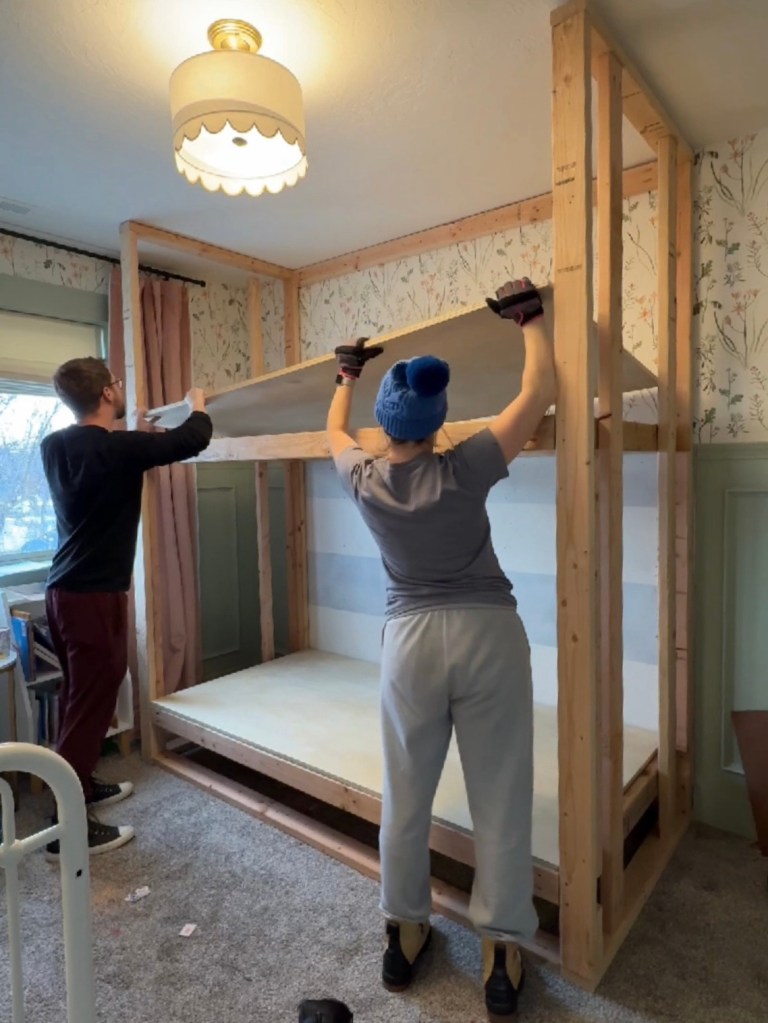
Figuring out where I wanted the height of the second level to sit was actually a really hard decision. I landed on leaving 30” space above the mattress, which meant installing that support board 43” above the bottom one. The bottom bunk gets 34.25” of headroom after I add the 8” mattress and like I said, the top bunk will get 30”. This is unbalanced, but since the top bunk is going to be used just for fun sleepovers, I was able to leave plenty of space for an adult to sit up on the bottom and also discourage too much rough play on the top.
I doubled up the horizontal 2x4s with 2x3s to add a bit more support for the plywood base to sit on. Since bunks mean a child sleeping on top of another child, it is super important to me that these are incredibly sturdy. I added these with screws and wood glue because it felt like that would be sturdy. I don’t know that the wood glue was actually necessary here, but it doesn’t hurt!

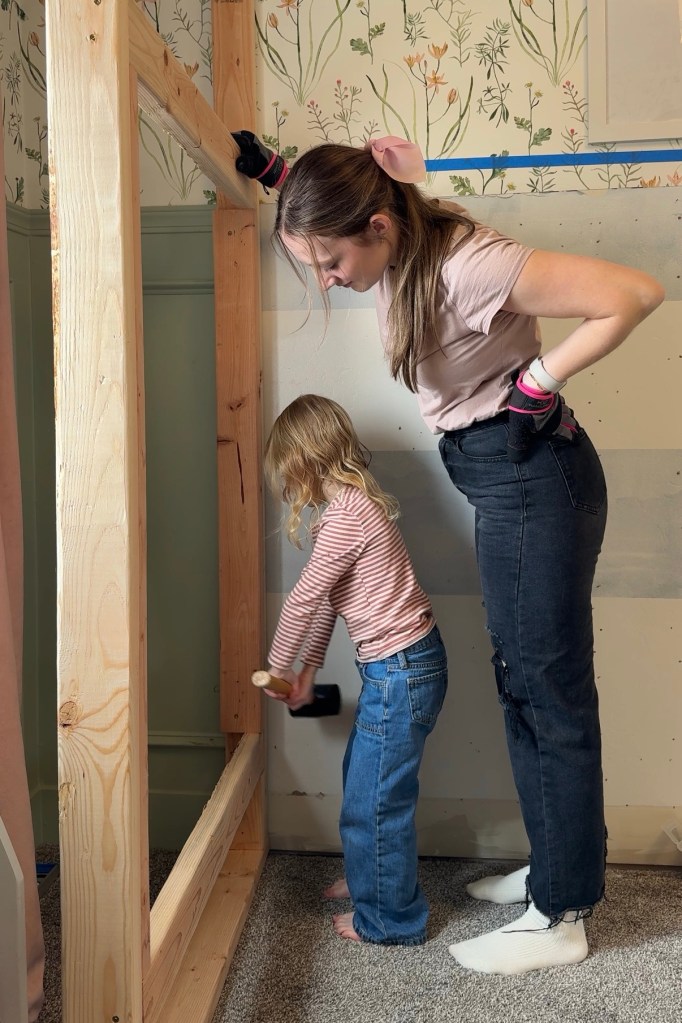
After that was all done, I added in the studs using pocket holes. I left 17.25” for the ladder and 16” for a potential headboard cubby, but like is said – the cubby idea has since been abandoned.
Now it was time for the plywood. I had two sheets of plywood but to 39.5”x77” and slid those onto the frame I’d built. This is where the mattresses will sit. I know there are differing opinions on if the mattress will be ok on a solid surface like this, but after doing some research I’m sure it will be ok in our desert climate. If you’re doing this in a more humid environment, you might consider installing 10-12 (minimum) 1×4 slats instead of the plywood.
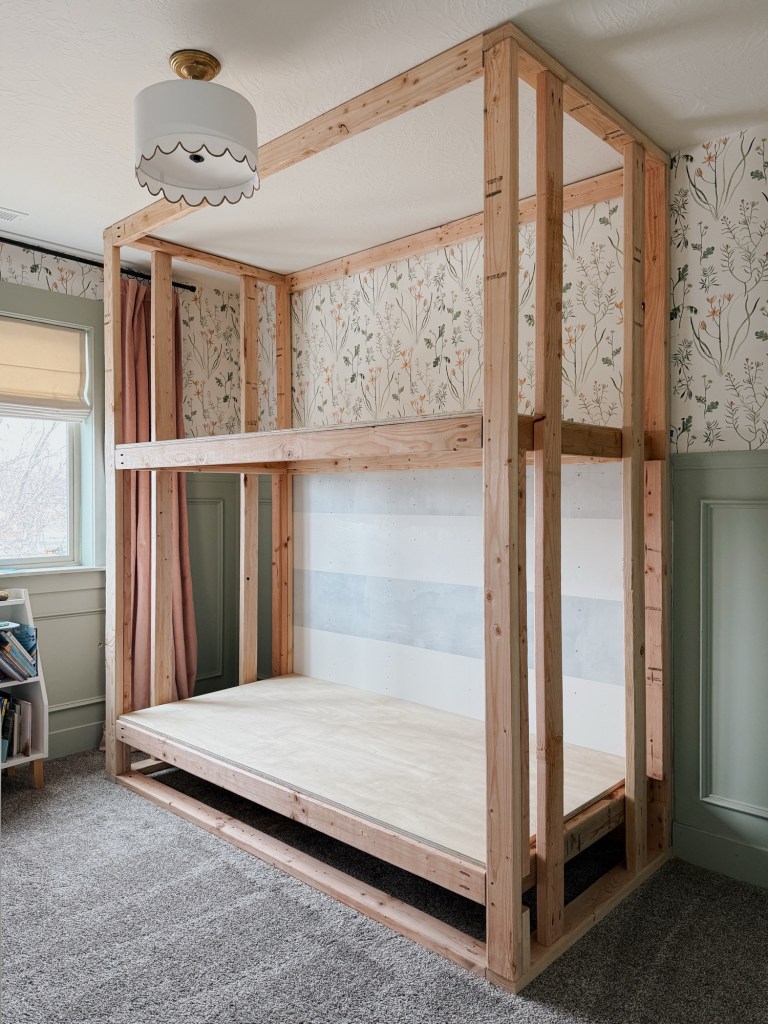
I had two leftover 2x3s (because I cut them too short for another part) so I ran them down the middle of the frame as an additional support for the plywood and mattress. While I didn’t originally plan this, it seems like it should definitely be here for some added stability. I can confidently say these will easily hold a grown adult and a few kids.

That’s pretty much it on the framing! I still need to screw the bottom into the floor and the top into the ceiling joists, but as soon as I do that it’ll be ready for me to trim it out and start making this beast look pretty!
If you have any questions, feel free to comment below or for a quicker response, send me a message on Instagram!
With love,
Mercedes 🖤

alluring!
LikeLike