
Even though we didn’t change the overall layout of the kitchen, planning where everything will go still took me hours. True to my personality, I had to create and consider every possible variation before I could make a decision that I felt confident in.

I used IKEA’s kitchen planner software to tweak and adjust until everything was perfect. The planner is pretty intuitive to use, though you do need to use a browser like Google Chrome on a computer rather than trying to do so on a mobile device. I’ve used IKEA’s kitchen planner to plan other things as well (like our last closet) even when we weren’t using IKEA’s products. It’s just a great tool to visualize cabinetry and get a good idea of what you can fit where!
I would have loved to have switched out the peninsula for an island, but I just couldn’t make it make sense without taking outer a wall, and that is not something I want to add to my project list. So the peninsula will remain! We are going to remove the seating overhang because it buts up right against our dining table. Like, right up against it. It doesn’t make sense to have stools hitting the dining chairs – we just sit on the chairs at the table!

Removing the overhang will increase our walkway into the kitchen and through the dining room while not decreasing functional space in the kitchen. Win-win! Also it opens the dining room up for some really fun ideas I have for it…
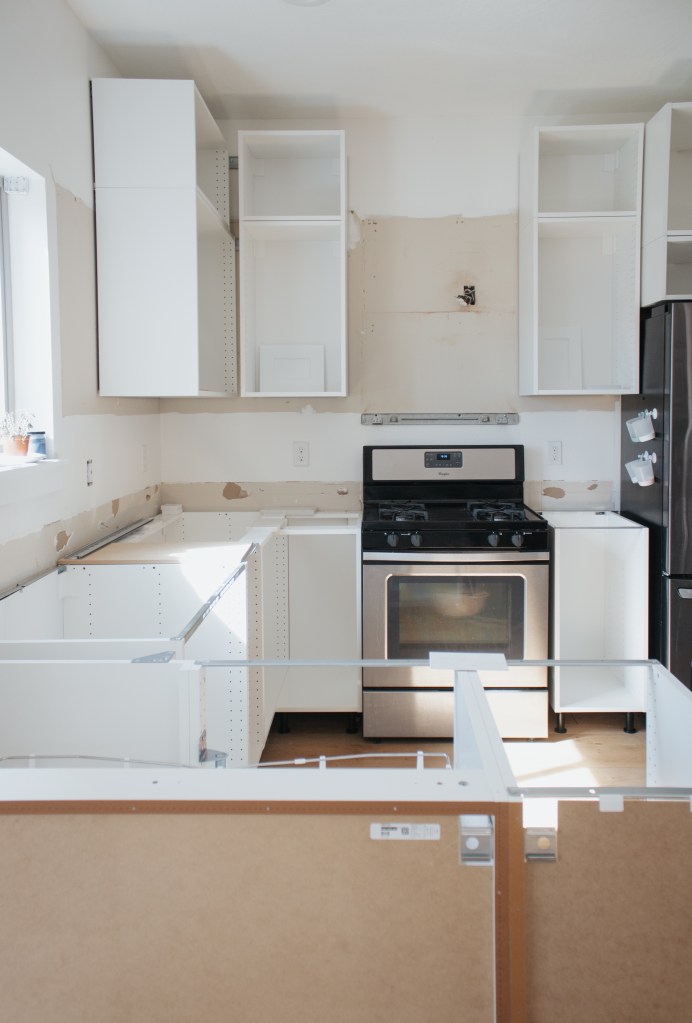
Once the bases cabinets were set, I had to figure out the uppers. It was pretty straightforward for most of it – the biggest wild card is that I really want to do a countertop tower cabinet with glass doors! I played with the layout of it in three different spots.
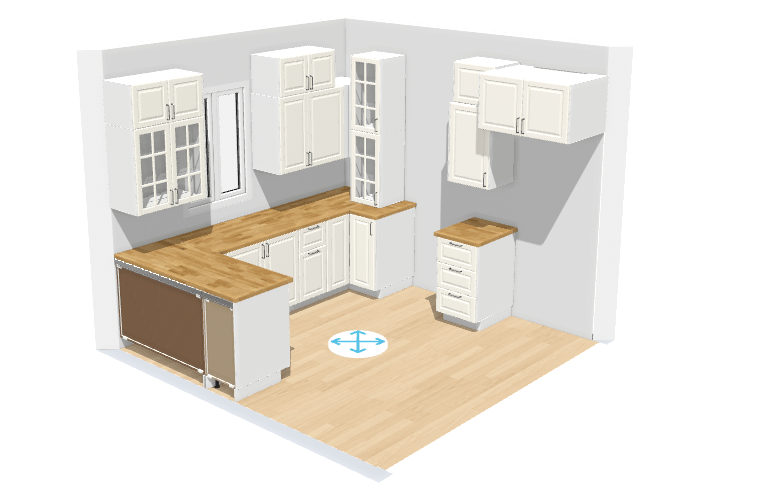
In the corner on the stove wall is where I really wanted it originally since that corner of countertop is deep and hard to reach, meaning it tends to collect things. This eliminated our ability to have a cabinet to the right of the sink or left us with a very weird deep pocket back there.

I also played with making it a corner cabinet there, but I’m not a huge fan of corner cabinets. And after looking through a ton of inspiration photos and going to IKEA to look at the corner cabinet in person, I doubled down on my opinion of them. So this wasn’t a good option either.

The winning option was to put it to the left of the sink! It doesn’t solve the deep counter area of the other corner, but this is another spot that tends to collect the infamous paper pile, so it’s a good spot as well! Plus I like that it’s free standing over here, which makes it look more like a furniture piece. It should be noted that the three stacked upper cabinets will all have glass, even though it doesn’t show it in the planner.
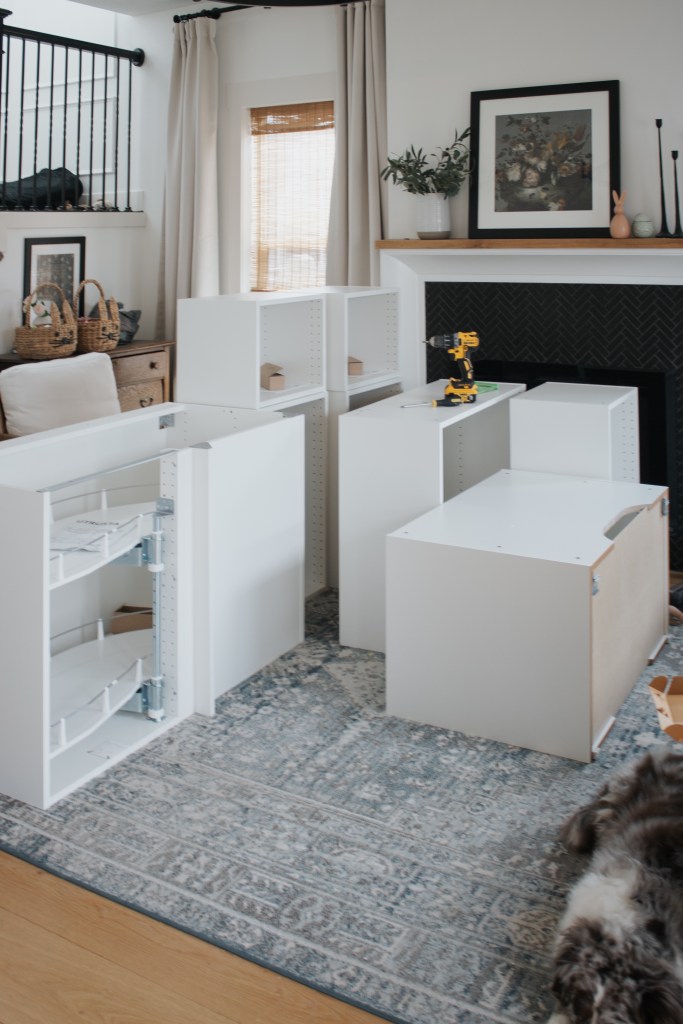
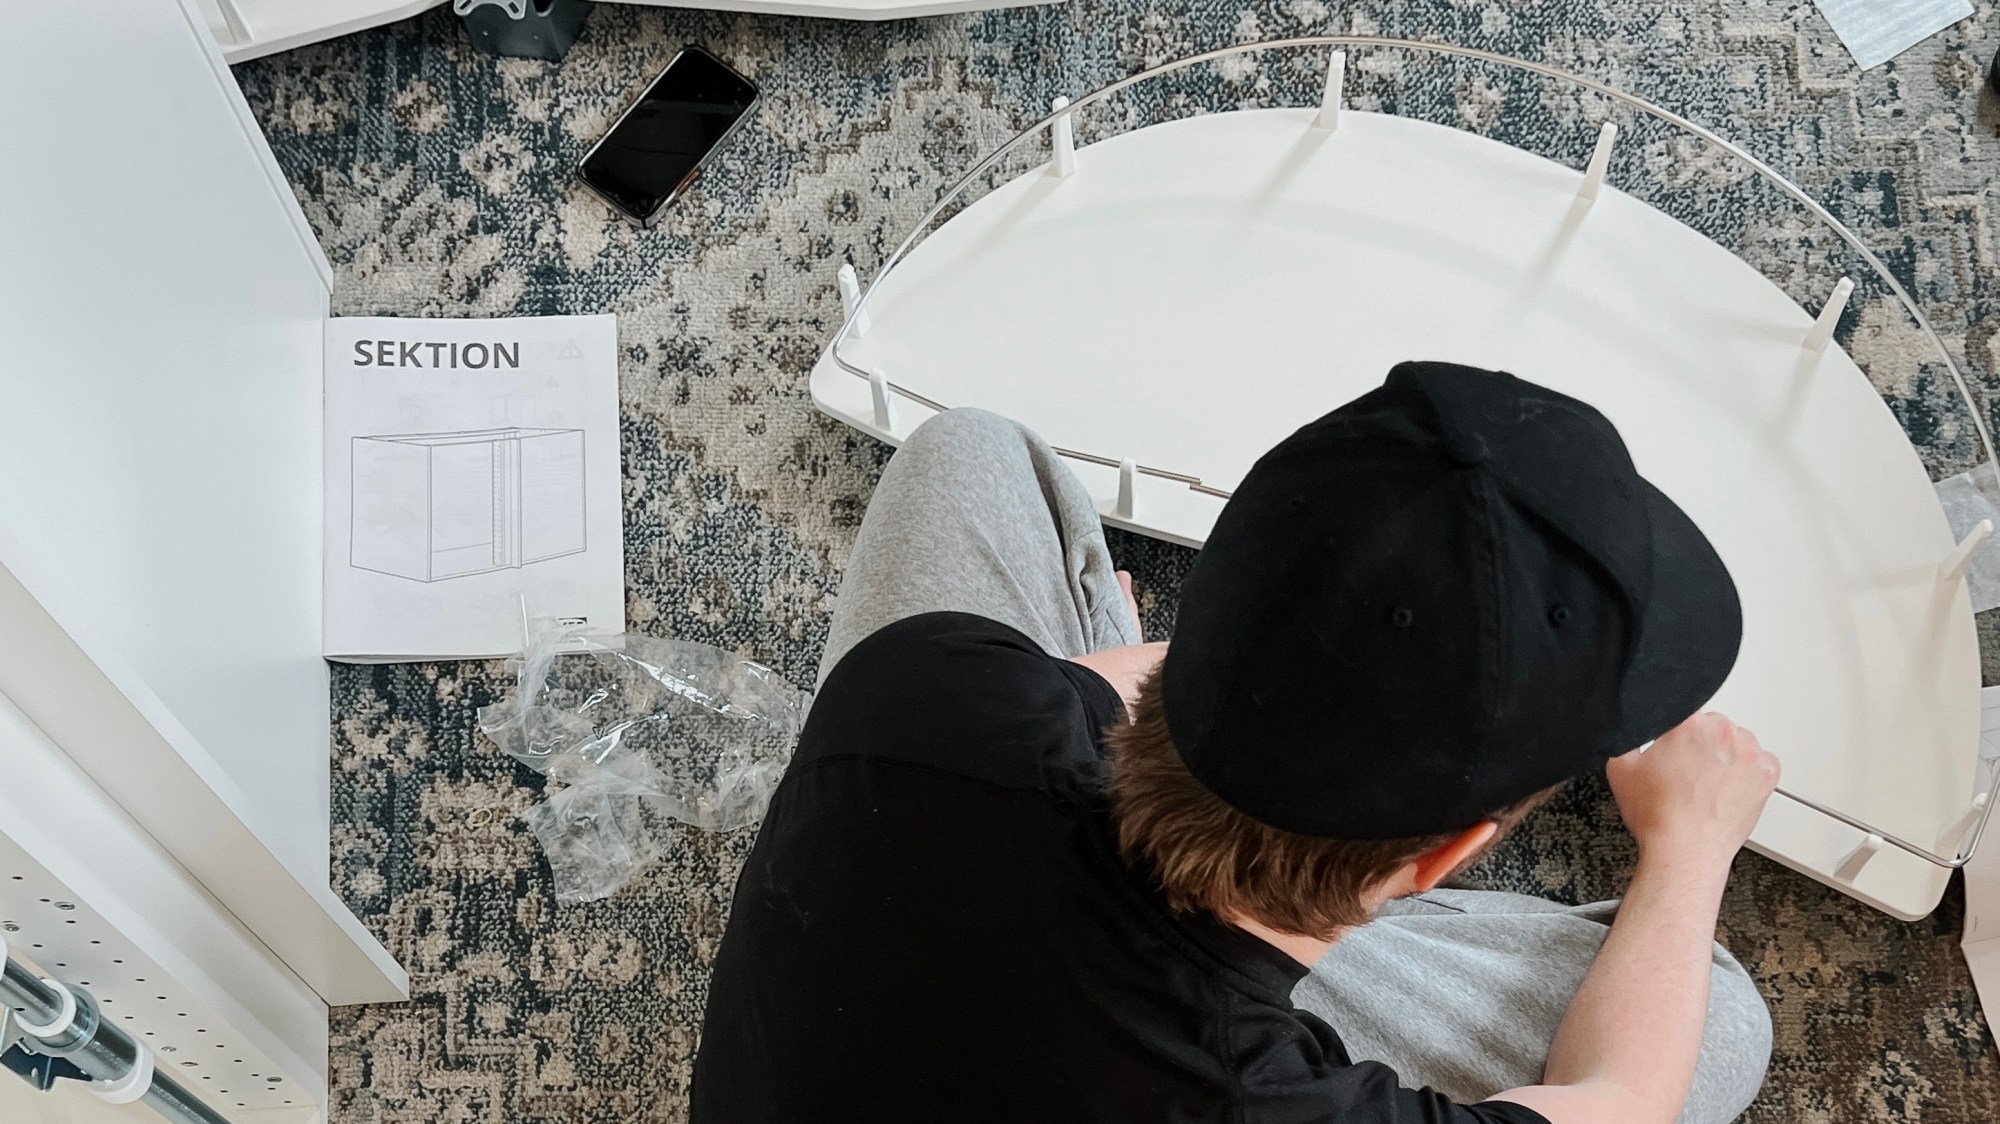
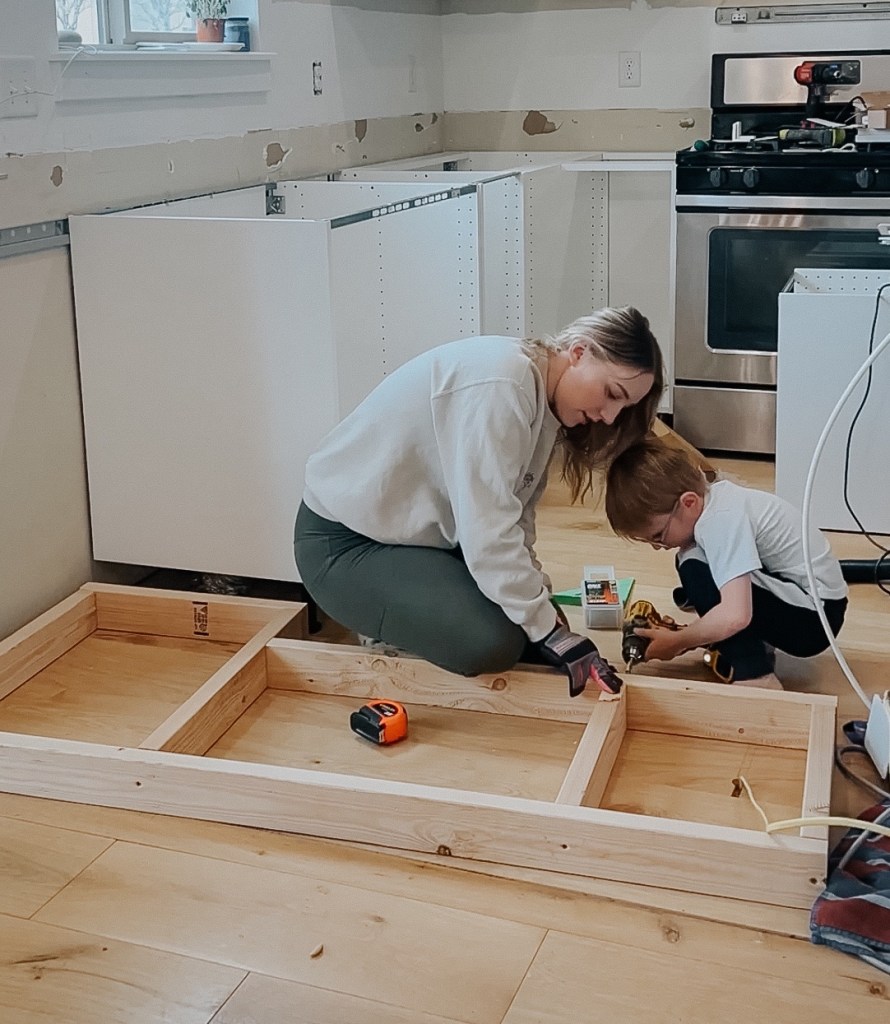
I was dreading putting all of these cabinets together – it seemed like such a daunting task! I invited my family over one Saturday and we got all of them built in one day! Even though the assembly instructions say it is a two person job, once you get the hang of it it’s pretty easy to do it solo.
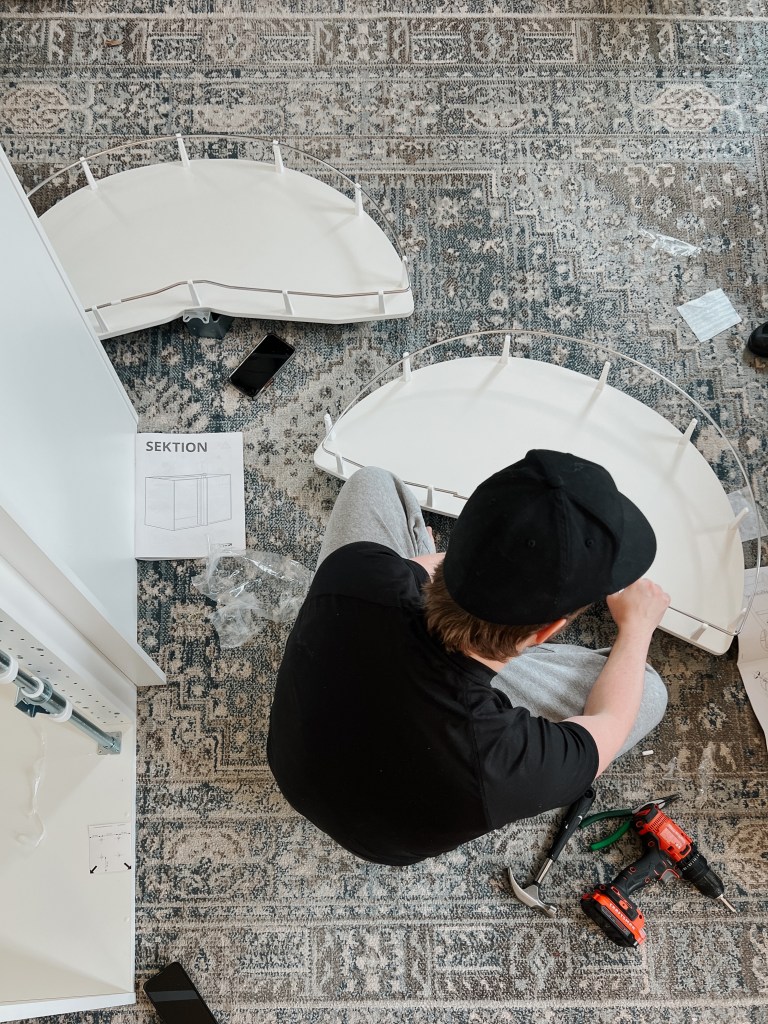
The biggest thing to keep in mind is to make sure the cabinets are square! Before you nail in the back panel, you’ll check the cabinet and wiggle it around a little to make sure that it is square. Do not skip this step! Once you’re hanging the cabinet, it’s crucial that they be square.

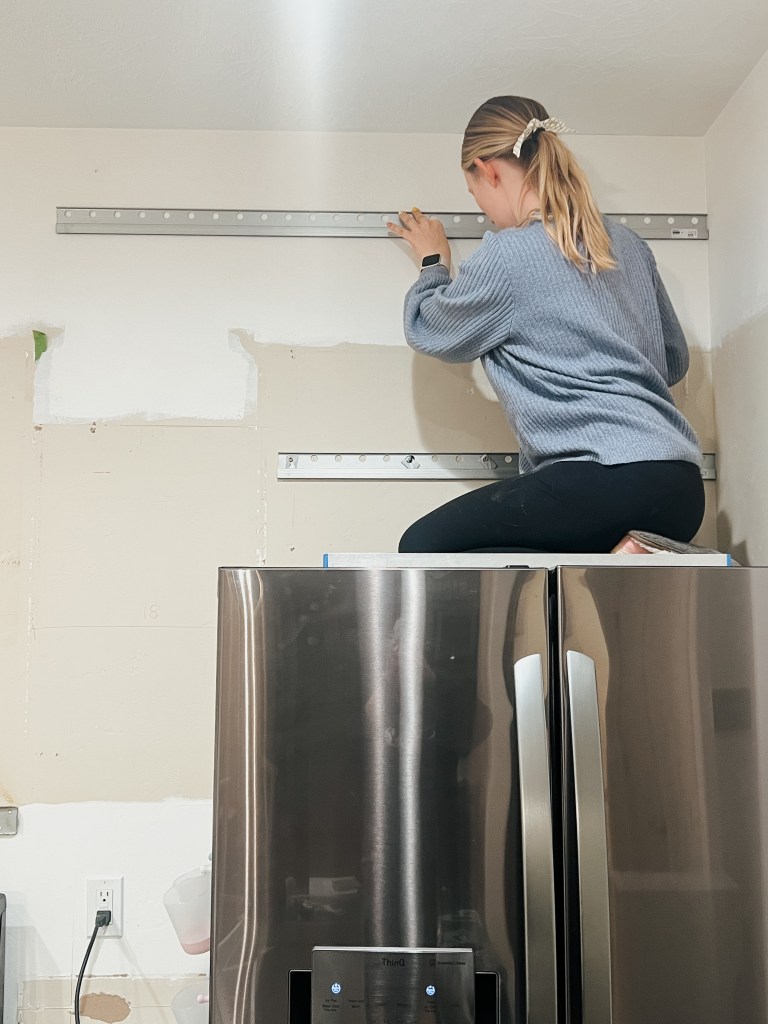

With them all built, we started hanging the suspension rails. It’s a super cool system that makes hanging them really easy – once you figure it out. The rails have holes in them so that you can easily hit studs. The recommendations are to hit every stud you can, but also to not go more than 10-12” without attaching it to a stud. Most studs are 16” apart, which makes this a little complicated. We hit all the studs we could and then in between the studs, we added these heavy duty toggle bolts.
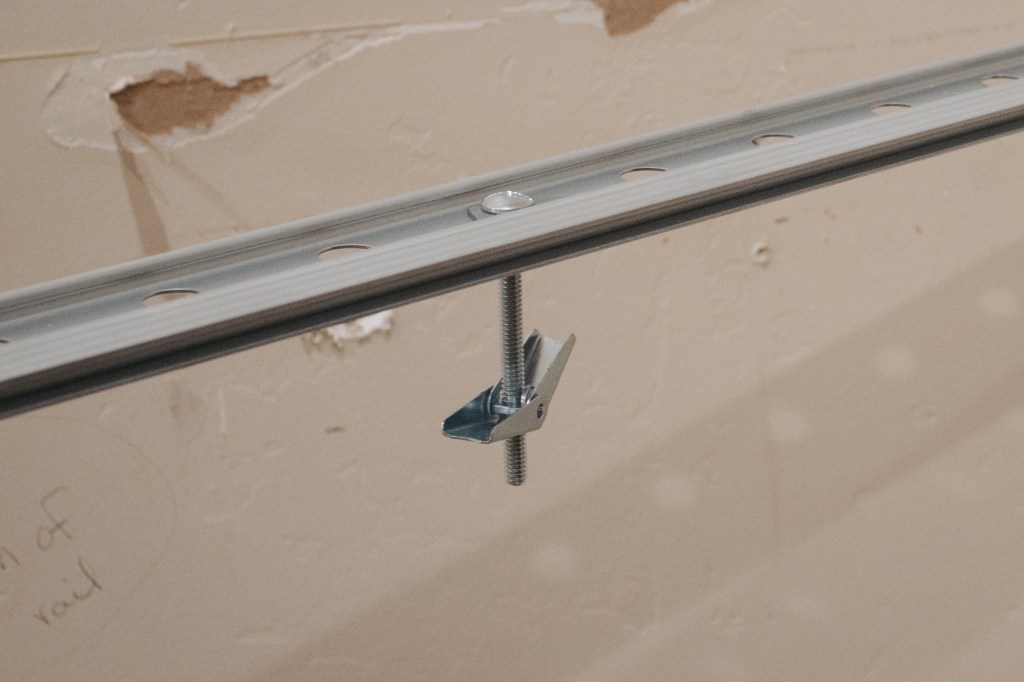
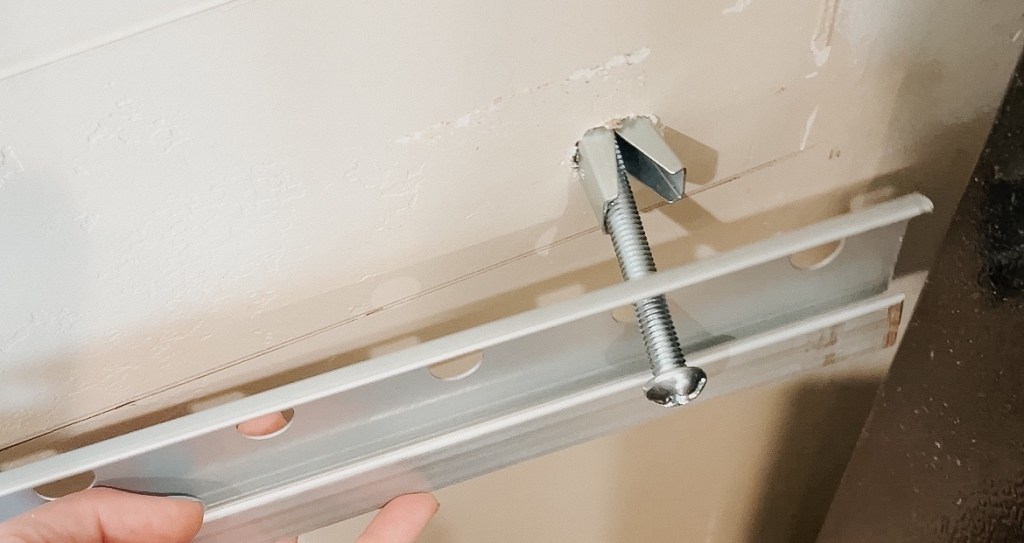
You’ll want to make sure the rail is super level and plumb to the wall, so if your wall bows in or out, use shims to correct it.
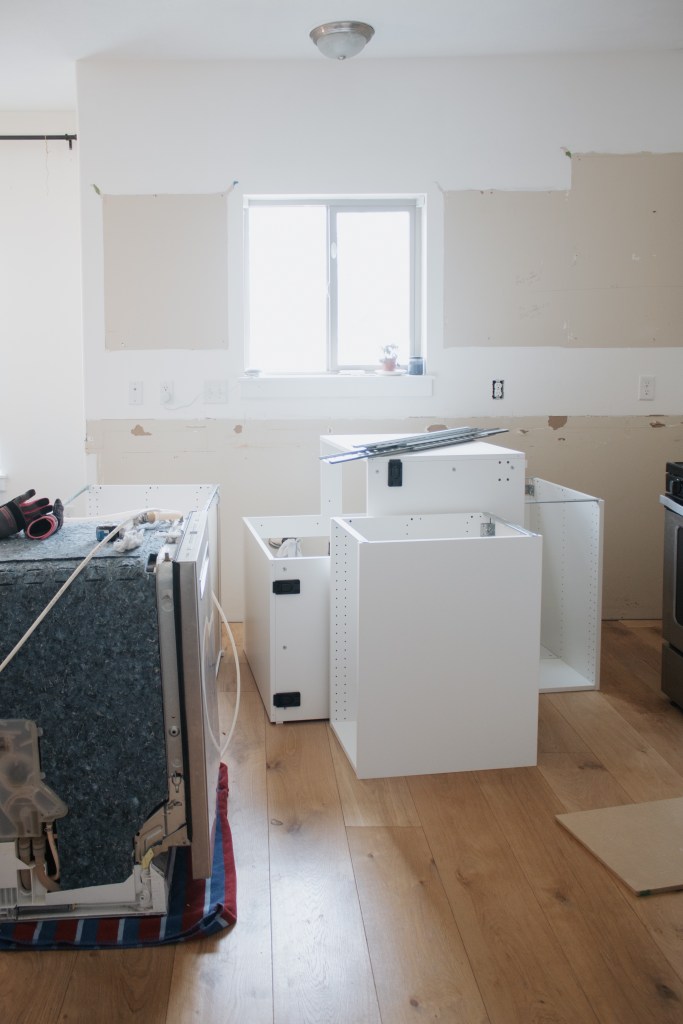
Once the rails are up, you just hang the cabinet on it and then lock it into place – super easy! The first one we hung was a little tricky because we couldn’t figure out if we were hooking it onto the rail correctly. Once we sorted that out we were golden. We hung the first layer of uppers first, then the small uppers on top of them, and then finally we did the lowers.
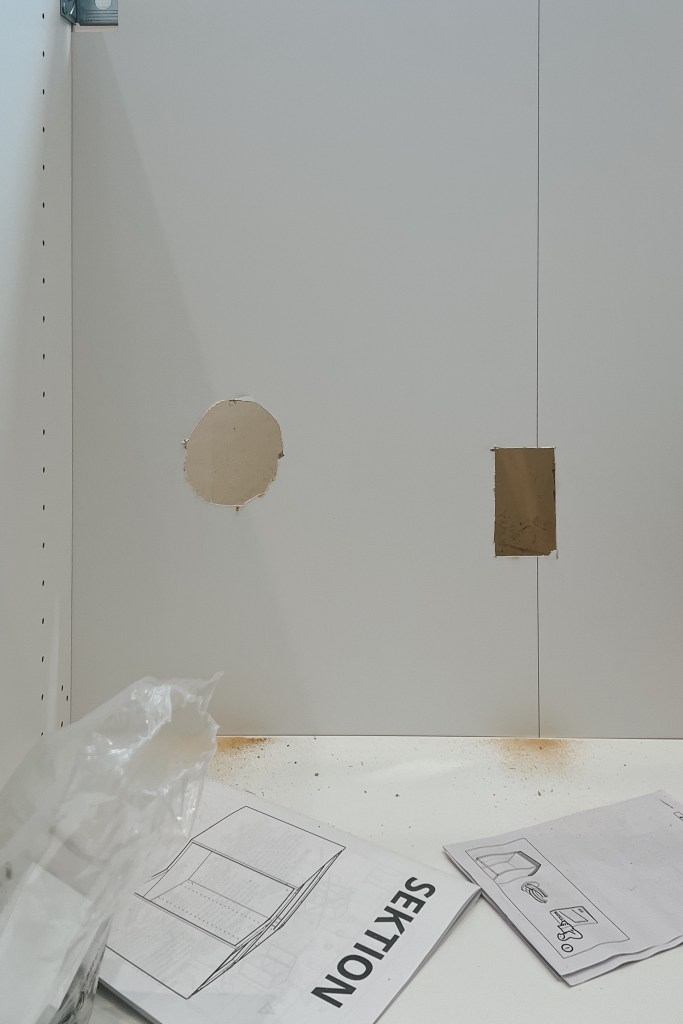
You’ll need to cut out the plumbing and electrical holes in the sink cabinet. I highly recommend a multitool for this!
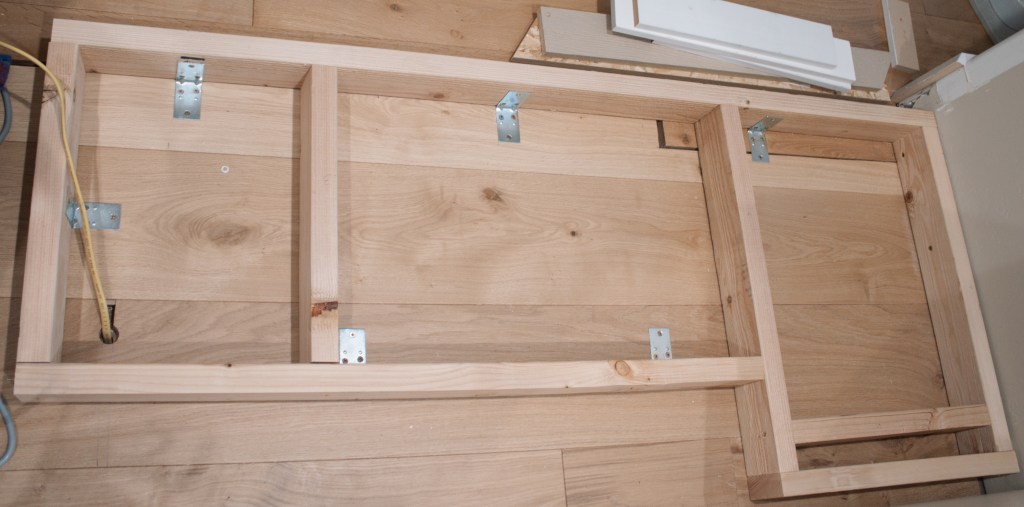
I built a ladder frame for the base of the peninsula, since of course there is no wall for a suspension rail to hang. It’s not too complicated, just some 2x4s screwed together to create a frame. I added some additional material on top (glued and nailed) to get it to match the height of the other cabinets. I screwed it into the studs of the wall and used some brackets to secure it to the floor.
After I confirmed where I wanted everything to be, I screwed all of the cabinets together. I was surprised at how much this increased the stability! I used a countersink bit to pre drill holes in the cabinets so that I could sink the screws into the frame a bit and have a nice, flush surface. I also tried to screw them together in similar spots in all the cabinets so that they have a uniform, organized look instead of seeing screws everywhere. I screwed the base cabinets of the peninsula right into the frame that I built.
There will be a gap between the wall and the cabinet – this is supposed to be there! IKEA cabinets all need to be finished off with end panels that cover those gaps. The feet on the bottom of the lowers also gets covered with a toe kick, though they do make a prettier foot option if you wanted to leave them open!
Next up – end panels, toe kicks, and hopefully counters and a sink soon!
With love,
Mercedes 🖤

2 thoughts on “Planning and Installing our IKEA Cabinets”