

I cannot believe that the One Room Challenge is almost halfway over!!! I’m starting to realize just how much I still need to do in the next 3 weeks in here. Send caffeine and vibes for long baby naps!
Want to see what projects I’m working on now? Follow me on Instagram!

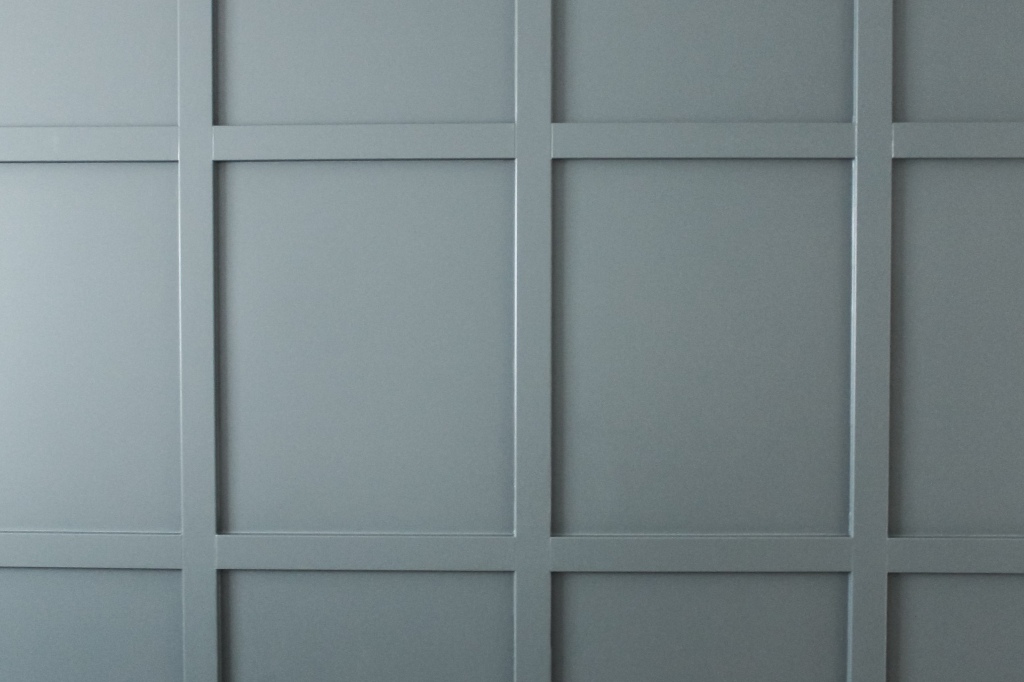
This week I added the dreamiest board and batten as an accent wall in our master bedroom and I’m in love! The dark color totally works. Right before I started painting, I had several moments of panic about going dark and I was this close to switching it up and going light. I knew a light color would look great and it was definitely the safer choice, but I really wanted a statement wall and I wasn’t sure that a light color would deliver that in the same way that this deep color would.

While I was panicking about the color, I painted a bunch of different samples on the wall because I knew that would help me get it right. While I loved how Stonington Gray and other light colors would have looked, I realized that they were going to push the room to take on a feminine feel. I’m totally game for that, but our master bathroom already leans to the feminine side, so I wanted the bedroom to have some masculine touches to balance it out. After all, this is a space that I want both J and I to love, so decking it out with soft, girly touches isn’t the way to go.

We landed on Knoxville Gray (with Newburg Green and Brewster Gray as close second and third place), which is actually the color I had picked out when I first dreamed up this wall. It is the perfect moody green-blue-gray and it is muted enough that the color doesn’t overwhelm the space but still offers plenty of color. I’m still trying to find someone who will let me paint an office/library this color because it is bomb! It is also fun because it leans more green or blue depending on the time of day, which I love!
The wall still needs baseboards (maybe I’ll get to that today so we can move our bed back), the window trim needs finishing, and the other three walls are still blue, but I am seriously digging the vibe this new wall is bringing into our space.

This week I’m going to be working on refinishing a dresser I found on Facebook Marketplace, so stay tuned! I’ve gotten a lot of requests for a tutorial on how I put the board and batten up so I’ve included that on here as well. This is totally something that you can do by yourself, you just have to be willing to use all of your limbs to hold things (haha).

How to DIY a Board and Batten Wall
Here us everything that I used for my board and batten. The amount of hardboard and MDF boards will depend on the size of your wall.
- 6 sheets of 4’x8′ 1/8 inch hardboard
- 19 8 ft 1×3 MDF boards
- 3 tubes of caulk
- Nail gun & nails (I have a Ryobi Airstrike – it’s battery powered and rocks)
- Jigsaw
- Miter/circular saw
- Drill
- Wood filler
- Paint
- Measuring tape
- Pencil (I learned that it takes a lot of paint to cover up Sharpie!)
The first thing that I needed to figure out was where all of the boards were going to land on the wall. After debating on whether or not I wanted two rows of rectangles with the first row being 1/3 of the wall and the second being the bottom 2/3 of the wall vs. three rows of equal sized rectangles, I decided to go with the latter. There are so many different ways you can arrange your boards, so find something that you love and do it!
It took me forever and a day (okay, maybe more like 2ish hours) to figure out where everything was going to go. I taped off where my bed will sit so that I could visualize it and then estimated how big I wanted my rectangles to be. I wanted the rectangles to fall well against the window and the bed. II measured how long my wall was (don’t forget to account for the two pieces of MDF you’ll attach to each corner) and figured out a width per rectangle that allowed for a full rectangle on each side, but I marked it out and didn’t like the way it fell around the window. Instead, I opted for the last column of rectangles to be a little bit smaller because it’ll be hidden by curtains anyway.

It’s a good idea to figure out where everything is going to fall before buying anything because getting the hardboard cut at the store is definitely the easiest way to go.
Once I got everything home, I started putting the hardboard up. If you have textured walls but want your board and batten to be smooth, hardboard is a great option. I’ve seen people put glue on the back of their hardboard as well, but I opted to just nail it on. The nails hold it up just fine and if I had glued it, I wouldn’t be able to remove it (if that’s something I ever want to do) without destroying the drywall.

There were two outlets that I needed to cut around. I measured where the outlet fell and traced it onto my panel. Using a drill, I made a hole in the corner big enough for my jigsaw blade to slip into and then used the jigsaw to cut it out.

When I got to the window, I had to make a decision. I was planning to trim out the window and I needed to decide whether to put the trim on top of the hardboard or not. I decided not to for the same reason I didn’t glue the panels on. If I ever want to remove this, I don’t want to have to redo the window trim. So I trimmed out the window then measured and traced it onto my panels and cut it out with my jigsaw. This was a little time consuming, but pretty straightforward. The jigsaw doesn’t leave the cleanest lines (maybe because my blade is super dull), so I sanded the edges down a little.

If you are putting up the hardboard by yourself, it can be tricky to get it and keep it level. If you are moving from left to right, start by lining up the upper left hand corner. You will probably need to use your knee/foot to hold it onto the wall (this is quite the acrobatic project). Throw a nail into that corner. Now that you’ve got that corner secure, you should be able to swing the panel a little. Grab your level and make sure it’s straight, then nail it in the rest of the way. Nail close to the edges where your MDF boards are going to cover the nail holes.

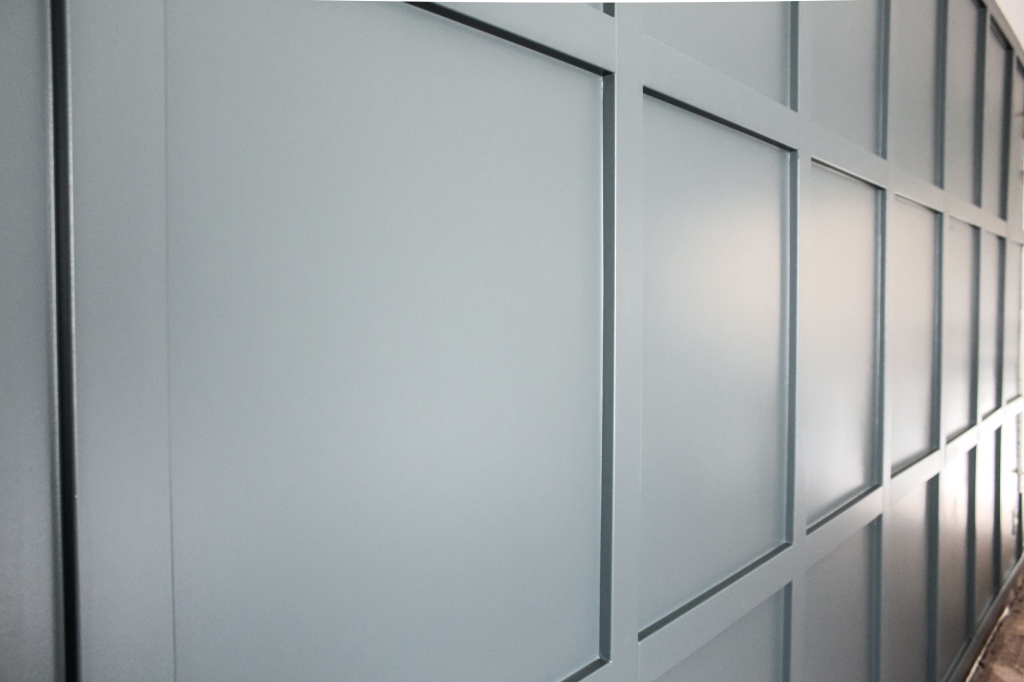
Next, you’re going to put up your MDF boards – this is surprisingly fast and super satisfying! I started by attaching the pieces that run along the ceiling. I have vaulted ceilings and considered mitering them all along the long edge so that they would fall flush with the ceiling. I’m so glad that I didn’t because that would have taken me 8,000 years and it looks great just the way it is. Make sure that you use your level here! Your ceilings probably aren’t perfectly level, but you want your boards to be. After you’ve got the top pieces on, continue to run boards (making sure they’re level) down the sides and along the bottom (don’t forget to account for the height of your baseboards).
Once again, if you’re doing this by yourself, it can be tricky to get an 8 foot long board that you’re holding over your head level. Start by lining up the edge to the previous board and putting a nail in that edge. You should still be able to swing your board a bit, so now you can adjust it to make sure it’s level and finish nailing it in.

Now you’re going to add the vertical boards. At about eye level, mark the wall where your first vertical board should be. I found it easiest to add 2.5″ to my measured width (2.5″ is how wide a 1×3 is) and measure from the outside edge of the previous board so that the lip of my measuring tape had something to catch. Measure how tall you need your board to be and cut it to length.
As you work through this project, it is important that you take measurements each time you need to cut a board because your lengths will vary. For example, don’t assume that all of your horizontal pieces need to be 26.5″ and cut them all at once.
Line the middle of your board up to the mark that you made and put one nail in, then adjust it to make sure it’s level and finish nailing.

Once all of your vertical pieces are on, add the horizontal ones (warning: this is about to get a little math-y). Measure the distance between the bottom of the top piece and the top of the bottom piece. Since it is easier to line a board up to an edge and not the middle, you need to find the distance from edge to edge. Since you’ll have two horizontal 1x3s, you need to subtract their width in order to find where the edges will be. Since 1x3s are 2.5″ wide and you’ll have two, take that first number you found and subtract 5″, then divide that by three. Now you have the distance from edge to edge of your middle boards.

Take your tape measurer and mark where the edge of your first board goes. Measure and cut your horizontal board to the right length and then line it up with that mark you made and nail it in (making sure it’s level, of course). For all the rest of the horizontal boards you put up, you want them to line up across the vertical board as if you have one continuous board. To do this, I measured the height of the previous rectangle on the right edge and used that measurement for the start of the following rectangle on the left edge.
After you’ve gotten all of your boards up, it’s time to celebrate! Actually, it’s time to caulk which is super time consuming and kind of the opposite of exciting. It’s necessary, but it’s one of those things that’s not very satisfying for me because it’s hard to see the progress. Caulk along all the seams and fill in your nail holes. I found that using a caulking tool here to smooth everything out was helpful because there are a lot of seams to do and if I caulk for a long time, my fingers die.

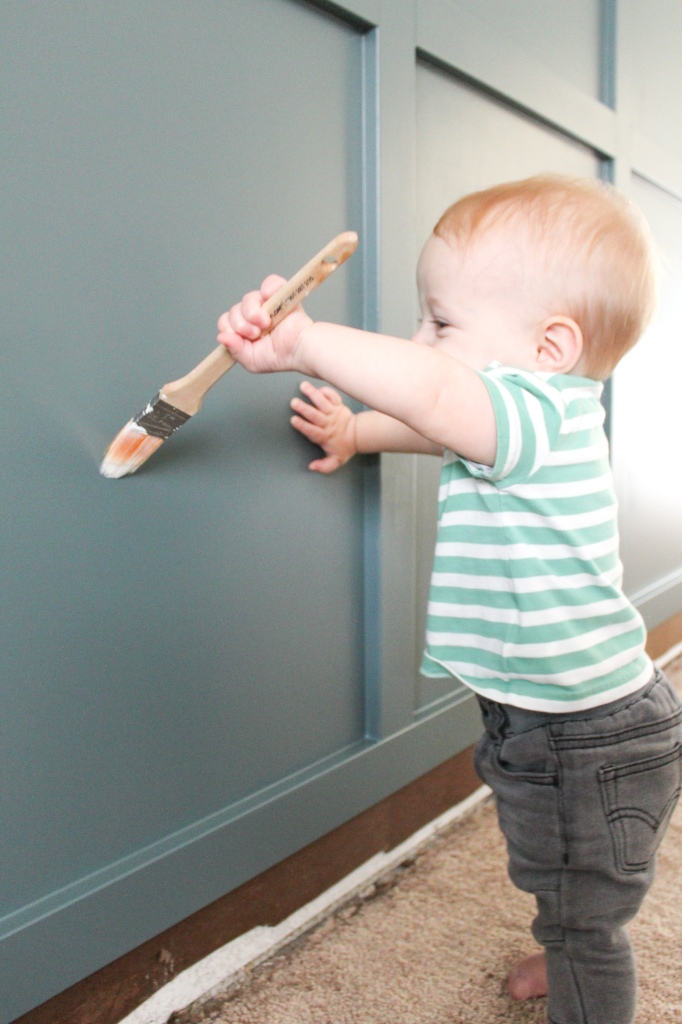
I really wanted to use a paint sprayer, but it was just not in the cards. My sprayer would not work for me, but I got a beautiful finish using a brush and a roller so all is well. Use the brush first to cut in the edges and then use the roller. Make sure that you roll over where you brushed to even out the texture. You can roll in whatever direction you want to get the paint on, but since the hardboard is such a flat surface, you need to be contentious of how you finish it or your roller marks will show. Before you move on to a new section, take your roller (don’t add more paint to it) and lightly roll over your section making slow, smooth, vertical passes.
My little project buddy joined be for both coats. You think your arms get tired painting? Try holding an 11 month old the whole time, haha! But seriously, if I could do this with a baby attached to my hip, you totally can too!


Ta da! There you have it! You can do this! And if you’re having a hard time figuring out the math (arguably the hardest part), send me a message on Instagram and I’ll help you. If you do tackle this, I want to see your project! Post it to Instagram and tag me (@with.love.mercedes) so I can see it.

Don’t forget to check out all the other awesome ORC participants here – there are some amazing spaces being transformed.
With love,
Mercedes ♥


That board and batten wall looks amazing, quite an accomplishment, especially with your little helper to look after! Looking forward to watching the rest of of your project take shape.
LikeLike
Thank you!!
LikeLike
I was wondering who made that, now I see it is you super mama and wife 🙂 congrulations!!!!
LikeLike
The wall looks amazing! how big was your wall?
I want this look in my living room however my wall is huge!
LikeLike
Hi! This wall was about 25 feet wide, so pretty big!
LikeLike
Super cool project and nice job! This may be a dumb question but in the main photo in this post – where you’re standing in front of the wall – is that the Knoxville gray? It looks soooooo blue. I love the color but am not clear which it is. Is it the same color shown in the main image in your blog post at https://withlovemercedes.com/2020/05/14/deep-blue-board-and-batten-one-room-challenge-week-2/?
thanks!
Matt
LikeLike
Thank you! And no they are not the same colors. The board and batten in the main bedroom is Knoxville Gray and in the laundry room it is Providence Blue.
LikeLike
ah super! thank you for both responses! great idea about painting part of the wall…
LikeLike
Looks amazing!!!!! What color are the other walls in the room? And where did you get the paint at?
LikeLike
The other walls are Benjamin Moore Pale Oak! I got the paint at my local Benjamin Moore store
LikeLike
Gorgeous! Wanted to ask did you do the board and batten grey wall with satin finish paint, or egg shell? Thank you!
Hannah
LikeLike
Thank you! I used satin 🙂
LikeLike
Hi! Can you tell me what color you chose for the other 3 walls? I love this wall and I’m looking to do the thing. Thanks!
LikeLike
Of course! The blue that was on them before (that you see in these pictures) is Benjamin Moore Quiet Moments. I painted the other 3 walls Benjamin Moore Pale Oak though, and you can see that if you go to the master bedroom reveal post!
LikeLike
Hello! We are doing a similar feature wall in our room and using the same hard boards to cover up the wall first. My question is did you prime anything before you painted it? Or did you just paint over everything with the finish paint color?
LikeLike
I didn’t prime and it still turned out perfectly, but now I know better and would 100% recommend priming first!
LikeLike